
1. Introduction
Thank you for choosing the HOTO Universal Rotary Tool QWLDM001. This versatile 35-in-1 tool is designed for precision tasks such as grinding, polishing, cutting, drilling, and engraving. Please read this instruction manual thoroughly before operation to ensure safe and efficient use of the product. Keep this manual for future reference.
2. Safety Information
WARNING: Always wear appropriate personal protective equipment (PPE) such as safety glasses, gloves, and a dust mask when operating the rotary tool.
- Ensure the work area is well-lit and clean. Cluttered or dark areas invite accidents.
- Do not operate power tools in explosive atmospheres, such as in the presence of flammable liquids, gases, or dust.
- Keep children and bystanders away while operating a power tool. Distractions can cause you to lose control.
- Avoid accidental starting. Ensure the switch is in the off-position before connecting to power, picking up, or carrying the tool.
- Use the correct tool for your application. Do not force the tool.
- Disconnect the plug from the power source before making any adjustments, changing accessories, or storing power tools.
- Store idle tools out of the reach of children and do not allow persons unfamiliar with the power tool or these instructions to operate the power tool.
- Maintain power tools. Check for misalignment or binding of moving parts, breakage of parts, and any other condition that may affect the power tool’s operation.
3. Package Contents
Verify that all items listed below are included in your package. If any items are missing or damaged, please contact HOTO customer support.
- HOTO Universal Rotary Tool QWLDM001
- Assorted Rotary Tool Accessories (35 pieces)
- USB Charging Cable
- User Manual
4. Product Overview
Familiarize yourself with the components of your HOTO Rotary Tool.
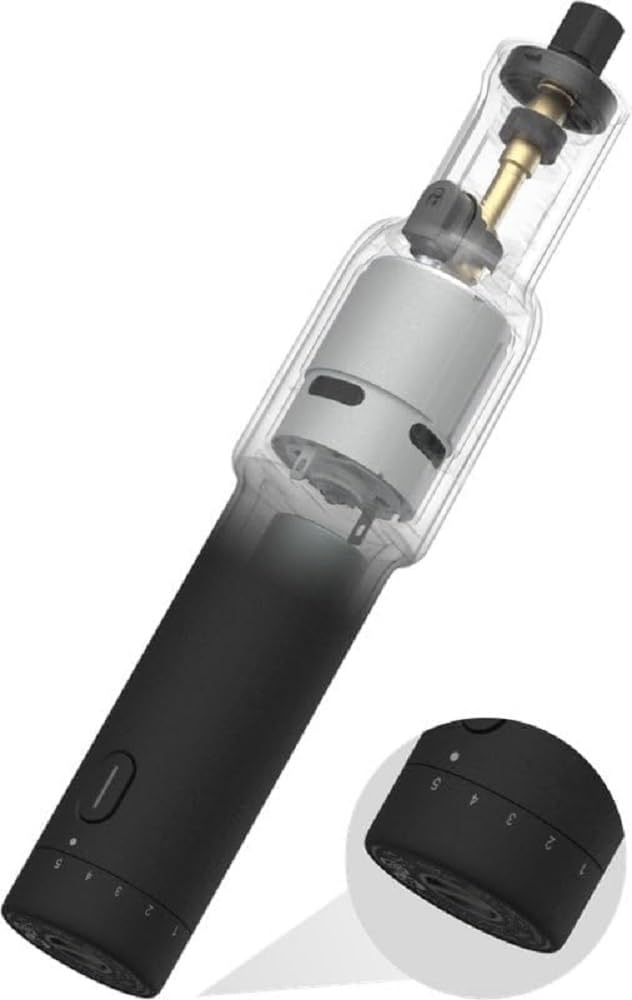
Image: The HOTO Universal Rotary Tool QWLDM001, showing its sleek black design. The upper transparent section reveals the internal motor and chuck mechanism. A magnified inset highlights the base of the tool, which features a rotary dial with numerical markings from 1 to 5, indicating speed settings.
- Power Button: Located on the main body, used to turn the tool on/off.
- Speed Adjustment Dial: Located at the base, allows selection of 5 different speed levels.
- Chuck/Collet: The mechanism at the top for securing accessories.
- Charging Port: Typically located near the base for USB charging.
5. Setup
- Charge the Tool: Before first use, fully charge the rotary tool using the provided USB charging cable. The indicator light will show charging status.
- Select Accessory: Choose the appropriate accessory (e.g., grinding stone, cutting disc, drill bit) for your task.
- Install Accessory: Unscrew the chuck nut, insert the accessory shaft into the collet, and then tighten the chuck nut securely. Ensure the accessory is firmly seated and centered.
- Prepare Workpiece: Secure your workpiece to prevent movement during operation.
6. Operating Instructions
- Power On: Press the power button to turn on the tool.
- Adjust Speed: Rotate the speed adjustment dial at the base of the tool to select the desired speed level (1-5). Start with a lower speed for delicate tasks and increase as needed.
- Begin Operation: Gently bring the rotating accessory into contact with the workpiece. Apply light, consistent pressure. Allow the tool to do the work; do not force it.
- Maintain Control: Always hold the tool firmly with both hands if necessary, maintaining full control.
- Power Off: After completing your task, press the power button to turn off the tool. Wait for the accessory to stop rotating completely before setting the tool down.
7. Maintenance
- Cleaning: After each use, disconnect the tool from power and use a soft, dry cloth to wipe down the tool body. Use a small brush to remove dust and debris from vents and the chuck area.
- Accessory Care: Clean accessories after use. Store them in their designated case to prevent damage and loss.
- Storage: Store the rotary tool and its accessories in a dry, cool place, away from direct sunlight and moisture.
- Battery Care: For optimal battery life, avoid fully discharging the tool frequently. Charge it regularly, even if not in use for extended periods.
8. Troubleshooting
| Problem | Possible Cause | Solution |
|---|---|---|
| Tool does not turn on. | Battery is depleted. | Charge the tool fully. |
| Tool loses power during operation. | Overload or low battery. | Reduce pressure on the workpiece. Recharge the battery. |
| Accessory wobbles or vibrates excessively. | Accessory not properly installed or damaged. | Ensure accessory is fully inserted and chuck nut is tightened. Replace damaged accessories. |
| Tool overheats. | Continuous heavy use or blocked vents. | Allow the tool to cool down. Clear any obstructions from the ventilation openings. |
9. Specifications
| Feature | Detail |
|---|---|
| Model Number | QWLDM001 |
| Brand | HOTO |
| Item Weight | 0.01 ounces |
| Manufacturer | HOTO |
| Country of Origin | China |
| First Available Date | March 12, 2023 |
| Speed Settings | 5 levels |
| Accessories Included | 35 pieces |
10. Warranty and Support
HOTO products are manufactured to high-quality standards. This product comes with a standard manufacturer's warranty against defects in materials and workmanship. Please refer to the warranty card included in your package for specific terms and conditions, including the warranty period.
For technical support, troubleshooting assistance, or warranty claims, please contact HOTO customer service. Contact information can typically be found on the HOTO official website or on the product packaging.
Please retain your proof of purchase for warranty purposes.