Introduction
Welcome to the MUSA 6.5 Qt. Air Pro Cook & Fry Pressure Cooker and Air Fryer. This innovative appliance combines the functionality of a pressure cooker and an air fryer into a single, compact unit, designed to simplify your cooking process. With its versatile cooking modes, including Pressure Cook, Slow Cook, Air Fry, Roast, Bake, Broil, Steam, Sauté, Rice/Grains, Proof, and Dehydrate, you can prepare a wide variety of meals efficiently. This manual provides essential information for safe operation, setup, maintenance, and troubleshooting to ensure you get the most out of your appliance.
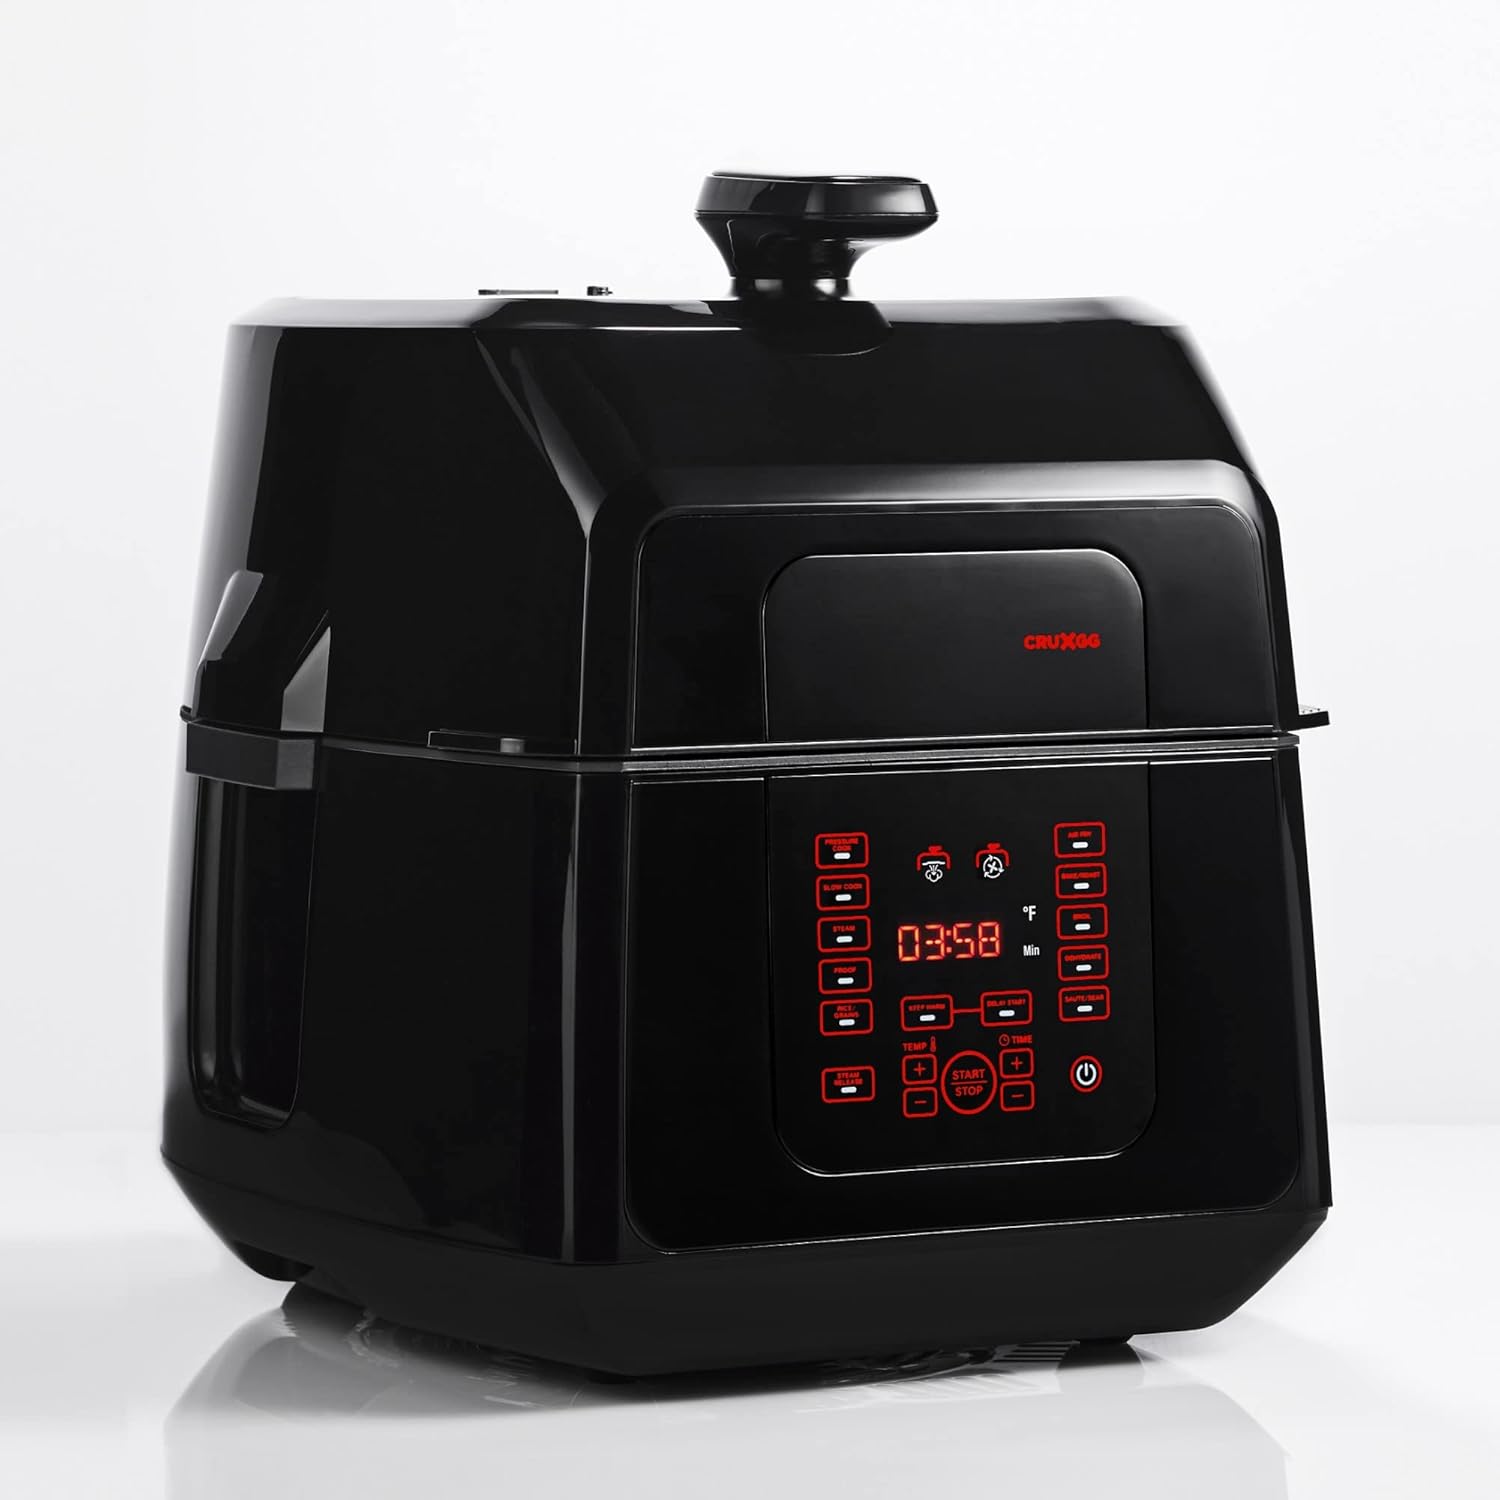
Figure 1: Front view of the MUSA 6.5 Qt. Air Pro Cook & Fry Pressure Cooker and Air Fryer.
Important Safeguards
When using electrical appliances, basic safety precautions should always be followed to reduce the risk of fire, electric shock, and/or injury to persons, including the following:
- Read all instructions before using the appliance.
- Do not touch hot surfaces. Use handles or knobs.
- To protect against electrical shock, do not immerse cord, plugs, or main unit in water or other liquid.
- Close supervision is necessary when any appliance is used by or near children.
- Unplug from outlet when not in use and before cleaning. Allow to cool before putting on or taking off parts.
- Do not operate any appliance with a damaged cord or plug, or after the appliance malfunctions or has been damaged in any manner.
- The use of accessory attachments not recommended by the appliance manufacturer may cause injuries.
- Do not use outdoors.
- Do not let cord hang over edge of table or counter, or touch hot surfaces.
- Do not place on or near a hot gas or electric burner, or in a heated oven.
- Extreme caution must be used when moving an appliance containing hot oil or other hot liquids.
- Always attach plug to appliance first, then plug cord into the wall outlet. To disconnect, turn any control to "off", then remove plug from wall outlet.
- Do not use appliance for other than intended use.
- This appliance cooks under pressure. Improper use may result in scalding injury. Make certain unit is properly closed before operating.
- Never force open the appliance. Ensure pressure is completely released before opening.
- Do not fill the unit over 2/3 full. When cooking foods that expand during cooking, such as rice or dried vegetables, do not fill the unit over 1/2 full.
- Always check the pressure release valve and float valve for clogging before use.
Product Overview
Components and Accessories
The MUSA Air Pro Cook & Fry comes with several key components and accessories to facilitate various cooking methods.
- Main Unit: The primary appliance housing the heating element and control panel.
- Single-Lid Design: An innovative lid that easily switches between pressure cooking and air frying functions.
- 6.5-Qt. Nonstick Pressure Cooking Pot: The main cooking vessel with handles, featuring a PFOA/PFOS-free ultra-nonstick GG Red surface.
- 4-Qt. Crisping Basket: Used for air frying, roasting, and dehydrating.
- Reversible Steam Rack: For steaming and elevating food during pressure cooking.
- Pressure Plate Insert: Essential for pressure cooking operations.
- Air Fry Grate: Placed inside the crisping basket for optimal air circulation during air frying.
- Plate Handle: For safely inserting and removing hot accessories.
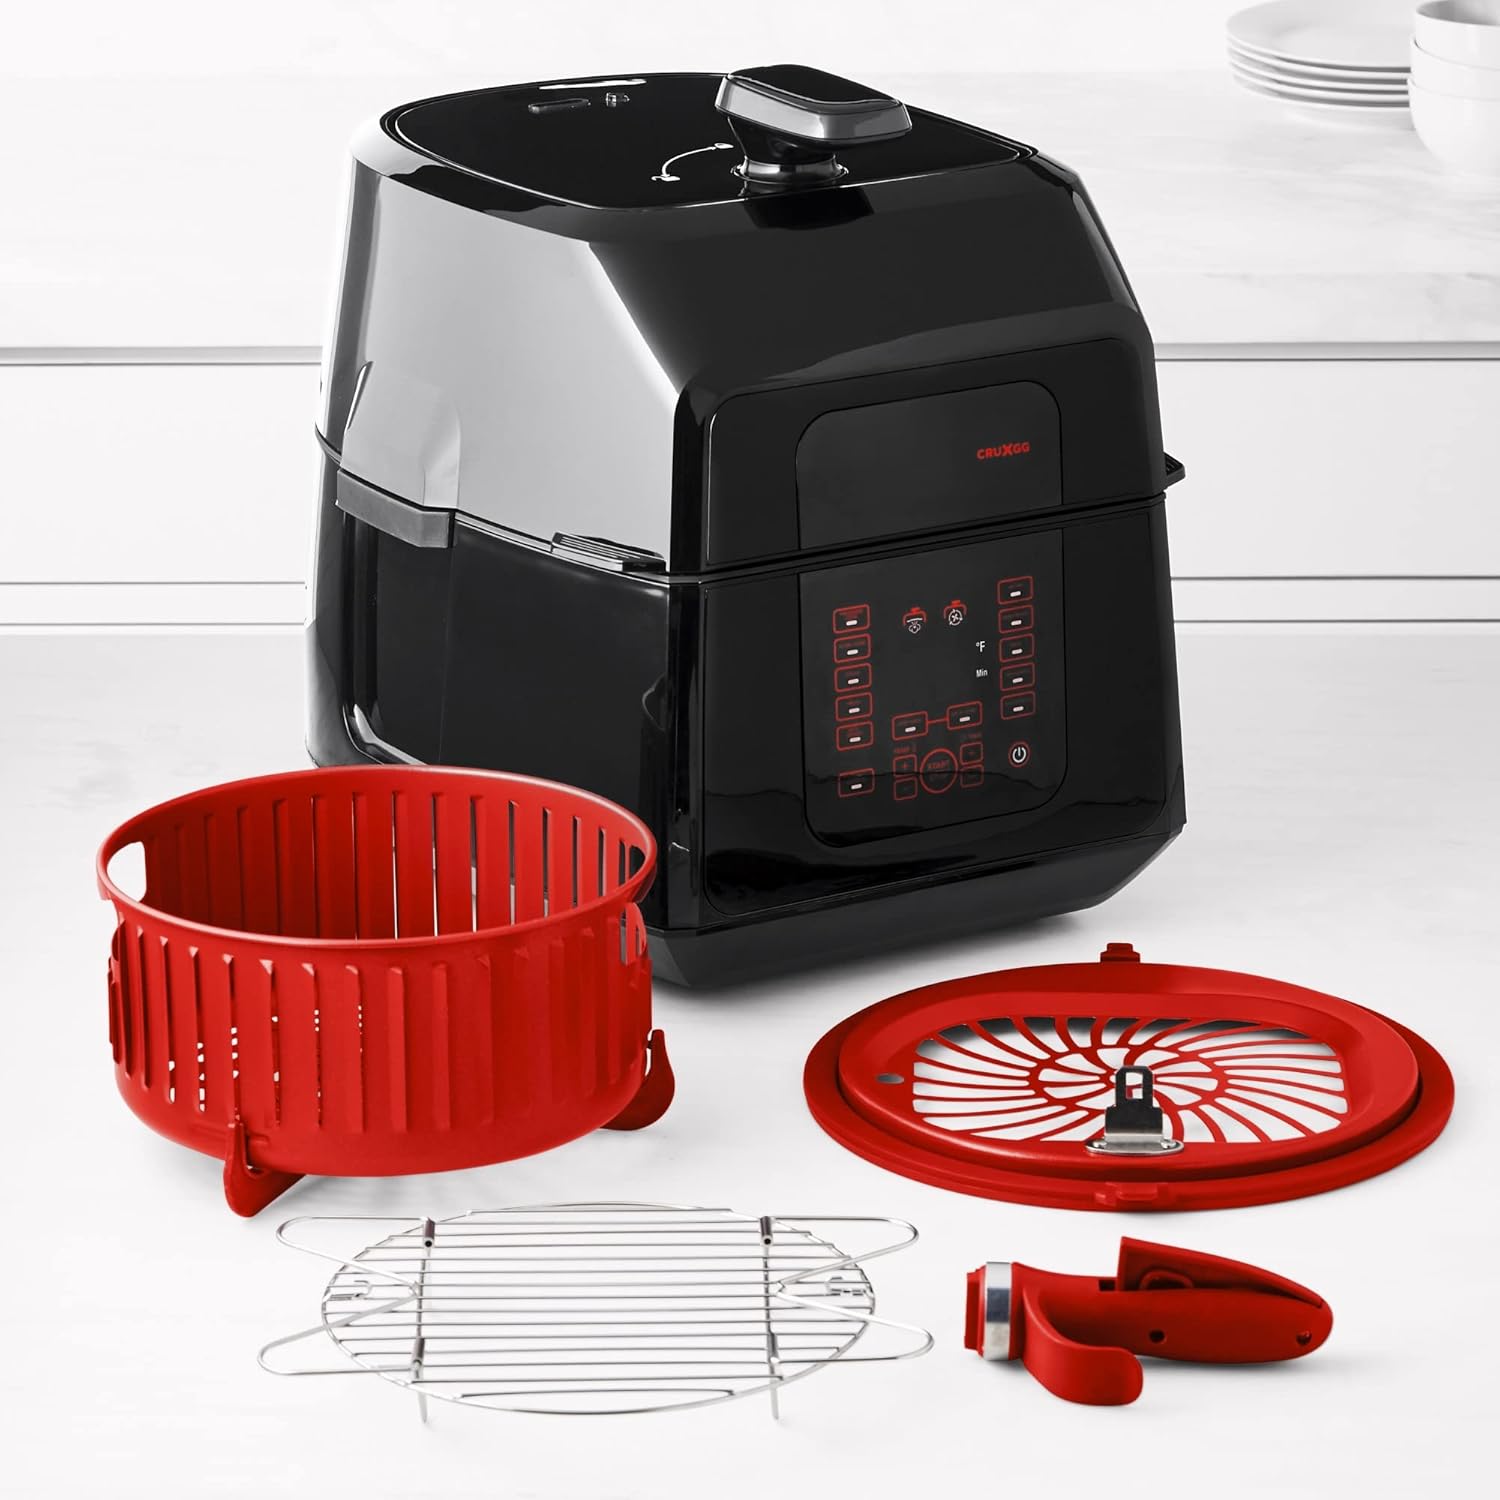
Figure 2: MUSA Air Pro Cook & Fry with its included accessories: pressure cooking pot, crisping basket, reversible steam rack, pressure plate insert, air fry grate, and plate handle.
Control Panel
The Signature GG Glow control panel features Precision Touch controls and a digital display for easy operation.
- Digital Display: Shows cooking time, temperature, and status indicators.
- Function Buttons: Dedicated buttons for Pressure Cook, Slow Cook, Air Fry, Roast, Bake, Broil, Steam, Sauté, Rice/Grains, Proof, and Dehydrate.
- TEMP +/- Buttons: Adjust cooking temperature.
- TIME +/- Buttons: Adjust cooking time.
- START/STOP Button: Initiates or cancels a cooking program.
- KEEP WARM Button: Maintains food temperature after cooking.
- DELAY START Button: Sets a delayed start time for cooking.
- STEAM RELEASE Button: Manually releases pressure after pressure cooking.
- Power Button: Turns the appliance on or off.

Figure 3: Detailed view of the Signature GG Glow control panel with Precision Touch controls.
Setup and First Use
- Unpacking: Carefully remove all components and accessories from the packaging. Retain packaging materials for future storage or transport if needed.
- Initial Cleaning: Before first use, wash the pressure cooking pot, crisping basket, steam rack, pressure plate insert, air fry grate, and plate handle in warm, soapy water. Rinse thoroughly and dry completely. Wipe the main unit with a damp cloth. Do not immerse the main unit in water.
- Placement: Place the appliance on a stable, level, heat-resistant surface, away from walls or other appliances to allow for proper air circulation. Ensure there is adequate space above and around the unit.
- Power Connection: Plug the power cord into a grounded electrical outlet. The digital display will illuminate.
- Lid Orientation: Familiarize yourself with the single-lid design. The lid can be positioned for pressure cooking (sealed) or air frying (vented, or removed for certain functions).
Operating Instructions
Pressure Cooking
- Place the pressure cooking pot into the main unit.
- Add ingredients and the required liquid to the pot. Ensure the liquid level is at least 1 cup for proper pressure build-up. Do not exceed the MAX fill line (2/3 full, or 1/2 full for expanding foods).
- Place the pressure plate insert over the food if required by the recipe.
- Close the lid, ensuring it is properly sealed for pressure cooking. The lid should click into place.
- Press the "Pressure Cook" button. The default time and temperature will appear.
- Use the "TEMP +/-" and "TIME +/-" buttons to adjust settings as needed.
- Press "START/STOP" to begin cooking. The unit will preheat and build pressure. Once pressure is reached, the float valve will rise, and the cooking timer will begin.
- Once cooking is complete, the unit will beep and may automatically switch to "KEEP WARM" mode.
- Pressure Release:
- Natural Release: Allow pressure to release naturally. This is suitable for foods that benefit from continued cooking or for foamy foods. The float valve will drop when pressure is fully released.
- Quick Release: Press the "STEAM RELEASE" button to quickly release pressure. Keep hands and face away from the steam vent. Only use for recipes that specify quick release. The float valve will drop when pressure is fully released.
- Once pressure is fully released and the float valve has dropped, carefully open the lid.
Air Frying
- Place the crisping basket into the main unit. If using, place the air fry grate inside the crisping basket.
- Add food to the crisping basket. Do not overfill; ensure air can circulate around the food.
- Close the lid, ensuring it is properly positioned for air frying (it may not seal completely like pressure cooking, allowing for air circulation).
- Press the "Air Fry" button. The default time and temperature will appear.
- Use the "TEMP +/-" and "TIME +/-" buttons to adjust settings as needed.
- Press "START/STOP" to begin cooking. The unit will preheat, and the fan will start.
- During cooking, you may pause the cycle to shake or flip food for even crisping. Close the lid to resume.
- Once cooking is complete, the unit will beep. Carefully open the lid and remove food using heat-resistant utensils.
Other Cooking Modes
The MUSA Air Pro Cook & Fry offers additional cooking modes. Refer to the specific function buttons on the control panel and adjust time/temperature as required by your recipe.
- Slow Cook: Ideal for tenderizing meats and simmering stews over extended periods.
- Roast/Bake/Broil: Use with the crisping basket for oven-like results.
- Steam: Requires liquid in the pot and the steam rack for healthy steaming.
- Sauté/Sear: Use the pressure cooking pot directly for browning ingredients before other cooking methods.
- Rice/Grains: Optimized settings for various grains.
- Proof: Provides a warm environment for dough rising.
- Dehydrate: Low-temperature cooking for drying fruits, vegetables, or jerky.

Figure 4: The MUSA Air Pro Cook & Fry in operation, demonstrating its versatility in meal preparation.
Maintenance and Cleaning
Regular cleaning and maintenance will extend the life of your MUSA Air Pro Cook & Fry and ensure optimal performance. Always unplug the appliance and allow it to cool completely before cleaning.
- Inner Pot and Accessories: The 6.5-qt. nonstick pressure cooking pot, 4-qt. crisping basket, reversible steam rack, pressure plate insert, air fry grate, and plate handle are dishwasher-safe. For best results, hand wash with warm, soapy water and a non-abrasive sponge. Rinse thoroughly and dry completely.
- Lid: Wipe the lid with a damp cloth. Pay attention to the sealing ring and float valve area, ensuring they are free of food debris. The sealing ring can be removed for thorough cleaning and should be reinserted correctly before next use.
- Main Unit: Wipe the exterior of the main unit and the control panel with a soft, damp cloth. Do not use abrasive cleaners or scouring pads. Never immerse the main unit in water or any other liquid.
- Storage: Ensure all parts are clean and dry before storing. Store the appliance in a cool, dry place.
Troubleshooting
If you encounter issues with your MUSA Air Pro Cook & Fry, consult the table below for common problems and their solutions.
| Problem | Possible Cause | Solution |
|---|---|---|
| Unit does not power on. | Not plugged in; power outlet issue; unit malfunction. | Ensure cord is securely plugged into a working outlet. Check household circuit breaker. If problem persists, contact customer support. |
| Pressure not building during pressure cook. | Lid not properly sealed; sealing ring not in place or damaged; insufficient liquid; steam release valve open. | Ensure lid is fully closed and locked. Check sealing ring for proper placement and damage. Add at least 1 cup of liquid. Ensure steam release valve is in the sealed position. |
| Food not crisping during air fry. | Overcrowding the basket; insufficient cooking time/temperature; food not flipped. | Do not overcrowd the basket; cook in batches if necessary. Increase cooking time or temperature. Flip or shake food halfway through cooking. |
| Error code displayed. | Specific internal issue. | Note the error code and refer to the full troubleshooting guide on the manufacturer's website or contact customer support. |
Specifications
| Model Number | 55854d46-84c5-48f2-8749-9927a6f8f352 |
| Brand | CRUXGG |
| Capacity | 6.5 Quarts |
| Wattage | 1500 watts |
| Dimensions (D x W x H) | 16.5"D x 13.25"W x 15.5"H |
| Material | Plastic (exterior), Nonstick (inner pot) |
| Color | Black |
| Control Method | Touch |
| Dishwasher Safe Parts | Inner pot, crisping basket, steam rack, pressure plate insert, air fry grate, plate handle |
| UPC | 829486149801 |
Warranty and Support
The MUSA 6.5 Qt. Air Pro Cook & Fry Pressure Cooker And Air Fryer is backed by a manufacturer's warranty. Please refer to the warranty card included with your purchase for specific terms and conditions, including warranty period and coverage details.
For technical support, troubleshooting assistance beyond this manual, or warranty claims, please contact CRUXGG Customer Service.
- Customer Service: Refer to the contact information provided on the CRUXGG official website or the product packaging.
- Online Resources: Visit the official CRUXGG website for FAQs, recipe ideas, and additional product information.


