Product Overview
The SPROLINK NeoLIVE R2 is a professional video mixer and switcher designed for live streaming and multi-camera productions. It features an integrated 5.5-inch LCD screen with a 10-window multi-view display, allowing comprehensive monitoring of all inputs and outputs.
Equipped with a USB 3.0 port, the NeoLIVE R2 enables seamless streaming to various live platforms and third-party software like OBS in 1080P quality. Its unique scene switching capability allows users to transition between pre-configured setups with ease. Advanced features include Picture-in-Picture (PIP), graphic background layers, chroma keying, and logo overlays, providing broadcast-level functionalities for diverse applications.
The device is built with robust metal casing and features professional, user-friendly buttons and rotary knobs for intuitive control. It supports 4 HDMI inputs and 1 HDMI output, along with dedicated USB ports for streaming and image management. Integrated audio inputs/outputs and a LAN port for remote control further enhance its versatility. A standout feature is its ability to control up to 4 PTZ cameras, allowing users to save and recall complete scenes including camera positions.
Key Features:
- Professional video mixer with 4 HDMI 1080P60 inputs, 1 HDMI output, and USB 3.0 output for streaming.
- Multiple chroma and DSK keys, plus 2 graphic layers for complex scene creation and storage.
- Seamless switching between scenes via cut, dissolve, or wipe effects.
- USB 3.0 output recognized as a single camera by computers, enabling multi-camera setups for platforms like Zoom and YouTube.
- Integrated audio mixer for managing 4 HDMI audio channels, with 2 additional audio inputs for microphones and two audio outputs.
- Multi-layer image construction: graphic background, 2 live video layers, and a logo overlay layer.
- Each live video layer includes a chroma keyer and DVE effects for complex scene building and preset saving.
- Integrated 5.5" LCD screen with a 10-window multi-screen display for inputs, preview, and output.
- Built-in PTZ controller for up to 4 PTZ cameras, allowing easy adjustment and saving of camera positions and zoom as presets.
- Robust metal casing with large, bright professional buttons and a T-bar for intuitive operation.
Package Contents
Please ensure all the following items are included in your package:
- SPROLINK NeoLIVE R2 Unit
- HDMI Cables
- USB Cables
- Power Adapter
- User Manual (this document)
Device Layout and Controls
Familiarize yourself with the various components and controls of your NeoLIVE R2 unit.

Figure 1: NeoLIVE R2 Control Panel Overview
This image displays the top and rear panels of the NeoLIVE R2, highlighting the integrated 5.5-inch LCD monitor, input selection buttons (1-4), menu, scene, PTZ, key, effect, and auto buttons. It also shows the volume knob, AFV button, CHA & CHB buttons, layer A & B buttons, zoom knob, scale knob, and the T-bar for transitions. The rear panel reveals the streaming USB 3.0 port, HDMI output, HDMI inputs (1-4), STILL/CTL port, and DC 12V power input. Below the main unit, a detailed diagram labels each control and port for easy identification.

Figure 2: Front View of NeoLIVE R2
This image provides a clear front-angle view of the SPROLINK NeoLIVE R2, showcasing its compact design, the central 5.5-inch LCD multi-view display, and the prominent control buttons and knobs. The T-bar for smooth transitions is also visible on the right side.

Figure 3: HDMI and USB 3.0 Ports
This close-up image illustrates the HDMI output and USB 3.0 port on the NeoLIVE R2, with cables connected, emphasizing their role in live streaming and video output. The text highlights that the USB 3.0 output allows the PC to recognize the device as a camera for smooth live streaming via third-party software, avoiding compatibility issues.
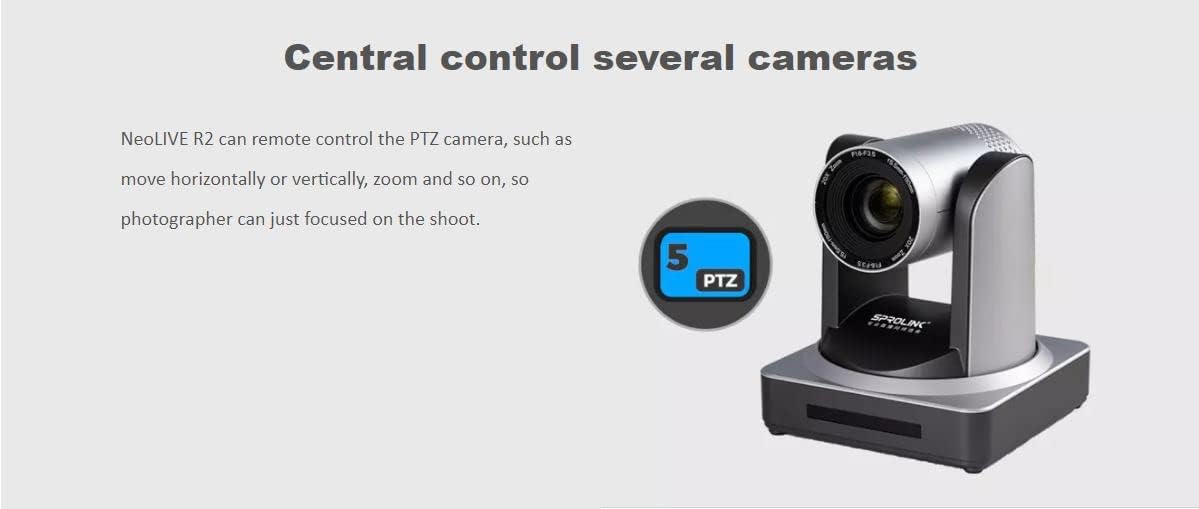
Figure 4: Audio Input Ports
This image shows a professional microphone next to the NeoLIVE R2, highlighting the device's support for 2 independent 3.5mm stereo audio inputs (Mic/Line In). It also mentions the ability to mix and monitor HDMI embedded audio and the two microphone inputs.
Setup Guide
Connecting Your Devices
- Power Connection: Connect the provided power adapter to the DC 12V input port on the rear of the NeoLIVE R2 and plug it into a power outlet.
- HDMI Inputs: Connect your HDMI source devices (e.g., cameras, game consoles, computers) to the HDMI IN 1-4 ports on the rear panel.
- HDMI Output: Connect a monitor or display to the HDMI OUT port to view the program output or multi-view display.
- USB 3.0 for Streaming: Connect a USB 3.0 cable from the STREAMING port on the NeoLIVE R2 to your computer for live streaming. Your computer will recognize the NeoLIVE R2 as a webcam.
- USB 2.0 for Image/Upgrade: Use the USB 2.0 port (often labeled STILL/CTL or similar) for uploading images for graphic overlays or for firmware upgrades.
- Audio Connections: Connect external microphones or audio sources to the 3.5mm audio input jacks (Mic/Line In). Connect headphones or speakers to the audio output jacks (Phones/Line Out) for monitoring.
- LAN Connection: Connect an Ethernet cable to the LAN port for remote control capabilities, if supported by your setup.
Powering On
Once all connections are secure, press the power button (if available, otherwise it powers on automatically when connected to power) to turn on the NeoLIVE R2. The integrated LCD screen will light up, displaying the multi-view interface.
Operating Instructions
Basic Operation
- Input Selection: Use the numbered buttons (1-4) to select the desired HDMI input source for your program output.
- Scene Switching: The NeoLIVE R2 allows switching between two pre-configured scenes (Preview and Program). Use the T-bar or the CUT/AUTO buttons for transitions.
- Multi-View Display: The 5.5-inch LCD screen provides a multi-view display of all input channels, the preview output, and the program output.
Advanced Features
- Picture-in-Picture (PIP): The NeoLIVE R2 supports PIP functionality, allowing you to overlay one video source onto another. Adjust size and position using the dedicated controls.
- Chroma Key and DSK: Utilize the independent chroma keyers and Downstream Key (DSK) functions to remove backgrounds (green screen) and overlay graphics or text.
- Graphic Layers: Construct your output with multiple layers: a graphic background layer, two live video layers (with scaling and chroma key), and a logo overlay layer.
- PTZ Camera Control:
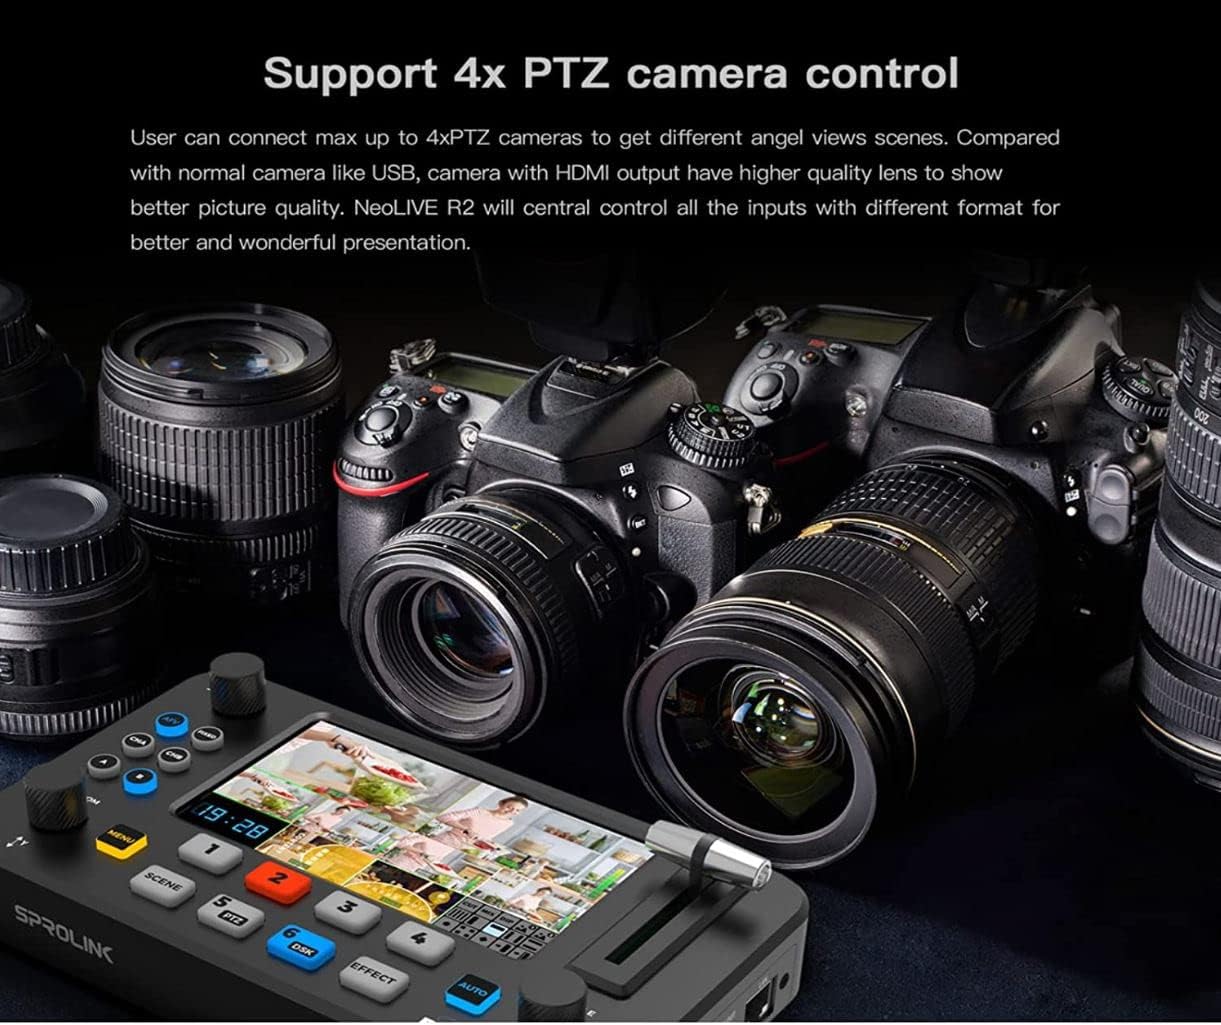
Figure 5: PTZ Camera Control Capability
This image shows the NeoLIVE R2's capability to control up to 4 PTZ cameras, allowing users to adjust camera angles and zoom for dynamic live productions. The text emphasizes that users can connect up to 4 PTZ cameras to get different angle views and that NeoLIVE R2 will centrally control all inputs for a better presentation.

Figure 6: Remote PTZ Control
This diagram visually represents the NeoLIVE R2's remote PTZ camera control feature, indicating that photographers can focus on shooting while the mixer handles camera movement (horizontal, vertical, zoom). The PTZ button (labeled 5) on the device is highlighted.
The integrated PTZ controller allows you to control up to 4 PTZ cameras. Adjust camera position (pan, tilt) and zoom directly from the NeoLIVE R2. Save and recall specific camera positions as presets for quick access during live events.
- Audio Mixer: Manage audio from your HDMI inputs and external microphone inputs. Control volume, mix audio channels, and apply audio follow video (AFV) or audio lock settings.
- Live Streaming via USB 3.0:
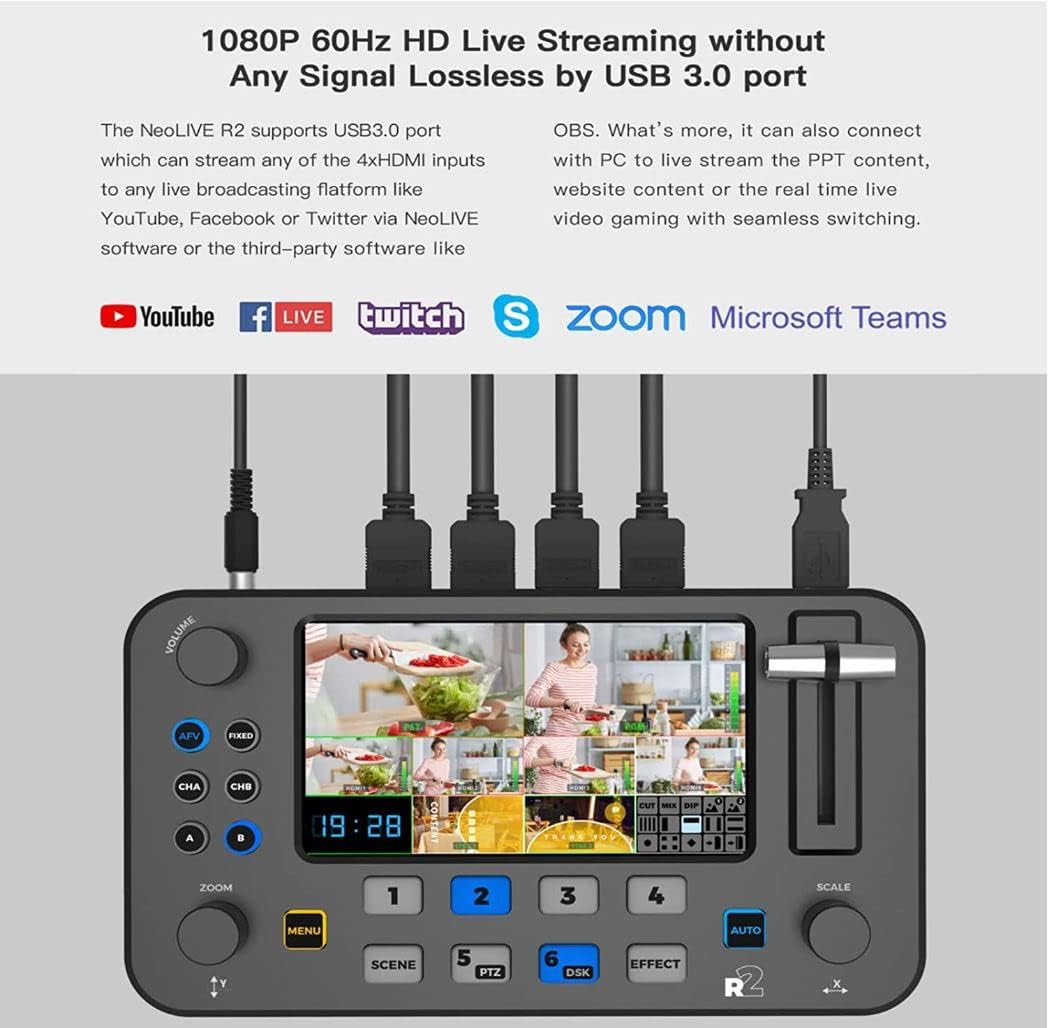
Figure 7: Live Streaming Setup
This image demonstrates the NeoLIVE R2's 1080P 60Hz HD live streaming capability via its USB 3.0 port. It shows the device connected to a computer and highlights compatibility with popular platforms such as YouTube, Facebook Live, Twitch, Zoom, and Microsoft Teams, indicating its use for streaming PPT content, website content, or real-time video gaming with seamless switching.
Connect the NeoLIVE R2 to your computer via the USB 3.0 port. The device will be recognized as a webcam, allowing you to use it with various streaming software (e.g., OBS, Zoom, YouTube Live) for high-quality live broadcasts.
Saving and Recalling Presets
The NeoLIVE R2 allows you to save complex scenes, including camera positions, layer configurations, and effects, as presets. Refer to the on-screen menu or specific buttons (e.g., SCENE) for saving and recalling these presets quickly during your production.
Application Scenarios
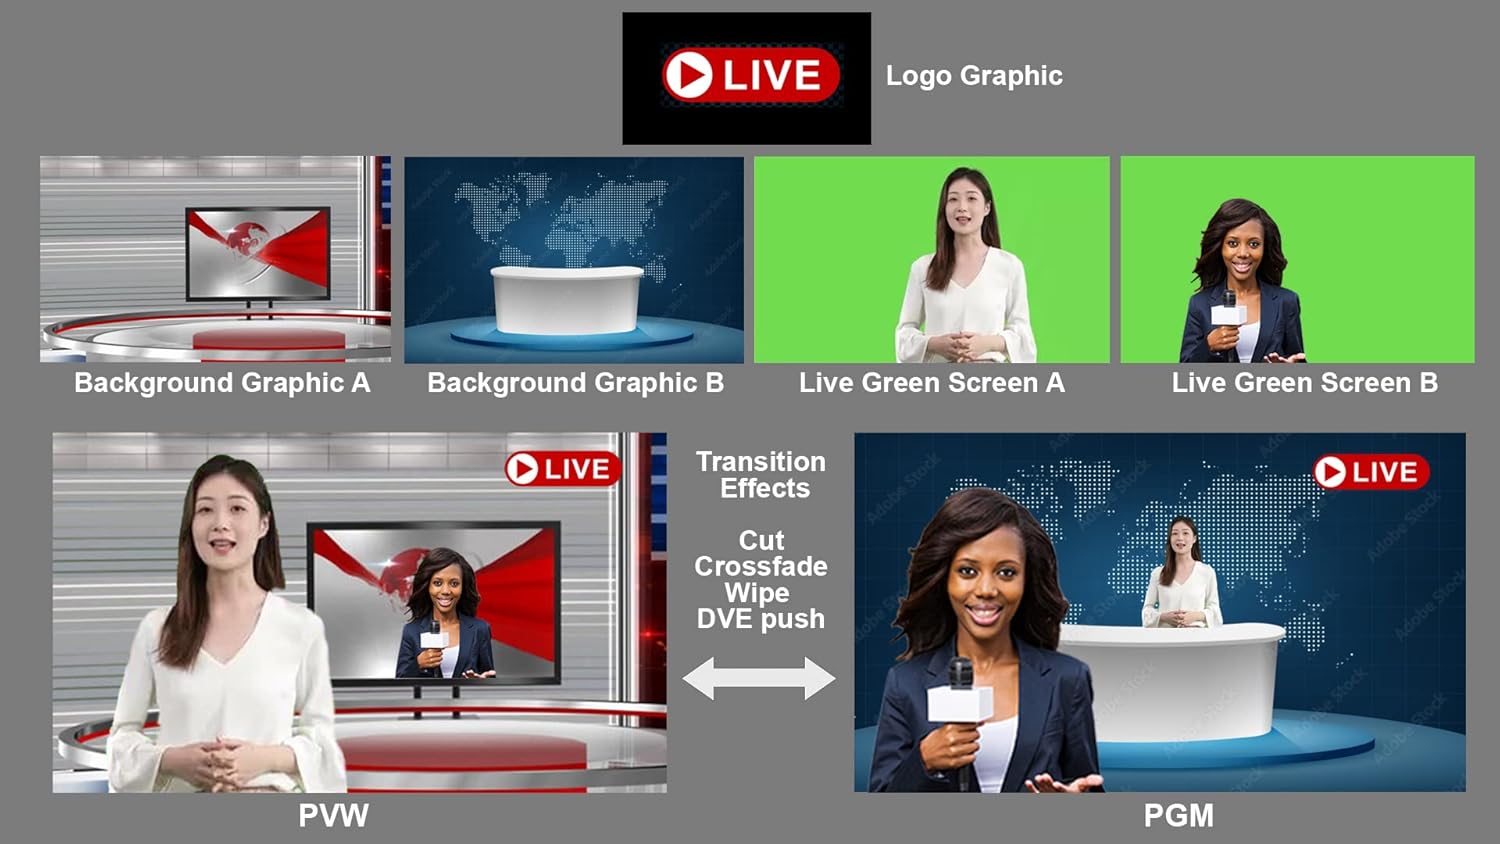
Figure 8: Diverse Application Examples
This image showcases the versatility of the NeoLIVE R2 across different professional settings. It illustrates its use in live talk shows, educational and training applications, live e-commerce businesses, e-sport media live streaming, and business presentations via platforms like Skype. Each scenario demonstrates how the compact design and multi-camera inputs facilitate easy operation and high-quality production.
Maintenance
- Cleaning: Regularly wipe the unit with a soft, dry cloth. Avoid using liquid cleaners or abrasive materials. Ensure no dust or debris accumulates in the ports or ventilation areas.
- Firmware Updates: Periodically check the Sprolink official website for firmware updates. Updates can be installed via the USB 2.0 port (often labeled STILL/CTL or similar) following the instructions provided with the update package.
- Storage: When not in use for extended periods, store the NeoLIVE R2 in a cool, dry place, away from direct sunlight and extreme temperatures.
Troubleshooting
If you encounter any issues with your SPROLINK NeoLIVE R2, please refer to the following common problems and solutions:
| Problem | Possible Cause | Solution |
|---|---|---|
| No power | Power adapter not connected or faulty; power outlet issue. | Ensure power adapter is securely connected. Try a different power outlet. Check power adapter for damage. |
| No video signal on output | Incorrect HDMI input selected; faulty HDMI cable; display issue. | Verify the correct input is selected on the NeoLIVE R2. Check HDMI cable connections. Try a different HDMI cable or display. |
| No audio output | Audio levels too low; incorrect audio input selected; faulty audio cable. | Adjust volume knobs. Ensure correct audio input is active. Check audio cable connections. |
| Computer not recognizing device for streaming | Incorrect USB port used; driver issue; USB cable issue. | Ensure USB 3.0 STREAMING port is used. Try a different USB 3.0 port on your computer. Restart computer and NeoLIVE R2. Check for necessary drivers (usually plug-and-play). |
| PTZ camera control not working | Incorrect PTZ camera connection; camera not in PTZ mode; network issue. | Verify PTZ camera is properly connected and configured. Ensure camera is in a compatible PTZ mode. Check network connection if controlling via LAN. |
If the problem persists after trying these solutions, please contact Sprolink customer support for further assistance.
Specifications
| Feature | Detail |
|---|---|
| Brand | Sprolink |
| Model Name | NeoLIVE R2 |
| Item Model Number | SC-PTZ -12X |
| Product Type | Compact |
| Screen Size | 5.5 inches LCD |
| Video Resolution | 1080p |
| Video Recording Resolution | 1080p |
| Connectivity Technology | Ethernet, USB, HDMI, Mini Jack |
| Compatible Devices | Tablet, Smartphone, Laptop, Personal Computer |
| Package Dimensions (L x W x H) | 24 x 17 x 17 centimeters |
| Package Weight | 2 Kilograms |
| Image Stabilization | No |
| Included Components | HDMI cables, USB cables, power adapter, user manual |
| Max Focal Length | 110 |
| Min Focal Length | 5.5 |
| Model Year | 2022 |
| Water Resistance Level | Not waterproof |
| Zoom Type | Optical |
| Focus Type | Manual Focus |
| Spare Parts Availability | Information unavailable on spare parts |
| Software Updates Guaranteed Until | Information not available |
| Flash Memory Type | Internal flash memory |
| Video Capture Format | MP4 |
| Supported Audio Format | AAC, MP3, PCM |
| Camcorder Type | Video Camera |
| Date First Available on Amazon.com.be | March 10, 2023 |
| Manufacturer | Sprolink |
Warranty and Support
The SPROLINK NeoLIVE R2 comes with a standard manufacturer's warranty. For detailed information regarding warranty terms, duration, and conditions, please refer to the warranty card included with your product or visit the official Sprolink website.
For technical support, troubleshooting assistance beyond this manual, or inquiries about spare parts and software updates, please contact Sprolink customer service through their official channels. Contact information can typically be found on their website or in the product packaging.


