
1. Introduction
Thank you for choosing the VISSPL V30 Smart Projector. This manual provides essential information for setting up, operating, and maintaining your projector. Please read it thoroughly before use to ensure optimal performance and safety.
2. Safety Information
- Do not look directly into the projector lens when the lamp is on.
- Ensure proper ventilation around the projector to prevent overheating.
- Keep the projector away from water, moisture, and extreme temperatures.
- Use only the power adapter supplied with the projector.
- Do not attempt to disassemble or repair the projector yourself. Contact qualified service personnel.
3. Package Contents
Verify that all items are present in your package:
- VISSPL V30 Smart Projector
- Remote Control
- Power Cable
- HDMI Cable
- User Manual
4. Product Overview
Key Features
- Native 1080P Resolution, 4K Supported
- Dual-band 5G+2.4G WiFi for stable connectivity
- Bluetooth 5.1 for external audio devices
- Auto Keystone Correction (±50° Horizontal/Vertical/Rotational) and 4-Point Correction
- Digital Zoom (50-100%)
- Multiple input interfaces: HDMI, USB, 3.5mm Audio, AV Port
- Eye Protection and Sleep Timer Shutdown functions
- Advanced Cooling System for extended lamp life
Visual Guide

Image 4.1: VISSPL V30 Projector Display Quality Comparison. This image illustrates the projector's native 1080P resolution, 28000L brightness, and 15000:1 contrast ratio compared to other projectors.

Image 4.2: VISSPL V30 Projector Key Features Overview. This image highlights the projector's main capabilities including Native 1080P, 480 ANSI, 5G+2.4G WiFi, Bluetooth 5.1, 6D/4P Keystone, Office Suite compatibility, 100%-50% Zoom, and MAX 400" projection size.

Image 4.3: VISSPL V30 Projector Multi-Device Compatibility. The projector supports connection with various devices including iOS, Android, laptops/PCs, PS5, USB drives, and TV boxes.
5. Setup
5.1 Placement
Place the projector on a stable, flat surface such as a tabletop. Ensure there is adequate space around the projector for ventilation. The optimal projection distance varies based on desired screen size.
5.2 Power Connection
- Connect the power cable to the projector's power input port.
- Plug the other end of the power cable into a power outlet.
- Press the power button on the projector or remote control to turn it on.
5.3 Initial Focus and Keystone Adjustment
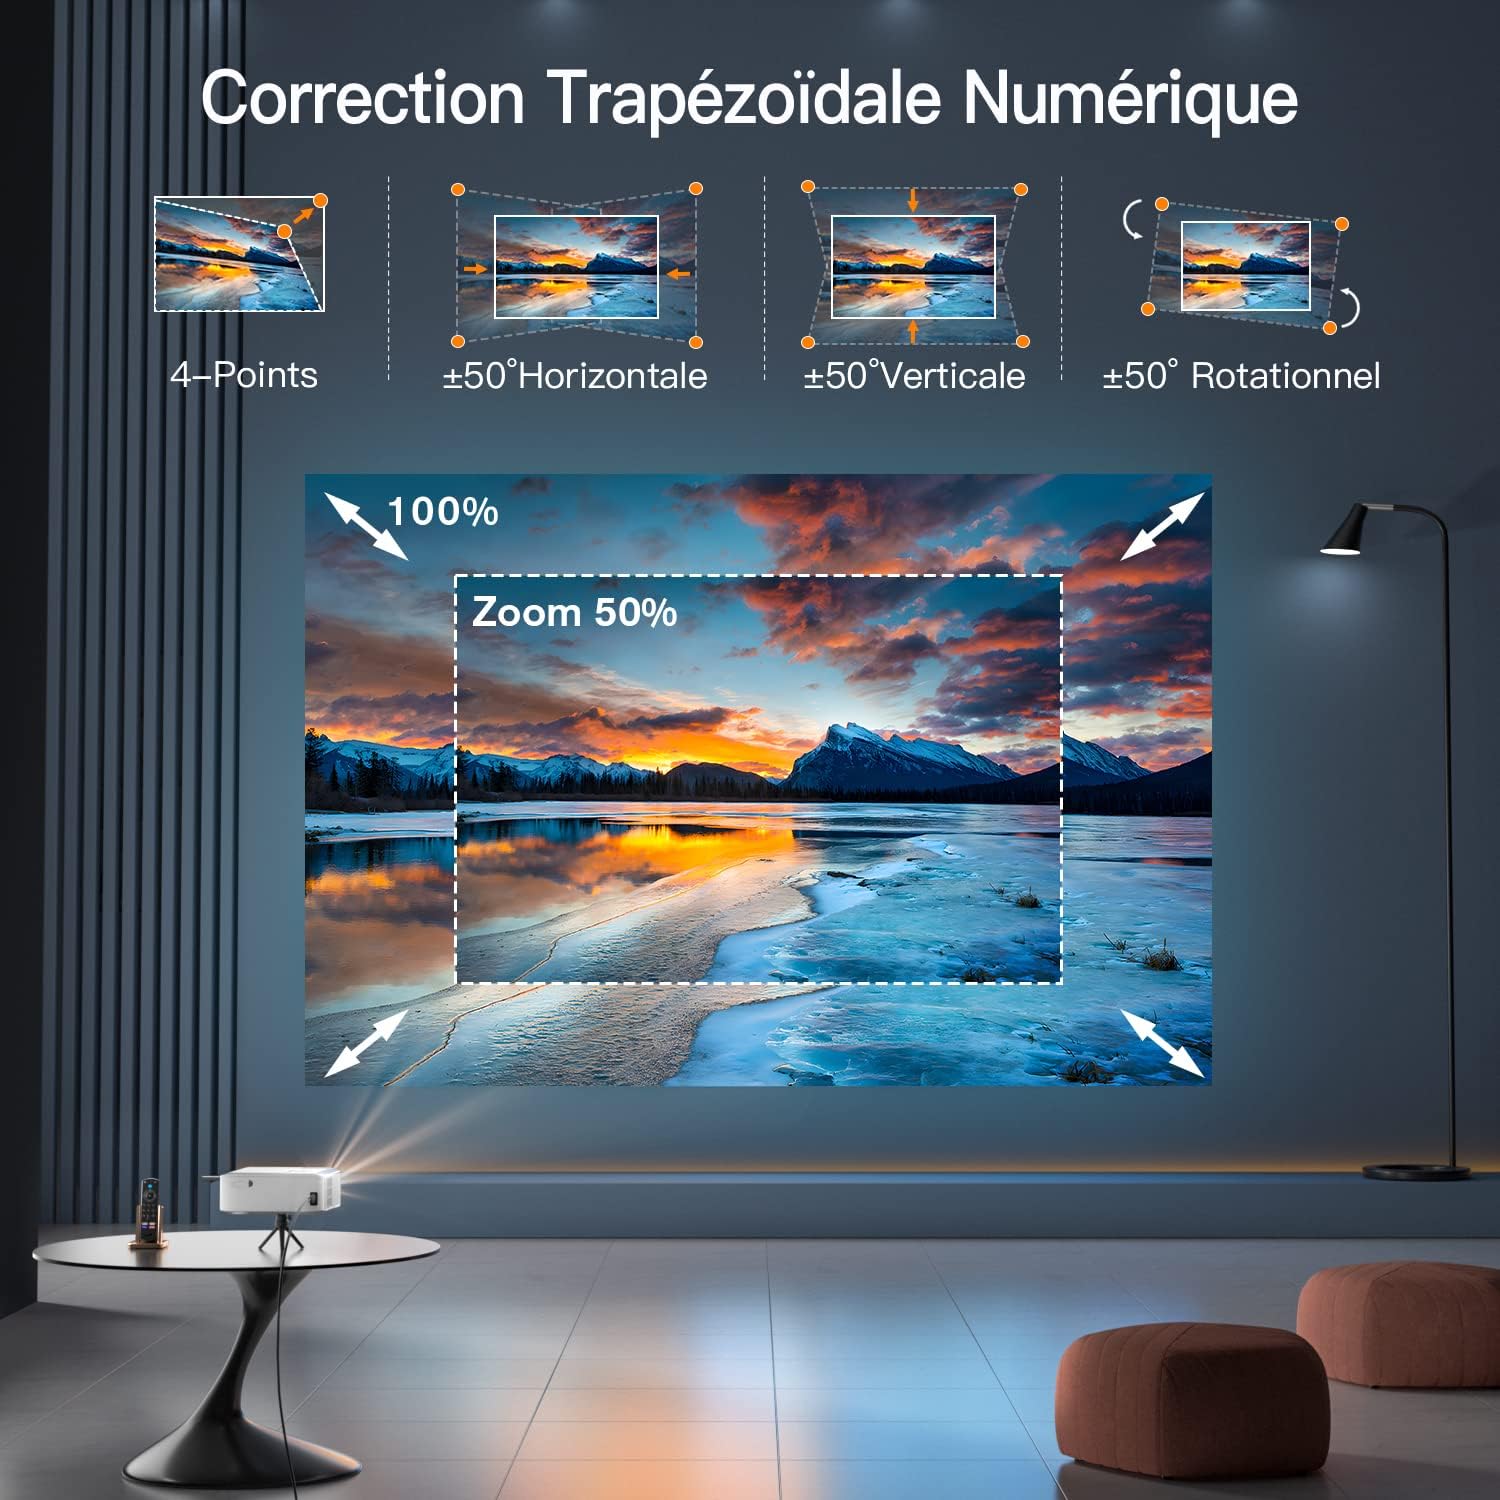
Image 5.1: VISSPL V30 Projector Digital Keystone Correction and Zoom. This image demonstrates the projector's capabilities for 4-point, horizontal, vertical, and rotational keystone correction, as well as digital zoom.
- Focus: Adjust the focus ring on the projector lens until the image is clear.
- Auto Keystone: The V30 features automatic keystone correction. If manual adjustment is needed, navigate to the settings menu to access 4-Point, Horizontal, Vertical, and Rotational keystone correction options.
- Zoom: Use the digital zoom function in the settings to adjust the screen size from 50% to 100% without moving the projector.
5.4 Connecting Devices
The VISSPL V30 supports various connection methods:
- HDMI: Connect devices like laptops, game consoles (e.g., PS5), or TV sticks using an HDMI cable.
- USB: Insert a USB drive to play media files directly. The projector supports various document formats for presentations.
- WiFi: Connect to your home network (5G or 2.4G) for online streaming and screen mirroring.
- Bluetooth: Pair with external Bluetooth speakers or headphones for enhanced audio.
- AV Port: Connect older devices using an AV cable.

Image 5.2: VISSPL V30 Projector 5G+2.4G WiFi Connectivity. This image highlights the projector's support for both 5G and 2.4G WiFi networks, ensuring faster and more stable connections.

Image 5.3: VISSPL V30 Projector Bluetooth 5.1 Audio Connection. This image shows the projector connected to a Bluetooth speaker, illustrating its Bluetooth 5.1 capability for an enhanced audio experience.
6. Operating
6.1 Power On/Off
Press the power button on the projector or the remote control to turn the unit on or off.
6.2 Source Selection
Use the 'Source' button on the remote or projector to cycle through input options (HDMI, USB, AV, Screen Mirroring).
6.3 Menu Navigation
Use the arrow keys and 'OK' button on the remote to navigate the on-screen menu for settings adjustments (e.g., picture mode, sound, network settings).
6.4 Screen Mirroring
To mirror your Android, iOS, or Windows device, select the appropriate screen mirroring option from the projector's main menu and follow the on-screen instructions.
6.5 USB Playback and Presentations

Image 6.1: VISSPL V30 Projector USB and Laptop Presentation Capability. This image shows the projector being used for a business presentation, highlighting its ability to display content directly from a USB drive or a connected laptop, supporting formats like PPT, Excel, PDF, and Word.
Insert a USB drive into the USB port. The projector's interface will allow you to browse and play media files or open documents (PPT, Excel, PDF, Word) directly.
7. Maintenance
7.1 Cleaning the Lens
Use a soft, lint-free cloth specifically designed for optical lenses to gently wipe the projector lens. Do not use abrasive cleaners or excessive force.
7.2 Cleaning the Projector Body
Wipe the exterior of the projector with a soft, dry cloth. For stubborn stains, a slightly damp cloth can be used, followed by a dry cloth.
7.3 Air Filter Cleaning
Regularly check and clean the air filter (if accessible) to ensure proper airflow and prevent dust buildup, which can affect performance and lamp life.
7.4 Storage
When not in use for extended periods, store the projector in a cool, dry place, protected from dust and direct sunlight. Use the original packaging or a protective case if available.

Image 7.1: VISSPL V30 Projector Long Life Span Lamp. This image highlights the projector's durable lamp designed for extended operational life.

Image 7.2: VISSPL V30 Projector Advanced Cooling System. This image illustrates the projector's advanced cooling system, which helps maintain optimal operating temperature and contributes to lamp longevity.
8. Troubleshooting
If you encounter issues, refer to the following common problems and solutions:
| Problem | Possible Cause | Solution |
|---|---|---|
| No image displayed | Power cable loose, incorrect input source, device not connected | Check power connection, select correct input source, ensure device is properly connected. |
| Image is blurry | Focus not adjusted, keystone incorrect | Adjust the focus ring, use auto or manual keystone correction. |
| No sound | Volume too low, external speaker not connected, audio format not supported | Increase volume, check Bluetooth connection, ensure audio format is compatible. |
| Remote control not working | Batteries dead, obstruction, remote not paired | Replace batteries, remove obstructions, ensure remote is pointed at the IR receiver. |
| WiFi connection unstable | Weak signal, interference | Move projector closer to router, reduce interference from other devices, try 2.4Ghz band if 5Ghz is unstable. |
9. Specifications
| Feature | Specification |
|---|---|
| Brand | VISSPL |
| Model | V30 |
| Display Technology | LCD |
| Native Resolution | 1280 x 800 (Supports 4K) |
| Aspect Ratio | 16:9, 4:3 |
| Digital Zoom | 50-100% |
| Keystone Correction | Auto, 4-Point, ±50° Horizontal, ±50° Vertical, ±50° Rotational |
| Wireless Standard | 5G+2.4G WiFi, Bluetooth 5.1 |
| Hardware Interface | 3.5mm Audio, AV Port, HDMI, USB |
| Voltage | 220 Volts |
| Wattage | 90 watts |
| Form Factor | Portable |
| Mounting Type | Tabletop Mount |
| Product Dimensions | 22.48 x 17.98 x 9.19 cm |
| Item Weight | 2.67 kg |
10. Warranty and Support
10.1 Warranty Information
The VISSPL V30 Smart Projector comes with a standard manufacturer's warranty. Please refer to the warranty card included in your package for specific terms and conditions, including warranty period and coverage details.
10.2 Customer Support
For technical assistance, troubleshooting not covered in this manual, or warranty claims, please contact VISSPL customer support. Contact details can typically be found on the VISSPL official website or on the warranty card.


