
Introduction
This manual provides comprehensive instructions for the installation, operation, and maintenance of your Dilwe CPU Water Cooling Pump. Please read this manual thoroughly before using the product to ensure proper function and longevity. This pump is designed for use in desktop computer water cooling systems, offering efficient heat dissipation for your CPU.
Product Overview and Features
The Dilwe CPU Water Cooling Pump is engineered for optimal performance and reliability in computer liquid cooling setups. Key features include:
- G1/4 Threaded Pipe: Utilizes universal G1/4 threaded pipe connections for broad compatibility with various water cooling components.
- Low Noise Operation: Designed with a fan mechanism that ensures quiet performance, enhancing the user experience without excessive noise.
- Durable Construction: Manufactured from high-quality aluminum alloy and ABS material, providing a robust and aesthetically pleasing design with extended service life.
- Wide Compatibility: Compatible with nearly all standard water cooling system configurations, making it a versatile choice for PC builders.
- D Port + 4Pin Interface: Features a D port and 4-pin interface for power and control, ensuring high accuracy and seamless integration with your existing equipment.

Figure 1: Main view of the Dilwe CPU Water Cooling Pump, showcasing its compact design and integrated components.

Figure 2: Side view of the pump, revealing its internal structure and the clear reservoir for coolant visibility.
Specifications
| Item Type | CPU Cooling Pump |
| Material | Aluminium Alloy, ABS |
| Scope | Computer |
| Rated Current | 0.8A±10% |
| Rated Power | 10W |
| Rated Voltage | 12V |
| Pump Head | Approx. 4 Meters / 13.1ft |
| Pump Waterflow | 600L/H |
| Power Connector Type | 4-Pin |
| Cooling Method | Water |
| Compatible Devices | Desktop |
| Model Number | Dilwe907qpra5w4 |
Package Contents
Upon opening the package, please verify that all components are present and undamaged:
- 1 x Dilwe CPU Cooling Pump
- (Additional accessories such as mounting hardware, tubing, or fittings may be included depending on the specific kit. Refer to your product packaging for a complete list.)
Setup and Installation
Proper installation is crucial for the performance and safety of your water cooling system. It is recommended to consult a professional if you are unsure about any steps.
- Prepare Your System: Ensure your computer is powered off and unplugged from the wall outlet. Open your computer case to access the CPU area and existing cooling components.
- Mount the Pump: Identify a suitable mounting location within your PC case. The pump can be mounted horizontally or vertically. Secure the pump using appropriate screws or brackets (not included unless part of a larger kit). Ensure it is stable and does not obstruct other components or airflow.
- Connect Tubing: Connect the G1/4 threaded fittings to the pump's inlet and outlet ports. Ensure all connections are tight to prevent leaks. Route the tubing to your CPU water block and radiator, ensuring there are no kinks or sharp bends that could restrict flow.
- Fill the Loop: Before powering on, fill your water cooling loop with a compatible coolant. Use a funnel to carefully pour coolant into the reservoir (if applicable) or the highest point of your loop. Bleed air from the system by gently tilting the case and running the pump intermittently (with only the pump powered, not the entire PC) until no more air bubbles are visible.
- Connect Power: Connect the D port and 4-pin power connectors from the pump to your power supply unit (PSU) and motherboard, respectively. Ensure secure connections.
- Leak Test: Before closing your case, perform a thorough leak test. Power on only the pump (if possible, using a dedicated PSU or jumper) and let it run for several hours, checking all fittings and connections for any signs of leaks. Place paper towels under connections to easily spot drips.
- Final Assembly: Once the leak test is complete and no leaks are detected, close your computer case.

Figure 3: Illustrates the process of installing the water cooling pump within a desktop computer case, showing the integration with other PC components.
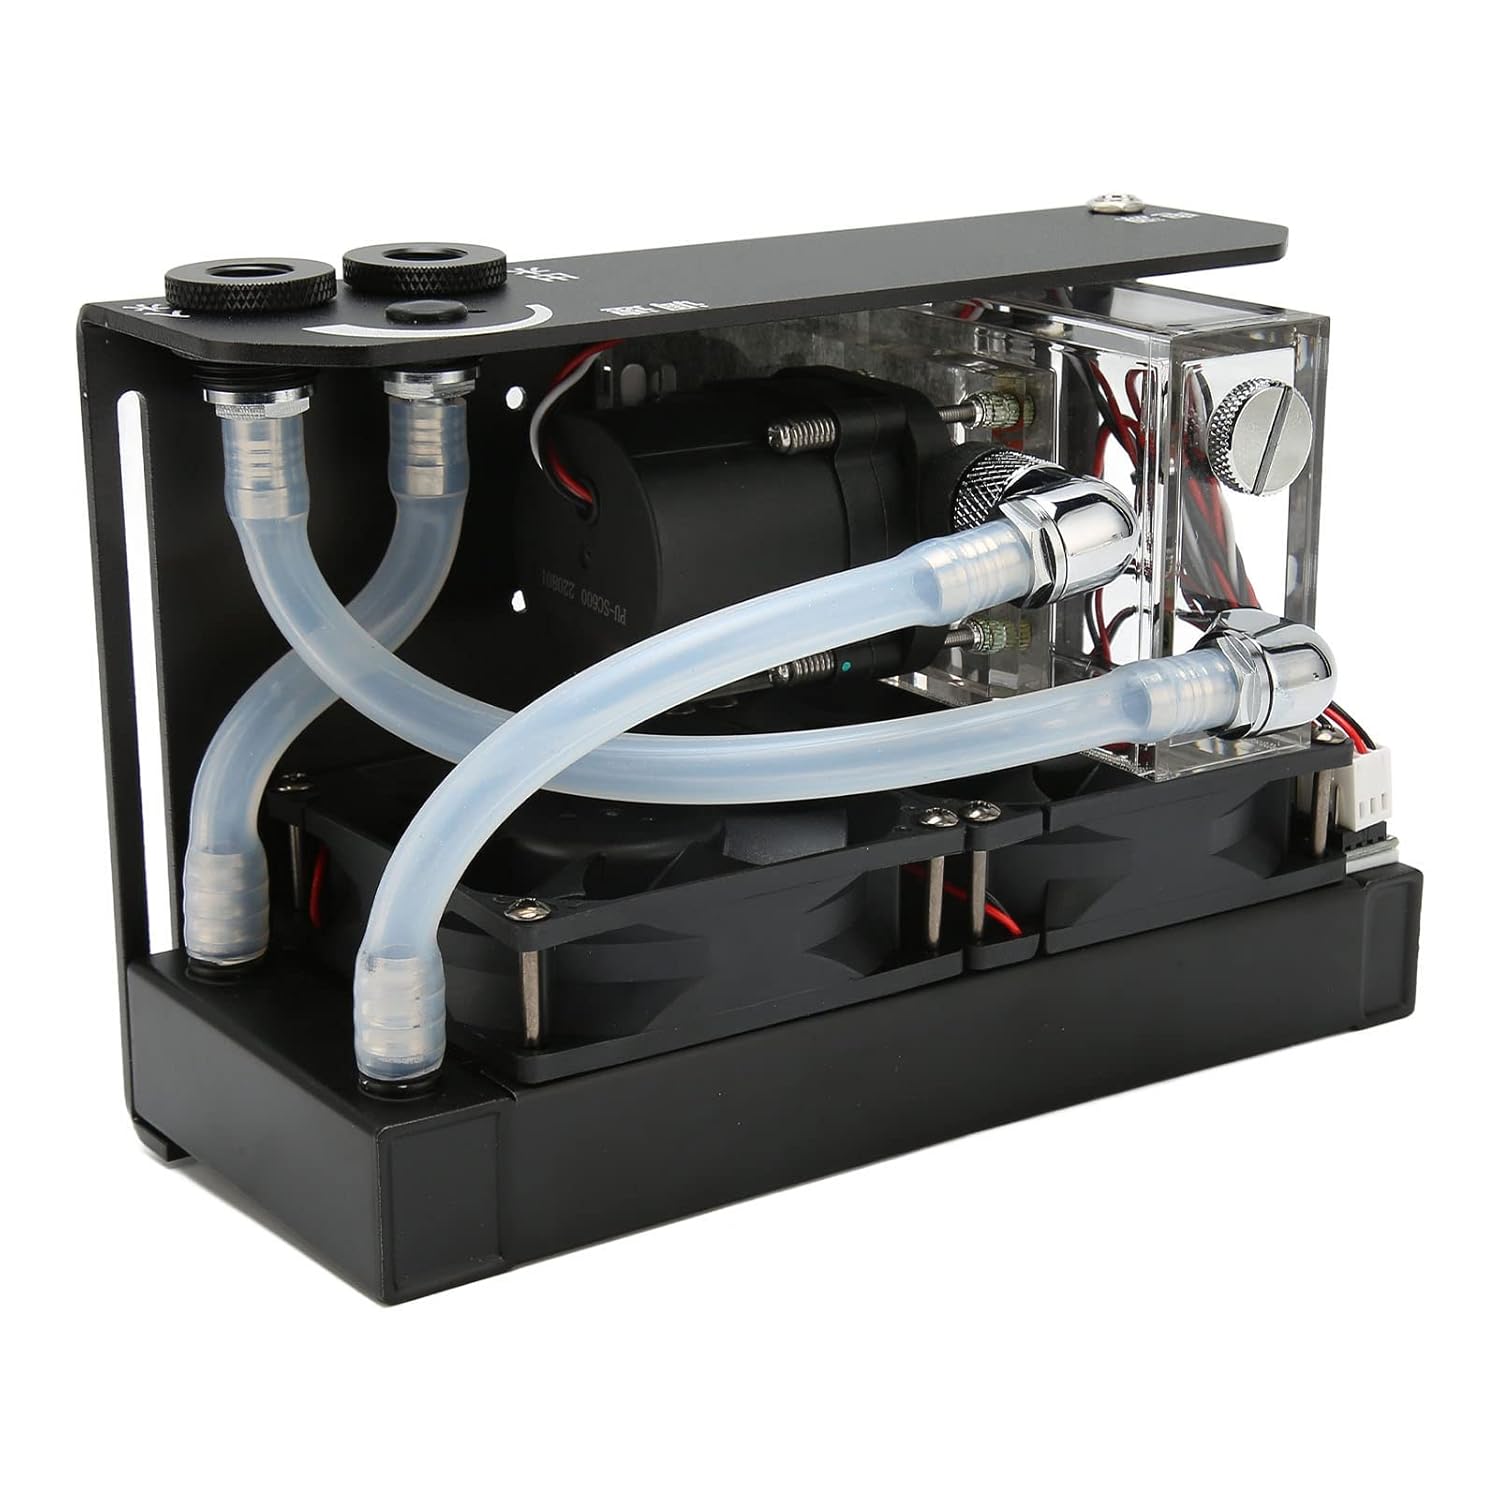
Figure 4: A top-down view of the pump, highlighting the G1/4 threaded inlet and outlet ports where tubing will be connected.

Figure 5: This image displays the front panel of the pump, indicating the power input and control interfaces (D port and 4-pin connections).
Operating Instructions
Once installed, the Dilwe CPU Water Cooling Pump operates as an integral part of your liquid cooling system. Its operation is largely automatic once the system is powered on.
- Power On: With the pump properly connected to your PSU and motherboard, power on your computer. The pump will begin circulating coolant through the loop.
- Monitoring: It is advisable to monitor your CPU temperatures using software utilities to ensure the cooling system is functioning effectively.
- Flow Rate: The pump provides a waterflow of 600L/H, ensuring efficient coolant circulation for optimal heat transfer.
- Noise Level: The pump is designed for low-noise operation. If you notice unusual noises, refer to the Troubleshooting section.
Maintenance
Regular maintenance helps ensure the longevity and optimal performance of your water cooling pump and entire system.
- Coolant Replacement: It is recommended to replace the coolant in your loop every 6-12 months, or as recommended by your coolant manufacturer, to prevent buildup and maintain cooling efficiency.
- System Flush: When replacing coolant, consider flushing the entire loop with distilled water or a dedicated cleaning solution to remove any accumulated debris or residue.
- Dust Removal: Periodically clean dust from the pump's exterior and any associated radiators or fans to ensure proper airflow and prevent overheating. Use compressed air or a soft brush.
- Inspect Tubing and Fittings: Regularly inspect all tubing and fittings for signs of wear, cracks, or leaks. Address any issues promptly to prevent damage to your computer components.
Troubleshooting
If you encounter issues with your Dilwe CPU Water Cooling Pump, refer to the following common problems and solutions:
| Problem | Possible Cause | Solution |
|---|---|---|
| Pump not starting/no flow |
|
|
| High CPU temperatures |
|
|
| Unusual noise from pump |
|
|
| Coolant leak |
|
|
Warranty and Support
Dilwe products are manufactured to high quality standards. For specific warranty information regarding your CPU Water Cooling Pump, please refer to the warranty card included with your purchase or visit the official Dilwe website. For technical support or inquiries, please contact Dilwe customer service through their official channels.
Manufacturer: Dilwe
Model Number: Dilwe907qpra5w4
Date First Available: March 9, 2023
For more information, visit the Dilwe Store on Amazon.