
PowMr 80A
Contents
User Manual: PowMr 80A Solar Charge Controller
Intelligent Regulator with Dual USB Port for 12V/24V/36V/48V Systems
1. Introduction
This manual provides detailed instructions for the installation, operation, and maintenance of your PowMr 80A Solar Charge Controller. Please read this manual thoroughly before installation and use to ensure optimal performance and safety.
2. Safety Instructions
Observe the following safety precautions during installation and operation:
- Ensure all connections are correct and secure before powering on the controller.
- Always connect the battery first, then the solar panel, and finally the load. Disconnect in reverse order.
- Do not expose the controller to water or excessive humidity.
- Ensure proper ventilation around the controller to prevent overheating.
- The controller is equipped with multiple protections including reverse polarity connection, over-discharging, overheating, output short circuit, and maximum charging current limits.
- Only qualified personnel should perform installation and maintenance.
3. Product Overview
3.1 Features
- Auto-detects 12V/24V/36V/48V systems.
- Max PV input voltage: 100 volts.
- Max. Input Power: 960W-3840W (depending on system voltage).
- Compatible with lithium-ion and lead-acid batteries, supports user-defined battery parameters.
- Built-in Dual USB output 5V/2.5A (max) for charging mobile devices.
- 3-Stage PWM Technology (Bulk, Boost, Float) for efficient and safe battery charging.
- Combination of solar light control and time control for adjustable load enable duration.
- Backlit LCD Screen for real-time monitoring and parameter control.
- Multiple protections: overheating, output short circuit, over-discharging, reverse polarity connection, and maximum charging current limit.
3.2 Components
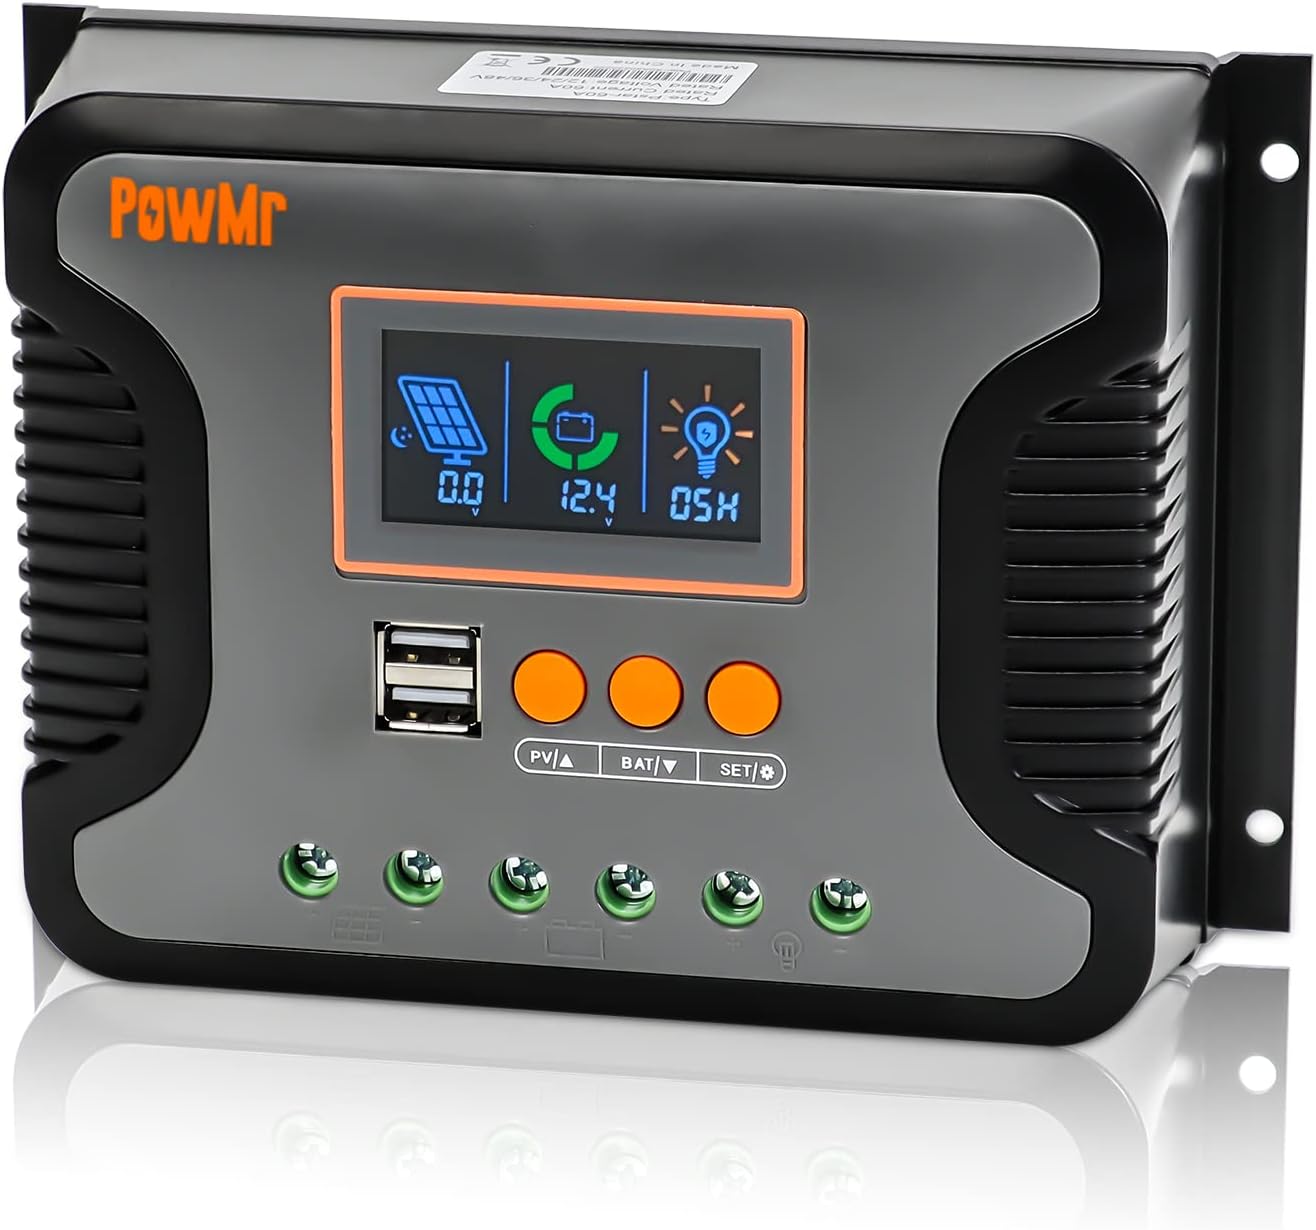
Figure 1: Front view of the PowMr 80A Solar Charge Controller.

Figure 2: Key components of the PowMr Solar Charge Controller, including the LCD display, USB ports, function keys, PV input port, battery port, and load port.
The controller features an intuitive LCD display, dual USB charging ports, and clearly labeled connection terminals for PV input, battery, and load. It also incorporates a robust heat sink for natural air cooling, ensuring silent operation.
Video 1: An overview of the PowMr Solar Charge Controller, highlighting its 12V/24V/36V/48V compatibility and key features.
4. Setup
4.1 Wiring Diagram and Connection Steps
Follow the wiring diagram and steps below for proper installation. Ensure all power sources are disconnected before making any connections.

Figure 3: Wiring diagram showing connections for solar panels, battery, inverter, and load to the charge controller.
- Connect the Battery: Connect the battery (lead-acid or lithium) to the battery terminals on the controller. Ensure correct polarity (positive to positive, negative to negative). The controller will auto-detect the system voltage.
- Connect the PV (Solar Panels): Connect the solar panels to the PV input terminals. Ensure the maximum open voltage of the PV array does not exceed 100V.
- Connect the Load: Connect your DC load directly to the load terminals, or connect an inverter to the battery bank for AC output.
Video 2: Demonstrates the connection process for the PowMr Solar Charge Controller, showing how to connect the battery, solar panels, and load for faster and safer charging.
5. Operating Instructions
5.1 LCD Display Navigation
The backlit LCD screen provides real-time monitoring and allows for parameter adjustments. Use the function keys (PV▲, BAT▼, SET/Ⓞ) to navigate and configure settings.

Figure 4: Steps for checking PV input information, battery information, and configuring load enable duration on the LCD screen.
- Press the "PV▲" key to cycle through PV information: PV input voltage, PV input current, and PV input power.
- Press the "BAT▼" key to cycle through battery information: current battery voltage, equipment temperature, battery calibration voltage, battery type, boost charging voltage, float charging voltage, low DC cut-off recovery voltage, and low DC cut-off voltage.
5.2 Battery Type Selection and Parameter Adjustment
The controller is compatible with 14 types of batteries, including SEL, USE, FLD, GEL, LiFePO4, and ternary lithium batteries. You can also define custom battery parameters.
Figure 5: Illustrates the various battery types supported by the controller, including lead-acid and lithium batteries.
- To select a battery type or adjust parameters, press and hold the "BAT▼" key until the setting flashes. Use "PV▲" and "BAT▼" to change values, then press "SET/Ⓞ" to confirm.
- For user-defined batteries, you can calibrate the battery voltage using a multimeter for accuracy.
5.3 Load Enable Duration Setting
The controller allows you to adjust the load enable duration based on solar light control and time control.
- Press and hold the "SET/Ⓞ" key to enter the load mode setting.
- Options include:
- 00H: Solar light control mode (DC output enabled when solar energy is sufficient).
- 24H: Turn on load immediately (default).
- 01H-23H: Adjust the load enable duration in hours.
6. Maintenance
Regular maintenance ensures the longevity and optimal performance of your solar charge controller:
- Keep the controller clean and free from dust and debris.
- Periodically check all wiring connections for tightness and corrosion.
- Ensure the heat sink (located on the back of the unit) is not obstructed to allow for efficient natural air cooling and silent operation.
- Monitor the LCD display for any error codes or unusual readings.
Figure 6: The controller's design emphasizes excellent heat dissipation through natural convection, contributing to its silent operation.
7. Troubleshooting
If you encounter issues with your solar charge controller, refer to the following common problems and solutions:
- No Display/No Power: Check battery connections and ensure the battery has sufficient voltage.
- Battery Not Charging: Verify solar panel connections, ensure adequate sunlight, and check PV input voltage on the display. Confirm the correct battery type is selected.
- Load Not Working: Check load connections, ensure the load enable duration is set correctly (e.g., not 00H if you need continuous power), and verify battery voltage is above the low DC cut-off voltage.
- Overheating: Ensure proper ventilation around the controller and that the heat sink is not blocked. Reduce load if necessary.
- Error Codes: Refer to the specific error code displayed on the LCD screen for detailed troubleshooting steps (not provided in this general manual).
8. Specifications
| Attribute | Value |
|---|---|
| Brand | PowMr |
| Model Number | 80A |
| System Voltage | 12V/24V/36V/48V Auto |
| Max PV Input Voltage | 100 Volts |
| Max. Input Power (12V System) | 960W |
| Max. Input Power (24V System) | 1920W |
| Max. Input Power (36V System) | 2880W |
| Max. Input Power (48V System) | 3840W |
| Charging Port Type | USB (Dual 5V/2.5A max) |
| Product Dimensions | 7.36 x 5.2 x 2.36 inches |
| Item Weight | 1.61 pounds |
| Display Type | LCD |
| Operating Temperature | Up to 60 Degrees Celsius |

Figure 7: Physical dimensions of the PowMr Solar Charge Controller.
9. Warranty and Support
PowMr products are manufactured to high-quality standards and are guaranteed against manufacturing defects. For warranty claims or technical support, please contact PowMr customer service through the retailer where the product was purchased or visit the official PowMr website for contact information.
Please retain your proof of purchase for warranty validation.
Ask a question about this manual
Ask about setup, troubleshooting, compatibility, parts, safety, or missing instructions. Manuals+ will review the question and use this page’s manual context to help answer it.