
Introduction
Thank you for choosing the Mata1 LED Camping Lantern. This manual provides essential information for the safe and efficient use of your new lantern. Designed for versatility, this collapsible, battery-powered lantern offers reliable illumination for camping, outdoor activities, and emergency situations.
Safety Information
- Battery Safety: Always insert batteries with correct polarity (+/-). Do not mix old and new batteries, or different types of batteries. Remove batteries if the lantern will not be used for an extended period to prevent leakage.
- Water Resistance: This lantern is NOT water resistant. Avoid exposure to rain, splashes, or submersion in water to prevent damage and electrical hazards.
- Heat: Do not expose the lantern to extreme temperatures or direct sunlight for prolonged periods.
- Children: Keep out of reach of small children.
- Disposal: Dispose of batteries and the product according to local regulations.
Package Contents
- 1 x Mata1 LED Camping Lantern (Model: M1-LAMP25CMPBK1)
Specifications
| Model Number | M1-LAMP25CMPBK1 |
| Light Source | 30 LED Bulbs |
| Luminous Flux | 180 Lumens |
| Beam Angle | 360 Degrees |
| Brightness Levels | 3 (Adjustable by expansion) |
| Power Source | 4 x AA Batteries (Not Included) |
| Battery Life | Up to 50 Hours |
| Material | ABS Plastic, LED, Iron |
| Color | Black |
| Dimensions (Collapsed) | 3.38 x 3.38 x 4.94 inches |
| Weight | 9.5 ounces (0.27 kg) |
| Water Resistance | Not Water Resistant |
Setup
1. Battery Installation
- Locate the battery compartment at the bottom of the lantern.
- Twist the battery cover counter-clockwise to open.
- Insert 4 AA batteries (not included) according to the polarity markings (+/-) inside the compartment.
- Replace the battery cover and twist clockwise to secure it.

Figure 1: Battery compartment for 4 AA batteries.

Figure 2: Detailed view of the battery compartment.
Operating Instructions
1. Turning On/Off
The Mata1 LED Camping Lantern operates by expanding and collapsing its body:
- To Turn On: Gently pull the top and bottom sections of the lantern apart. The LED lights will illuminate as the lantern expands.
- To Turn Off: Push the top and bottom sections back together until the lantern is fully collapsed. The LED lights will turn off.
2. Adjusting Brightness
The lantern features 3 adjustable brightness levels. The brightness is controlled by how much you expand the lantern:
- Low Brightness: Partially expand the lantern.
- Medium Brightness: Expand the lantern further.
- High Brightness: Fully expand the lantern for maximum illumination (180 lumens).

Figure 3: Collapsible design for power and brightness control.
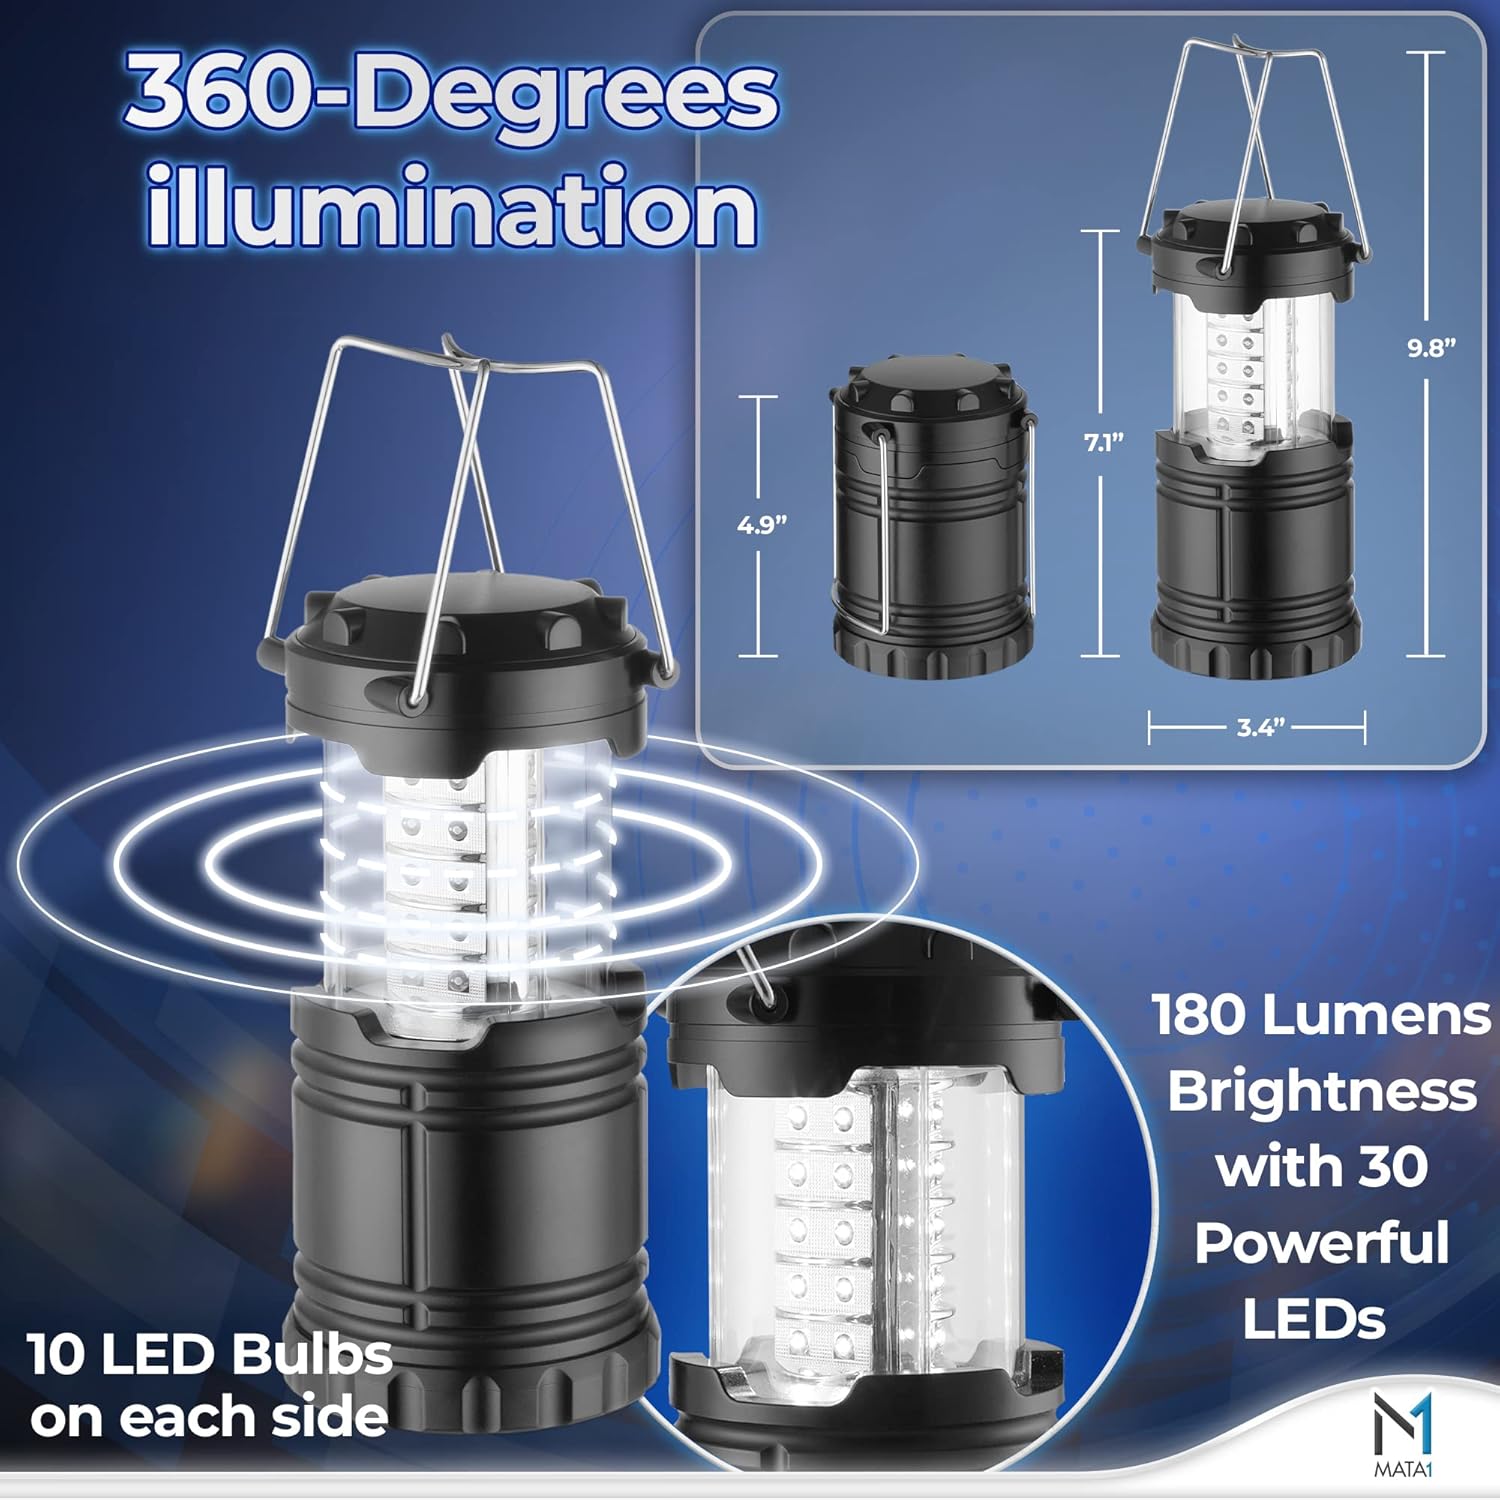
Figure 4: Visual representation of adjustable brightness levels.
3. Using the Handles
The lantern is equipped with two metal handles for convenient carrying or hanging:
- Lift the handles to carry the lantern.
- Hook the handles onto a tent loop, branch, or other suitable fixture for overhead lighting.

Figure 5: Lantern with handles extended for portability.
Maintenance
1. Cleaning
- Wipe the exterior of the lantern with a soft, dry cloth.
- Do not use abrasive cleaners or solvents, as these may damage the finish.
2. Battery Replacement
- When the light becomes dim or stops working, replace all 4 AA batteries.
- Follow the battery installation steps outlined in the Setup section.
3. Storage
- Store the lantern in a cool, dry place when not in use.
- Ensure the lantern is fully collapsed and turned off before storage.
- Remove batteries if storing for an extended period (more than 30 days) to prevent corrosion.
Troubleshooting
| Problem | Possible Cause | Solution |
| Lantern does not turn on. | Batteries are dead or incorrectly installed. Lantern is not fully expanded. | Check battery polarity and replace if necessary. Ensure the lantern is fully expanded. |
| Light is dim. | Batteries are low. | Replace all 4 AA batteries with new ones. |
| Lantern does not collapse smoothly. | Debris or obstruction. | Inspect the collapsible mechanism for any obstructions and gently clear them. Do not force. |
Warranty and Support
For warranty information or product support, please refer to the documentation included with your purchase or contact Mata1 customer service through the retailer where the product was purchased. Please have your model number (M1-LAMP25CMPBK1) available when contacting support.