
1. Introduction
This manual provides detailed instructions for the installation, operation, and maintenance of your Aqua Control FullVision 2 Digital Irrigation Timer. This device is designed to automate garden watering with two independent outlets, ensuring efficient and precise irrigation.
2. Product Overview
The Aqua Control FullVision 2 features a panoramic LCD screen for clear visibility of all programming information. It includes intuitive buttons for easy setup and control.
2.1. Components
- Main Timer Unit with LCD Display
- Control Buttons (NOW, A/B, ESC/OFF, OK, +, -, DELAY)
- Water Inlet (with 1/2" and 3/4" double thread)
- Two Independent Water Outlets (A and B)
- Battery Compartment (located on the back)
2.2. Display and Controls
The large LCD screen displays the current time, start time, watering duration, frequency, and next watering event. Buttons allow for navigation and setting adjustments.

Figure 1: Front view of the Aqua Control FullVision 2 Digital Irrigation Timer, showing the panoramic LCD display and control buttons. The timer has a black body with blue connectors.
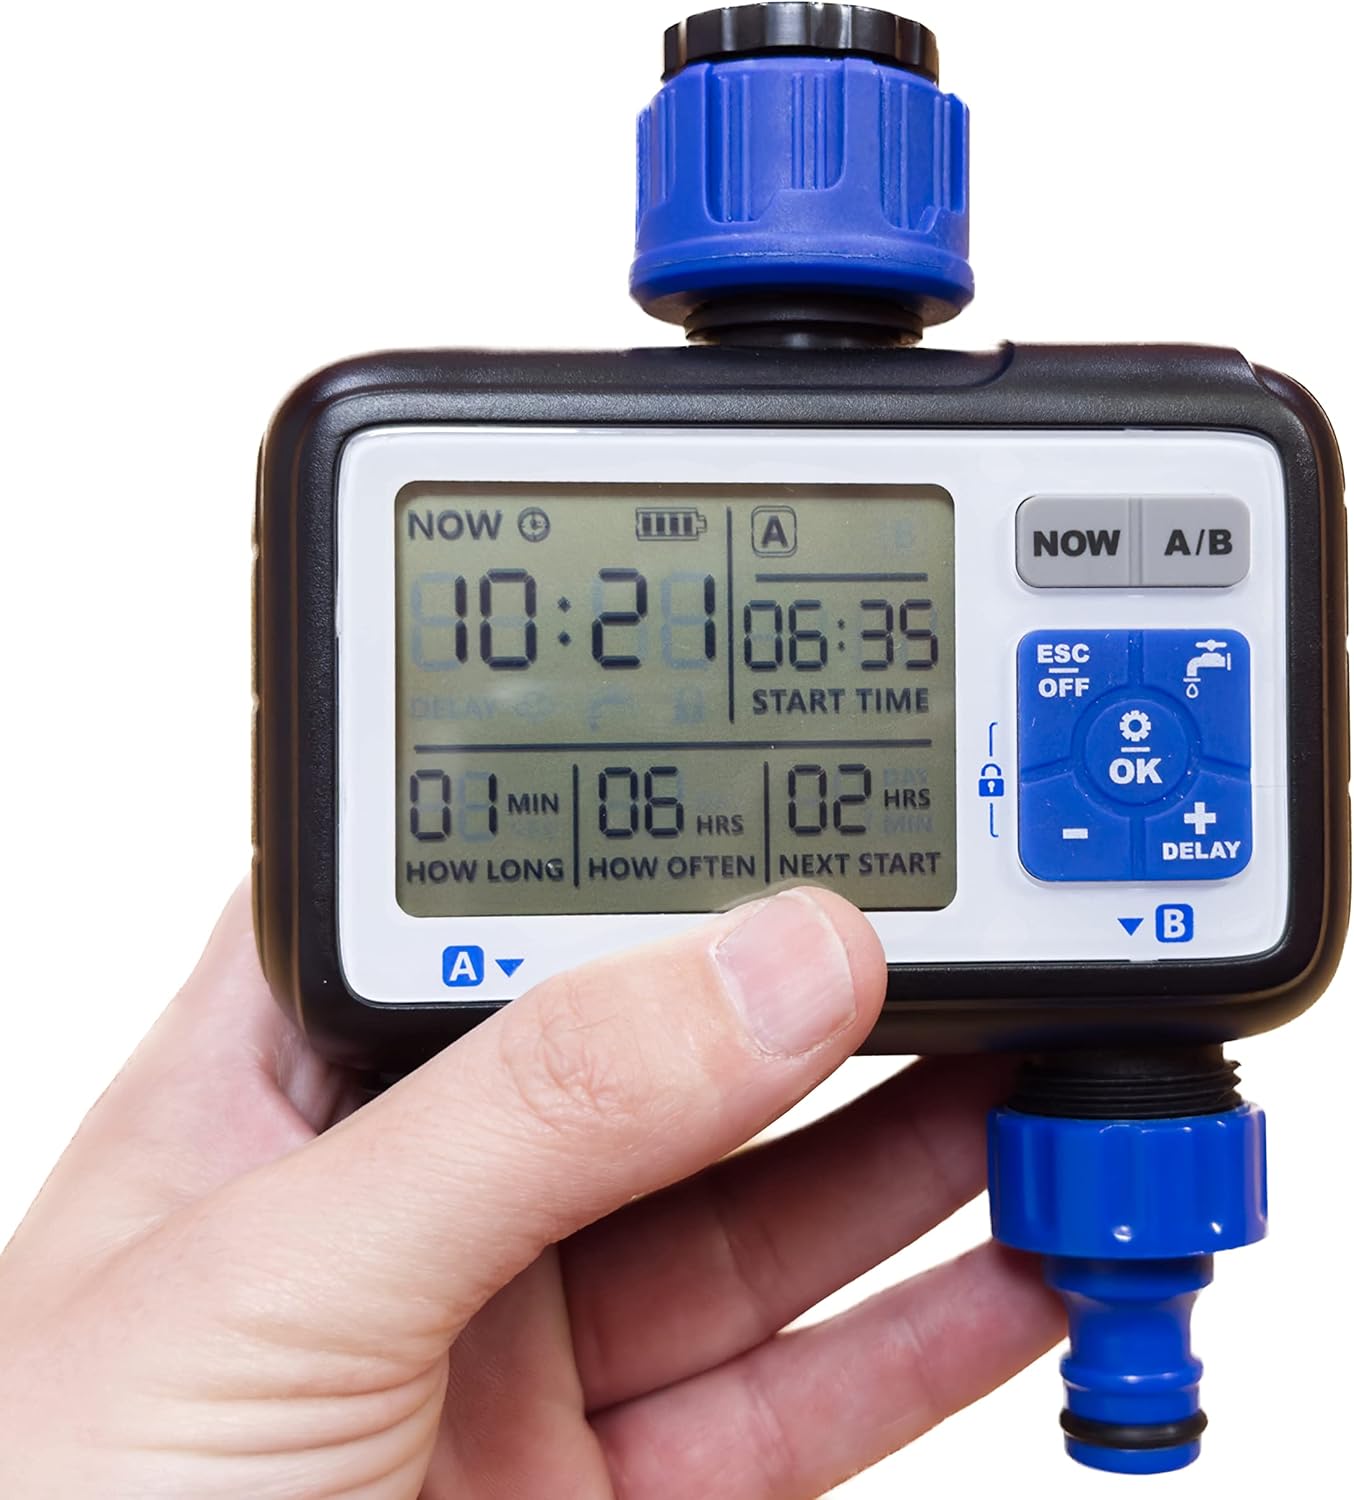
Figure 2: A hand holding the Aqua Control FullVision 2 timer, illustrating the size and the clear visibility of the digital display. The display shows current time, start time, duration, frequency, and next start time. A QR code is visible on the packaging in the background, linking to http://qr.altadex.com/C4115 for additional information.
3. Setup
3.1. Battery Installation
- Locate the battery compartment on the back of the timer.
- Open the compartment cover.
- Insert two 1.5V AA alkaline batteries (not included), ensuring correct polarity.
- Close the battery compartment cover securely.
3.2. Connecting to the Faucet
- Ensure the faucet is turned off.
- The timer includes a double thread (1/2" and 3/4") for compatibility with most garden taps. Screw the timer onto your garden faucet securely by hand. Do not overtighten.
- Connect your irrigation hoses to the two independent outlets (A and B) at the bottom of the timer.

Figure 3: Top view of the Aqua Control FullVision 2 timer, highlighting the water inlet with its universal thread connector.
4. Operating Instructions
The FullVision 2 timer is designed for straightforward programming in just four steps.
4.1. Basic 4-Step Programming
After installing batteries, follow these steps to set up your watering schedule:
- Set Current Time: Press the 'NOW' button. Use the '+' and '-' buttons to adjust the current hour and minute. Press 'OK' to confirm.
- Set Start Time: Press 'OK' to move to 'START TIME'. Use '+' and '-' to set the desired time for watering to begin. Press 'OK' to confirm.
- Set Duration: Press 'OK' to move to 'HOW LONG' (watering duration). Use '+' and '-' to set the length of each watering cycle (e.g., 15 minutes). Press 'OK' to confirm.
- Set Frequency: Press 'OK' to move to 'HOW OFTEN' (watering frequency). Use '+' and '-' to set how often the watering cycle repeats (e.g., every 6 hours). Press 'OK' to confirm.
The timer will now display the next scheduled watering event. You can switch between programming for outlet A and outlet B using the 'A/B' button.
4.2. Special Functions
- Screen Lock: To prevent accidental changes, press and hold the 'OK' button until a lock icon appears on the screen. Repeat to unlock.
- Rain Delay: Press the 'DELAY' button to pause the watering schedule for a set period (e.g., 24, 48, 72 hours) in case of rain. Press 'DELAY' repeatedly to cycle through options.
- Manual Watering: To initiate watering outside of the programmed schedule, press and hold the 'OK' button (without screen lock) until manual watering begins. This will not alter your existing program.
- Battery Saving Mode: The timer automatically enters a low-power mode when inactive to conserve battery life.
- Turning Off: Press the 'ESC/OFF' button to turn off the timer. Press it again to turn it back on.
5. Maintenance
- Cleaning: Periodically clean the exterior of the timer with a soft, damp cloth. Do not use abrasive cleaners or immerse the unit in water.
- Battery Replacement: Replace batteries when the low battery indicator appears on the screen to ensure continuous operation.
- Winterization: Before freezing temperatures, disconnect the timer from the faucet, remove batteries, and store the unit indoors in a dry, frost-free location.
6. Troubleshooting
- No Water Flow:
- Ensure the faucet is fully open.
- Check if the timer is programmed correctly and not in 'OFF' mode or 'Rain Delay'.
- Verify that batteries are installed correctly and have sufficient charge.
- Display Not Working:
- Replace batteries with new ones.
- Ensure battery polarity is correct.
- Incorrect Watering Times:
- Re-check your programming settings for current time, start time, duration, and frequency.
- Ensure the screen is not locked, preventing changes.
7. Specifications
| Feature | Specification |
|---|---|
| Model Number | C4115 |
| Dimensions | 14 x 15 x 6 cm |
| Weight | 418 g |
| Material | Resin, Plastic |
| Screen Type | LCD |
| Power Source | 2 x 1.5V AA Batteries (not included) |
| Water Outlets | 2 Independent |
| Faucet Connection | 1/2" and 3/4" Double Thread |
8. Warranty and Support
For warranty information, please refer to the documentation included with your product or contact Aqua Control customer support. Additional product information and support may be available via the manufacturer's website or by scanning the QR code found on the product packaging: http://qr.altadex.com/C4115.


