1. Introduction
This manual provides essential instructions for the safe and effective use of your PULUZ One-Way Valve Diving Case. Designed for compatible iPhone models, this waterproof housing allows you to capture photos and videos up to 40 meters (130 feet) underwater. Please read this manual thoroughly before initial use to ensure proper operation and prevent damage to your device.

Image 1.1: PULUZ One-Way Valve Diving Case compatible with iPhone 12, 12 Pro, 13, 13 Pro, 14, 14 Pro, 15, 15 Pro.
2. Package Contents
Verify that all items listed below are included in your package:
- Waterproof Case x 1
- Manual Pump x 1
- Lanyard x 1
- Red Filter x 1
- Cleaning Cloth x 1
- O-ring Seal x 1
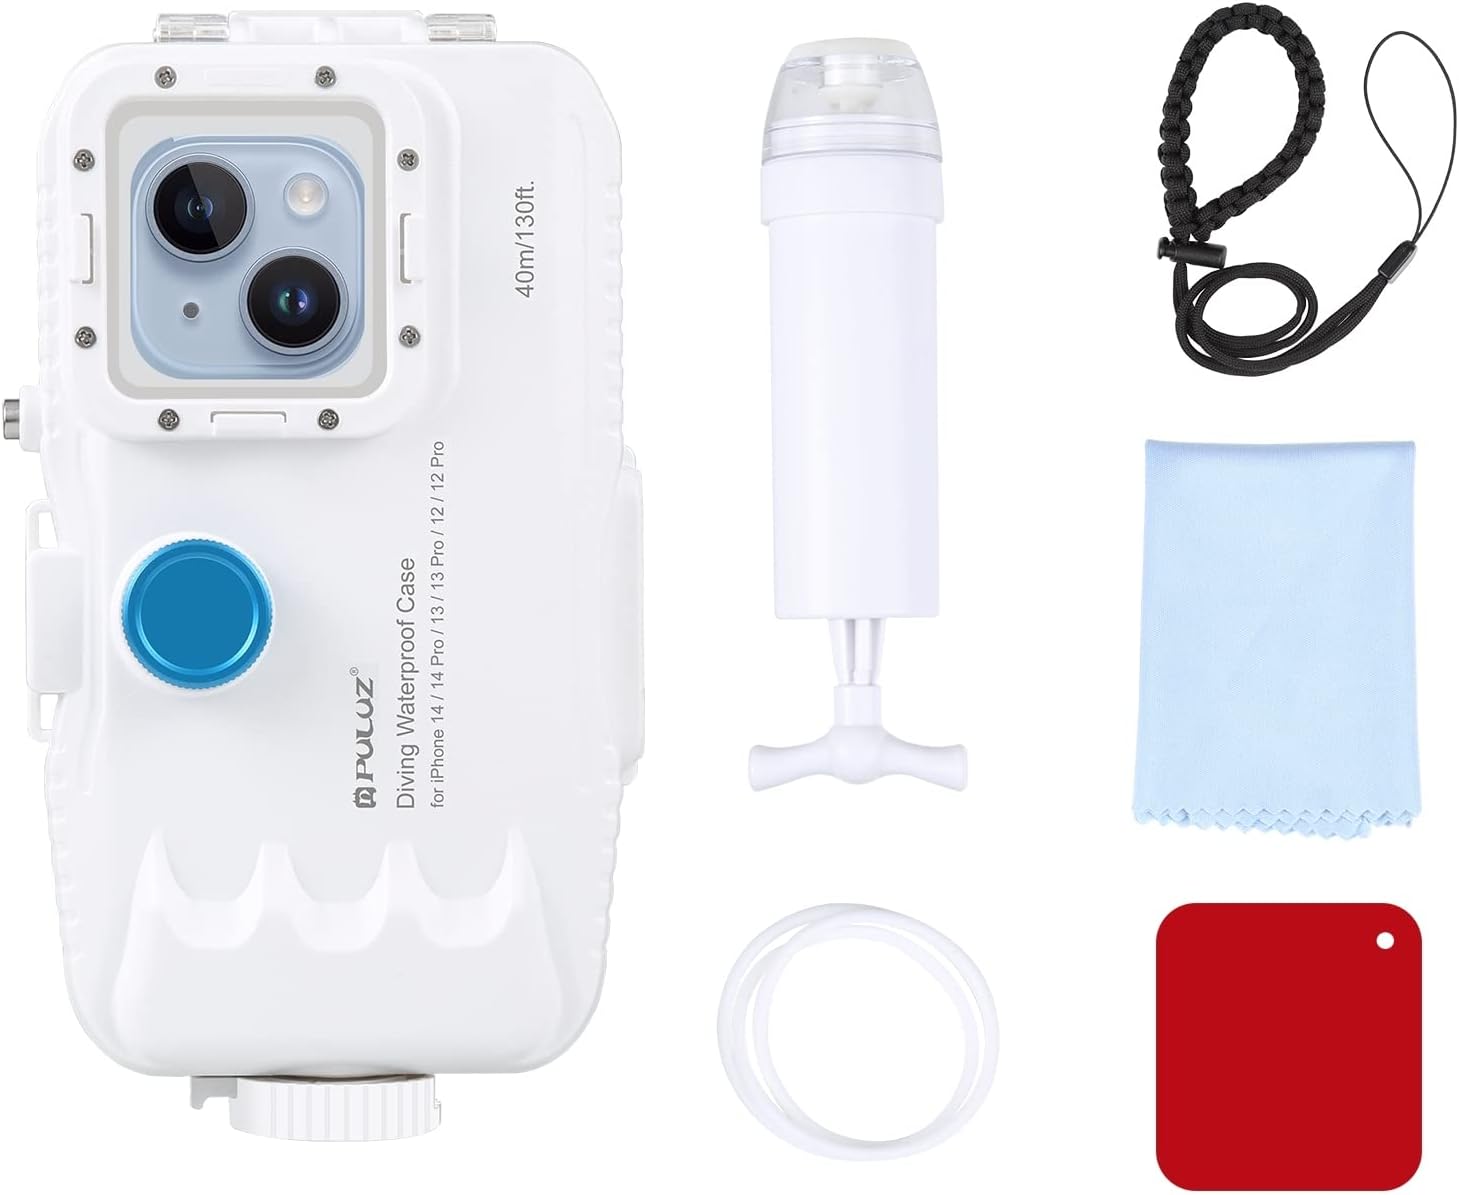
Image 2.1: Included accessories with the PULUZ Diving Case.
3. Product Overview
Familiarize yourself with the components of your diving case:

Image 3.1: Labeled components of the PULUZ Diving Case.
- Strap: For securing the case.
- Mode Button (L): Left-side button for mode selection.
- Shoot Button: Button for capturing photos or starting/stopping video recording.
- Power Button: Button for device power control.
- Mode Function Button (R): Right-side button for additional mode functions.
- Camera Button/Front-facing and Rear-facing Camera Switching: Button for camera control and switching.
- 1/4'' Screw Hole: For mounting on tripods or other accessories.
- Lens Ring: Area around the camera lens.
- Camera: iPhone camera window.
- Filter Buckle: For attaching the red filter.
- Cold Shoe Interface: For attaching external lights or microphones.
- One-way valve: For vacuum sealing the case.
- Security Lock: Mechanism to secure the case closure.

Image 3.2: Detailed view of key features including the security lock, screw holes, and screen buttons.
4. Compatibility
The PULUZ One-Way Valve Diving Case is compatible with the following iPhone models:
- iPhone 15 / iPhone 15 Pro
- iPhone 14 / iPhone 14 Pro
- iPhone 13 / iPhone 13 Pro
- iPhone 12 / iPhone 12 Pro
Ensure your phone model is listed above for proper fit and functionality. The case is designed with precise cutouts for these models.

Image 4.1: Visual representation of compatible iPhone models.
5. Safety Precautions
Failure to follow these precautions may result in water damage to your phone and void the product warranty.
- Waterproof Test: Before each use, especially the first time, perform a waterproof test without your phone inside. Submerge the empty case in water for at least 30 minutes. Inspect for any leaks. If leaks are detected, do not use the case and contact support.
- Inspect Seals: Always check the O-ring seal for any debris, hair, or damage before closing the case. A clean and intact seal is crucial for waterproofing.
- Proper Closure: Ensure the case is securely and completely latched shut. The security lock must be engaged.
- Depth Limit: Do not exceed the maximum diving depth of 40 meters (130 feet).
- Temperature: Avoid using the case in extreme temperatures that may affect the phone or case materials.
- Impact: Protect the case from drops or impacts, which could compromise its waterproof integrity.
- Button Operation: Due to water pressure, buttons may require firm pressing underwater.
- Phone Preparation: Fully charge your phone before use. Set your phone to the desired camera mode before sealing the case, as touchscreen functionality is limited underwater. Keep the camera app open.
6. Setup Instructions
6.1 Initial Waterproof Test (Mandatory)
- Ensure the case is empty and clean.
- Close the case securely, engaging all latches and the security lock.
- Submerge the empty case in a sink or bucket of water for at least 30 minutes.
- Remove the case, dry its exterior thoroughly, and then open it.
- Inspect the interior for any signs of water ingress. If water is present, do not use the case and contact customer support.
6.2 iPhone Installation
- Prepare Phone: Remove any existing phone case or screen protector. Clean your iPhone screen and camera lenses. Ensure your phone is fully charged.
- Open Case: Release the security lock and open the diving case.
- Insert Phone: Carefully place your iPhone into the case, ensuring it sits flush and the camera aligns with the case's lens window.
- Close Case: Close the diving case firmly, ensuring the O-ring seal is properly seated and free of obstructions. Engage all latches and the security lock.
- Vacuum Seal (Optional but Recommended):
- Open the one-way valve cover.
- Attach the manual pump to the valve.
- Pump to create a vacuum inside the case. This enhances air tightness.
- Remove the pump and close the valve cover.

Image 6.1: Step-by-step installation process for the iPhone and vacuum sealing.
6.3 Video Guide for Setup
Video 6.1: A visual demonstration of the diving case setup and usage.
7. Operating Instructions
7.1 Pre-Dive Phone Settings
- Camera App: Open your iPhone's camera application and select your desired mode (photo, video, etc.) before sealing the case.
- Auto-Lock: Disable auto-lock or set it to a longer duration to prevent the phone from sleeping during your dive.
- Brightness: Adjust screen brightness to maximum for better visibility underwater.
- Low Power Mode: Disable Low Power Mode to ensure full camera functionality.
7.2 Underwater Operation
- Buttons: Use the physical buttons on the case to control your iPhone's camera functions (e.g., shoot, mode, power). Press firmly due to water pressure.
- Red Filter: For optimal color correction in blue or clear freshwater, attach the included red filter to the lens buckle. This helps restore natural colors lost at depth.

Image 7.1: Effect of the red filter on underwater image quality.
7.3 Post-Dive
- After surfacing, rinse the case thoroughly with fresh water to remove salt, sand, or chlorine.
- Dry the exterior completely before opening the case to prevent water droplets from entering.
- Carefully open the case and remove your iPhone.
Video 7.2: General overview of the product's features and use cases.
8. Maintenance and Storage
- Cleaning: After each use, especially in saltwater, rinse the case with fresh water. Use the provided cleaning cloth to gently wipe the lens and screen areas.
- O-ring Care: Periodically inspect the O-ring seal for cracks, tears, or deformation. Clean it gently with a soft cloth. If necessary, apply a thin layer of silicone grease (not included) to maintain its elasticity and sealing properties. Replace damaged O-rings immediately.
- Storage: Store the diving case in a cool, dry place away from direct sunlight and extreme temperatures. Keep the case slightly ajar during storage to prevent compression of the O-ring.
- Avoid Chemicals: Do not use harsh chemicals, solvents, or abrasive cleaners on the case, as they can damage the materials and seals.
9. Troubleshooting
9.1 Water Leakage
- Cause: Improperly closed latches, damaged O-ring, debris on O-ring.
- Solution: Ensure all latches are securely closed and the security lock is engaged. Inspect the O-ring for any foreign particles or damage; clean or replace if necessary. Always perform a waterproof test before use.
9.2 Buttons Not Responding
- Cause: Phone not properly aligned, excessive water pressure, phone screen locked.
- Solution: Re-open the case and ensure the phone is correctly seated. Press buttons more firmly. Ensure the phone's screen is active and the camera app is open before diving.
9.3 Fogging Inside Case
- Cause: Temperature difference between inside and outside the case, high humidity.
- Solution: Ensure the phone is dry before placing it in the case. Consider using anti-fog inserts (not included) if fogging persists in humid conditions.
10. Specifications
| Feature | Specification |
|---|---|
| Model Number | For iPhone 15/14/13/12 & 15/14/13/12 Pro |
| Waterproof Rating | IP68 |
| Maximum Diving Depth | 40 meters (130 feet) |
| Material | Polycarbonate |
| Product Dimensions | 7.2 x 1.6 x 3.9 inches |
| Item Weight | 1.06 pounds |
11. Warranty and Support
PULUZ products are designed for durability and performance. For warranty information or technical support, please refer to the official PULUZ website or contact your retailer. Keep your purchase receipt as proof of purchase.
For further assistance, visit: PULUZ Official Store on Amazon


