
Important Safety Information
Please read and understand all safety instructions before installing, operating, or maintaining this product. Failure to do so may result in electric shock, fire, or serious injury.
- This product is for professional use only.
- Ensure the power supply voltage matches the product's requirements.
- Always disconnect from the main power supply before cleaning or servicing.
- Do not operate the fixture if the power cord is damaged.
- Avoid direct eye exposure to the light source.
- Maintain adequate ventilation around the fixture to prevent overheating.
- Mount the fixture securely using appropriate hardware and safety cables.
Product Overview
The FODEXAZY 12X 10W Moving Head Beam Light is a versatile stage lighting fixture designed for dynamic lighting effects. It features 12 powerful 10W LEDs, offering vibrant colors and sharp beam projections with 360° rotation and 180° tilt capabilities. This fixture is suitable for various applications including DJ performances, live events, and stage productions.
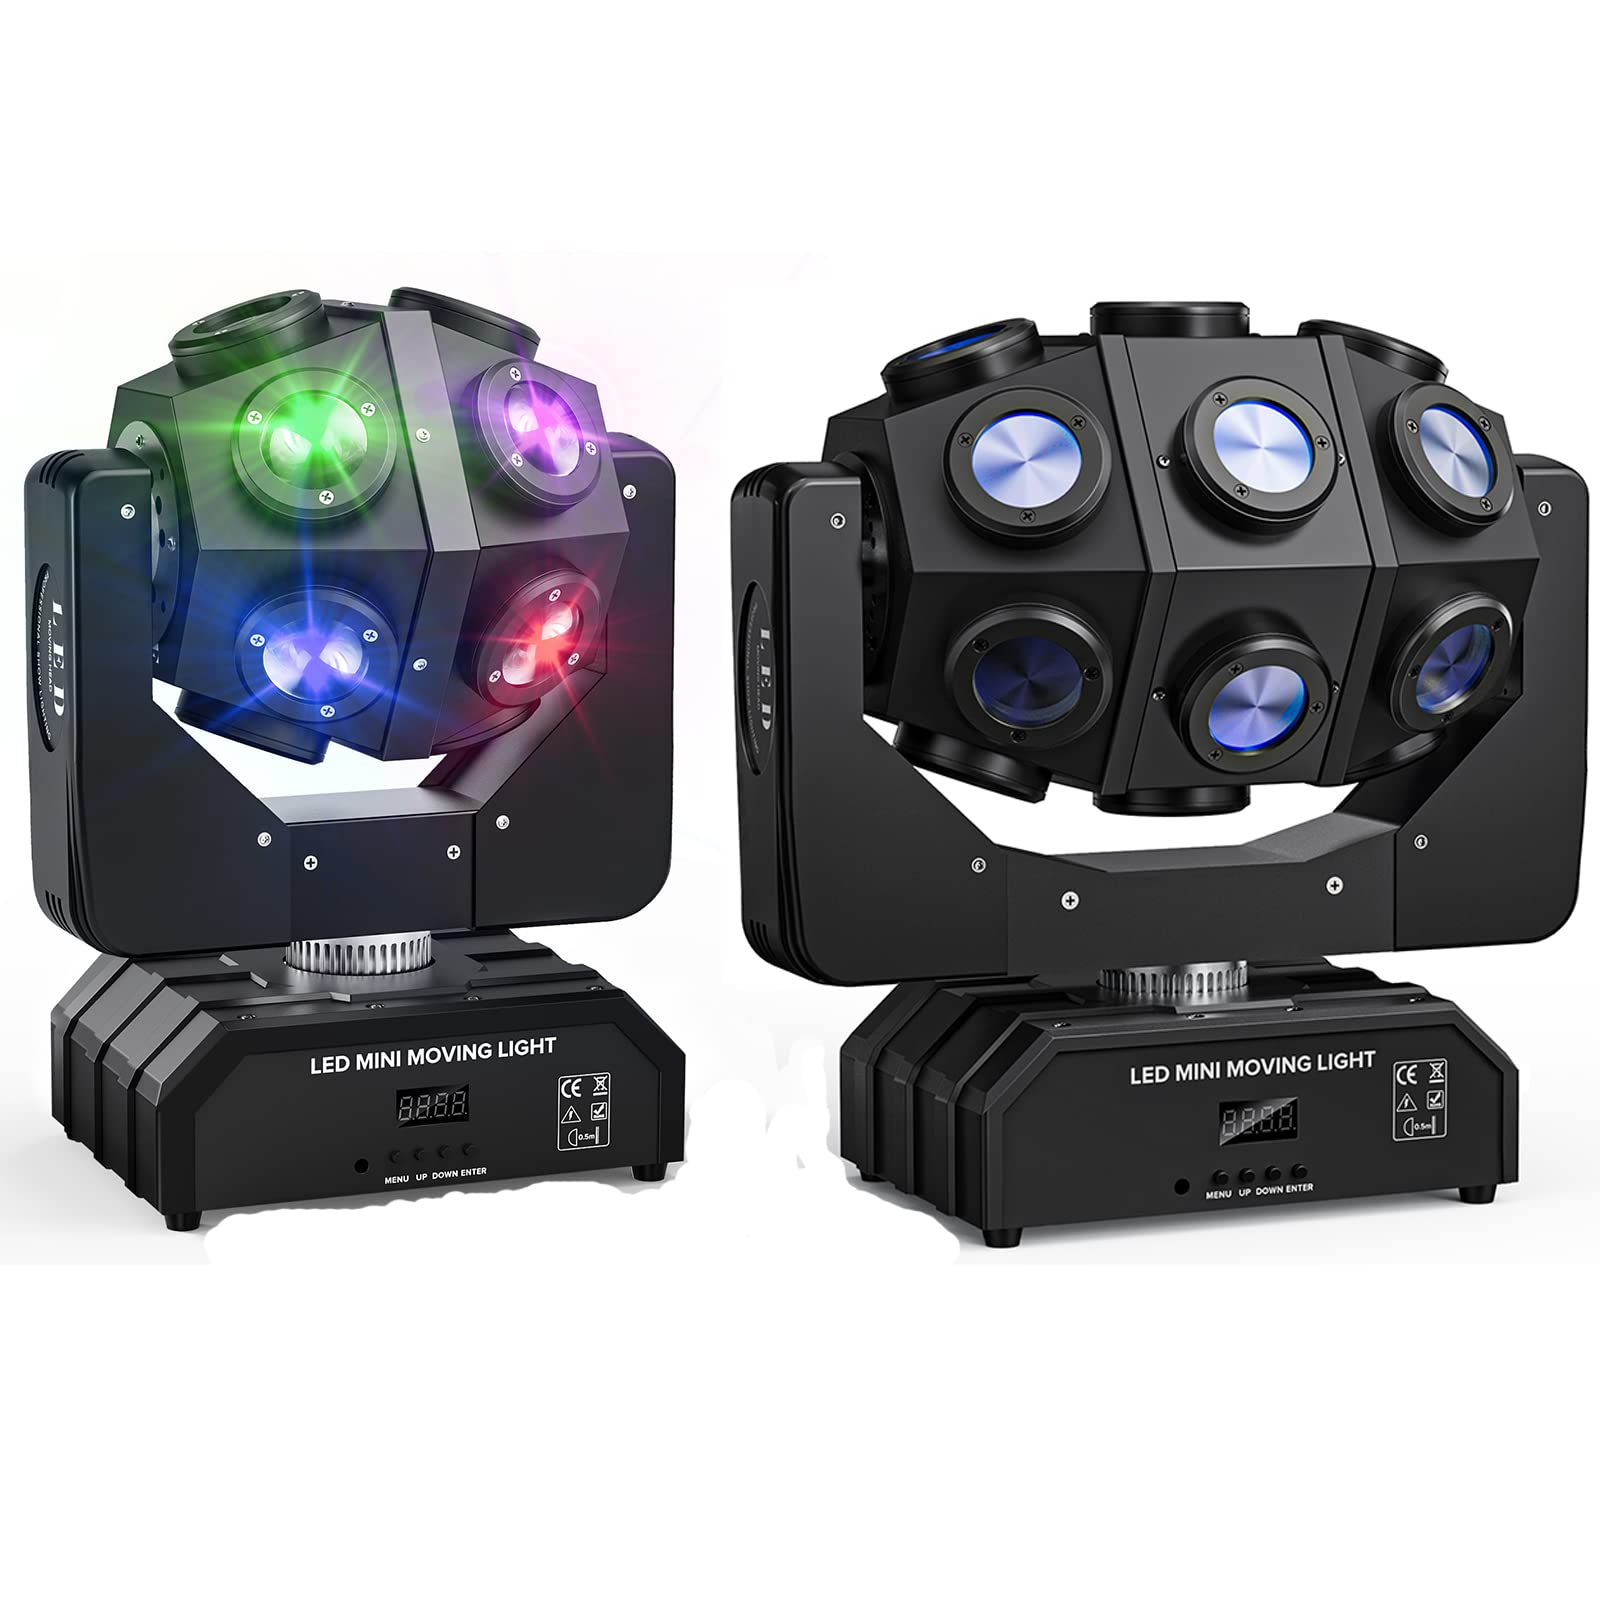
Image: The FODEXAZY 12X 10W Moving Head Beam Light, illustrating its compact design and beam output capabilities.
Package Contents
Verify that all items listed below are included in your package:
- 1 x FODEXAZY 12X 10W Moving Head Beam Light
- 1 x Power Cable
- 1 x DMX Cable (optional, may vary by package)
- 1 x Mounting Bracket with Screws
- 1 x User Manual (this document)
Setup
1. Unpacking
Carefully remove the fixture from its packaging. Inspect for any damage that may have occurred during shipping. Retain the packaging for future transport or storage.
2. Mounting
The fixture can be mounted in various orientations (e.g., truss, floor, wall). Use the provided mounting bracket and ensure it is securely fastened to a stable surface or structure. Always use a safety cable (not included) as a secondary attachment point to prevent accidental drops.
3. Power Connection
Connect the included power cable to the power input on the rear of the fixture and then to a suitable power outlet. Ensure the power source meets the fixture's voltage requirements (typically AC 100-240V, 50/60Hz).
4. DMX Connection (Optional)
For DMX control, connect a DMX cable from your DMX controller's output to the DMX IN port on the fixture. If linking multiple fixtures, connect from the DMX OUT of the first fixture to the DMX IN of the next, and so on. Terminate the last fixture in the chain with a DMX terminator.
Operating Instructions
1. Control Panel Overview
The fixture features a digital display and control buttons (Menu, Up, Down, Enter) for navigating settings and modes. Refer to the display for current mode, DMX address, and other parameters.
2. DMX Control Mode
Set the DMX address using the control panel. The fixture will respond to DMX signals from your controller, allowing precise control over pan, tilt, color, dimmer, strobe, and other effects. Consult the DMX channel chart (usually found in the full manual or on the product's support page) for specific channel assignments.
3. Sound Active Mode
In Sound Active mode, the fixture's movements and effects synchronize with ambient sound. Use the control panel to select this mode and adjust sensitivity if available.
4. Auto Mode
Auto mode runs pre-programmed light shows without external control. Select from various built-in programs using the control panel. Speed and other parameters may be adjustable.
5. Master/Slave Mode
Link multiple fixtures together for synchronized operation without a DMX controller. Set one fixture as 'Master' and others as 'Slave'. The Slave units will mimic the Master's movements and effects.
Maintenance
1. Cleaning
Regularly clean the fixture's lenses and exterior casing to ensure optimal light output and prevent overheating. Use a soft, lint-free cloth and a mild glass cleaner. Do not use abrasive materials or solvents.
2. Storage
When not in use, store the fixture in its original packaging or a suitable flight case in a dry, dust-free environment.
3. Inspection
Periodically inspect power cables, DMX cables, and mounting hardware for signs of wear or damage. Replace any damaged components immediately.
Troubleshooting
| Problem | Possible Cause | Solution |
|---|---|---|
| Fixture does not power on | No power supply; Damaged power cable; Blown fuse | Check power connection; Replace power cable; Check/replace fuse |
| No DMX control | Incorrect DMX address; Faulty DMX cable; No DMX signal from controller | Verify DMX address; Check DMX cable connections; Ensure DMX controller is active |
| Light output is dim or flickering | Overheating; Dirty lens; Power supply issue | Ensure proper ventilation; Clean lens; Check power stability |
| Fixture not responding to sound | Sound Active mode not selected; Microphone sensitivity too low | Select Sound Active mode; Adjust microphone sensitivity via control panel |
Specifications
| Feature | Specification |
|---|---|
| Light Source | 12 x 10W LEDs |
| Power Consumption | 180W (Max) |
| Voltage | AC 100-240V, 50/60Hz |
| Control Modes | DMX512, Auto, Sound Active, Master/Slave |
| Pan/Tilt | 360° Pan / 180° Tilt |
| Dimmer | 0-100% Electronic Dimming |
| Strobe | Variable Strobe Speed |
| Cooling | Forced Air Cooling |
| Housing Material | Plastic + Metal |
| Operating Temperature | -20°C to 40°C |
Warranty and Support
This product comes with a standard manufacturer's warranty. For specific warranty terms, duration, and support inquiries, please refer to the warranty card included with your purchase or contact FODEXAZY customer service directly. Please have your product model and purchase date available when contacting support.
For further assistance or technical support, please visit the official FODEXAZY website or contact their customer service department.


