1. Product Overview
The GROOVYPETS Remote Dog Training Collar is designed to assist in training dogs of various sizes, from puppies to adult dogs. This versatile system helps teach basic obedience commands and correct undesirable behaviors such as excessive digging, jumping, chasing, and barking. It features a remote transmitter and a waterproof receiver collar, offering multiple training modes for effective communication with your pet.
Key features include a rubber-coated finish on both the remote and receiver for durability, a belt-clip on the remote for easy portability, and an automatic bark control function that can be activated from the remote.
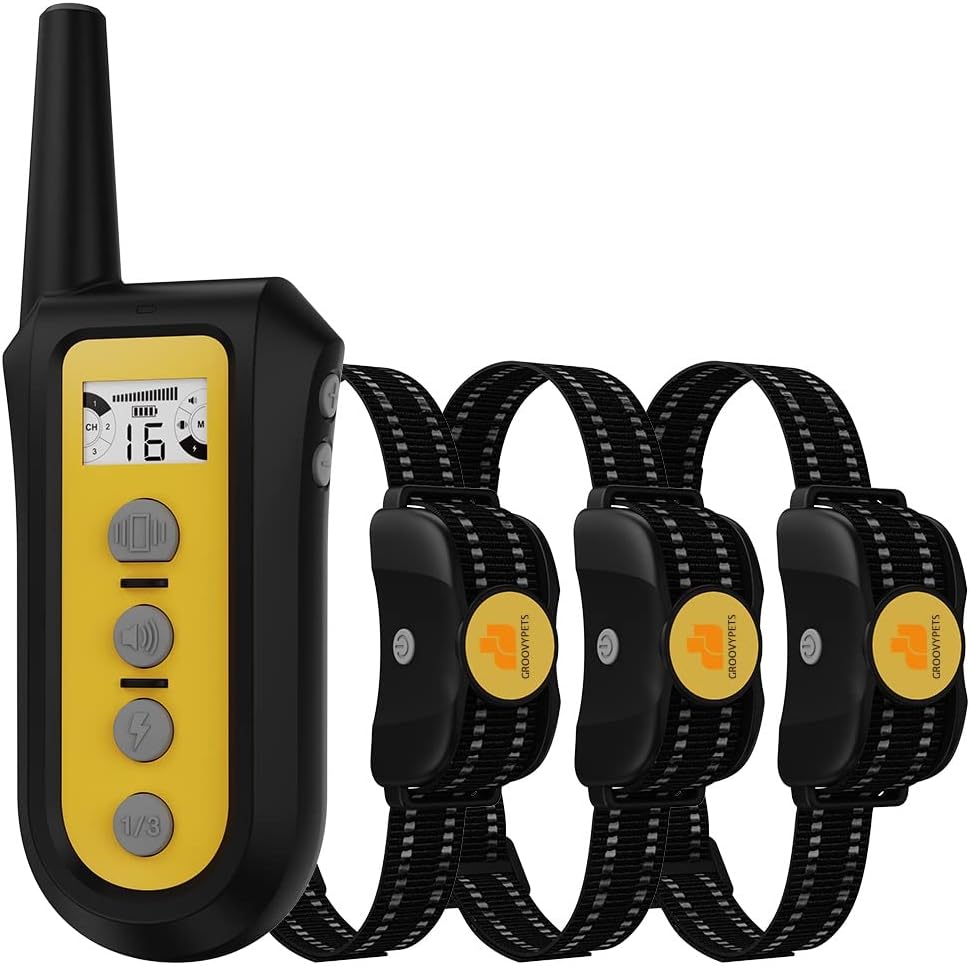
Figure 1: GROOVYPETS 3-Dog Training Kit showing the remote transmitter and three receiver collars.

Figure 2: Product Function Introduction, detailing the components and controls of the remote and collar.
2. Setup
2.1 Unboxing and Initial Inspection
Upon receiving your GROOVYPETS training collar kit, carefully open the packaging and inspect all components for any signs of damage. Ensure all listed items are present.

Figure 3: Unboxing the GROOVYPETS Remote Dog Training Collar kit.
2.2 Charging the Devices
Both the remote transmitter and the receiver collar are rechargeable. Use the provided charging cable to fully charge both devices before first use. A full charge ensures optimal performance and battery life.
- Connect the charging cable to the charging ports on the remote and collar.
- Plug the USB end of the cable into a compatible USB power adapter (not included).
- Allow both devices to charge until the indicator lights show a full charge.
Video 1: This video demonstrates the unboxing and initial setup of the GROOVYPETS Remote Dog Trainer Collar, including how to charge the remote and receiver.
2.3 Fitting the Receiver Collar
Proper fit of the receiver collar is crucial for effective and humane operation. The contact points on the collar must make direct contact with your dog's skin.
- Ensure the collar is turned off before fitting.
- Place the collar around your dog's neck, positioning the receiver centrally under the chin.
- Adjust the strap so that it is snug, but not too tight. You should be able to fit two fingers comfortably between the strap and your dog's neck.
- Trim any excess strap length if necessary.
- For dogs with thick coats, you may need to trim some fur around the contact points to ensure proper skin contact. The kit includes silicon rubber caps for gentle contact.

Figure 4: The collar is IPX7 waterproof, allowing dogs to swim and play in water while wearing it.
3. Operating Instructions
The remote transmitter allows you to control up to three receiver collars individually, with a range of up to 650 yards. The remote offers Tone, Vibration, and Static Pulse modes.
3.1 Remote Control Functions
- Tone Mode: Emits an audible beep. This is often used as a warning or attention signal.
- Vibration Mode: Provides a non-harmful vibration. There are 8 adjustable levels of vibration intensity.
- Static Pulse Mode: Delivers a humane static pulse. There are 16 adjustable levels of static pulse intensity.
- Channel Switch Button: Allows you to switch between controlling Dog 1, Dog 2, or Dog 3 if you have multiple collars.

Figure 5: The remote supports training up to three dogs with adjustable levels for each mode.
3.2 Automatic Bark Control Mode
The receiver collar can be switched into an automatic anti-bark mode directly from the remote. In this mode, the collar will progressively apply corrections (beep, vibration, static) from level 1 to 6 in response to your dog's barking. After 1 minute of no barking, the collar enters a protection mode.

Figure 6: Anti-bark mode progression from level 1 to 6.
3.3 Humane Foolproof Safety-Lock Feature
For your dog's safety, the system is programmed to stop vibration or static pulse if a button is held for more than 10 seconds. This prevents over-correction and provides peace of mind during training or when the dog is left alone with the collar on.
4. Maintenance
Regular maintenance ensures the longevity and proper functioning of your training collar.
- Cleaning: Wipe down the remote and collar with a damp cloth as needed. Ensure the collar is dry before charging.
- Charging: Recharge the devices when the battery indicator is low. Avoid overcharging for extended periods.
- Storage: Store the collar and remote in a cool, dry place when not in use.
- Contact Points: Periodically check the contact points on the receiver collar for cleanliness and ensure they are free from debris or corrosion.
5. Troubleshooting
| Problem | Possible Cause | Solution |
|---|---|---|
| Collar not responding to remote. | Low battery on remote or collar; devices not paired; out of range. | Charge both devices. Re-pair the remote and collar (refer to pairing instructions in the full manual). Ensure you are within the 650-yard range. |
| Automatic bark control not working. | Collar not in bark control mode; improper fit; dog's barking not triggering sensor. | Activate bark control mode from the remote. Adjust collar fit to ensure proper contact. Ensure the collar is not too loose. |
| No static pulse or vibration. | Low battery; contact points not touching skin; safety-lock activated. | Charge collar. Adjust collar fit. Ensure silicon caps are properly installed or removed if stronger contact is needed. Release button if held for too long. |
| Remote display is blank. | Remote is off or in hibernation mode; low battery. | Press any button to wake up the remote. Charge the remote. |
6. Specifications
- Brand: GROOVYPETS
- Model: T221
- Range: Up to 650 yards
- Training Modes: Tone, 8 levels of Vibration, 16 levels of Static Pulse
- Bark Control: Automatic, progressive levels (1-6)
- Waterproof Rating: IPX7 (receiver collar)
- Battery: Rechargeable Lithium Ion batteries (included)
- Material: Metal, Nylon, Rubber
- Target Audience: Dogs (Small, Medium, Large)
- Breed Recommendation: All breeds
- Safety Feature: Foolproof safety-lock (stops correction after 10 seconds)
7. Warranty and Support
For specific warranty information and details regarding product support, please refer to the warranty card included in your product packaging or contact GROOVYPETS customer service directly. Keep your purchase receipt for warranty claims.
For further assistance or inquiries, please visit the official GROOVYPETS website or contact their customer support team.


