
DEWENWILS IR102+MLC18
Contents
DEWENWILS Wireless Motion Sensor Outlet Instruction Manual
Model: IR102+MLC18
Product Overview
The DEWENWILS Wireless Motion Sensor Outlet system provides automated lighting and appliance control based on motion detection and ambient light conditions. It consists of a wireless motion sensor (transmitter) and a plug-in outlet receiver, designed for easy installation and versatile use in various indoor environments.

Image: The wireless motion sensor (left) and the plug-in outlet receiver (right).
This system eliminates the need for complex wiring, offering a convenient solution for automating lights in hallways, storage rooms, basements, garages, and for controlling other plug-in devices like cat water dispensers.
Key Features
- Easy Installation: No wires or tools required. The wireless motion-sensing lighting control transmitter can be mounted in any location.
- Four Motion/Light Sensor Modes: Offers PIR (Passive Infrared), NTM (Night Time Motion Activation), D2D (Dusk to Dawn), and RND (Random) modes, selectable via a knob switch.
- Sensitive Motion Detection: Built-in IR motion detection with a wide 120° sensing angle and a 20ft (6m) sensing distance.
- Adjustable Time Delay: Time-delay function ranging from 0-30 minutes, with selectable options of 1 min, 5 mins, 15 mins, and 30 mins.
- Extended Control Range: Strong signal up to 100 ft (30m) control range between the motion sensor and the outlet receiver, capable of working through doors, walls, and windows.
- Versatile Application: Separate design allows for easy plug-in of 2-pin/3-pin fixtures, suitable for indoor lighting, garage lights, closet lights, and various appliances.
- Certified Safety: FCC & ETL certified for quality and safety assurance.

Image: Visual representation of the four selectable modes for the motion sensor.
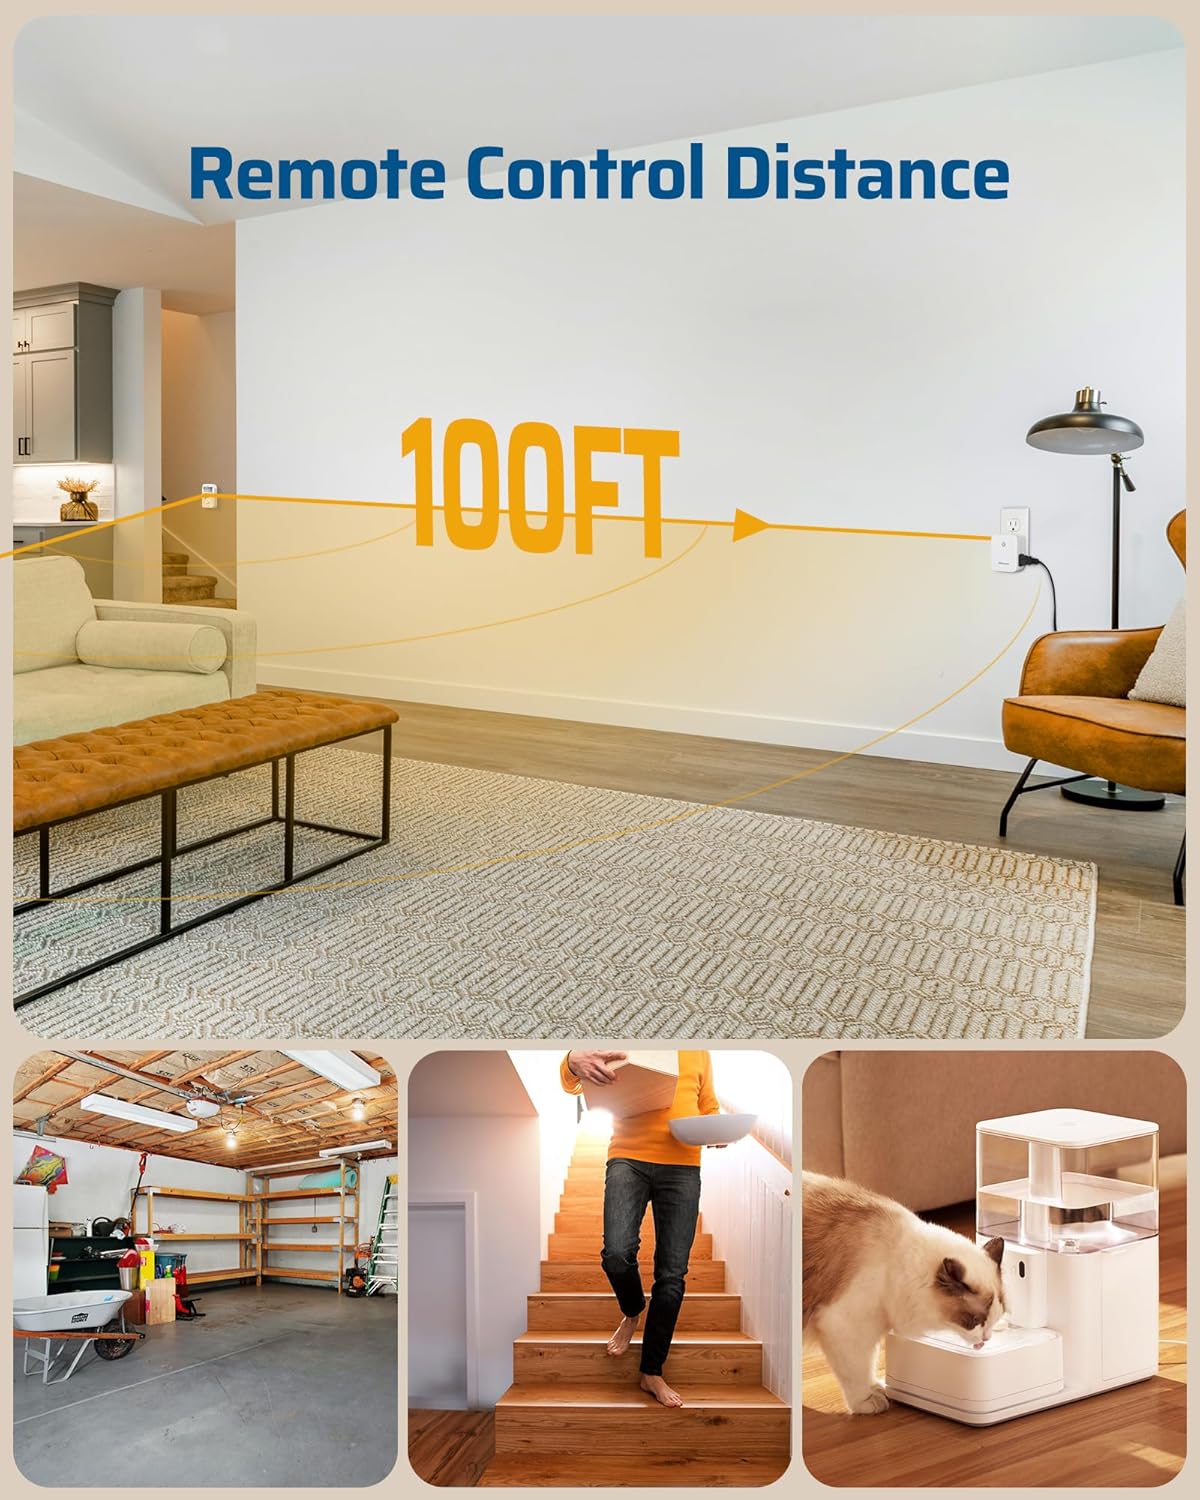
Image: The effective remote control distance of 100 feet between the sensor and the outlet.
Package Contents
Before beginning installation, please ensure all components are present:
- 1 x Wireless Motion Sensor (Transmitter)
- 1 x Plug-in Outlet Receiver
- Mounting Screws and Anchors
- Instruction Manual (this document)
Note: 3 x AAA batteries are required for the motion sensor (transmitter) and are not included in the package. NiMH rechargeable batteries are recommended.
Setup and Installation
1. Battery Installation (Motion Sensor)
- Locate the battery compartment on the back of the motion sensor.
- Open the compartment cover.
- Insert 3 x AAA batteries, ensuring correct polarity (+/-).
- Close the battery compartment cover securely.
2. Mounting the Motion Sensor
The motion sensor can be mounted on a wall or placed on a flat surface. For optimal performance, consider the following:
- Installation Height: Recommended height is 3-7 feet (0.9-2.1 meters) from the floor.
- Sensing Angle: The sensor has a 120° sensing angle. Position it to cover the desired detection area.
- Sensing Distance: The maximum sensing distance is 20 feet (6 meters).
- Avoid direct sunlight, heat sources, or areas with rapid temperature changes, as these can affect sensor performance.

Image: Steps for mounting the motion sensor and adjusting its angle.
- Choose a desired location for the transmitter.
- Install the transmitter mounting bracket using the included screws and anchors.
- Hang the transmitter onto the fixed bracket.
- Adjust the sensor head to achieve the desired detection angle.

Image: Illustration of the motion sensor's detection range and angle.
3. Plugging in the Outlet Receiver
Plug the outlet receiver into any standard 2-pin or 3-pin wall outlet. Ensure it is within 100 feet (30 meters) of the motion sensor for reliable communication.
Operating Modes
The motion sensor offers four distinct operating modes, selected using the knob switch on the front of the sensor:
- PIR (Passive Infrared) Mode: The connected device will turn on when motion is detected, regardless of ambient light conditions. It will turn off after the set time delay if no further motion is detected.
- NTM (Night Time Motion Activation) Mode: The connected device will turn on only when motion is detected AND the ambient light level is low (dusk/darkness). It will turn off after the set time delay if no further motion is detected or if the light level increases.
- D2D (Dusk to Dawn) Mode: The connected device will turn on automatically when the ambient light level is low (dusk) and remain on until the light level increases (dawn). Motion detection is not active in this mode.
- RND (Random) Mode: The connected device will turn on and off randomly during low light conditions to simulate occupancy, providing a security deterrent. Motion detection is not active in this mode.

Image: The mode selection knob on the motion sensor.
Time Delay Function
The motion sensor allows you to set how long the connected device remains on after motion is no longer detected (in PIR or NTM modes). The time delay can be adjusted from 0 to 30 minutes.
Adjusting the Time Delay:
On the back of the motion sensor, locate the "Delayed" dial key. Use a small screwdriver or a similar tool to slide the switch to your desired time setting:
- 1 min: Device turns off 1 minute after last detected motion.
- 5 mins: Device turns off 5 minutes after last detected motion.
- 15 mins: Device turns off 15 minutes after last detected motion.
- 30 mins: Device turns off 30 minutes after last detected motion.
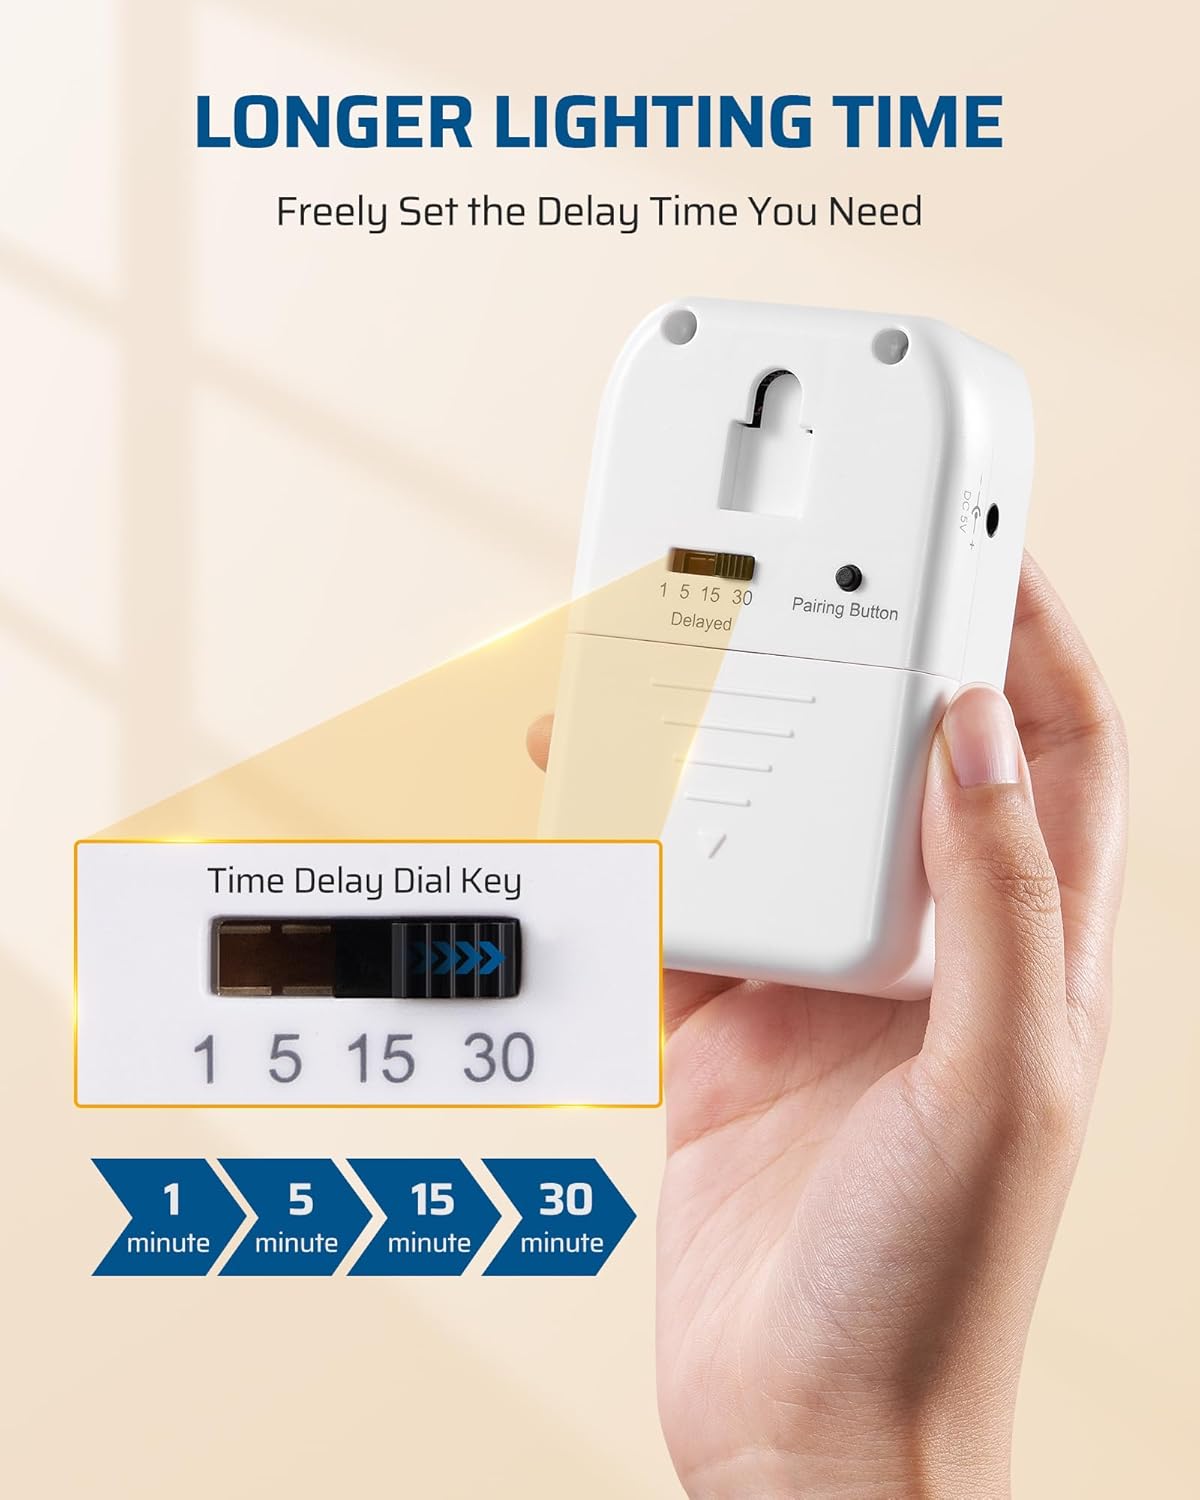
Image: Adjusting the time delay setting on the motion sensor.
Specifications
| Attribute | Value |
|---|---|
| Brand | DEWENWILS |
| Model Number | IR102+MLC18 |
| Power Source (Sensor) | 3 x AAA Batteries (Not Included) |
| Sensing Angle | 120° |
| Sensing Distance | Up to 20 Feet (6 meters) |
| Control Range | Up to 100 Feet (30 meters) |
| Time Delay Options | 1 min, 5 mins, 15 mins, 30 mins |
| Color | White |
| Item Weight | 0.42 Pounds (approx. 190g) |
| Package Dimensions | 4.37 x 3.94 x 2.8 inches (11.1 x 10 x 7.1 cm) |
| Certifications | FCC, ETL Listed |
Troubleshooting
If you encounter issues with your DEWENWILS Wireless Motion Sensor Outlet, please refer to the following common problems and solutions:
- Problem: Device does not turn on when motion is detected.
- Check Batteries: Ensure the motion sensor has fresh AAA batteries installed with correct polarity. Low batteries can cause unreliable operation.
- Check Mode Setting: Verify the knob switch is set to PIR or NTM mode. If set to D2D or RND, motion detection is not active.
- Ambient Light (NTM Mode): If in NTM mode, ensure the ambient light is low enough for activation. Test in a darker environment.
- Sensor Placement: Ensure the sensor is positioned correctly to detect motion in the desired area. Obstructions can block detection.
- Distance/Obstacles: Confirm the motion sensor and outlet receiver are within the 100ft control range and that thick walls or metal objects are not severely interfering with the signal.
- Re-pairing: If the units seem disconnected, try re-pairing them. (A pairing button is typically located near the time delay switch on the sensor).
- Problem: Device turns on randomly or stays on too long/short.
- Mode Setting: If in RND mode, random activation is normal. If in PIR/NTM, ensure the time delay is set correctly.
- False Triggers: Ensure the sensor is not pointing at heat sources (vents, radiators), moving curtains, or areas with pets that might trigger it.
- Time Delay Setting: Adjust the time delay switch on the back of the sensor to your preferred duration (1, 5, 15, or 30 minutes).
- Problem: Limited detection range or sensitivity.
- Battery Level: Weak batteries can reduce sensor performance. Replace with fresh AAA batteries.
- Sensor Angle: Adjust the sensor head to optimize the detection area.
- Obstructions: Clear any objects that might be blocking the sensor's view.
- Environmental Factors: Extreme temperatures (below 34°F / 1°C) can affect performance, as noted in some user feedback.
If issues persist, please contact DEWENWILS customer support for further assistance.
Maintenance
- Battery Replacement: Replace the 3 x AAA batteries in the motion sensor when performance degrades or the indicator light (if present) signals low battery.
- Cleaning: Wipe the sensor lens and the unit's exterior with a soft, dry cloth. Do not use abrasive cleaners or solvents.
- Storage: If storing the unit for an extended period, remove the batteries from the motion sensor to prevent leakage.

Image: Location of the adjustable sensor head and battery compartment for maintenance.
Warranty and Support
The DEWENWILS Wireless Motion Sensor Outlet is FCC & ETL certified, ensuring compliance with safety and quality standards.
For any product inquiries, technical support, or warranty claims, please contact DEWENWILS customer service. Refer to the product packaging or the official DEWENWILS website for the most current contact information.
DEWENWILS is committed to providing warm service and support for their products.
Ask a question about this manual
Ask about setup, troubleshooting, compatibility, parts, safety, or missing instructions. Manuals+ will review the question and use this page’s manual context to help answer it.