
1. Introduction
This instruction manual provides comprehensive guidance for the assembly and finishing of the ICM 24020 WWII German Staff Personnel 1:24 scale model kit. This kit allows for the creation of three detailed figures: two Wehrmacht officers (a general and his aide) and a driver, depicted in a scene from the daily life of German staff personnel. Please read all instructions carefully before beginning assembly.
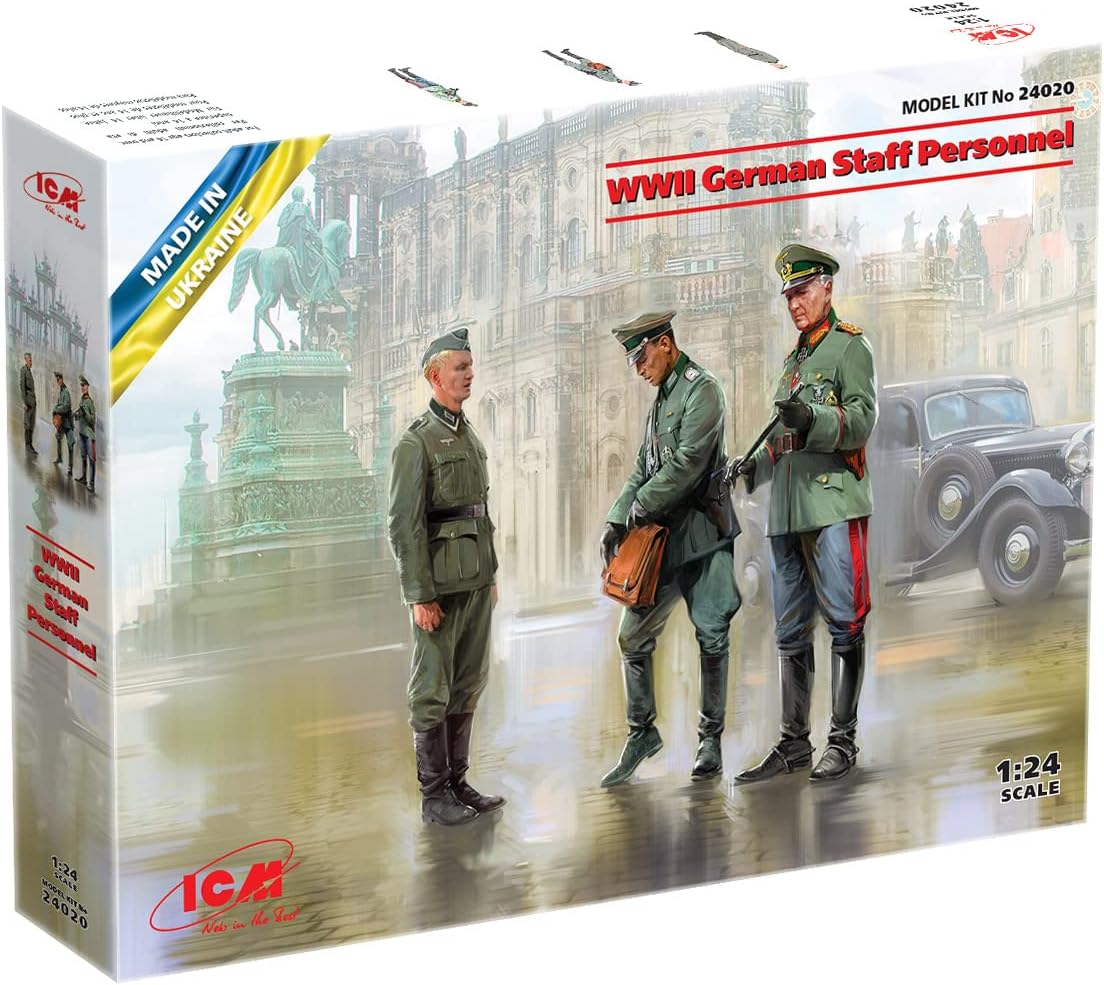
Figure 1: Front view of the ICM 24020 model kit box, showing the assembled figures in a historical setting. This image illustrates the product packaging and the intended final appearance of the figures.

Figure 2: Detailed box art for the ICM 24020 kit, highlighting the 1:24 scale and key features such as highly detailed clothing, equipment, insignia, and awards. This image provides a closer look at the figures' design and historical accuracy.
2. Safety Information
Always observe the following safety precautions:
- This product contains small parts and is not suitable for children under 15 years of age due to choking hazards.
- Use sharp tools (hobby knife, nippers) with extreme care. Always cut away from your body.
- When using glues and paints, ensure adequate ventilation. Refer to the manufacturer's safety data sheets for specific product warnings.
- Keep all modeling supplies out of reach of small children and pets.
3. Kit Contents and Preparation
3.1. Included Components
The ICM 24020 kit includes:
- Plastic parts molded on sprues for three figures.
- Accurate instruction manual.
- Self-printed decals for added realism.
The kit consists of 32 plastic pieces. Please verify all parts are present and undamaged before starting assembly.

Figure 3: View of the plastic sprue containing all the individual parts for the three figures. Each part is numbered for easy identification during assembly.
3.2. Recommended Tools (Not Included)
- Hobby knife or sprue cutters for removing parts.
- Plastic cement (model glue).
- Small files or sandpaper for cleaning parts.
- Tweezers for handling small parts.
- Paints and brushes for detailing.
4. Assembly Instructions
Follow the numbered steps in the included instruction manual for precise assembly. The general process involves:
- Part Removal: Carefully cut each part from the sprue using a hobby knife or sprue cutters. Avoid pulling or twisting, which can damage parts.
- Part Cleaning: Gently remove any excess plastic (flash) from the parts using a hobby knife or fine sandpaper. Ensure mating surfaces are clean and smooth for a good fit.
- Test Fit: Before applying glue, dry-fit parts together to ensure proper alignment and fit. Make any necessary adjustments.
- Gluing: Apply a small amount of plastic cement to one of the mating surfaces and press the parts together firmly. Hold in place until the glue sets. Work on one figure at a time, following the sequence provided in the kit's specific instructions.
- Sub-Assemblies: Assemble smaller components (e.g., arms, heads, equipment) before attaching them to the main body.
- Decals: Apply self-printed decals as indicated in the instruction manual after painting is complete. Use decal setting solutions for best results.

Figure 4: Front view of the unpainted prototype figures, demonstrating the detailed sculpting and poses. This image serves as a reference for assembly and final appearance.

Figure 5: Rear view of the unpainted prototype figures, showing the intricate details of their uniforms and equipment from behind. This provides additional reference for accurate assembly and painting.
5. Painting and Finishing (Operating)
Once assembled, your figures are ready for painting. The box art and historical references can guide your color choices. Paints and glue are not included in the kit.
- Priming: Apply a thin coat of primer to all surfaces. This helps paint adhere better and provides a uniform base.
- Base Coats: Apply base colors for uniforms, skin, and equipment. Use thin coats to preserve detail.
- Detail Painting: Paint smaller details such as insignia, buttons, buckles, and facial features.
- Washing and Weathering: Apply washes to enhance panel lines and shadows. Weathering techniques can add realism, simulating dirt, dust, or wear.
- Protective Coat: Once painting is complete and dry, apply a clear matte or satin varnish to protect the paintwork.
6. Maintenance and Care
To ensure the longevity and appearance of your finished model:
- Display the model in a cool, dry place away from direct sunlight to prevent fading and warping.
- Dust regularly with a soft brush or compressed air. Avoid abrasive cleaners.
- Handle the model by its base or sturdy parts to avoid damaging delicate components.
7. Troubleshooting
Common issues and solutions during model assembly:
| Problem | Solution |
|---|---|
| Parts do not fit together. | Ensure all flash is removed. Test fit again. If necessary, gently sand or trim mating surfaces. |
| Glue joint is weak. | Ensure surfaces are clean and dry. Apply sufficient, but not excessive, glue. Hold parts firmly until set. |
| Paint is not adhering or is uneven. | Ensure parts are clean and primed. Apply paint in thin, even coats. Allow each coat to dry thoroughly. |
| Decals silvering (clear film visible). | Apply decals to a glossy surface. Use decal setting solutions to help them conform to details and eliminate air bubbles. |
8. Specifications
- Model Name: WWII German Staff Personnel
- Model Number: ICM 24020
- Brand: ICM
- Scale: 1:24
- Material: Plastic
- Number of Pieces: 32
- Dimensions (Product): 8.07 x 9.25 x 1.3 inches (packaging)
- Item Weight: 1.76 ounces (packaging)
- Age Range: 15 years and up
- Manufacturer: ICM Holding
9. Support
For further assistance or inquiries regarding your ICM model kit, please refer to the contact information provided on the product packaging or visit the official ICM website. Ensure you have your model number (ICM 24020) ready when contacting support.
You can also visit the ICM Store on Amazon for additional products and information.