1. Introduction
This instruction manual provides comprehensive guidance for the safe and efficient operation of the GOYOJO Density Balance Benchtop Digital Meter. This precision instrument is designed for accurate measurement of density for both solid and liquid materials, as well as general weighing applications in laboratory and industrial settings. Please read this manual thoroughly before initial use to ensure proper setup, operation, and maintenance.
2. Safety Information
- Always place the balance on a stable, level, and vibration-free surface.
- Avoid operating the balance in areas with strong air currents, direct sunlight, or extreme temperature fluctuations.
- Ensure the power supply matches the specifications indicated on the adapter. Use only the provided power adapter.
- Do not immerse the balance in water or other liquids. Clean with a soft, damp cloth.
- Keep the weighing pan and surrounding area clean and free from debris.
- Do not overload the balance beyond its maximum capacity.
- Only qualified personnel should perform maintenance or repairs.
3. Package Contents
Verify that all items listed below are present and in good condition upon unpacking:
- GOYOJO Density Balance Main Unit
- Power Adapter (6V DC)
- Density Measurement Kit (includes beaker, solid sample basket/cage, liquid sample holder/sinker, support frame)
- User Manual
4. Product Overview
The GOYOJO Density Balance features a clear digital display and intuitive control buttons for various functions. The integrated density measurement kit allows for precise density determination.
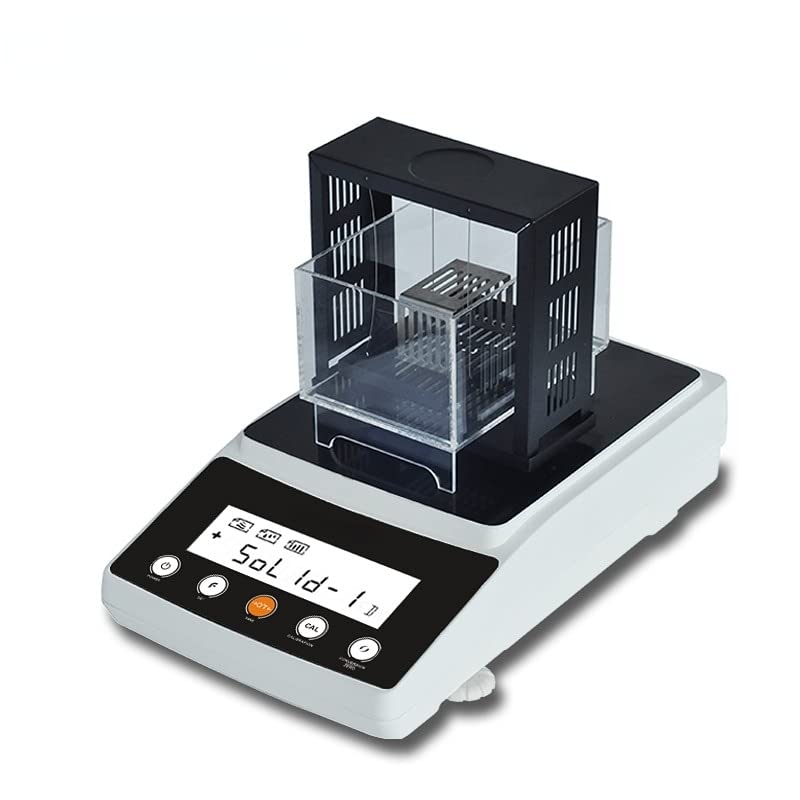
Figure 4.1: Front view of the GOYOJO Density Balance with the solid density measurement kit, showing the display and control buttons.
Control Panel:
- POWER Button: Turns the balance ON/OFF.
- F Button: Function key, often used for unit conversion or menu navigation.
- H/T/+ Button: Hold function, Tare function, or Increment value in settings.
- CAL Button: Initiates calibration procedure.
- MODE Button: Switches between weighing modes (e.g., general weighing, solid density, liquid density).
Rear Panel:
- 6V DC Power Input: Connects to the provided power adapter.
- RS232 Port: For data communication with external devices (e.g., computer, printer).
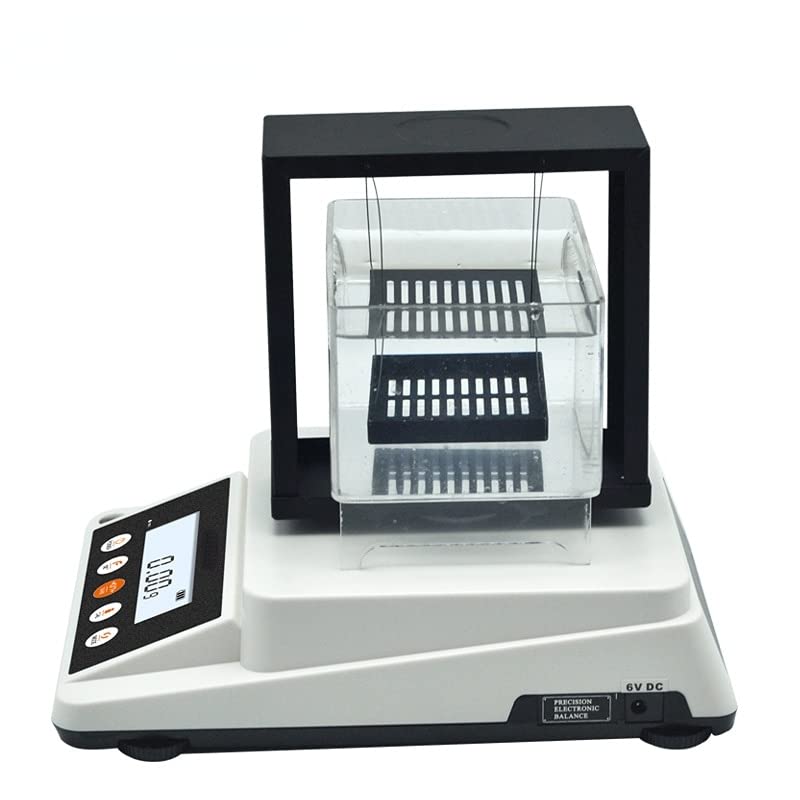
Figure 4.2: Rear view of the GOYOJO Density Balance, highlighting the 6V DC power input and RS232 communication port.
5. Setup
5.1 Unpacking and Placement
- Carefully remove the balance and all accessories from the packaging.
- Place the balance on a firm, level, and stable workbench or table, away from drafts, vibrations, and direct heat sources.
5.2 Leveling the Balance
For accurate measurements, the balance must be perfectly level.
- Locate the bubble level indicator, usually found on the front or side of the balance.
- Adjust the two front adjustable feet (and rear if present) by turning them clockwise or counter-clockwise until the air bubble is centered within the indicator circle.
5.3 Power Connection
- Connect the provided 6V DC power adapter to the power input port on the rear of the balance.
- Plug the adapter into a suitable electrical outlet.
- Press the POWER button to turn on the balance. The display will perform a self-test and then show "0.000g" or similar.
6. Operating Instructions
6.1 Basic Weighing
- Ensure the balance is level and powered on.
- If using a container, place it on the weighing pan and press the H/T/+ button to tare (zero) the balance. The display should show "0.000g".
- Carefully place the item to be weighed onto the center of the weighing pan.
- Read the stable weight displayed on the screen.
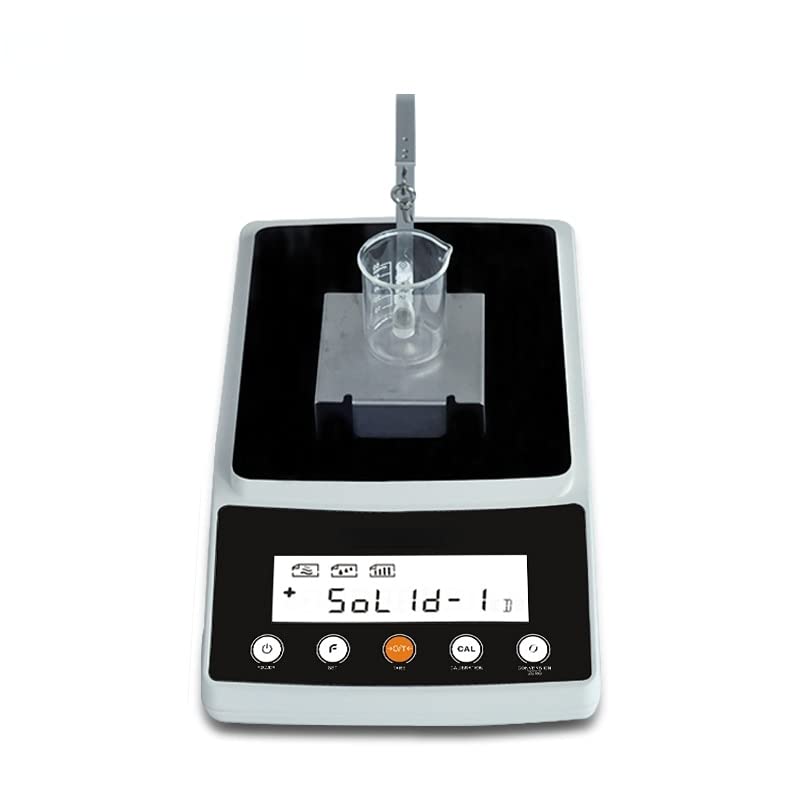
Figure 6.1: The balance set up for basic weighing, with a beaker on the weighing platform.
6.2 Solid Density Measurement
This procedure uses the Archimedes principle to determine the density of solid samples.
- Assemble the density measurement kit, ensuring the support frame and solid sample basket are correctly positioned over the weighing pan. Place a beaker filled with distilled water (or other suitable liquid) onto the support platform, ensuring the basket is fully submerged without touching the bottom or sides of the beaker.
- Press the MODE button repeatedly until the display shows a solid density mode (e.g., "Sol 1d-1" as seen in Figure 4.1).
- With the empty submerged basket in place, press H/T/+ to tare the balance.
- Carefully place the solid sample into the submerged basket. The balance will measure the weight of the sample in liquid.
- Remove the sample from the basket and dry it. Place the dry sample directly onto the weighing pan (with the density kit still assembled but the sample not submerged). The balance will measure the weight of the sample in air.
- The balance will automatically calculate and display the density of the solid sample.
6.3 Liquid Density Measurement
This method typically uses a specific gravity sinker or a known volume method.
- Assemble the density measurement kit with the liquid sample holder/sinker suspended from the balance hook, ensuring it is submerged in a beaker of distilled water (or a liquid of known density) placed on the support platform.
- Press the MODE button repeatedly until the display shows a liquid density mode (e.g., "Liq d-1").
- With the sinker submerged in the reference liquid, press H/T/+ to tare the balance.
- Replace the reference liquid with the liquid whose density is to be measured, ensuring the sinker is fully submerged.
- The balance will automatically calculate and display the density of the liquid sample.
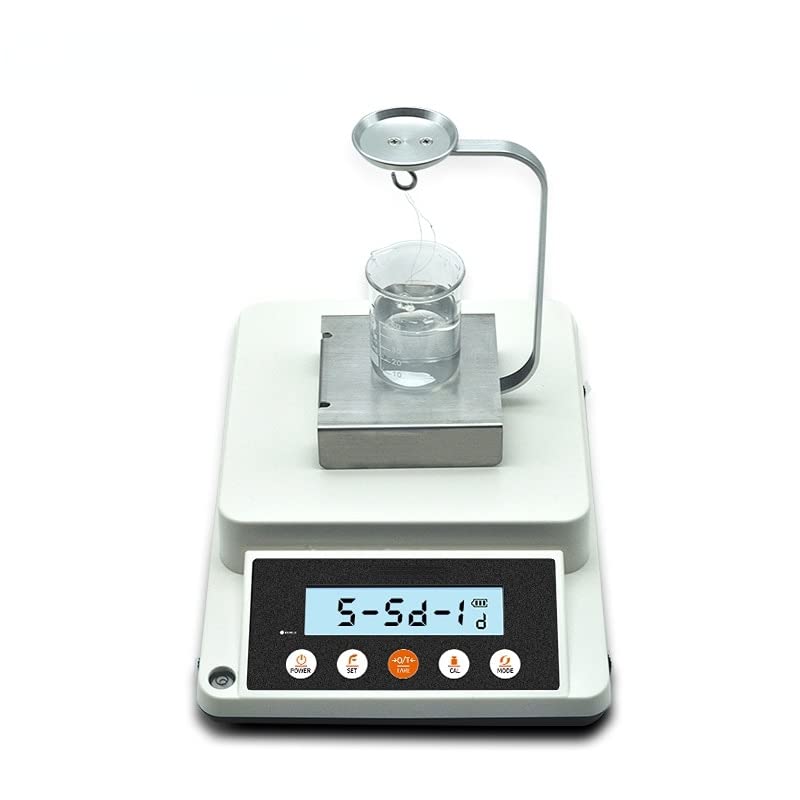
Figure 6.2: The balance configured for liquid density measurement, showing a specific gravity sinker immersed in a liquid.
6.4 Calibration
Regular calibration ensures the accuracy of your balance. Refer to the specific calibration weight required for your model.
- Ensure the balance is stable and empty.
- Press and hold the CAL button until "CAL" appears on the display.
- The display will then show the required calibration weight (e.g., "200.000g").
- Carefully place the specified calibration weight onto the center of the weighing pan.
- Wait for the balance to stabilize and complete the calibration process. The display will typically show "PASS" or return to weighing mode.
- Remove the calibration weight.
7. Maintenance
7.1 Cleaning
- Always disconnect the power adapter before cleaning.
- Wipe the exterior of the balance with a soft, damp cloth. A mild detergent can be used if necessary.
- Do not use abrasive cleaners, solvents, or harsh chemicals, as these can damage the finish or internal components.
- Ensure no liquid enters the balance housing or the RS232 port.
- Clean the weighing pan and density kit components thoroughly after each use, especially after contact with corrosive or sticky substances.
7.2 Storage
- When not in use for extended periods, store the balance in a dry, dust-free environment.
- Keep the original packaging for safe transport or storage.
8. Troubleshooting
| Problem | Possible Cause | Solution |
|---|---|---|
| Balance does not power on. | No power supply; faulty adapter; power button issue. | Check power adapter connection and outlet. Ensure power button is pressed firmly. |
| Inaccurate or unstable readings. | Balance not level; drafts; vibrations; needs calibration; dirty pan. | Level the balance. Move to a stable, draft-free location. Perform calibration. Clean the weighing pan. |
| "Err" message on display. | Overload; internal error; unstable environment. | Remove excess weight. Power cycle the balance. Check for environmental factors. If persistent, contact support. |
| Density measurement errors. | Air bubbles on sample/sinker; sample touching beaker; incorrect liquid temperature. | Ensure no air bubbles. Verify sample/sinker is freely suspended. Use liquid at a stable, known temperature. |
9. Specifications
| Parameter | Value |
|---|---|
| Model | B0BX87BSY9 |
| Brand | GOYOJO |
| Power Supply | 6V DC (via included adapter) |
| Interface | RS232 |
| Measurement Principle | Archimedes Principle (for density) |
| Applications | Solid density, liquid density, general weighing |
10. Warranty and Support
GOYOJO stands behind the quality of its products. This product is covered by a 30-day satisfaction guarantee. If you encounter any quality concerns within this period, please contact your retailer or GOYOJO customer support for assistance, including replacements or refunds.
For technical support, troubleshooting assistance, or warranty claims, please refer to the contact information provided by your point of purchase or visit the official GOYOJO website.


