
VONROC SA501AC
VONROC Electric Scarifier & Aerator Instruction Manual
Model: SA501AC
1. Product Overview
The VONROC SA501AC is a powerful 2-in-1 electric garden tool designed for comprehensive lawn care. It functions as both a scarifier and an aerator, effectively removing moss, thatch, and weeds while loosening the soil to promote healthy grass growth. This manual provides essential information for safe and efficient operation, assembly, maintenance, and troubleshooting.

Image 1.1: Front view of the VONROC SA501AC Electric Scarifier and Aerator.
2. What's Included
Upon unpacking, please ensure all components are present and undamaged:
- VONROC Electric Scarifier & Aerator Unit
- Scarifying Roller (pre-installed or separate)
- Aerating Roller
- 35-Liter Grass Collection Bag
- Instruction Manual
3. Important Safety Instructions
Always read and understand all safety warnings and instructions before operating the appliance.
- Personal Protective Equipment (PPE): Always wear appropriate eye protection, sturdy footwear, and long trousers when operating the machine. Consider hearing protection.
- Work Area: Keep children, pets, and bystanders away from the operating area. Ensure the area is clear of debris, stones, and other objects that could be thrown by the machine.
- Electrical Safety: Ensure the power supply matches the specifications on the product label. Use only outdoor-rated extension cords. Always unplug the machine before cleaning, maintenance, or when not in use.
- Operation: Do not operate the machine in wet conditions or on steep slopes. Always maintain a firm grip on the handles. Never lift or carry the machine while it is running.
- Blade/Tine Safety: The blades/tines are sharp. Exercise extreme caution when handling or changing rollers.
4. Assembly and Setup
4.1 Handle Assembly
The handle of the VONROC SA501AC is designed for easy assembly and folding for storage. Attach the upper handle section to the lower handle section using the provided knobs and bolts. Ensure all connections are secure.
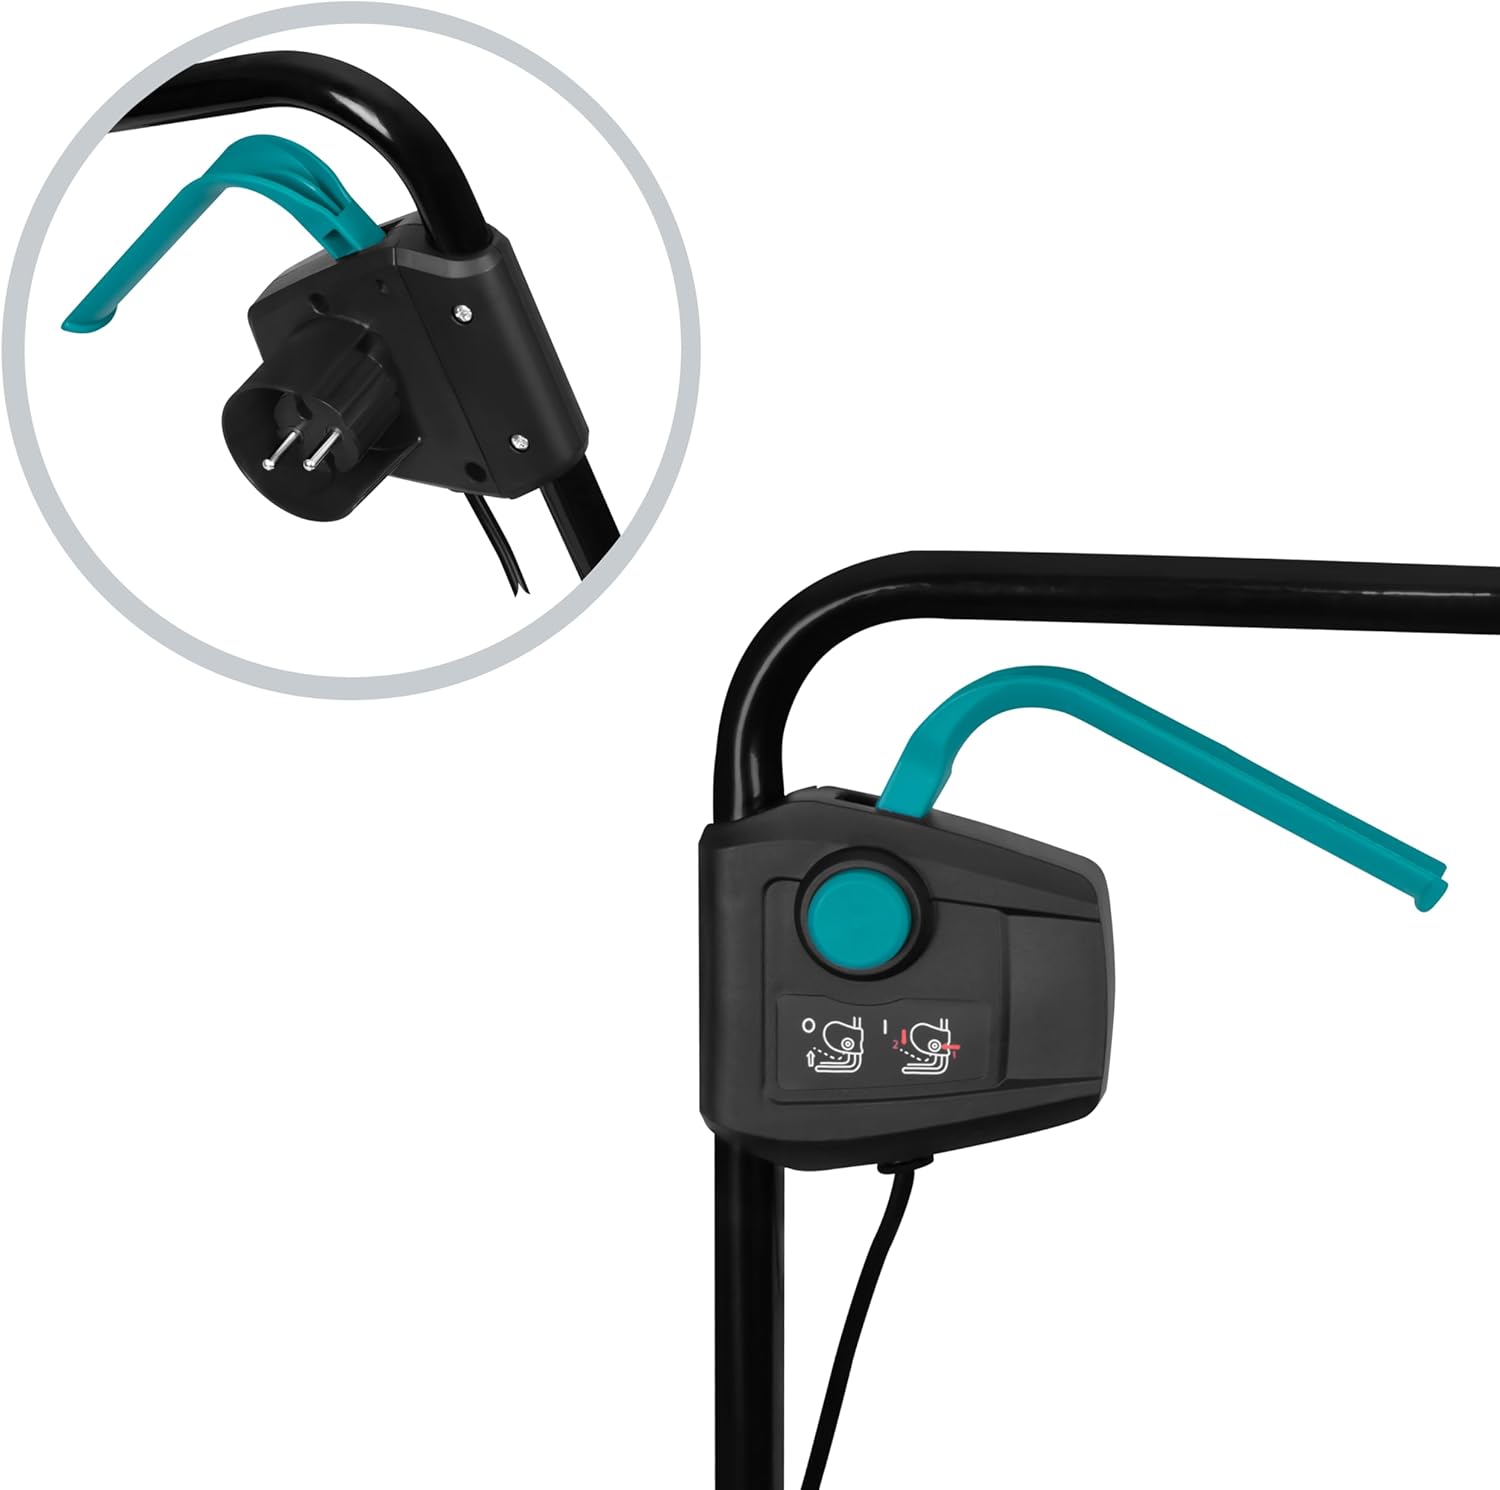
Image 4.1: Detail of the handle and control panel, showing the power connection point.
4.2 Grass Collection Bag Attachment
Assemble the 35-liter grass collection bag according to the instructions. Hook the assembled bag onto the rear of the machine. Ensure it is securely attached to prevent material from escaping during operation.
4.3 Roller Change (Scarifying vs. Aerating)
The VONROC SA501AC comes with two interchangeable rollers: one for scarifying (with blades) and one for aerating (with tines). To change the roller:
- Disconnect Power: Always unplug the machine from the power outlet before attempting to change rollers.
- Access Roller: Turn the machine on its side to access the roller compartment.
- Release Roller: Locate the roller release mechanism (often a knob or lever) and disengage it. Carefully slide out the currently installed roller.
- Insert New Roller: Align the desired roller (scarifying or aerating) with the slots and slide it into place. Ensure it clicks securely into position.
- Verify: Gently tug on the roller to ensure it is firmly seated before returning the machine to an upright position.

Image 4.2: Illustration demonstrating the simple roller change mechanism using a knob, requiring no additional tools.
5. Operation
5.1 Power Connection
Connect the machine's power cable to a suitable outdoor-rated extension cord, and then plug it into a grounded power outlet. Ensure the cable is routed safely to avoid entanglement or damage.
5.2 Starting and Stopping
To start the machine, press and hold the safety button, then squeeze the operating lever. Release the operating lever to stop the machine. The safety button prevents accidental starts.
5.3 Adjusting Working Depth
The VONROC SA501AC offers 4 adjustable working depths to suit different lawn conditions and tasks. Use the depth adjustment lever, typically located near the wheels, to select the desired depth:
- 3mm: Light aeration or very light scarifying.
- 6mm: Standard aeration or moderate scarifying.
- 9mm: Deeper scarifying for thicker thatch.
- 12mm: Aggressive scarifying for heavily matted lawns.
Start with a shallower depth and gradually increase if needed. For aeration, a shallower depth is usually sufficient. For scarifying, a deeper setting will remove more thatch.

Image 5.1: The depth adjustment lever allows for quick and easy selection between 4 different working depths (3, 6, 9, 12 mm).
5.4 Scarifying vs. Aerating
Understanding the difference between scarifying and aerating is crucial for effective lawn care:
- Scarifying: Uses the bladed roller to cut into the lawn, removing moss, dead grass, and thatch. This allows sunlight, water, and nutrients to reach the soil more effectively. Best done in spring or autumn.
- Aerating: Uses the tined roller to prick holes in the soil surface, loosening compacted soil and improving air and water penetration to the grass roots. Can be done more frequently than scarifying.

Image 5.2: Visual explanation of the 2-in-1 function: Scarifying clears the surface for sunlight, while aerating loosens the soil for air and water, leading to healthier grass and stronger roots.
5.5 Operating Tips
- Always work in straight lines, overlapping slightly to ensure even coverage.
- Empty the grass collection bag frequently to maintain optimal performance and prevent clogging.
- For heavily matted lawns, it may be beneficial to scarify without the collection bag first, then collect the debris, and finally go over the area again with the aerating roller and bag.
6. Maintenance and Storage
6.1 Cleaning
After each use, disconnect the power and clean the machine. Remove any grass, soil, or debris from the housing, rollers, and collection bag. Use a brush or damp cloth; do not use high-pressure water or harsh chemicals.
6.2 Roller Inspection
Regularly inspect the scarifying blades and aerating tines for wear or damage. Worn or damaged rollers should be replaced to ensure effective performance and safety. Refer to the roller change instructions in Section 4.3.
6.3 Storage
The VONROC SA501AC features a foldable handle for compact storage. Clean the machine thoroughly before storing. Store it in a dry, secure location, away from direct sunlight and extreme temperatures. The integrated wall bracket allows for convenient wall-mounted storage.

Image 6.1: Key features of the product, including the powerful 1300W motor, safety start button, 35-liter collection bag, and the ability to fold or hang for space-saving storage.
7. Troubleshooting Guide
This section addresses common issues you might encounter. For problems not listed here, please contact customer support.
| Problem | Possible Cause | Solution |
|---|---|---|
| Machine does not start | No power supply; Safety button/lever not engaged; Overload protection activated. | Check power connection; Ensure safety button is pressed before engaging lever; Allow machine to cool down. |
| Poor scarifying/aerating performance | Incorrect depth setting; Worn blades/tines; Clogged roller. | Adjust to a deeper setting; Replace worn rollers; Clean roller and housing. |
| Excessive vibration/noise | Damaged roller; Loose components; Obstruction. | Inspect and replace roller if damaged; Check all fasteners; Remove any obstructions. |
| Grass collection bag not filling | Bag not attached correctly; Discharge chute clogged; Depth setting too shallow. | Re-attach bag securely; Clear chute; Increase working depth. |
8. Technical Specifications
| Specification | Value |
|---|---|
| Model Number | SA501AC |
| Power Input | 1300 Watt |
| Voltage | 230 Volt |
| Product Dimensions | 60 x 49 x 29 cm |
| Item Weight | 10 Kilograms |
| Material | Steel, Rubber, Plastic |
| Grass Collection Bag Capacity | 35 Liters |
| Working Depths | 3mm, 6mm, 9mm, 12mm |
9. Warranty and Customer Support
VONROC products are manufactured to high-quality standards. For information regarding warranty terms and conditions, please refer to the warranty card included with your product or visit the official VONROC website. If you encounter any issues or require assistance, please contact VONROC customer support. Have your model number (SA501AC) and purchase details ready for faster service.
Ask a question about this manual
Ask about setup, troubleshooting, compatibility, parts, safety, or missing instructions. Manuals+ will review the question and use this page’s manual context to help answer it.