
1. Introduction
Thank you for choosing the GOYOJO NV3185-a Day and Night Vision Monocular. This device is designed for observation in both day and night conditions, making it suitable for various outdoor activities such as hunting, surveillance, and exploration. Please read this manual carefully before using the device to ensure proper operation and to maximize its performance and longevity.
2. Product Overview
Familiarize yourself with the components of your GOYOJO NV3185-a monocular.
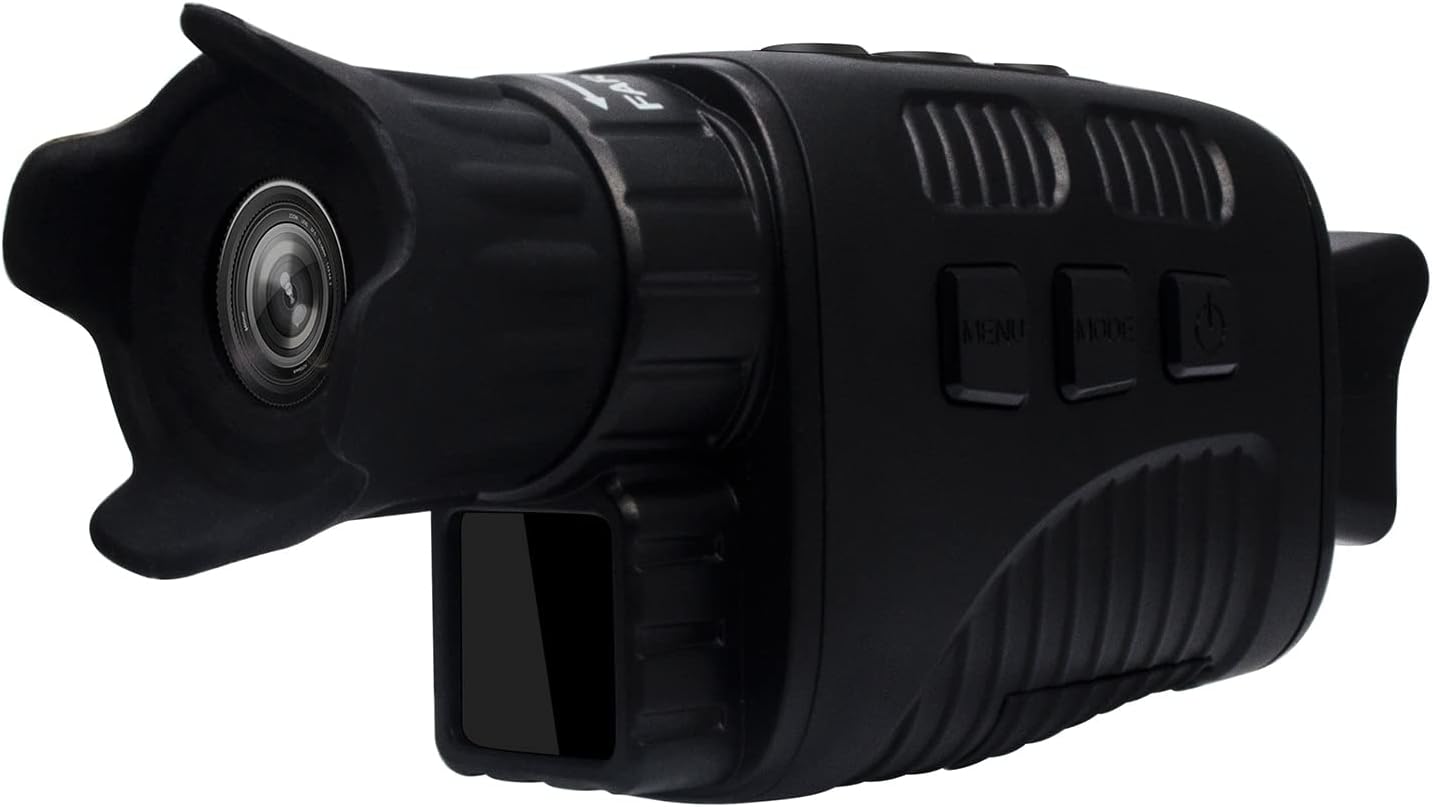
Figure 2.1: Front and side view of the monocular, highlighting the objective lens and main controls.

Figure 2.2: Rear and side view of the monocular, showing the eyepiece and power button.

Figure 2.3: Top view of the monocular, illustrating the focus adjustment wheel and infrared intensity buttons.

Figure 2.4: Side view of the monocular, detailing the USB port, TF card slot, and tripod mounting point.
Key Components:
- Objective Lens: Captures light from the scene.
- Eyepiece: For viewing the image.
- Focus Wheel: Adjusts the focus for a clear image.
- Power Button: Turns the device on/off.
- MENU Button: Accesses the device settings.
- MODE Button: Switches between photo, video, and playback modes.
- IR Adjustment Buttons: Controls the intensity of the infrared illuminator.
- USB Port: For data transfer and charging (if applicable).
- TF Card Slot: For inserting a MicroSD (TF) card for storage.
- Tripod Mount: Allows attachment to a tripod for stable viewing.
3. Setup
3.1 Battery Installation
- Locate the battery compartment on the device.
- Open the battery compartment cover.
- Insert 5 x AA batteries, ensuring correct polarity (+/-).
- Close the battery compartment cover securely.
3.2 Memory Card Installation
The device supports a TF (MicroSD) card up to 32GB for storing photos and videos.
- Locate the TF card slot, typically protected by a rubber cover (refer to Figure 2.4).
- Gently insert the TF card into the slot until it clicks into place. Ensure the correct orientation.
- To remove, press the card gently inward until it springs out.
3.3 Powering On/Off
- To Power On: Press and hold the Power button for approximately 3 seconds until the screen illuminates.
- To Power Off: Press and hold the Power button for approximately 3 seconds until the screen turns off.
4. Operating Instructions
4.1 Focus Adjustment
Rotate the focus wheel (refer to Figure 2.3) until the image in the eyepiece appears clear and sharp.
4.2 Day and Night Vision Modes
The device automatically adjusts between day (color) and night (black and white) vision based on ambient light. In low light or darkness, the infrared (IR) illuminator will activate.
4.3 Infrared (IR) Adjustment
In night vision mode, use the IR adjustment buttons (refer to Figure 2.3) to increase or decrease the intensity of the infrared light. Higher IR intensity provides better visibility in complete darkness but consumes more battery power.
4.4 Menu Navigation
- Press the MENU button to enter the settings menu.
- Use the navigation buttons (often the IR adjustment buttons) to scroll through menu options.
- Press the MODE button (or a dedicated OK/Enter button if present) to select an option.
- Press the MENU button again to exit the menu.
4.5 Photo and Video Recording
- Press the MODE button to switch between photo mode (camera icon), video mode (video camera icon), and playback mode (play icon).
- In photo mode, press the capture button (often the same as the OK/Enter button) to take a picture.
- In video mode, press the capture button to start recording. Press it again to stop recording.
4.6 Digital Zoom
The device features 4x digital zoom. Use the appropriate buttons (often the IR adjustment buttons when not in menu) to zoom in or out on the image.
5. Maintenance
5.1 Cleaning
- Use a soft, lint-free cloth to clean the lenses. For stubborn smudges, use a lens cleaning solution specifically designed for optics.
- Wipe the body of the monocular with a soft, damp cloth. Do not use abrasive cleaners or solvents.
5.2 Storage
- When not in use for extended periods, remove the batteries to prevent leakage.
- Store the device in a cool, dry place, away from direct sunlight and extreme temperatures.
- Keep the lens caps on to protect the lenses from dust and scratches.
5.3 Waterproofing
The GOYOJO NV3185-a is waterproof. While it can withstand wet environments, avoid submerging it in water for prolonged periods or exposing it to high-pressure water jets. Ensure all port covers are securely closed when in wet conditions.
6. Troubleshooting
- Device does not power on:
- Check if batteries are inserted correctly with the right polarity.
- Ensure batteries have sufficient charge. Replace with new batteries if necessary.
- Press and hold the power button for at least 3 seconds. - Image is blurry:
- Adjust the focus wheel until the image is clear.
- Ensure the objective lens is clean and free from smudges. - No image in complete darkness:
- Ensure the IR illuminator is turned on and its intensity is adjusted appropriately. - Cannot record photos/videos:
- Ensure a TF card is inserted correctly.
- Check if the TF card has sufficient free space.
- Format the TF card through the device's menu if it's a new card or experiencing issues (this will erase all data). - Short battery life:
- Reduce IR illuminator intensity when not needed.
- Use high-quality alkaline or rechargeable batteries.
7. Specifications
The following table outlines the technical specifications of the GOYOJO NV3185-a Day and Night Vision Monocular.
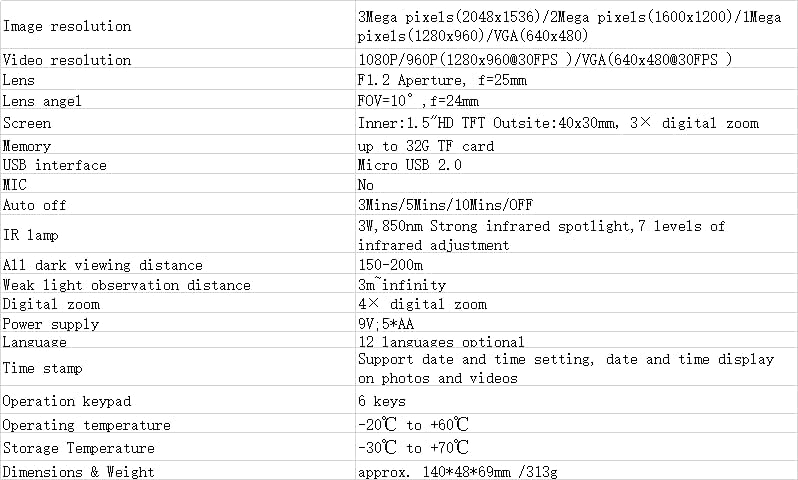
Figure 7.1: Detailed product specifications.
| Feature | Specification |
|---|---|
| Image Resolution | 3 Mega pixels (2048x1536) / 2 Mega pixels (1600x1200) / 1 Mega pixels (1280x960) / VGA (640x480) |
| Video Resolution | 1080P/960P (1280x960@30FPS) / VGA (640x480@30FPS) |
| Lens | F1.2 Aperture, f=25mm |
| Lens Angle | FOV=10°, f=24mm |
| Screen | Inner: 1.5" HD TFT, Outside: 40x30mm, 3x digital zoom |
| Memory | Up to 32G TF card |
| USB Interface | Micro USB 2.0 |
| MIC | No |
| Auto Off | 3 Mins / 5 Mins / 10 Mins / OFF |
| IR Lamp | 3W, 850nm Strong infrared spotlight, 7 levels of infrared adjustment |
| All Dark Viewing Distance | 150-200m |
| Weak Light Observation Distance | 3m ~ infinity |
| Digital Zoom | 4x digital zoom |
| Power Supply | 9V, 5xAA |
| Language | 12 languages optional |
| Time Stamp | Support date and time setting, date and time display on photos and videos |
| Operation Keypad | 6 keys |
| Operating Temperature | -20°C to +60°C |
| Storage Temperature | -30°C to +70°C |
| Dimensions & Weight | Approx. 140x49x69mm / 313g |
8. Warranty and Support
For warranty information and technical support, please refer to the GOYOJO official website or contact your retailer. Keep your purchase receipt as proof of purchase for any warranty claims.