Lenovo Lenovo ThinkPad L14 Gen2
Lenovo ThinkPad L14 Gen2 User Manual
Comprehensive Guide for Your Business Laptop
1. Introduction
This manual provides essential information for setting up, operating, maintaining, and troubleshooting your Lenovo ThinkPad L14 Gen2 14-inch FHD Touchscreen Business Laptop. Please read this guide thoroughly to ensure optimal performance and longevity of your device.
The Lenovo ThinkPad L14 Gen2 is a powerful and versatile business laptop featuring an 11th Gen Intel Core i5-1135G7 processor, 32GB DDR4 RAM, and a 1TB PCIe SSD, designed for high efficiency and productivity. It comes pre-installed with Windows 10 Pro.
2. Setup
2.1 Unboxing and Initial Inspection
Carefully remove all components from the packaging. Verify that all items listed in the packing slip are present and undamaged. If any items are missing or damaged, contact your vendor immediately.
2.2 Connecting to Power
Connect the power adapter to the laptop's power input port and then plug the power cord into a wall outlet. The battery will begin charging automatically.
2.3 First Boot and Windows Setup
Press the power button to turn on the laptop. Follow the on-screen instructions to complete the initial Windows 10 Pro setup, including language selection, network connection, and user account creation.

Image: The Lenovo ThinkPad L14 Gen2 laptop open and powered on, showing the Windows 10 operating system desktop. A SnowBell USB card is visible to the left of the laptop.
3. Operating Your Laptop
3.1 Keyboard and Touchpad Usage
The ThinkPad L14 Gen2 features a full-sized keyboard and a precision touchpad for navigation. The TrackPoint pointing device, located in the center of the keyboard, offers an alternative method for cursor control.
3.2 Touchscreen Functionality
The 14-inch FHD display supports multi-touch gestures, allowing for intuitive interaction with Windows 10 Pro. Use gestures such as pinch-to-zoom, swipe, and tap for navigation and application control.
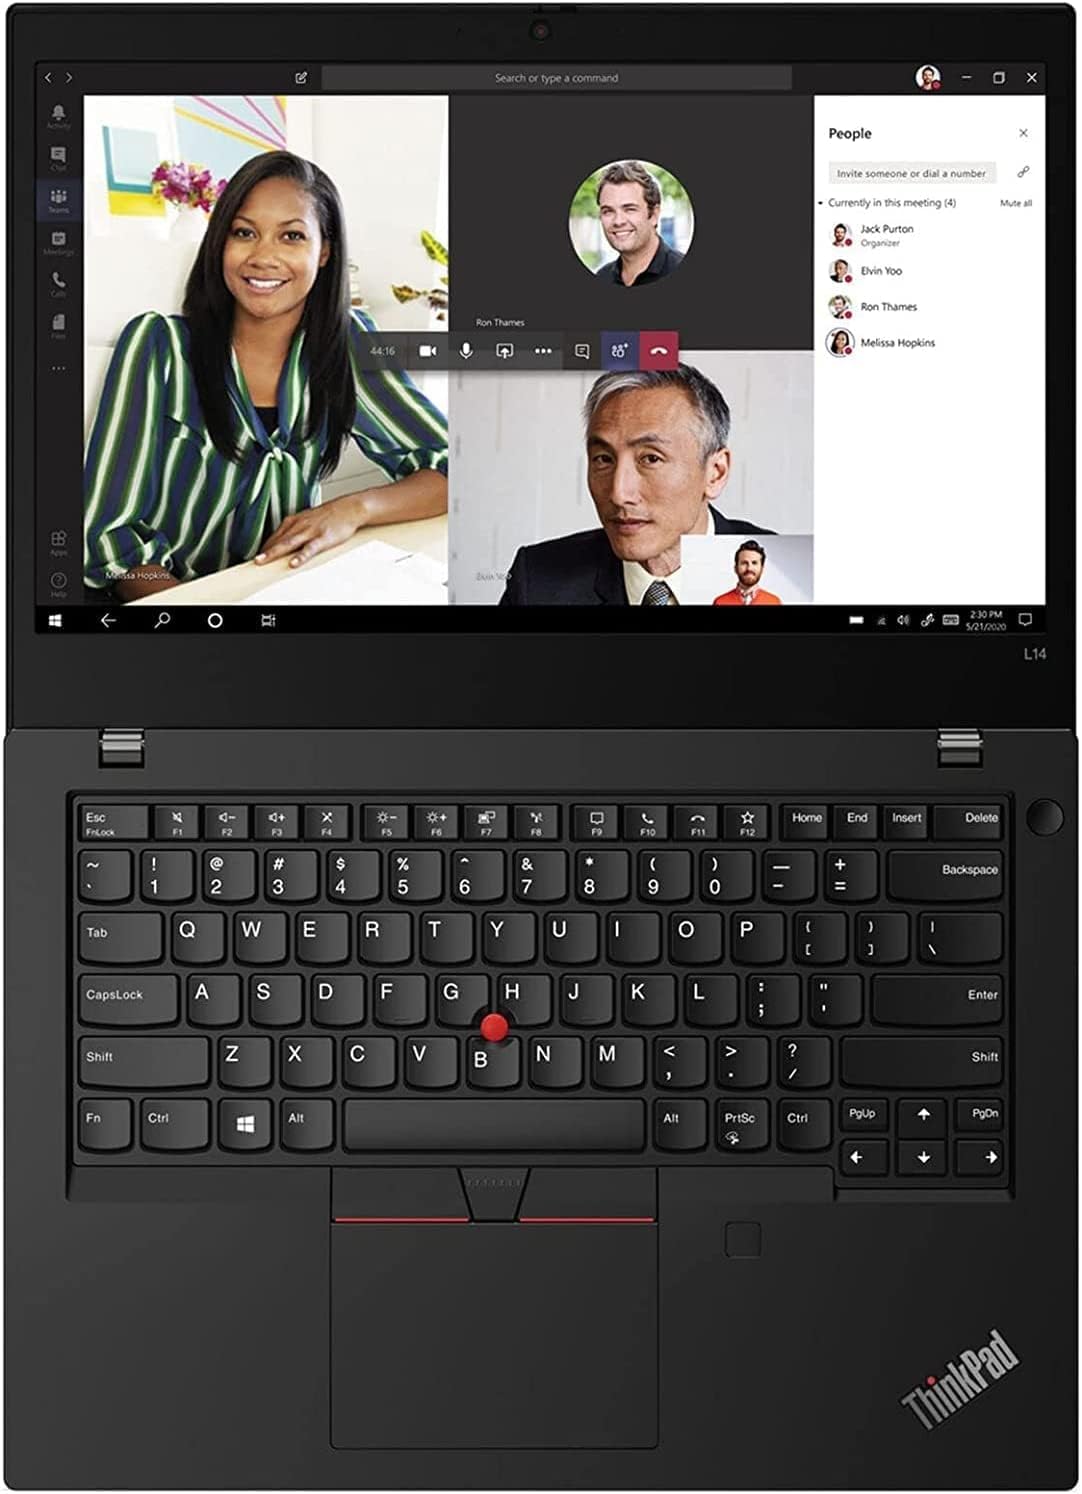
Image: A top-down view of the Lenovo ThinkPad L14 Gen2, highlighting the keyboard and the screen displaying a video conference application.
3.3 Ports and Connectivity
The laptop is equipped with various ports for connecting external devices and accessories:
- USB-A 3.2 Gen 2: For connecting USB devices like external drives, mice, and keyboards.
- USB-C 3.2 Gen 2 / Thunderbolt 4: Versatile port for data transfer, video output, and power delivery.
- HDMI: For connecting to external displays or projectors.
- Headphone/Mic Combo Jack: For audio input and output.
- RJ45 (Ethernet): For wired network connections.
- 4-in-1 Card Reader: For reading various memory card formats.

Image: A detailed side view of the Lenovo ThinkPad L14 Gen2, illustrating the placement of its various connectivity ports.
3.4 Wireless Connectivity
The laptop supports Wi-Fi 6 for high-speed wireless internet access and Bluetooth for connecting wireless peripherals such as headphones and mice.
4. Maintenance
4.1 Cleaning Your Laptop
To clean the screen, use a soft, lint-free cloth lightly dampened with water or a screen-cleaning solution. For the keyboard and chassis, use a soft cloth. Avoid harsh chemicals or abrasive materials.
4.2 Battery Care
To maximize battery life, avoid fully discharging the battery frequently. Store the laptop in a cool, dry place when not in use for extended periods. Periodically calibrate the battery by fully discharging and recharging it.
4.3 Software Updates
Regularly check for and install Windows updates and Lenovo driver updates to ensure system stability, security, and optimal performance. These updates often include bug fixes and performance enhancements.
5. Troubleshooting
This section addresses common issues you might encounter with your Lenovo ThinkPad L14 Gen2.
5.1 No Power
- Ensure the power adapter is securely connected to both the laptop and a working power outlet.
- Check if the power outlet is functional by plugging in another device.
- If the battery is completely drained, allow it to charge for at least 30 minutes before attempting to power on.
5.2 Display Issues
- If the screen is blank, try pressing the Fn + F7 (or equivalent) key combination to toggle the display output.
- Ensure display drivers are up to date through Windows Update or Lenovo's support website.
- If using an external monitor, check the cable connection and ensure the monitor is powered on.
5.3 Connectivity Problems (Wi-Fi/Bluetooth)
- Verify that Wi-Fi or Bluetooth is enabled in Windows settings.
- Restart your router/modem for Wi-Fi issues.
- Update wireless drivers from the Lenovo support website.
- For Bluetooth, ensure the device you are trying to connect is in pairing mode and within range.
6. Specifications
Below are the detailed technical specifications for the Lenovo ThinkPad L14 Gen2 laptop:
| Feature | Specification |
|---|---|
| Model Number | Lenovo ThinkPad L14 Gen2 |
| Processor | 11th Gen Intel Core i5-1135G7 (2.4 GHz, 4 Cores) |
| RAM | 32 GB DDR4 SDRAM |
| Storage | 1 TB PCIe SSD |
| Display | 14-inch FHD (1920 x 1080) Touchscreen IPS, 300-Nits |
| Graphics | Intel HD Graphics 520 (Integrated) |
| Operating System | Windows 10 Pro |
| Webcam | 720P HD Camera |
| Wireless | Wi-Fi 6, Bluetooth |
| Battery | 3-Cell 45WH Lithium-Polymer |
| Dimensions (LxWxH) | 12.71 x 8.58 x 0.7 inches |
| Weight | 3.08 lbs (approx. 5 pounds shipping weight) |
| Color | Black |

Image: The underside of the Lenovo ThinkPad L14 Gen2, displaying its ventilation design and product labels.
7. Warranty and Support
7.1 Product Warranty
The Lenovo ThinkPad L14 Gen2 comes with an original 1-Year Manufacturer Warranty on most components. Additionally, upgraded RAM and SSD components are covered by a 1-Year warranty from SnowBell. Please retain your proof of purchase for warranty claims.
7.2 Return Policy
This product is eligible for a 30-day return policy, allowing for a refund or replacement within 30 days of purchase, subject to the seller's terms and conditions.
7.3 Technical Support
For technical assistance, driver downloads, or further support, please visit the official Lenovo support website or contact their customer service. Have your product model number and serial number ready when seeking support.