1. Introduction
Thank you for choosing the Browning Dark Ops Full HD Extreme Trail Camera. This camera is designed for capturing high-quality images and videos of wildlife with its advanced motion-activated system and invisible infrared illumination. This manual provides detailed instructions for setting up, operating, and maintaining your camera to ensure optimal performance.
2. Package Contents
Please verify that all items are present in your package:
- Browning Dark Ops Full HD Extreme Trail Camera (Main camera unit)
- Mounting Strap
- Instruction Manual (this document)
Note: Batteries and SD card are sold separately.
3. Camera Overview
Familiarize yourself with the key components of your Browning Dark Ops Full HD Extreme Trail Camera.
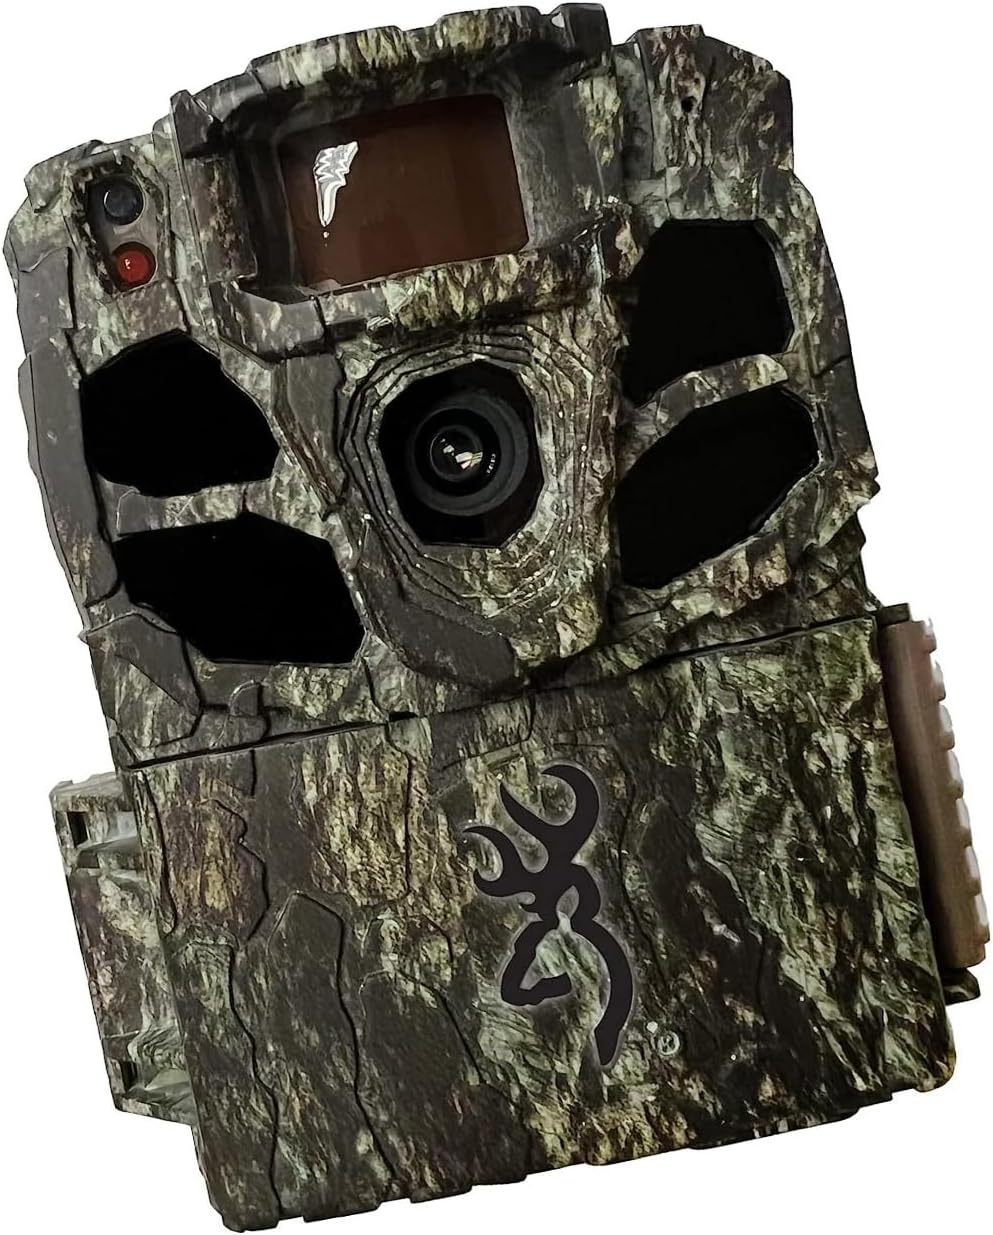
Figure 3.1: Front view of the Browning Dark Ops Full HD Extreme Trail Camera, showcasing its camouflage design and primary lens.

Figure 3.2: Internal view of the camera with the front cover open, displaying the LCD screen, navigation buttons (E, arrows), ON/OFF switch, MODE button, SD card slot, and Eject button.
Key components include:
- Main Lens: Captures images and videos.
- Infrared LEDs: Provide invisible illumination for night vision.
- Motion Sensor (PIR): Detects movement to trigger recording.
- LCD Screen: Displays menu options and settings.
- Control Buttons: For navigating menus and adjusting settings.
- ON/OFF Switch: Powers the camera on or off.
- MODE Button: Switches between setup, photo, and video modes.
- SD Card Slot: For inserting your memory card.
- Battery Compartment: Holds the required batteries.
4. Setup
4.1 Battery Installation
- Open the camera housing by unlatching the side clips.
- Locate the battery compartment.
- Insert 8 AA batteries, ensuring correct polarity (+/-) as indicated inside the compartment.
- Close the battery compartment securely.
4.2 SD Card Installation
- With the camera powered off, locate the SD card slot.
- Insert a compatible SD card (up to 512GB, not included) into the slot until it clicks into place.
- It is recommended to format the SD card using the camera's menu system before first use and periodically thereafter. To format, navigate to the 'Format SD Card' option in the camera's setup menu and confirm.
4.3 Mounting the Camera
- Select a sturdy tree or post at the desired location.
- Thread the provided mounting strap through the slots on the back of the camera.
- Securely fasten the camera to the tree or post, ensuring it is stable and pointed in the desired direction.
- Adjust the camera's angle to cover the intended area. Ensure no obstructions are directly in front of the lens or motion sensor.
5. Operating Instructions
5.1 Powering On/Off
- To power on: Slide the ON/OFF switch to the 'ON' position. The LCD screen will illuminate.
- To power off: Slide the ON/OFF switch to the 'OFF' position.
5.2 Menu Navigation
Use the control buttons (up, down, left, right arrows, and 'E' for Enter) to navigate through the camera's menu options. The 'MODE' button switches between different operational modes.
5.3 Mode Selection
Press the 'MODE' button to cycle through the following operational modes:
- Setup Mode: Access camera settings and configurations.
- Photo Mode: Camera captures still images when triggered.
- Video Mode: Camera records video clips when triggered.
- Timelapse Plus Mode: Captures images at set intervals and also triggers on motion.
5.4 Adjusting Settings
In Setup Mode, you can customize various camera settings:
- Image Resolution: Select from various resolutions up to 24 Megapixels for still photos.
- Video Resolution: Choose 1080p Full HD for video recording.
- Trigger Speed: Adjust the trigger speed from 0.135 to 0.7 seconds to capture fast-moving subjects.
- Flash Range: Set the infrared flash range up to 90 feet for night captures.
- Detection Range: Configure the motion detection range up to 80 feet.
- IR Illumination: Utilize the Radiant 4 LED system for optimal night-time visibility.
- Timelapse Plus: Configure intervals for timelapse photography.
- Smart IR Video: Optimizes infrared recording for efficient storage.
5.5 SD Card Management
The camera features an SD Card Management system to optimize storage. This system helps overwrite older files when the card is full, ensuring continuous operation. Refer to the camera's menu for specific settings related to SD card management.
6. Key Features
- Invisible Flash: The Dark Ops Full HD Extreme camera features an invisible flash with the innovative Radiant 4 LED system, capturing high-quality night-time images and videos without disturbing wildlife.
- Wide Field of View: With a 55-degree field of view, this camera allows for a broader coverage area, ensuring you capture more of the action.
- HDR Night Photos: The addition of HDR night photos enhances the camera's ability to capture clear and detailed images in low-light conditions.
- Adjustable Trigger Speeds: Users can customize their experience by adjusting the trigger speed to match their specific preferences, ensuring precise and timely capture of wildlife activity.
- Storage and Organization: The camera includes a unique SD Card Management system and Smart IR Video setting to enhance storage efficiency and optimize infrared recording.
7. Specifications
| Specification | Detail |
|---|---|
| Effective Still Resolution | 24 MP |
| Video Capture Resolution | 1080p Full HD |
| Max Shutter Speed (Trigger Speed) | 0.135 to 0.7 seconds (adjustable) |
| Flash Range | 90 feet (Infrared IR illumination) |
| Detection Range | 80 feet (adjustable) |
| IR LEDs | Radiant 4 LED System |
| Power Source | Battery Powered (8 AA batteries, not included) |
| Connectivity Technology | Wireless (Wi-Fi for certain features/connectivity, though direct remote viewing is not specified) |
| Indoor/Outdoor Usage | Outdoor |
| Water Resistance Level | IP65 (Dust tight and protected against water jets) |
| Dimensions (L x W x H) | 3.13 x 9.13 x 4.75 inches |
| Item Weight | 1.06 pounds |
| Model Number | BTC-6FHDX |
8. Troubleshooting
If you encounter issues with your camera, please refer to the following common problems and solutions:
- Camera Not Powering On:
- Ensure batteries are inserted correctly with proper polarity.
- Check if batteries are fully charged or replace them with new ones.
- Verify the ON/OFF switch is in the 'ON' position.
- No Images/Videos Captured:
- Confirm the SD card is properly inserted and formatted.
- Check if the SD card has sufficient free space.
- Ensure the camera is in an active recording mode (Photo, Video, or Timelapse Plus).
- Verify that the motion sensor is not obstructed and the detection range is set appropriately.
- Test the camera's motion detection by walking in front of it.
- Poor Image/Video Quality:
- Clean the camera lens with a soft, dry cloth.
- Adjust image/video resolution settings to a higher quality.
- Ensure the camera is stable and not subject to movement from wind or animals.
- For night images, ensure subjects are within the effective flash range.
- Short Battery Life:
- Use high-quality alkaline or lithium batteries.
- Reduce the frequency of captures or video length in settings.
- In cold weather, battery performance can decrease; consider using lithium batteries for better cold-weather performance.
9. Maintenance
- Cleaning: Regularly clean the camera lens and the PIR sensor window with a soft, lint-free cloth. Avoid abrasive materials or harsh chemicals.
- Battery Care: Remove batteries if the camera will not be used for an extended period to prevent leakage.
- Storage: Store the camera in a cool, dry place away from direct sunlight and extreme temperatures.
- SD Card: Periodically format your SD card to maintain optimal performance and prevent data corruption.
10. Warranty and Support
Browning Trail Cameras are covered by a limited warranty. For detailed warranty information, product registration, or technical support, please visit the official Browning Trail Cameras website or contact their customer service department. Keep your purchase receipt as proof of purchase for warranty claims.
For further assistance, please refer to the contact information provided on the official Browning website: www.browningtrailcameras.com


