1. Introduction
Welcome to your new Northpoint NP-TDL30 Battery LED Light. This manual provides detailed instructions for installation, operation, and maintenance to ensure optimal performance and longevity of your device. Please read this manual thoroughly before use and keep it for future reference.
2. Safety Instructions
- Do not expose the device to extreme temperatures, direct sunlight, or high humidity.
- Keep the device away from water and other liquids.
- Do not attempt to disassemble, repair, or modify the device yourself. Contact qualified service personnel if needed.
- Use only the provided USB-C cable for charging.
- Ensure the mounting surface is clean and dry before applying the adhesive pad.
- This product is intended for indoor use only.
3. Package Contents
Please check the package for the following items:
- Northpoint Battery LED Light (NP-TDL30)
- Magnetic Holder with Adhesive Pad
- USB-C Charging Cable
- User Manual
4. Product Overview
The Northpoint NP-TDL30 is a versatile battery-powered LED light featuring an integrated time display, adjustable color temperature, and a timer function. Its magnetic mounting system allows for easy installation without drilling, making it suitable for various indoor environments such as bathrooms, studies, or bunk beds.

Figure 4.1: Product dimensions of the Northpoint NP-TDL30 LED light. The light measures approximately 300mm in length, 42mm in width, and 43mm in height when mounted.
5. Setup and Installation
5.1. Charging the Device
The LED light is powered by a built-in 2000 mAh Li-ion battery. Before first use, or when the battery is low, charge the device:
- Connect the provided USB-C cable to the charging port on the light.
- Connect the other end of the USB-C cable to a suitable USB power adapter (not included) or a computer USB port.
- The charging indicator (if available) will show the charging status. Once fully charged, disconnect the cable.
5.2. Mounting the Light
The Northpoint NP-TDL30 features a convenient magnetic mounting system that requires no drilling.
- Choose a clean, dry, and smooth surface for mounting.
- Peel off the protective film from the adhesive pad on the magnetic holder.
- Firmly press the magnetic holder onto the desired surface and hold for a few seconds to ensure strong adhesion.
- Once the magnetic holder is securely attached, simply place the LED light onto the holder. The magnets will hold it in place.
- The light source can be easily removed from the magnetic holder for charging or repositioning.

Figure 5.1: The magnetic holder with adhesive pad allows for easy, drill-free installation. The light attaches securely to the holder.
6. Operating Instructions
6.1. Power On/Off
Locate the power button on the device. Press it once to turn the light on or off.
6.2. Adjusting Color Temperature
The Northpoint NP-TDL30 offers three color temperature settings to suit your needs:
- Warm White (3000 K): Ideal for creating a cozy and relaxing atmosphere.
- Neutral White (4500 K): Provides bright, natural daylight, suitable for general illumination.
- Cool White (6000 K): Offers a bright, crisp light, perfect for tasks requiring focus, such as working or reading.
To change the color temperature, press the dedicated color temperature button (often indicated by a sun or color icon) repeatedly until you reach your desired setting.
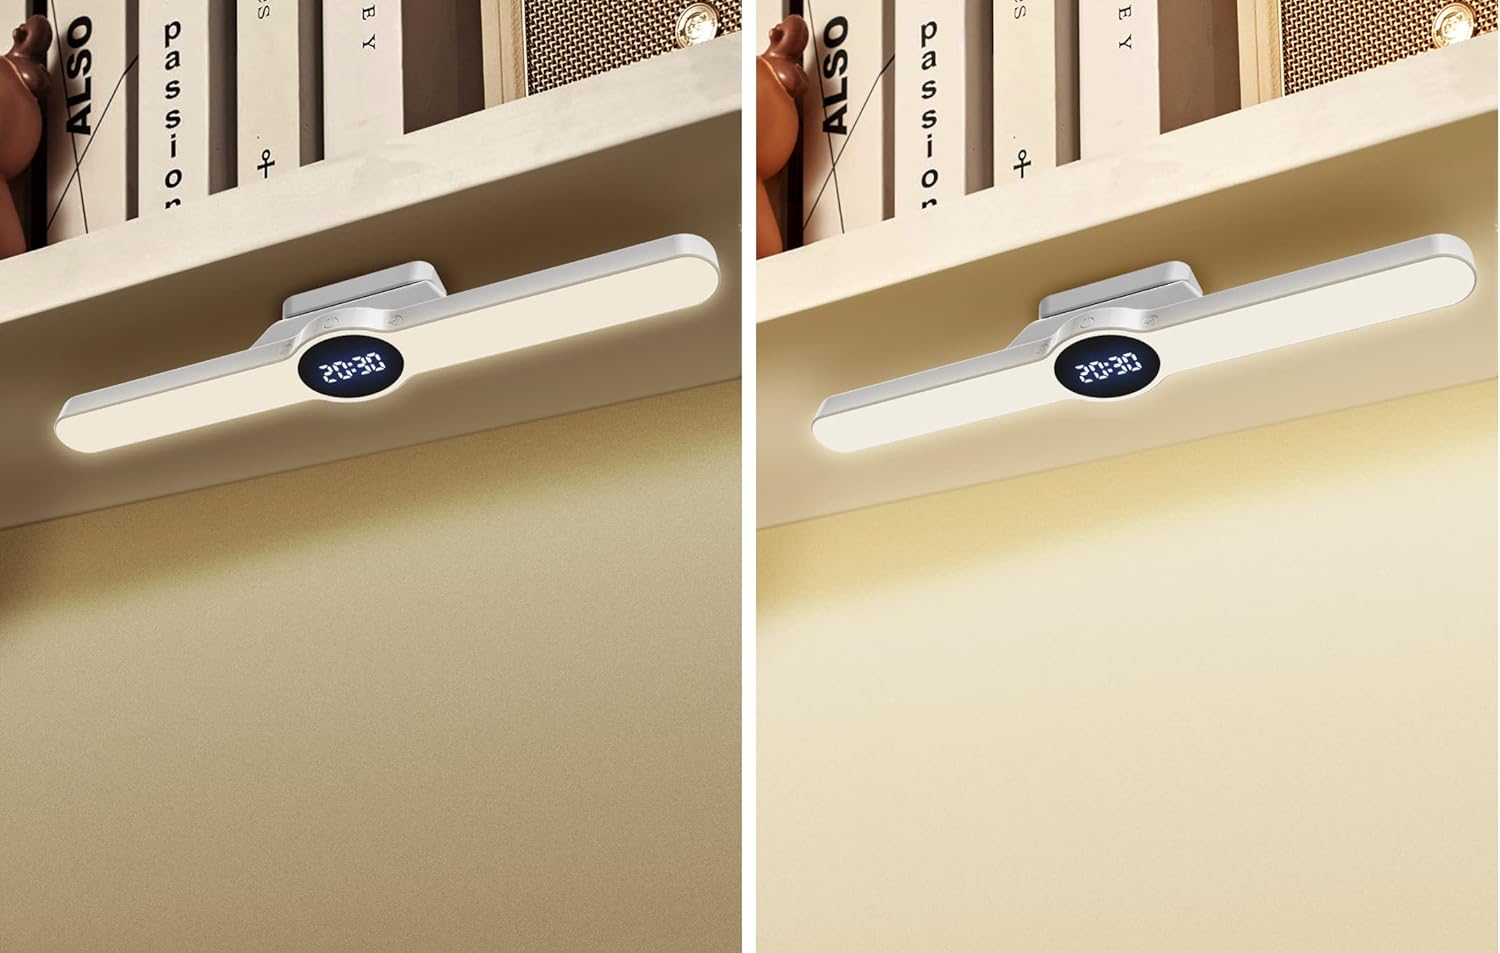
Figure 6.1: The light can be adjusted to warm white (left) for a cozy ambiance or cool white (right) for task lighting.
6.3. Using the Timer Function
The light features a timer function that automatically switches off both the light and the display after a set period:
- Press the timer button (often indicated by a clock icon) to activate the timer.
- Each press will cycle through the available timer settings: 15 minutes, 30 minutes, or 60 minutes.
- The light and display will automatically turn off after the selected duration.
6.4. Time Display
The integrated display shows the current time. Refer to the specific controls on your device to set the time. Typically, a long press on a designated button or a combination of buttons will enter time setting mode.

Figure 6.2: The LED light provides illumination for a desk area, with the time clearly visible on its display.

Figure 6.3: The light is suitable for various applications, including providing clear illumination for personal grooming in front of a mirror.

Figure 6.4: The compact design and adjustable light make it ideal for use in small spaces, such as providing reading light for a bunk bed.
7. Maintenance and Care
- Cleaning: Wipe the device with a soft, dry cloth. Do not use abrasive cleaners or solvents.
- Battery Care: To prolong battery life, avoid fully discharging the battery frequently. Charge the device regularly, even if not in use for extended periods.
- Storage: Store the device in a cool, dry place when not in use.
8. Troubleshooting
If you encounter any issues with your Northpoint NP-TDL30, please refer to the table below for common problems and solutions.
| Problem | Possible Cause | Solution |
|---|---|---|
| Light does not turn on. | Battery is discharged. | Charge the device using the USB-C cable. |
| Light flickers or is dim. | Low battery. | Recharge the device. |
| Cannot change color temperature. | Incorrect button press. | Ensure you are pressing the correct button for color temperature adjustment. |
| Timer function not working. | Timer not activated or set incorrectly. | Press the timer button to cycle through 15, 30, or 60 minutes. |
| Light falls off mounting surface. | Adhesive pad not properly applied or surface is unsuitable. | Ensure the surface is clean, dry, and smooth. Reapply the adhesive pad if necessary, or use a stronger adhesive. |
9. Specifications
| Feature | Specification |
|---|---|
| Brand | Northpoint |
| Model Number | NP-TDL30 |
| Product Dimensions | 30 x 4.3 x 4.2 cm |
| Power Source | Battery (2000 mAh Li-ion) |
| Charging | USB-C |
| Light Type | LED |
| Color Temperatures | Warm White (3000 K), Neutral White (4500 K), Cool White (6000 K) |
| Special Features | Adjustable Color Temperature, Time Display, Timer Function (15/30/60 min) |
| Mounting Type | Wall Mount (Magnetic with Adhesive Pad) |
| CRI (Color Rendering Index) | 80 |
| EU Energy Label | G |
10. Warranty and Support
Northpoint products are designed for quality and reliability. While specific warranty details may vary by region and retailer, we are committed to providing excellent customer service.
If you have any questions, suggestions, or encounter any issues with your Northpoint NP-TDL30 LED Light, please do not hesitate to contact us. Our customer support team is available to assist you. You can typically reach us via a message on the platform where you purchased the product, and we aim to respond within 24 hours on business days.
For more information about Northpoint and our commitment to service, please visit our official brand store or contact us directly.


