
1. Product Overview
The VTOMAN X1 and V6 Pro are versatile portable power devices designed for vehicle emergency situations and outdoor activities. The X1 model integrates a powerful jump starter with a 150PSI digital tire inflator, while the V6 Pro focuses on robust jump-starting capabilities and power bank functions. Both models feature advanced safety protections and multipurpose LED lighting.

Image: The VTOMAN X1 (left) and V6 Pro (right) jump starters, showcasing their compact design and included accessories such as jumper cables, charging cables, and carrying cases.
2. Package Contents
Please verify that all items are present in your package:
- 1 x VTOMAN X1 Jump Starter with Air Compressor
- 1 x VTOMAN V6 Pro Jump Starter
- 2 x Smart Jumper Cables
- 2 x Charging Cables
- 2 x Carrying Bags
- 1 x Pump Tube (for X1)
- 3 x Air Nozzles (for X1)
- 2 x User Manuals
3. Product Features
3.1 Jump Starting Capability
- VTOMAN X1: 2500A Peak Current, capable of starting up to 8.5L gasoline and 6.0L diesel engines.
- VTOMAN V6 Pro: 2000A Peak Current, capable of starting up to 7.0L gasoline and 5.0L diesel engines.
- Designed for 12V vehicles.
- Provides up to 30 starts on a single charge (V6 Pro) or 50 starts (X1).

Image: The VTOMAN X1 jump starter connected to a car battery, illustrating its readiness to jump-start a vehicle. The display shows battery status.

Image: The VTOMAN V6 Pro jump starter connected to a car battery, demonstrating its ability to jump-start various vehicle types including motorcycles, cars, trucks, yachts, snowmobiles, and lawn mowers.
3.2 Digital Cordless Air Compressor (X1 Model Only)
- 150PSI maximum pressure.
- Built-in LCD digital meter for tire pressure detection.
- Auto shut-off feature when preset pressure is reached.
- Supports 3 optional units: PSI, BAR, KPA.
- Suitable for bikes, cars, balls, and other inflatables.

Image: The VTOMAN X1 jump starter with its air compressor hose connected to a car tire, illustrating its use for inflating various items like bicycles, balls, inflatable boats, and car/motorcycle tires.
3.3 Power Bank Functionality
- 2 USB outputs (5V/2.4A and 5V/9V/12V) for charging electronic devices.
- Type-C 15W input port.
- Battery level indicators to show remaining charge.
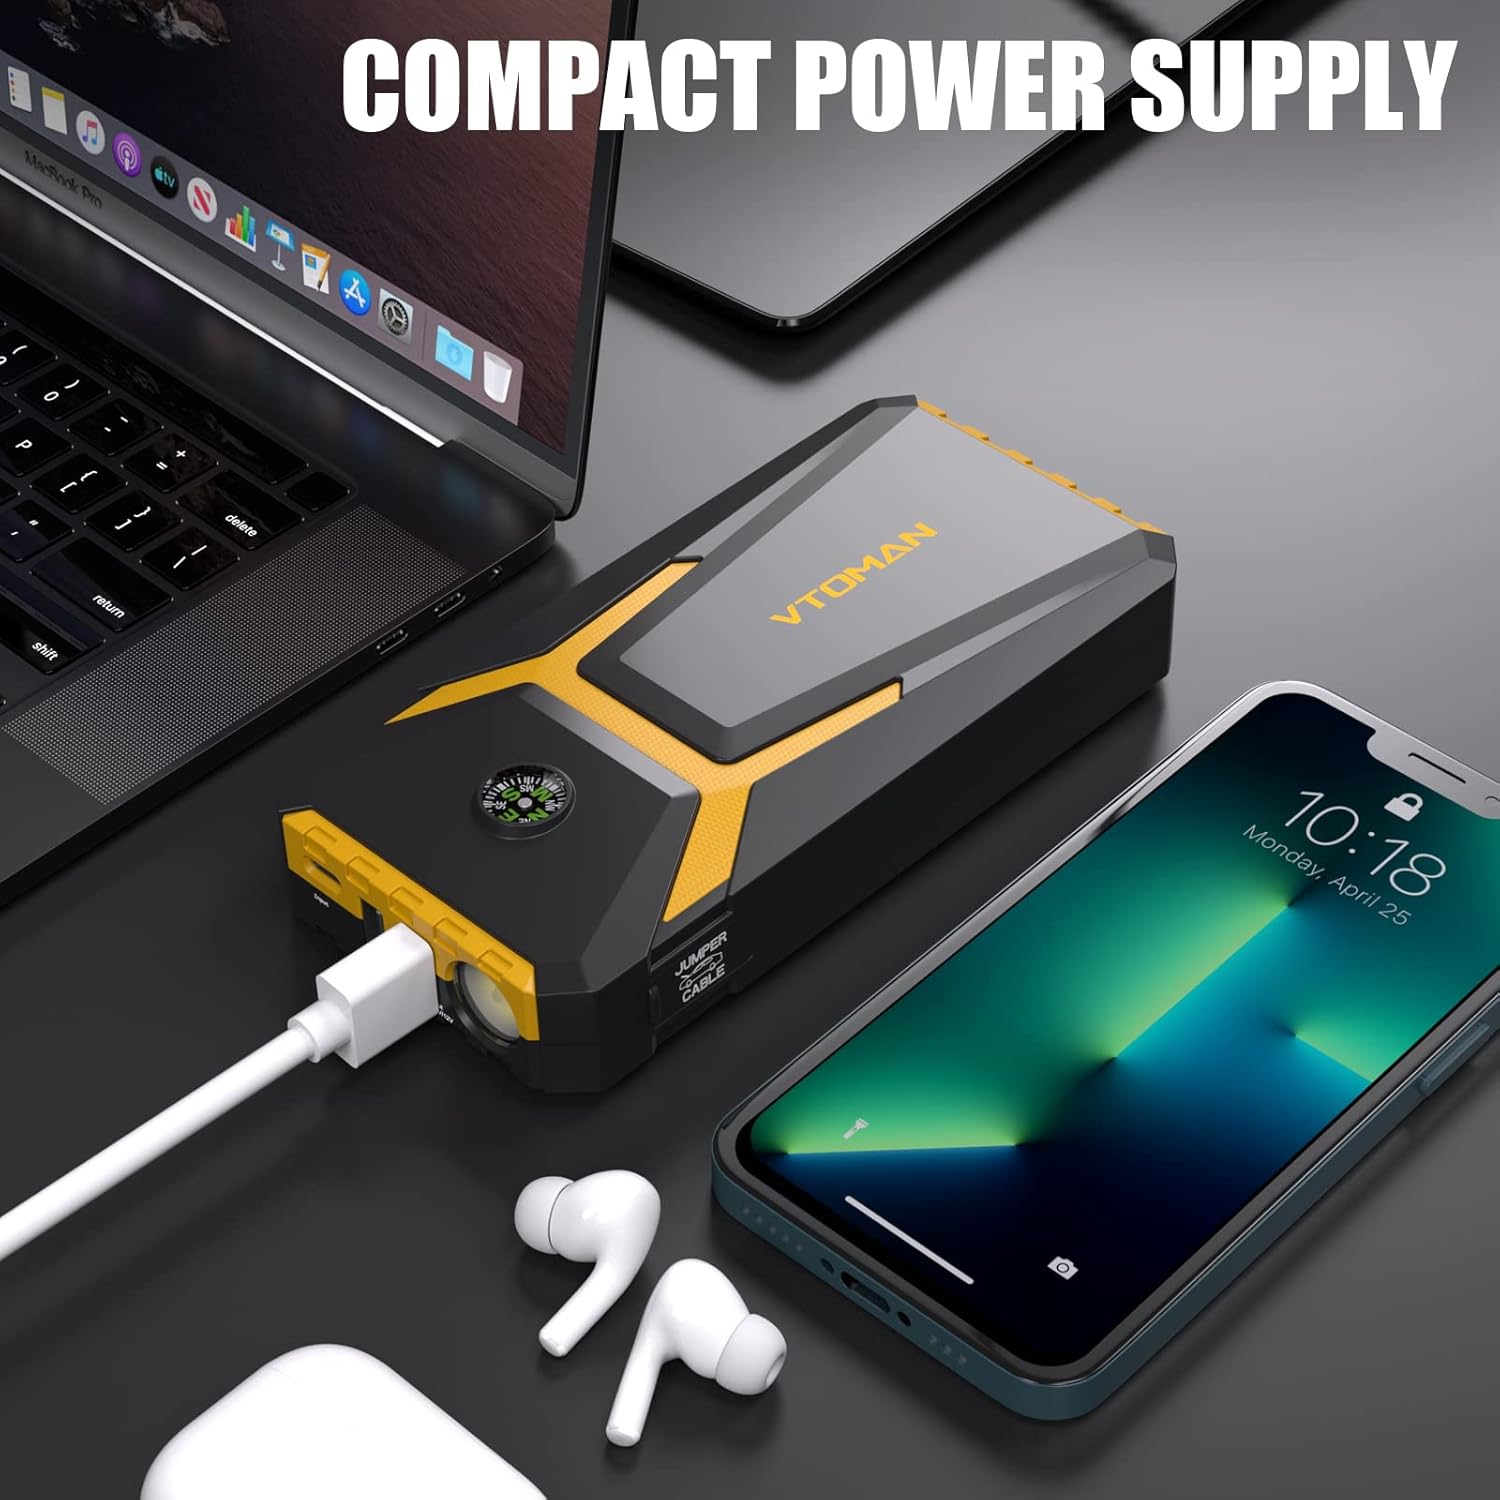
Image: The VTOMAN V6 Pro jump starter acting as a power bank, charging a smartphone and wireless earbuds, demonstrating its utility for various electronic devices.
3.4 Multipurpose LED Lights
- 400 lumens LED lights (X1) or 300 lumens (V6 Pro).
- Three modes: Normal (flashlight), Strobe, and SOS.
- Can be used for outdoor camping, roadside emergencies, power failures, and car repair.
- X1 model features a red warning light that also functions as a warning triangle.

Image: The VTOMAN V6 Pro jump starter highlighting its multipurpose LED lights, showing flashlight, SOS, and strobe modes for various emergency and utility scenarios.

Image: The VTOMAN X1 jump starter displaying its red warning light, which can function as a warning triangle for roadside safety.
3.5 Additional Features
- Built-in compass for navigation.
- Compact and portable design (approx. 0.8 lbs for V6 Pro).
- Long standby time: up to 24 months.
- Fast charging: 0-100% in approximately 3.3 hours.
- Honeycomb heat dissipation design for enhanced safety and service life.
- Operates in extreme temperatures: -4°F to 140°F.

Image: A close-up of the VTOMAN X1 jump starter, highlighting its honeycomb heat dissipation design, which improves safety performance by 30% and promotes a 50% longer service life.

Image: The VTOMAN X1 jump starter depicted in both hot (140°F) and cold (-4°F) environments, illustrating its robust performance across a wide temperature range.
4. Safety Information
The VTOMAN jump starters are equipped with an Intelligent Protection System (LifeBMS) and smart jumper cables to ensure safe operation. These protections include:

Image: Icons illustrating the 10 advanced safety protections: Over-Charge, Over-Current, Short-Circuit, Reverse-Polarity, Low-Temp, High-Temp, Over-Voltage, Over-Load, Spark-Proof, and Reverse-Charge.
- Over-Charge Protection: Prevents battery damage from excessive charging.
- Over-Current Protection: Safeguards against current surges.
- Short-Circuit Protection: Automatically cuts off power in case of a short circuit.
- Reverse-Polarity Protection: Prevents damage if cables are connected incorrectly.
- Low-Temp Protection: Ensures safe operation in cold conditions.
- High-Temp Protection: Prevents overheating during use.
- Over-Voltage Protection: Protects against voltage spikes.
- Over-Load Protection: Prevents damage from excessive load.
- Spark-Proof: Designed to prevent sparks during connection.
- Reverse-Charge Protection: Prevents current flow back to the jump starter from the vehicle battery.
Always read and understand the full safety instructions in the included user manual before operation.
5. Setup
5.1 Initial Charging
- Connect the provided charging cable to the jump starter's input port.
- Connect the other end of the charging cable to a suitable USB power adapter (not included).
- Charge the device until the battery indicator shows a full charge. This typically takes about 3.3 hours for a 0-100% charge.
5.2 Preparing for Use
Ensure the jump starter is fully charged before attempting to jump-start a vehicle or inflate tires.
6. Operating Instructions
6.1 Jump Starting a Vehicle
- Insert: Insert the smart jumper cable into the jump starter's designated port.
- Connect: Connect the red clamp (+) to the positive terminal of the vehicle battery and the black clamp (-) to the negative terminal. Ensure a secure connection.
- Ready: The LED indicator on the smart jumper cable will show a solid green light when the connection is correct and safe to proceed. If it shows a red light or blinks, check the connections.
- Start: Once the green light is solid, start your car engine within 30 seconds.
- Remove: After the engine starts, immediately remove the jumper clamps from the vehicle battery, then disconnect the smart jumper cable from the jump starter.

Image: A visual guide demonstrating the four steps to jump-start a vehicle: 1. Insert jumper cable into booster, 2. Connect clamps to car battery, 3. Confirm LED indicator is correct, 4. Start car engine.
6.2 Inflating Tires (X1 Model Only)
- Assemble: Screw the pump tube onto the air compressor port of the X1 jump starter.
- Connect: Connect the other end of the pump tube to the tire valve. Ensure it is securely attached.
- Setting: Use the 'M' key to select the inflation mode (PSI, BAR, KPA). Use the '+' and '-' keys to adjust the desired inflation value.
- Start: Long press the power button to begin inflation. The compressor will automatically stop when the preset pressure is reached.

Image: A visual guide demonstrating the four steps to inflate tires: 1. Assemble the tube, 2. Connect the tube to the car tire, 3. Set the inflation mode and value, 4. Long press the power button to start.
6.3 Using the LED Light
- Press the light button once for constant illumination (flashlight mode).
- Press again for strobe mode.
- Press a third time for SOS signal mode.
- Press a fourth time to turn off the light.
6.4 Charging External Devices
- Connect your device's USB charging cable to one of the USB output ports on the jump starter.
- The jump starter will automatically begin charging your device.
Video: An official VTOMAN video demonstrating the features and usage of the V6 Pro jump starter, including its jump-starting capabilities, power bank function, and LED light modes.
7. Maintenance
- Store the jump starter in a cool, dry place away from direct sunlight and moisture.
- Recharge the unit every 3-6 months, even if not used, to maintain optimal battery health and ensure the 24-month standby capability.
- Clean the exterior with a soft, damp cloth. Do not use harsh chemicals or abrasive materials.
- Inspect the jumper cables and clamps for any damage before each use.
8. Troubleshooting
| Problem | Possible Cause | Solution |
|---|---|---|
| Unit does not turn on. | Battery is completely drained. | Charge the unit fully before use. |
| Vehicle does not jump start. | Incorrect cable connection; vehicle battery too low; engine size exceeds capacity. | Ensure correct polarity (+ to +, - to -). Check battery voltage. Verify engine size is within the jump starter's specifications. |
| Air compressor not inflating (X1). | Hose not securely attached; preset pressure already reached; unit not charged. | Check hose connections. Adjust preset pressure. Ensure unit is charged. |
| LED indicator on smart cable is red/blinking. | Incorrect connection; short circuit detected. | Disconnect and re-connect clamps ensuring correct polarity. The safety features are preventing operation. |
9. Specifications
| Feature | VTOMAN X1 | VTOMAN V6 Pro |
|---|---|---|
| Peak Current | 2500A | 2000A |
| Gas Engine Rating | Up to 8.5L | Up to 7.0L |
| Diesel Engine Rating | Up to 6.0L | Up to 5.0L |
| Voltage Compatibility | 12V | 12V |
| Air Compressor | 150PSI Digital | N/A |
| USB Outputs | Yes (details in manual) | 2 USB (5V/2.4A, 5V/9V/12V) |
| Type-C Input | Yes (details in manual) | 15W |
| LED Light Lumens | 400 Lumens | 300 Lumens |
| Standby Time | Up to 24 months | Up to 24 months |
| Operating Temperature | -4°F to 140°F | -4°F to 140°F |
10. Warranty and Support
VTOMAN stands behind the quality of its products. Your purchase includes:
- 18 Months Warranty: Covers manufacturing defects and malfunctions under normal use.
- 30-Day Money-Back Guarantee: For any reason, within 30 days of purchase.
- Lifetime Technical Support: Available for the lifespan of the product.
- 24-Hour Quick Reply: Customer service inquiries are typically responded to within 24 hours.
For technical assistance or warranty claims, please contact VTOMAN customer support:
Phone: 1-888-818-9811 (US Mon. - Fri. 9 a.m. - 5 p.m. PST)
Please refer to the official VTOMAN website or your product packaging for the most up-to-date contact information.