1. Introduction
This manual provides detailed instructions for the setup, operation, and maintenance of your Goiaey GO1 Projector. Please read this manual thoroughly before using the projector to ensure proper operation and to maximize its lifespan. Keep this manual for future reference.
2. Product Overview
2.1 Key Features
- Auto Focus & Auto-Electric Lens Cap: Automatically adjusts focus and protects the lens from dust and scratches.
- Native 1080P Resolution & 490 ANSI Lumens: Delivers clear, bright images with support for 4K resolution and a 20000:1 contrast ratio.
- Auto 6D Keystone & 4P Correction: Automatically corrects image distortion, even when the projector is moved.
- 100%-50% Zoom Function: Adjusts screen size without moving the projector or compromising image quality.
- Dual-Band WiFi (2.4G & 5G) & Bluetooth 5.2: Ensures stable and fast wireless connectivity for streaming and audio.
- Wide Compatibility: Connects to smartphones, laptops, TV sticks, PS5, tablets, and TV boxes.
2.2 Product Components
Familiarize yourself with the main components of your Goiaey GO1 Projector:

Figure 2.2.1: Goiaey GO1 Projector and accessories. This image displays the projector unit, a carrying backpack, a smartphone, and a projected screen, highlighting its portability and connectivity options.

Figure 2.2.2: Rear view of the Goiaey GO1 Projector showing its input ports. The image illustrates the projector's connectivity options including AV, headphone, USB, and HDMI ports, along with examples of compatible devices such as DVD players, headphones, USB drives, smartphones, laptops, and gaming consoles.
3. Setup
3.1 Placement
Place the projector on a stable, flat surface. Ensure there is adequate ventilation around the unit. The projection distance will determine the screen size. The GO1 supports screen sizes from 50 inches up to 300 inches.

Figure 3.1.1: Illustration of projection distances and corresponding screen sizes. This image demonstrates how the projector can achieve different screen sizes (50", 100", 300") based on its distance from the projection surface, showing flexibility in setup.
3.2 Power Connection
Connect the power adapter to the projector's power input port and then plug the adapter into a standard electrical outlet (110 Volts DC).
3.3 Initial Power On and Auto Adjustments
Press the power button on the projector or remote control to turn on the device. The Goiaey GO1 features automatic focus and keystone correction for a quick and clear setup.
- Auto Focus: The projector will automatically adjust the image clarity within approximately 5 seconds.
- Auto 6D Keystone Correction: The built-in sensor and 6-way gyroscope will automatically adjust the screen to a rectangular shape, even if the projector is placed at an angle or moved.

Figure 3.3.1: Visual representation of the auto focus and correction feature. The image shows a projector casting an image onto a screen with a 'AUTO FOCUS' circle, indicating the automatic adjustment process for image clarity.
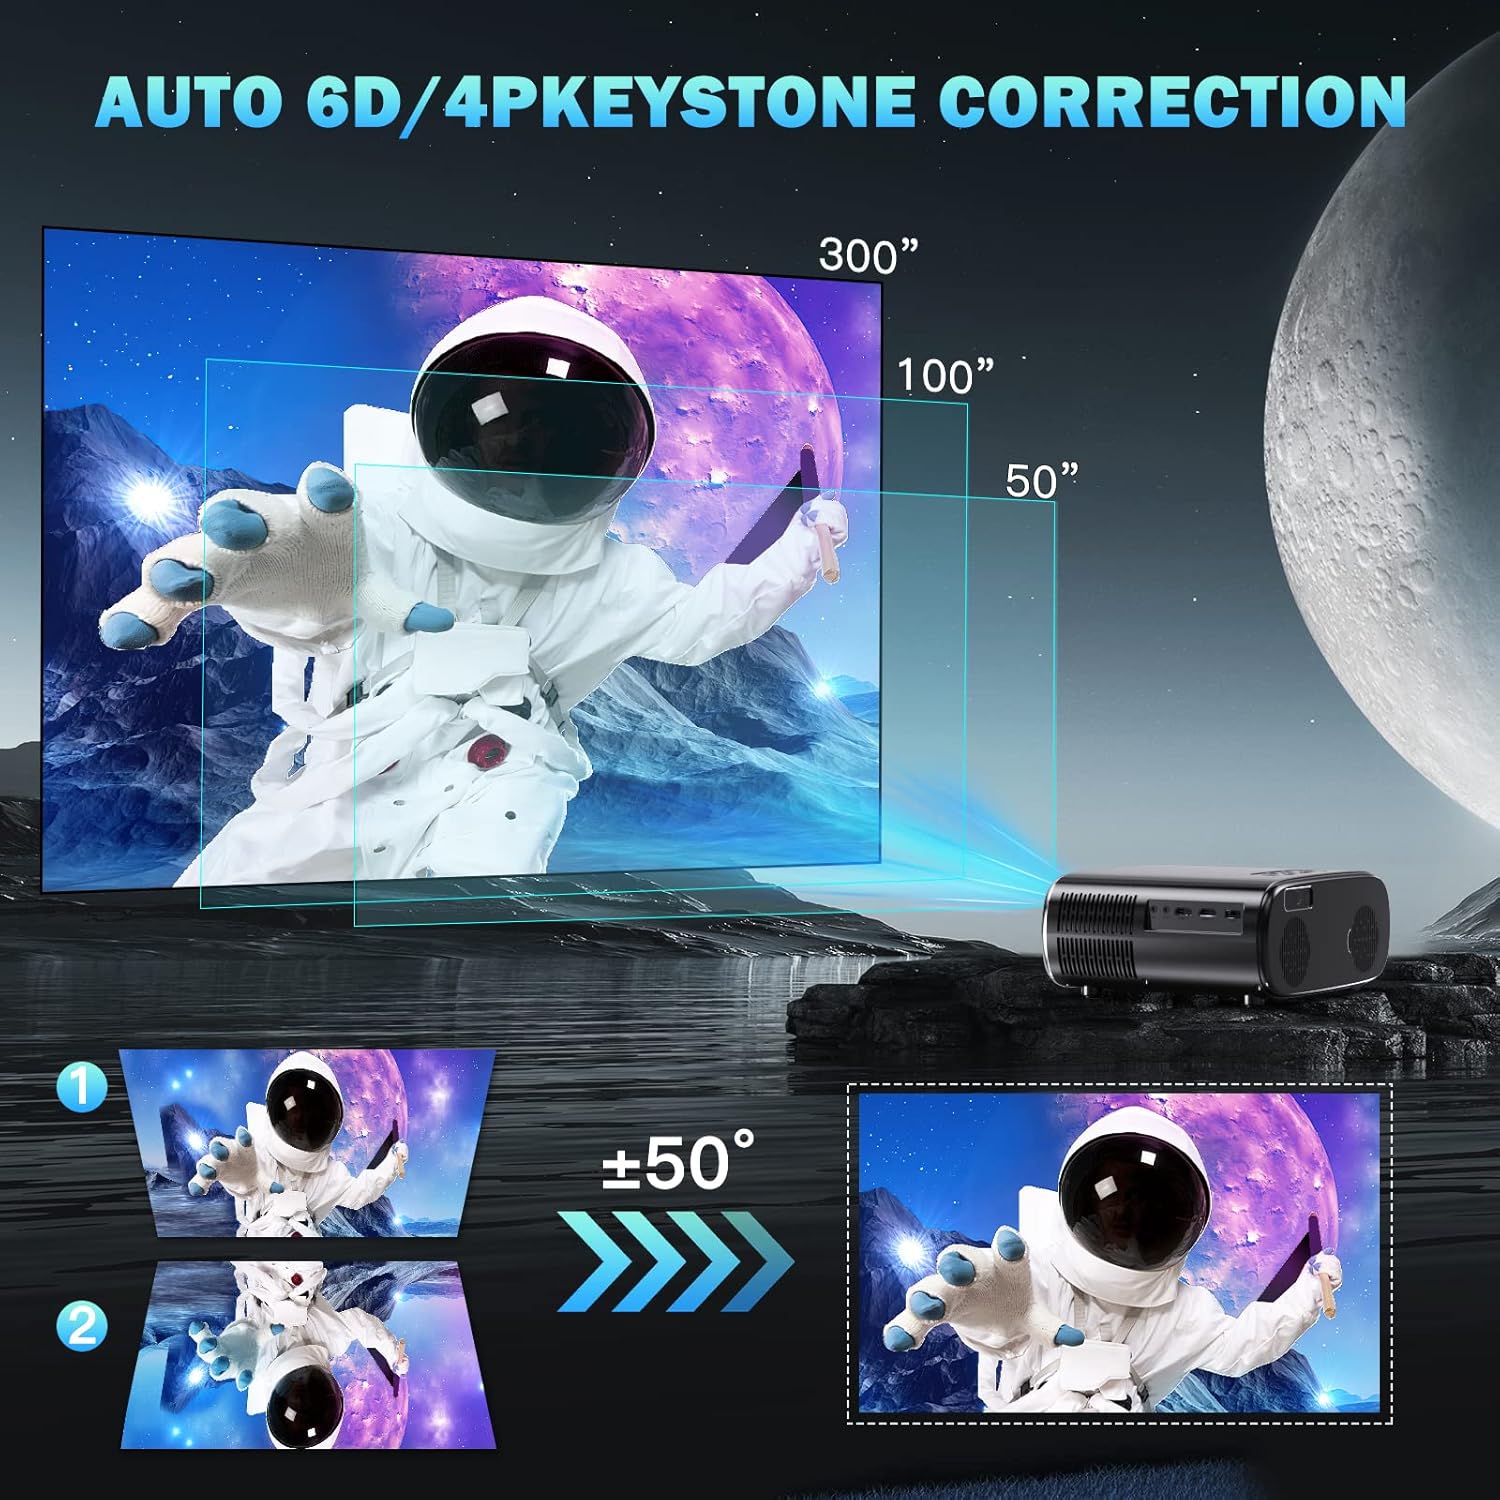
Figure 3.3.2: Demonstration of auto 6D/4P keystone correction. This image illustrates how the projector automatically corrects distorted images, showing examples of skewed projections being straightened to a perfect rectangle.
3.4 Auto-Electric Lens Cap
The projector is equipped with an auto-electric slide lens cap that opens automatically when powered on and closes when powered off, protecting the lens from dust and scratches.

Figure 3.4.1: Comparison of the projector with its lens cap open and closed. This image visually explains the auto-electric lens cap feature, showing the lens exposed when in use and covered for protection when not.
4. Operating Instructions
4.1 Basic Navigation
Use the included remote control to navigate the projector's interface. The remote allows you to select input sources, adjust settings, and control media playback.
4.2 Input Source Selection
The Goiaey GO1 Projector supports multiple input sources:
- HDMI: Connect devices such as laptops, gaming consoles (PS5), TV sticks, or Blu-ray players.
- USB: Connect USB drives for media playback.
- AV: Connect older devices using an AV cable.
Select the desired input source from the projector's main menu using the remote control.
4.3 Wireless Connectivity
4.3.1 WiFi Connection (2.4G & 5G)
The projector supports dual-band WiFi (2.4G and 5G) for high-speed wireless connections.
- Go to the 'Settings' menu on the projector.
- Select 'Network' or 'WiFi Settings'.
- Turn on WiFi and select your desired network from the list.
- Enter the password if prompted and connect.

Figure 4.3.1: Illustration of the projector's dual-band WiFi capabilities. This image shows the projector connected wirelessly to a smartphone and laptop, emphasizing the fast and stable connection provided by 5G+2.4G WiFi.
4.3.2 Bluetooth Connection (5.2)
The projector features bidirectional Bluetooth 5.2 for connecting to external audio devices like speakers or headphones.
- Go to the 'Settings' menu on the projector.
- Select 'Bluetooth Settings'.
- Turn on Bluetooth.
- Ensure your Bluetooth audio device is in pairing mode.
- Select your device from the list of available devices to pair.
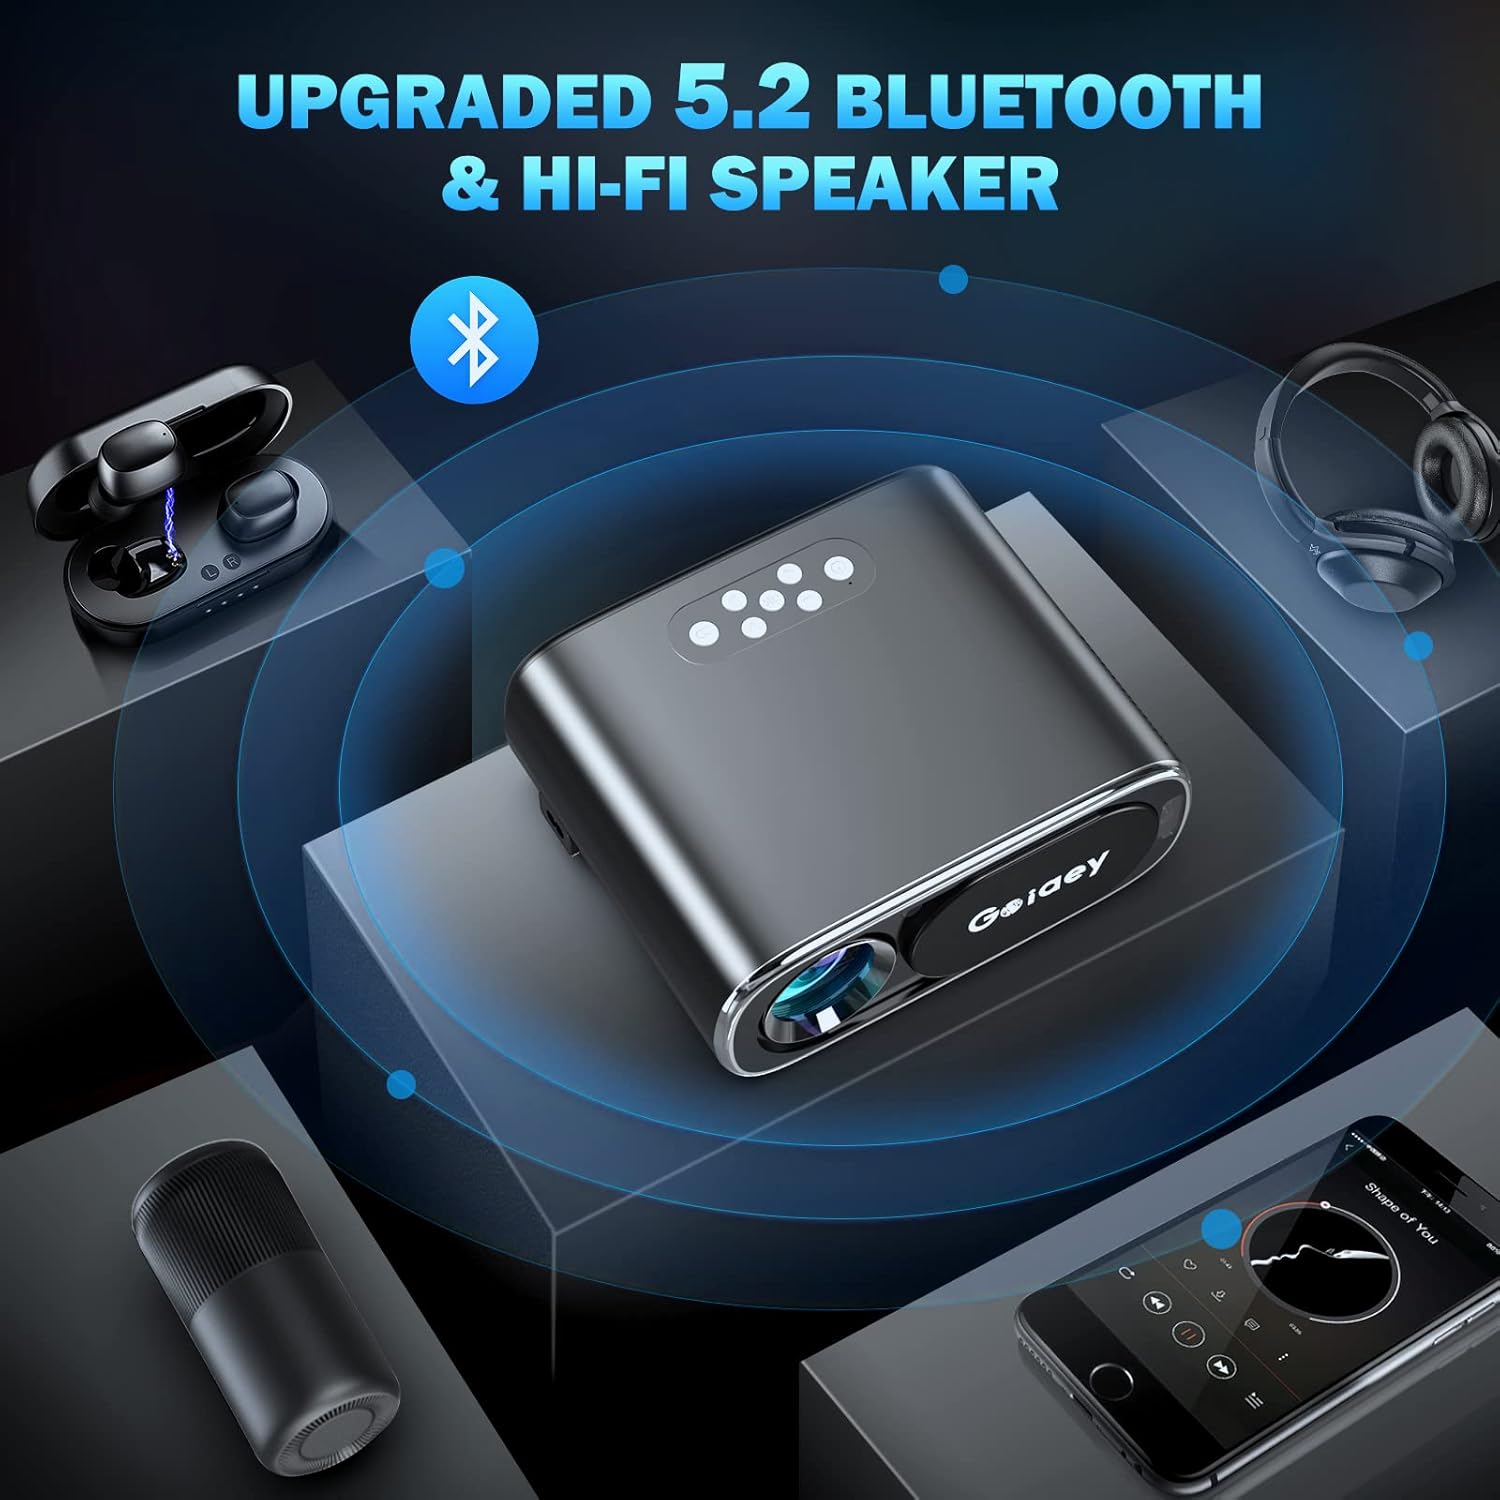
Figure 4.3.2: Visualizing Bluetooth 5.2 connectivity with the projector. The image shows the projector wirelessly connected to various audio devices such as earbuds, headphones, and a portable speaker, demonstrating its enhanced audio capabilities.
4.4 Screen Mirroring / Screencast
The projector supports screen mirroring from iOS and Android devices. Please note that due to copyright restrictions, content from streaming services like Netflix or Amazon Prime Video cannot be mirrored directly from your phone. To watch such content, connect a TV Stick or use an HDMI cable with a computer.
4.5 Zoom Adjustment
The projector offers a 100%-50% zoom function, allowing you to adjust the image size without physically moving the projector. This feature is accessible through the projector's menu or remote control.
5. Maintenance
5.1 Cleaning the Lens
Use a soft, lint-free cloth specifically designed for optical lenses to gently wipe the projector lens. Avoid using abrasive cleaners or cloths that could scratch the lens surface.
5.2 Dust Filter Cleaning
Regularly check and clean the projector's dust filters to ensure optimal airflow and prevent overheating. Refer to the specific location of the dust filter in your product diagram (if available) or consult the manufacturer's website for detailed instructions.
5.3 Storage
When not in use for extended periods, store the projector in a cool, dry place, away from direct sunlight and extreme temperatures. Use the auto-electric lens cap to protect the lens, and consider storing it in its original packaging or a protective case.
6. Troubleshooting
If you encounter issues with your Goiaey GO1 Projector, refer to the following common problems and their solutions:
| Problem | Possible Cause | Solution |
|---|---|---|
| No image projected | Power cable disconnected; Incorrect input source selected; Lens cap closed. | Ensure power cable is securely connected; Select the correct input source (HDMI, USB, etc.); Check if the auto-electric lens cap is open. |
| Image is blurry | Projector out of focus; Projection distance incorrect. | Allow auto-focus to complete; Adjust projector distance or use the digital zoom function. |
| Image is distorted (trapezoid shape) | Projector not perpendicular to screen. | Allow auto 6D keystone correction to activate; Manually adjust keystone if needed. |
| No sound | Volume too low; External audio device not connected or paired; Copyrighted content limitations. | Increase projector volume; Ensure Bluetooth device is paired or external speakers are connected; For copyrighted content, use a TV Stick or HDMI connection. |
| WiFi connection unstable | Weak signal; Interference. | Move projector closer to router; Ensure no obstructions; Try connecting to the 5G band if available. |
7. Technical Specifications
Below are the detailed specifications for the Goiaey GO1 Projector:
| Feature | Specification |
|---|---|
| Brand | Goiaey |
| Model Name | GO1 |
| Display Technology | LCD |
| Native Resolution | 1920 x 1080 Pixels (Full HD) |
| Supported Resolution | 4K |
| Brightness | 490 ANSI Lumens |
| Contrast Ratio | 20000:1 |
| Image Aspect Ratio | 4:3 Native, 16:9 Selectable |
| Connectivity Technology | WiFi (2.4G & 5G), Bluetooth 5.2, HDMI, USB 2.0, Ethernet |
| Compatible Devices | Smartphones, Laptops, TV Sticks, PS5, Tablets, TV Boxes |
| Special Features | Auto Focus, Auto 6D Keystone Correction, 100%-50% Zoom, Portable, Auto-Electric Lens Cap |
| Power Source | Corded Electric |
| Voltage | 110 Volts (DC) |
| Wattage | 110 watts |
| Product Dimensions | 25.6 x 21 x 10 cm |
| Item Weight | 2.48 kg |

Figure 7.1.1: Visual comparison of 1080P Native resolution (Goiaey) versus 720P Native resolution (Others). This image highlights the superior clarity and detail offered by the Goiaey GO1's native 1080P resolution and 490 ANSI lumens compared to lower resolution projectors.
8. Warranty and Support
Goiaey stands behind the quality of its products. Your Goiaey GO1 Projector comes with the following support:
- 3-Year Warranty: Enjoy peace of mind with a comprehensive 3-year warranty covering manufacturing defects.
- 24-Hour Customer Support: Goiaey's customer support team is ready to assist you with any issues within 24 hours.
- Lifetime Support: Benefit from lifetime technical support and satisfied solutions for your product.
For assistance, please refer to the contact information provided with your product packaging or visit the official Goiaey website.


