Introduction
This manual provides comprehensive instructions for the installation, operation, and maintenance of your Jensen JW10A 10-inch Subwoofer. Please read this manual thoroughly before using the product to ensure proper function and safety. Retain this manual for future reference.
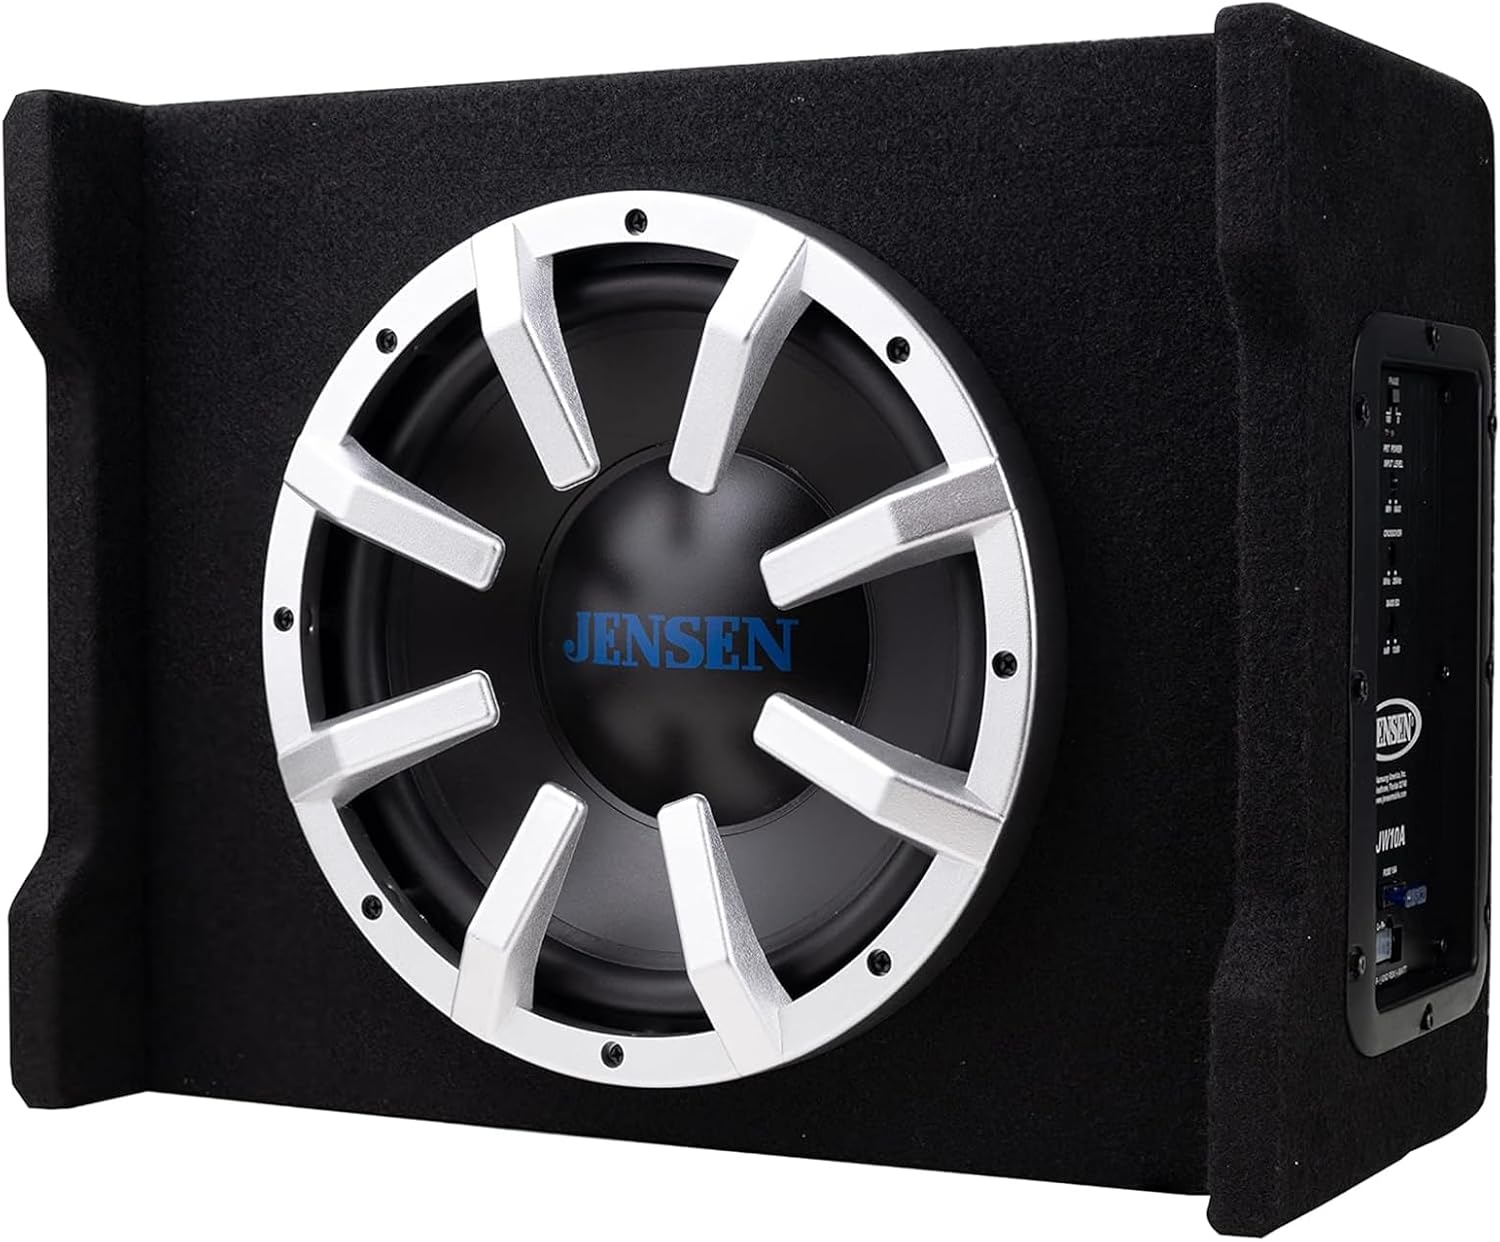
Figure 1: Jensen JW10A 10-inch Subwoofer
Safety Information
Observe the following safety precautions during installation and operation:
- Always disconnect the vehicle's negative battery terminal before making any electrical connections.
- Ensure all wiring is properly insulated and secured to prevent short circuits and damage.
- Mount the subwoofer securely to prevent movement during vehicle operation.
- Avoid placing the subwoofer in locations that obstruct airbags or driver visibility.
- Do not expose the unit to excessive moisture or extreme temperatures.
- If you are unsure about any installation steps, consult a qualified professional.
Product Overview
The Jensen JW10A is a 10-inch subwoofer integrated into a multi-mounting vented enclosure, featuring a built-in MOSFET powered amplifier for enhanced bass performance.
Subwoofer Features
- 10-inch Subwoofer
- Black polypropylene cone
- Black rubber surround
- 2-inch Voice coil
Enclosure Features
- Durable carpeted enclosure with reinforced construction
- Vented design for increased output efficiency and deeper bass
- Multi-mounting capability
Control Panel Overview

Figure 2: Rear Control Panel
The control panel on the rear of the enclosure provides access to power connections, input options, and audio adjustments. Key controls include PHASE, INPUT LEVEL, CROSSOVER, and BASS EQ.
Setup and Installation
Proper installation is crucial for optimal performance and safety. Follow these steps carefully.
Mounting Considerations
The JW10A is designed for multi-mounting, allowing flexible placement within your vehicle. Ensure the chosen location is secure, does not obstruct vehicle operation, and allows for adequate ventilation around the amplifier's control panel to prevent overheating.

Figure 3: Side Profile of the Enclosure
Wiring Connections
Refer to Figure 2 (Rear Control Panel) for connection points.
- Power Connection (BATT+): Connect a fused power wire (minimum 10-gauge recommended) directly from the vehicle's positive battery terminal to the BATT+ terminal on the subwoofer. Ensure the fuse is located within 18 inches of the battery.
- Remote Turn-On (REM): Connect a remote turn-on wire from your head unit's remote output to the REM terminal. This will turn the subwoofer on and off with your head unit.
- Ground Connection (GND): Connect a ground wire (minimum 10-gauge recommended) from the GND terminal to a clean, unpainted metal surface on the vehicle chassis. Ensure a solid, low-resistance connection.
- Audio Input:
- RCA Inputs (L-R): If your head unit has RCA pre-outs, connect RCA cables from the head unit's subwoofer or full-range outputs to the L-R RCA input jacks on the subwoofer.
- Speaker Level Inputs: If your head unit does not have RCA pre-outs, use the provided speaker level input harness. Connect the speaker wires from your head unit's rear speakers to the corresponding inputs on the harness, then plug the harness into the subwoofer's speaker level input port.
Operating Instructions
Once installed, adjust the subwoofer's settings for optimal audio performance.
Initial Power On
After all connections are made and verified, reconnect the vehicle's negative battery terminal. Turn on your head unit. The subwoofer should power on automatically via the remote turn-on wire.
Adjusting Controls
- PHASE (0°/180°): This switch adjusts the phase of the subwoofer's output relative to the main speakers. Set it to 0° or 180° to achieve the best bass response and blend with your vehicle's audio system. Experiment with both settings to find the one that sounds most cohesive.
- INPUT LEVEL (MIN/MAX): This control matches the input sensitivity of the subwoofer to the output level of your head unit. Start with the control at MIN, then slowly increase it until you hear distortion, then back off slightly. This prevents clipping and ensures a clean signal.
- CROSSOVER (50Hz-250Hz): This is a low-pass filter that determines the maximum frequency the subwoofer will reproduce. Adjust this to blend the subwoofer's output with your main speakers. A common starting point is around 80-100Hz, but this may vary based on your vehicle and speaker setup.
- BASS EQ (0dB/12dB): This control provides a bass boost at a specific frequency. Use this sparingly to enhance low-frequency impact. Start at 0dB and increase gradually if desired, being mindful of potential distortion.
Maintenance
Regular maintenance ensures the longevity and performance of your subwoofer.
- Cleaning: Use a soft, dry cloth to wipe down the enclosure and control panel. Avoid using harsh chemicals or abrasive cleaners.
- Inspection: Periodically check all wiring connections for tightness and corrosion. Ensure the subwoofer is still securely mounted.
- Ventilation: Ensure the amplifier's control panel area has adequate airflow to prevent overheating, especially during extended use.
Troubleshooting
If you encounter issues with your Jensen JW10A subwoofer, refer to the following table for common problems and solutions.
| Problem | Possible Cause | Solution |
|---|---|---|
| No sound from subwoofer | No power; Remote wire not connected; RCA/speaker inputs incorrect; Blown fuse | Check power, ground, and remote connections. Verify input signal. Check fuse on power wire. |
| Distorted sound | Input level too high; Crossover set incorrectly; Poor quality audio source | Reduce INPUT LEVEL. Adjust CROSSOVER. Ensure head unit output is clean. |
| Subwoofer overheats and shuts off | Insufficient ventilation; Input level too high; Prolonged high-volume use; Improper impedance load | Ensure adequate airflow around the amplifier. Reduce INPUT LEVEL. Allow unit to cool. Verify wiring. Note: A break-in period of approximately 15 hours at low power is recommended for new subwoofers. |
| Weak or muddy bass | PHASE setting incorrect; Crossover too low; Input level too low | Toggle PHASE switch. Increase CROSSOVER frequency. Increase INPUT LEVEL. |
Specifications
Detailed technical specifications for the Jensen JW10A subwoofer.
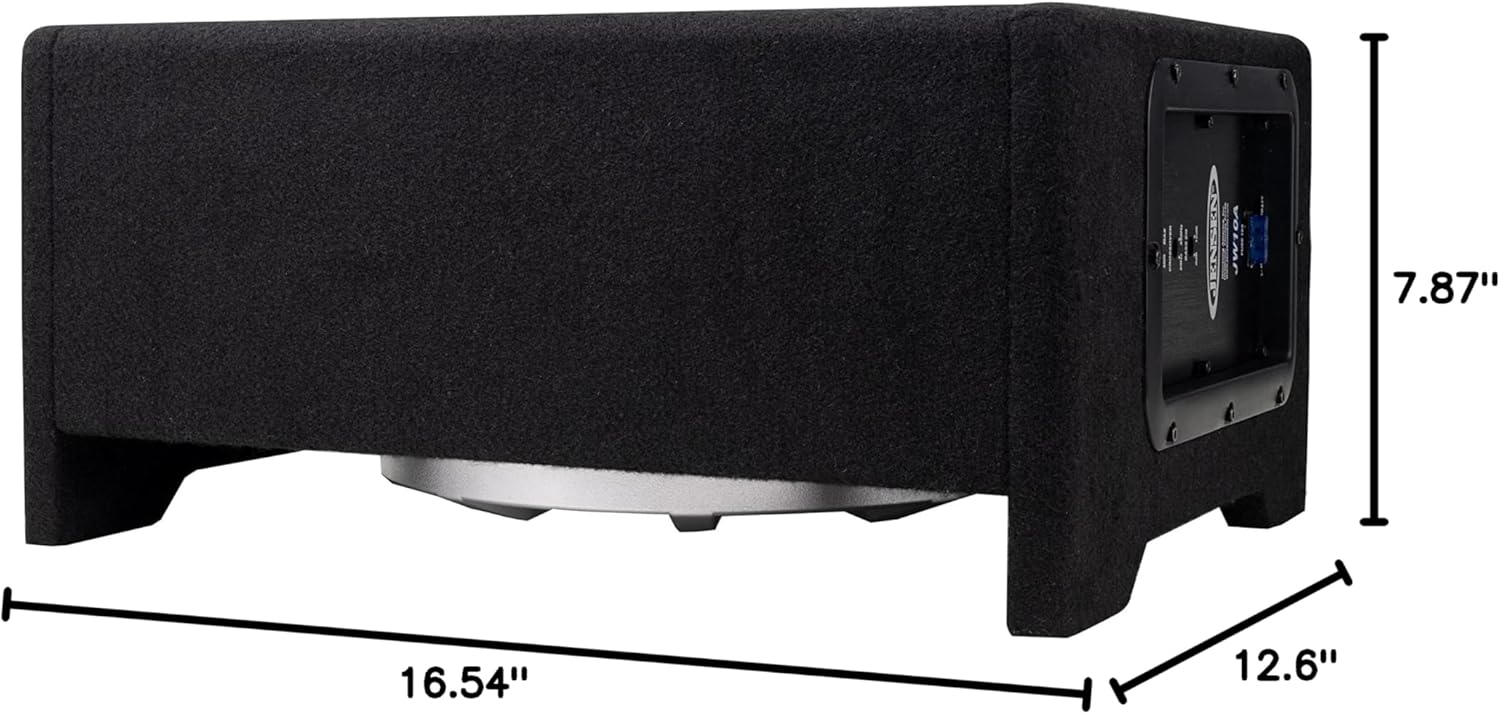
Figure 4: Product Dimensions
| Feature | Specification |
|---|---|
| Model Name | JW10A |
| Speaker Type | Subwoofer |
| Subwoofer Diameter | 10 Inches |
| Maximum Output Power | 300 Watts |
| RMS Power Output | 100 Watts |
| Sensitivity | 88dB |
| Frequency Response | 40-250Hz |
| Nominal Impedance | 4 Ohms |
| Product Dimensions (D x W x H) | 7.87" x 16.54" x 12.6" |
| Item Weight | 14.11 pounds (225.76 Ounces) |
| Connectivity Technology | Wired |
| Power Source | Corded Electric |
Warranty Information
Jensen offers a 2-year standard warranty on this product. You can extend this to a 3-year warranty by registering your product on Jensenmobile.com. Please retain your proof of purchase for warranty claims.
Customer Support
For technical assistance, troubleshooting, or warranty inquiries, please visit the official Jensen website or contact their customer service department. You can find more information and support resources at Jensenmobile.com.


