1. Introduction
This manual provides essential information for the assembly, operation, maintenance, and troubleshooting of your IKEA PLATSA/SMÅSTAD wardrobe. Please read these instructions carefully before beginning assembly or use to ensure safe and correct installation and functionality.
The PLATSA/SMÅSTAD wardrobe is designed as a versatile storage solution, particularly suitable for children's rooms. Its design allows for adjustable interior components to adapt as a child grows, and it is deep enough to accommodate adult-sized hangers.

Image 1: The IKEA PLATSA/SMÅSTAD wardrobe in a typical room setting.
2. Safety Information
- Wall Fastening: It is crucial to secure the wardrobe to the wall using the provided anti-tip device. This prevents the furniture from tipping over, which can cause serious or fatal crushing injuries. Different wall materials require different types of fastening devices. Use fastening devices suitable for the walls in your home.
- Assembly: Assemble the product on a soft, clean surface to prevent scratches. Ensure all fittings are tightened securely.
- Supervision: Children should not be allowed to climb on or play with the wardrobe.
- Weight Distribution: Distribute weight evenly on shelves and in drawers to maintain stability.
3. Setup and Assembly
Assembly of the PLATSA/SMÅSTAD wardrobe requires two people. Please ensure all parts are present before starting.
3.1. Tools Required
- Screwdriver (Phillips head)
- Hammer
- Measuring tape
- Level
- Drill (for wall fastening)
3.2. Assembly Steps (General Guide)
- Unpack and Identify Parts: Carefully unpack all components and compare them with the parts list in the separate assembly guide (not included in this document but provided with the product packaging).
- Assemble the Frame: Connect the side panels, top, and bottom panels using the provided dowels and cam locks. Ensure all connections are tight and the frame is square.
- Attach the Back Panel: Slide or nail the back panel into the grooves or onto the back of the frame. This adds stability to the structure.
- Install Interior Fittings: Insert shelves, hanging rails, and any other interior organizers into the pre-drilled holes. Adjust their positions according to your storage needs.
- Mount the Doors: Attach the hinges to the doors and then to the wardrobe frame. Adjust the hinges to ensure the doors align correctly and close smoothly.
- Attach Handles/Knobs: Secure the chosen handles or knobs to the doors.
- Secure to Wall: Position the wardrobe in its desired location. Using the anti-tip device, mark and drill holes in the wall. Secure the wardrobe to the wall using appropriate fasteners. This step is critical for safety.
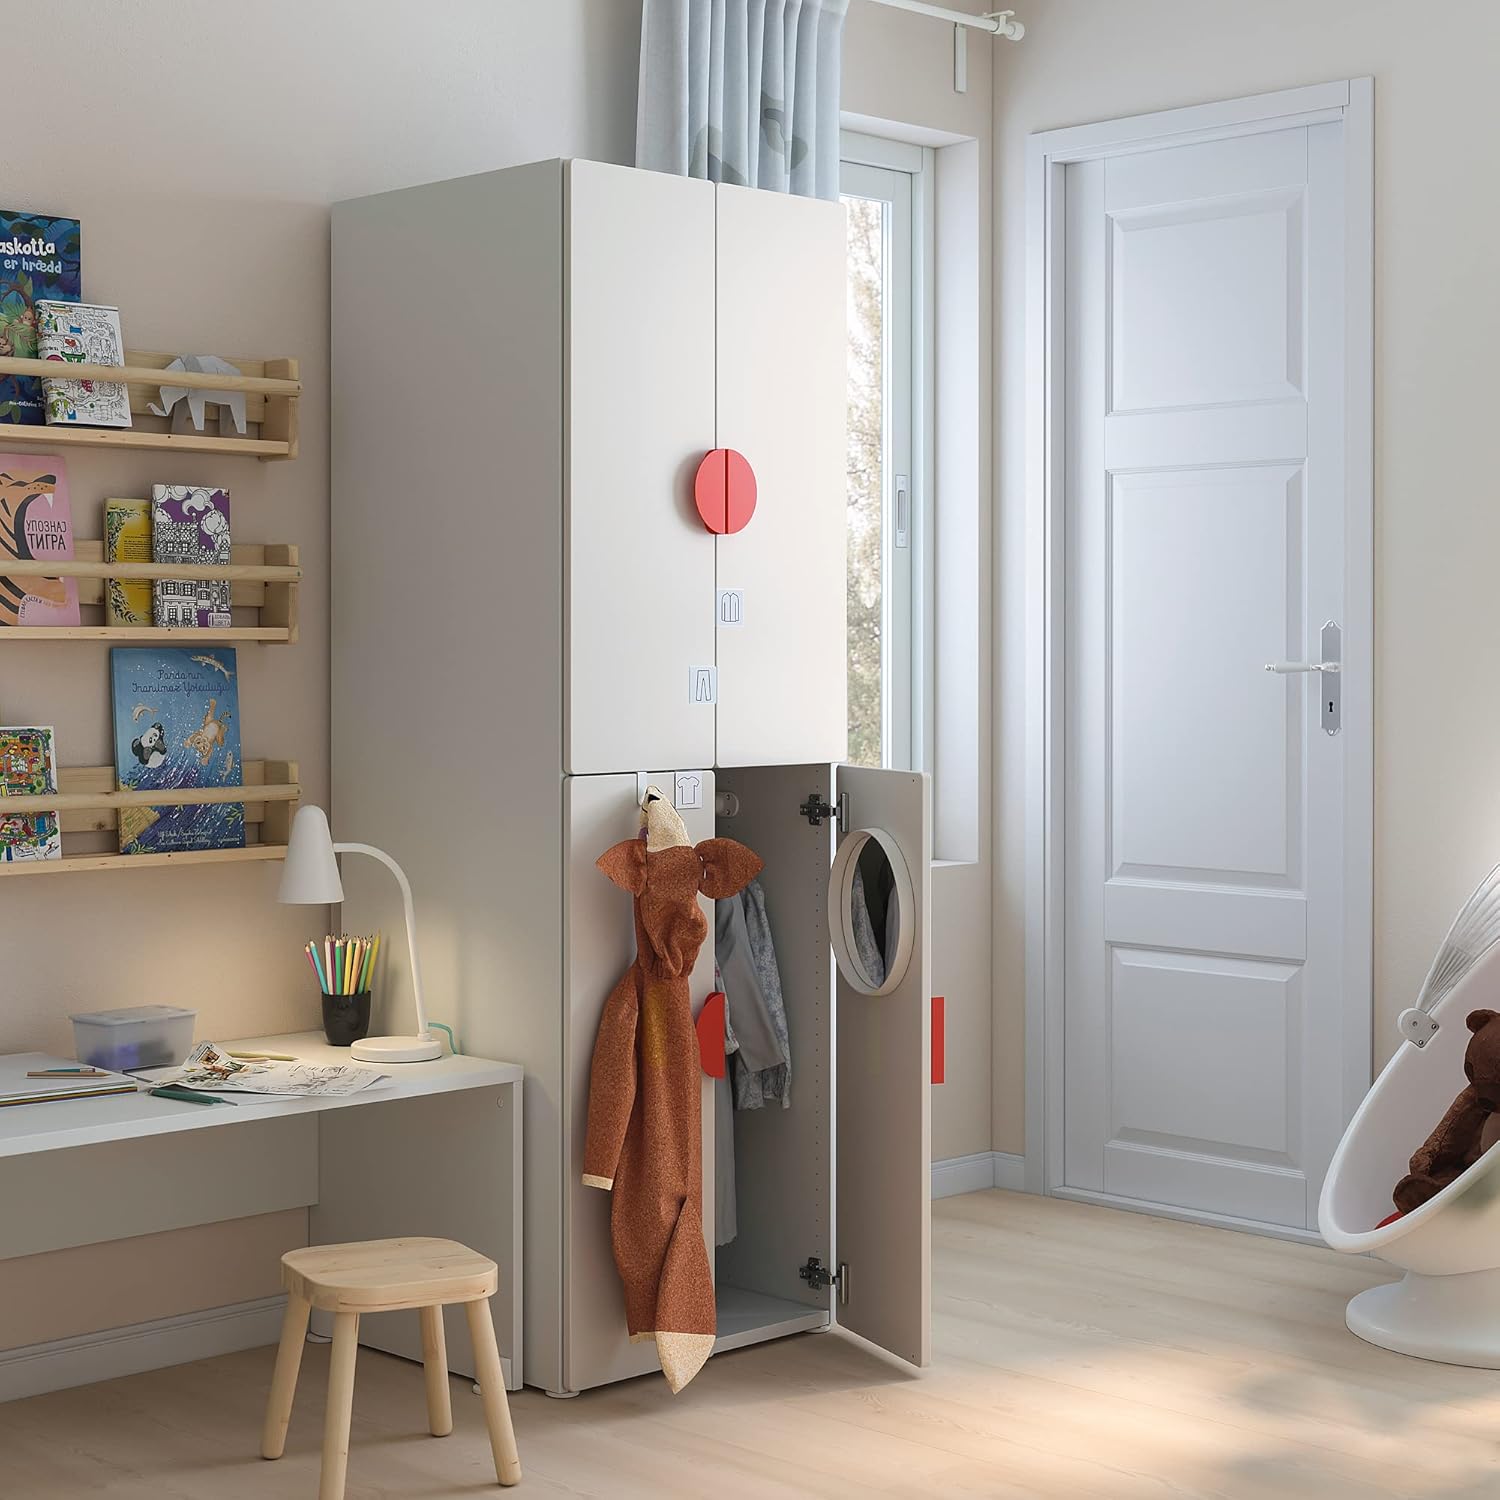
Image 2: The PLATSA/SMÅSTAD wardrobe with an open door, showing interior storage possibilities.
4. Usage and Operation
The PLATSA/SMÅSTAD wardrobe is designed for easy use and adaptability.
- Opening/Closing Doors: Gently pull the handles to open the doors. Push them firmly to close. Avoid slamming the doors to prevent damage to hinges and the frame.
- Adjusting Interior: Shelves and hanging rails can be repositioned by removing them from their current supports and placing them in different pre-drilled holes. Ensure all supports are securely inserted before placing items on shelves.
- Weight Capacity: Do not overload shelves or hanging rails beyond their intended capacity. Refer to the specific assembly guide for detailed weight limits if available.

Image 3: Detail of the wardrobe, illustrating how accessories can be integrated.
5. Care and Maintenance
Proper care will extend the life and appearance of your wardrobe.
- Cleaning: Wipe clean with a cloth dampened in a mild cleaner. Wipe dry with a clean cloth. Avoid using abrasive cleaners or strong chemicals, as these can damage the engineered wood surface.
- Periodic Checks: Regularly check that all assembly fittings are tightened and re-tighten them as necessary. This helps maintain the stability and safety of the wardrobe.
- Environmental Conditions: Avoid placing the wardrobe in direct sunlight or near heat sources, which can cause discoloration or warping.

Image 4: Close-up of the wardrobe's engineered wood door panel.
6. Troubleshooting
- Wobbly Wardrobe: Ensure all cam locks and screws are fully tightened. Verify that the back panel is correctly installed and secured. Check if the wardrobe is level on the floor; use furniture pads if necessary.
- Doors Not Closing Properly: Adjust the hinges. Most IKEA hinges allow for vertical, horizontal, and depth adjustments using screws on the hinge plate. Refer to the hinge-specific instructions in the assembly guide.
- Scratches/Minor Damage: For minor scratches, touch-up paint or furniture markers matching the white finish can be used.
- Missing Parts: If any parts are missing upon unpacking, contact IKEA customer service immediately.
7. Specifications
| Feature | Detail |
|---|---|
| Brand | Ikea |
| Model Name | PLATSA/SMÅSTAD |
| Color | White |
| Material | Engineered Wood |
| Dimensions (Width x Depth x Height) | 60 x 57 x 181 cm (23 5/8 x 22 1/2 x 71 1/4 inches) |
| Recommended Use | Garments |
| Mounting Type | Floor Standing |
| Included Components | Shelves, 2 hanging rails |
| Number of Doors | 2 |
| Assembly Required | Yes |

Image 5: Dimensional diagram of the PLATSA/SMÅSTAD wardrobe.
8. Warranty Information
IKEA products are typically covered by a limited warranty. For specific details regarding the warranty period and terms for your PLATSA/SMÅSTAD wardrobe, please refer to the warranty information provided with your purchase receipt or visit the official IKEA website for your region. Keep your proof of purchase for any warranty claims.
9. Customer Support
If you have any questions, require assistance with assembly, or need to report missing/damaged parts, please contact IKEA customer service. You can find contact information (phone numbers, email, online chat) on your local IKEA website or by visiting an IKEA store.
For further information, please visit the official IKEA website: www.ikea.com