1. Product Overview
The FOSA 4G LTE Mobile Hotspot Device, model fosayewd8g6psg, is a portable wireless router designed to provide internet access via a SIM card. It supports 4G LTE connectivity and can accommodate 8 to 10 users simultaneously, making it suitable for home, office, or travel use. Its compact design ensures portability and ease of use.

Image 1.1: Front view of the FOSA 4G LTE Mobile Hotspot Device, displaying signal, Wi-Fi, and battery indicators.
Key Features:
- 4G LTE Connectivity: Utilizes a SIM card for internet access, providing network speed and stability.
- Portable Design: Small and lightweight, ideal for travel and mobile use.
- Multi-User Support: Connects 8 to 10 users concurrently.
- 2100mAh Battery: Integrated battery for portable operation.
- Increased Coverage: Designed to extend Wi-Fi coverage and minimize network dead zones.
2. Package Contents
Verify that all items are present in the package:
- FOSA Portable Internet Hotspot Device
- Charging Cord (USB to Micro-USB)
- User Manual
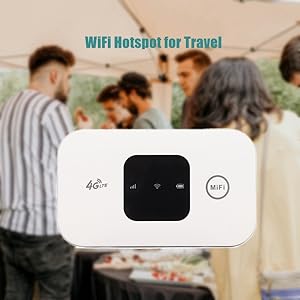
Image 2.1: Representation of package contents.
3. Setup Instructions
3.1. Installing the SIM Card and Battery
- Carefully remove the back cover of the hotspot device.
- Insert your activated 4G LTE SIM card into the designated SIM card slot. Ensure the SIM card is correctly oriented according to the diagram near the slot.
- Insert the provided 2100mAh battery into its compartment. Important: Ensure any protective plastic film covering the battery contacts is removed before insertion. Failure to do so will prevent the device from powering on or charging.
- Replace the back cover, ensuring it clicks securely into place.

Image 3.1: Hotspot device with back cover and battery removed, illustrating SIM card slot access.
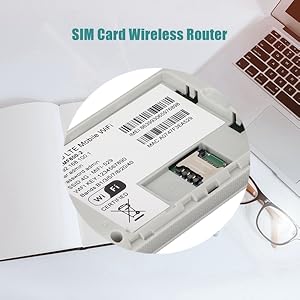
Image 3.2: Detailed view of the SIM card slot and internal product information label.
3.2. Initial Charging
Before first use, it is recommended to fully charge the device. Connect the provided USB charging cable to the Micro-USB port on the hotspot and plug the other end into a compatible USB power adapter (not included) or a computer USB port.

Image 3.3: Hotspot device connected to its charging cable.
4. Operating Instructions
4.1. Powering On/Off
- To Power On: Press and hold the power button (usually located on the side or front) until the screen illuminates and indicators light up.
- To Power Off: Press and hold the power button until the device powers down.
4.2. Connecting Devices to Wi-Fi
Once the hotspot is powered on and has established a 4G connection (indicated by the signal strength icon on the display), you can connect your devices:
- On your Wi-Fi enabled device (smartphone, laptop, tablet), open the Wi-Fi settings.
- Scan for available Wi-Fi networks.
- Locate the network name (SSID) for your FOSA hotspot. This information is typically found on a label inside the device (e.g., SSID: MiFi-529).
- Select the hotspot's SSID and enter the Wi-Fi password (WIFI KEY), also found on the internal label.
- Your device should now be connected to the internet via the hotspot.

Image 4.1: Internal label displaying the default SSID and Wi-Fi Key for network connection.
4.3. Accessing the Web Management Interface
For advanced settings, such as changing the SSID or password, you can access the web management interface:
- Connect your device to the hotspot's Wi-Fi network.
- Open a web browser and enter the IP address for the administration panel (e.g., 192.168.100.1 or 192.168.1.1). This IP address is usually printed on the internal label.
- Enter the default username and password (e.g., username: admin, password: admin). These credentials are also typically found on the internal label.
- You can now configure network settings, view connected devices, and manage other hotspot features.
Image 4.2: Illustration of multiple devices, such as laptops, smartphones, and tablets, connected to the hotspot.
5. Maintenance
5.1. Battery Care
- To maximize battery life, avoid extreme temperatures.
- Charge the device using the provided charging cable.
- For extended use, it may be necessary to keep the device plugged into a power source, as battery life can vary based on usage and signal strength.
5.2. Cleaning
Use a soft, dry cloth to clean the exterior of the device. Avoid using liquid cleaners or abrasive materials, as these can damage the device.
6. Troubleshooting
If you encounter issues with your FOSA 4G LTE Mobile Hotspot Device, refer to the following common problems and solutions:
| Problem | Possible Cause | Solution |
|---|---|---|
| Device does not power on or charge. | Protective plastic film on battery contacts. Battery not inserted correctly. Faulty charging cable. | Ensure protective plastic film is removed from battery contacts. Reinsert battery correctly. Try a different charging cable or power source. |
| No signal or 'DISCONNECTED' status. | SIM card not activated or incorrectly inserted. No network coverage. Incorrect APN settings. | Verify SIM card is active and correctly inserted. Move to an area with better network coverage. Check APN settings via the web management interface (refer to your SIM card provider for correct settings). |
| Cannot connect to Wi-Fi. | Incorrect Wi-Fi password. Hotspot not powered on. | Ensure the hotspot is powered on. Verify the Wi-Fi password (WIFI KEY) is entered correctly. Refer to the internal label for default credentials. |
| Slow internet speed. | Weak signal strength. Network congestion. Too many connected users. | Relocate the hotspot to an area with stronger signal. Reduce the number of connected devices. |
| Battery drains quickly. | High usage (streaming, multiple devices). Weak signal requiring more power. | For prolonged use, keep the device connected to a power source. Reduce simultaneous usage. |
6.1. Accessing the Digital Manual
A more detailed PDF manual may be accessible through the device's web management interface. Connect to the hotspot's Wi-Fi, navigate to the administration IP address in a web browser, and look for a 'Settings' or 'Help' section.
7. Specifications
| Feature | Detail |
|---|---|
| Model Name | fosayewd8g6psg |
| Brand | FOSA |
| Connectivity Technology | LTE, WCDMA (UMTS), Wi-Fi |
| Wireless Communication Standard | 802.11b |
| Frequency Band Class | Dual-Band |
| Special Feature | WPS |
| Compatible Devices | Personal Computer, Smartphones, Tablets |
| Recommended Uses | Home, Office, Travel |
| Operating System | Windows (for management interface access) |
| Item Weight | 3.2 ounces |
| Package Dimensions | 4.37 x 3.07 x 0.94 inches |
| Battery Capacity | 2100mAh (approximate, based on product description) |
| Max Users Supported | 8 to 10 users |
8. Warranty and Support
For warranty information and technical support, please refer to the documentation included with your purchase or contact the retailer where the product was acquired. Specific warranty terms and support channels may vary.