Introduction
Thank you for choosing the Surker 7-in-1 Multi-Functional Grooming Kit, Model RFC-5618. This versatile grooming tool is designed for precision hair cutting, beard trimming, body grooming, and more. Featuring a durable manganese steel blade and a powerful motor, it provides a comfortable and efficient grooming experience. This manual provides essential information for safe operation, maintenance, and optimal performance of your new grooming kit.
Important Safety Information
For safe use, keep the device away from the face and eyes. Do not ingest or inhale small parts. Clean properly after each use. Not suitable for unsupervised children.
Package Contents
Your Surker 7-in-1 Multi-Functional Grooming Kit includes the following items:
- Main Trimmer Unit
- T-blade Trimmer Head
- Hair Clipper Head
- Precision Trimmer Head
- Micro Shaver Head
- Nose Trimmer Head
- Beard Trimmer Head
- Body Trimmer Head
- 4 Guide Combs for T-blade (1mm, 3mm, 5mm, 7mm)
- 5 Guide Combs for Hair Clipper (3mm, 6mm, 9mm, 12mm, 15mm)
- Adjustable Precision Comb
- Body Hair Trimmer Comb (3/6/9mm)
- Cleaning Brush
- USB Charging Cable
- Storage Stand

Image: The complete Surker 7-in-1 Grooming Kit, including the main unit, various interchangeable heads, guide combs, cleaning brush, and charging stand.
Product Overview
The Surker Grooming Kit features a robust design with multiple interchangeable heads to cater to all your grooming needs. The main unit is equipped with an LED display indicating battery life and an ON/OFF button.

Image: Visual representation of the 7 interchangeable heads included in the grooming kit.
Key Features:
- T-blade Trimmer: Ideal for precise edging, detailing, and zero-gapped cuts.
- Hair Clipper: For general hair cutting and styling.
- Precision Trimmer: For fine lines and intricate designs.
- Micro Shaver: For a smooth finish on small areas.
- Nose Trimmer: Safely removes unwanted nose and ear hair.
- Beard Trimmer: Maintains beard length and shape.
- Body Trimmer: For grooming body hair.
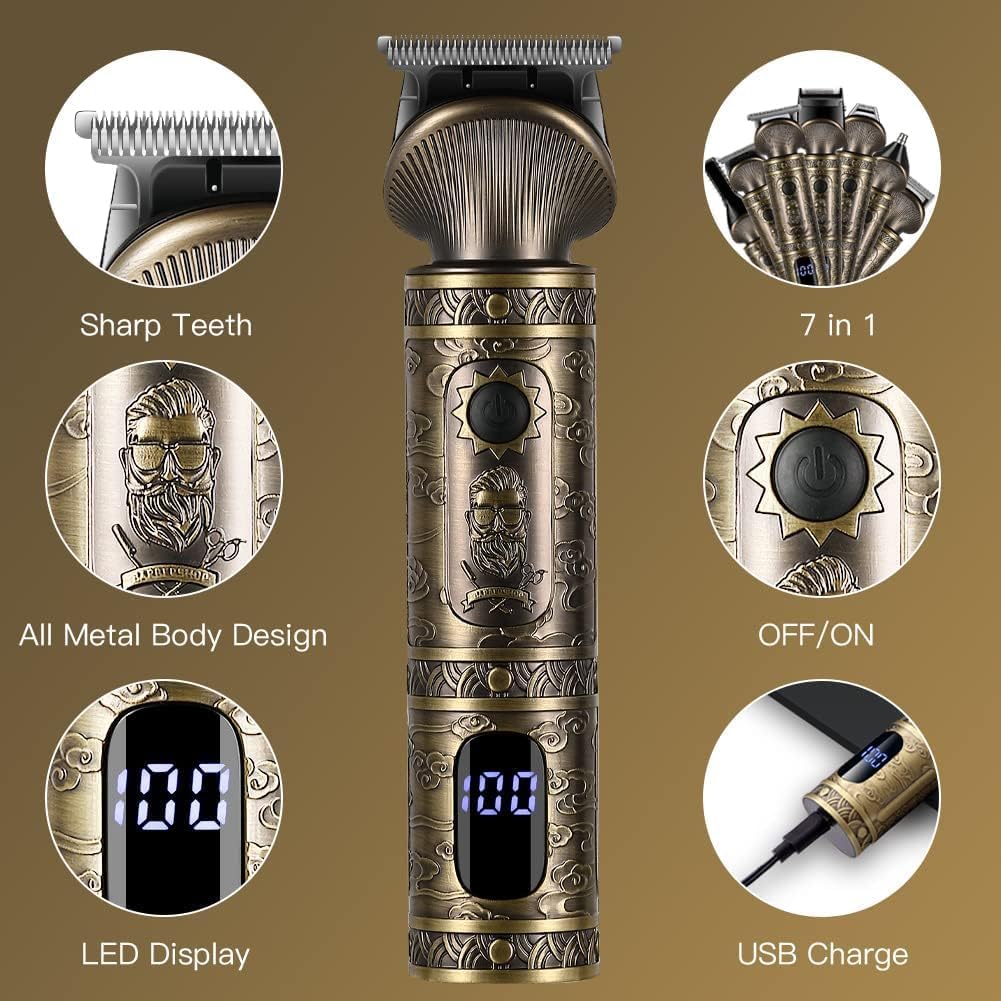
Image: Detailed view of the trimmer's features, including its sharp blades, metal construction, LED battery indicator, and USB charging capability.
Setup
Charging the Device:
- Ensure the device is turned OFF before charging.
- Connect the USB charging cable to the charging port at the bottom of the trimmer.
- Plug the other end of the USB cable into a compatible USB power source (e.g., computer, laptop, USB charger, power bank).
- The LED display will show the charging progress. A full charge takes approximately 90 minutes and provides up to 180 minutes of runtime.

Image: The trimmer being charged via a USB connection, highlighting its fast charging time and long runtime.
Attaching and Detaching Trimmer Heads:
- To attach a head: Align the desired trimmer head with the main unit and press firmly until it clicks into place.
- To detach a head: Hold the main unit firmly and gently push the trimmer head upwards or away from the unit until it releases.

Image: An array of detachable trimmer heads and guide combs, demonstrating the kit's versatility.
Operating Instructions
Always ensure your hair and skin are clean and dry before use for best results. Select the appropriate trimmer head and guide comb for your desired style.
Using Guide Combs:
- T-blade Trimmer: Use the 1mm, 3mm, 5mm, or 7mm guide combs for desired hair length. Attach the comb by sliding it onto the blade until it locks.
- Hair Clipper: Use the 3mm, 6mm, 9mm, 12mm, or 15mm guide combs for various hair lengths.
- Precision Trimmer: This head may come with an adjustable comb for specific precision lengths.
- Body Trimmer: Use the 3/6/9mm comb for body hair grooming.

Image: Different guide combs for the hair clipper and T-blade trimmer, indicating various cutting lengths.

Image: The precision comb for detailed trimming and the body hair trimmer head with its specific comb.
General Trimming Tips:
- Turn on the trimmer by pressing the ON/OFF button.
- For best results, move the trimmer against the direction of hair growth.
- Use slow, controlled movements.
- For T-blade and Hair Clipper, start with a longer guide comb and gradually reduce the length if desired.
- For the Nose Trimmer, gently insert the trimmer tip into the nostril or ear and move it in a circular motion.
- For the Micro Shaver, use short, gentle strokes on clean, dry skin.
Maintenance
Cleaning the Blades:
Regular cleaning ensures optimal performance and hygiene.
- Turn off the trimmer and detach the trimmer head.
- Use the provided cleaning brush to remove loose hairs from the blades and inside the trimmer head.
- The blades are washable. Rinse the detached blade unit under running water for a quick and hygienic clean.
- Allow the blades to air dry completely before reattaching or storing.
- For optimal performance, apply a small drop of lubricating oil (not included) to the blades periodically.
Storage:
Store the grooming kit and its accessories in a cool, dry place, away from direct sunlight and out of reach of children.
Troubleshooting
- Device not turning on: Ensure the device is fully charged. Check the USB cable and power source.
- Poor cutting performance: Clean the blades thoroughly to remove any hair buildup. Ensure the blades are properly lubricated. The battery might be low; recharge the device.
- Blades pulling hair: This usually indicates dull blades or low battery. Clean and lubricate the blades. If the issue persists, consider replacing the blade head if available, or ensure the device is fully charged.
- Excessive noise: Ensure the trimmer head is securely attached. Clean and lubricate the blades.
Specifications
| Model Number | RFC-5618 |
| Brand | SURKER |
| Blade Material | Manganese Steel |
| Power Source | Rechargeable Battery |
| Battery Type | Lithium-ion rechargeable |
| Charging Time | 90 minutes |
| Operating Time | Up to 180 minutes |
| Package Dimensions | 21.7 x 14.4 x 6.5 cm |
| Weight | 680 grams |
| Country of Origin | China |
Warranty and Support
For warranty information and customer support, please refer to the documentation provided with your purchase or contact your retailer. Keep your proof of purchase for any warranty claims.


