
1. Introduction
This manual provides essential information for the proper installation, operation, and maintenance of your Spinner Grind 20" Suspension Fork. Designed for 20-inch wheels, this fork features 50mm travel, a 1-1/8" (28.6mm) diameter steer tube, and a convenient remote lockout mechanism for versatile riding conditions. Please read this manual thoroughly before use to ensure safe and optimal performance.
2. Product Overview
The Spinner Grind suspension fork is engineered for durability and performance. Familiarize yourself with its main components:
- Fork Assembly: Includes the steer tube, crown, stanchions, and lower legs.
- Remote Lockout Lever: Allows for on-the-fly suspension lockout from the handlebar.
- Preload Adjustment Knob: Located on the fork crown, used to adjust spring stiffness.
- Brake Mounts: Compatible with both disc and V-brakes.
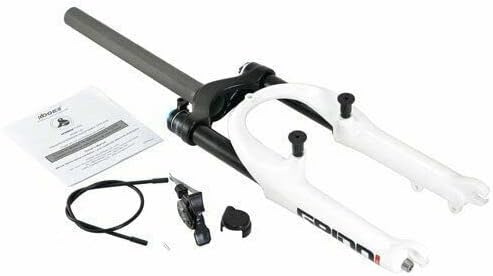
Figure 2.1: Overall view of the Spinner Grind 20" Suspension Fork, including the remote lockout lever and accompanying documentation.

Figure 2.2: Close-up of the remote lockout lever and its cable, designed for handlebar mounting to control the fork's suspension.
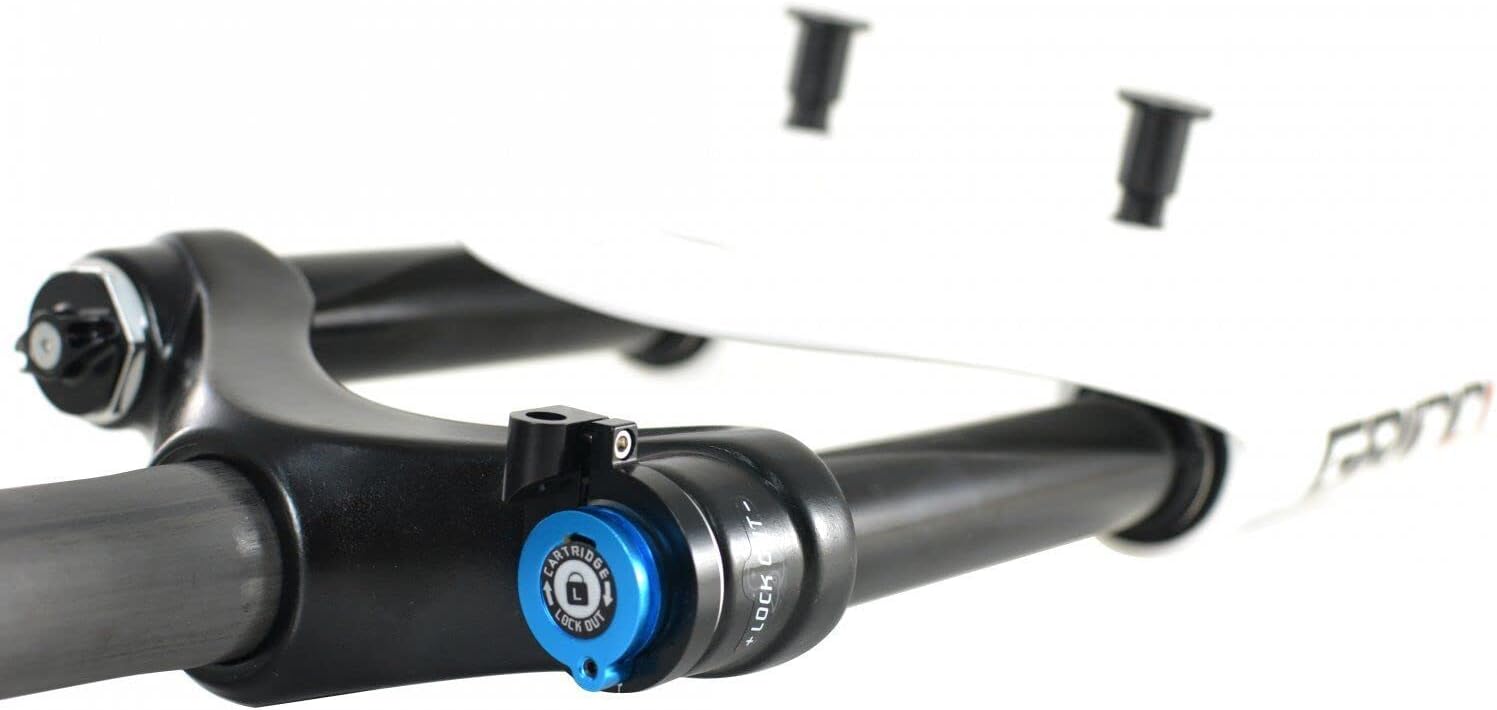
Figure 2.3: Detail of the remote lockout mechanism located on the fork crown, where the cable connects to engage or disengage the suspension.

Figure 2.4: View of the preload adjustment knob, allowing riders to fine-tune the spring stiffness of the fork.
3. Setup and Installation
Proper installation is crucial for safety and performance. If you are unsure about any steps, it is highly recommended to seek assistance from a qualified bicycle mechanic.
3.1 Unpacking and Inspection
- Carefully remove the fork from its packaging.
- Inspect the fork for any signs of shipping damage. Do not install if damage is present.
- Verify all components are included: fork assembly, remote lockout lever, and cable.
3.2 Steer Tube Preparation
- Measure and cut the steer tube to the appropriate length for your bicycle frame and stem. The steer tube has a diameter of 1-1/8" (28.6mm) and a length of 265mm.
- Install the crown race onto the base of the steer tube, ensuring it is fully seated.
3.3 Fork Installation
- Insert the steer tube through the head tube of your bicycle frame.
- Install the headset components and stem according to your headset manufacturer's instructions.
- Tighten the stem bolts to the manufacturer's specified torque settings.
3.4 Brake System Installation
- The fork supports both disc and V-brake systems. Install your chosen brake system onto the designated mounts on the fork legs.
- Ensure brake calipers/arms are properly aligned and secured.
3.5 Remote Lockout Cable Installation
- Mount the remote lockout lever on your handlebar in a comfortable and accessible position.
- Route the lockout cable from the lever to the lockout mechanism on the fork crown, ensuring smooth operation and no sharp bends.
- Secure the cable and adjust tension for proper lockout engagement and disengagement.
3.6 Wheel Installation
- Install your 20-inch wheel into the fork dropouts. The O.L.D. spacing is 100mm.
- Secure the wheel using quick-release skewers or axle bolts, ensuring it is centered and tight.
3.7 Final Safety Checks
- Before riding, double-check all bolts and fasteners for proper torque.
- Ensure the brakes are functioning correctly and the remote lockout engages and disengages smoothly.
- Perform a short test ride in a safe area to confirm proper function.
4. Operating Instructions
4.1 Remote Lockout
The remote lockout feature allows you to quickly switch the fork between a fully active suspension mode and a locked-out, rigid mode. This is particularly useful for climbing steep hills or riding on smooth surfaces where suspension is not desired, improving pedaling efficiency.
- To Lockout: Press the lever on your handlebar to engage the lockout. The fork will become rigid.
- To Unlock: Press the release button on the lever to disengage the lockout. The fork will return to its active suspension mode.
4.2 Preload Adjustment
The preload adjustment knob, located on the top of one of the fork legs, allows you to adjust the initial compression of the spring. This affects how much force is required to initiate fork travel and can be used to fine-tune the fork's feel for different rider weights and preferences.
- Turn the knob clockwise to increase preload, making the fork feel stiffer and reducing sag.
- Turn the knob counter-clockwise to decrease preload, making the fork feel softer and increasing sag.
5. Maintenance
Regular maintenance will extend the life of your Spinner Grind fork and ensure consistent performance.
- Cleaning: After each ride, especially in dirty or wet conditions, wipe down the stanchions and seals with a clean, damp cloth. Avoid high-pressure washing directly on seals.
- Inspection: Periodically inspect the fork for any signs of damage, cracks, or loose components. Check the remote lockout cable for fraying or excessive wear.
- Lubrication: Keep the stanchions clean and free of debris. A small amount of suspension-specific lubricant can be applied to the stanchions and wiped off to help keep seals supple.
- Professional Service: For internal maintenance, seal replacement, or damper service, it is recommended to consult a professional bicycle mechanic or authorized Spinner service center.
6. Troubleshooting
Here are some common issues and their potential solutions:
| Problem | Possible Cause | Solution |
|---|---|---|
| Fork not locking out completely | Cable tension too low; mechanism dirty or damaged. | Adjust cable tension at the lever or fork; clean lockout mechanism; consult a mechanic if damaged. |
| Poor suspension travel or feels too stiff | Preload set too high; internal issue. | Decrease preload using the adjustment knob; if issue persists, seek professional service. |
| Fork makes unusual noises | Loose components; lack of lubrication; internal wear. | Check all bolts (axle, brake, stem); clean and lubricate stanchions; if noise persists, professional inspection is needed. |
| Oil leakage around seals | Damaged or worn seals; excessive dirt. | Clean stanchions and seals thoroughly; if leakage continues, seals may need replacement by a professional. |
7. Specifications
| Feature | Specification |
|---|---|
| Model Name | SPINNER GRIND |
| Wheel Size Compatibility | 20 inch |
| Travel | 50mm |
| Steer Tube Diameter | 1-1/8" (28.6mm) |
| Steer Tube Length | 265mm |
| O.L.D. Spacing (Axle) | 100mm |
| Ride Height (Axle to Race) | 357.5 mm |
| Brake Type Compatibility | Disc & V-brake |
| Spring Type | Coil |
| Color | Glossy White |
| Material | Alloy |
| Approx. Weight | 2060g (2.06 kg) |
| Manufacturer | Spinner USA |
| Origin | Made in Taiwan |
8. Warranty Information
The Spinner Grind 20" Suspension Fork comes with a 1-year limited warranty from the date of purchase. This warranty covers manufacturing defects in materials and workmanship. It does not cover damage resulting from improper installation, misuse, neglect, accidents, or normal wear and tear. Please retain your proof of purchase for all warranty claims.
9. Support
For technical assistance, spare parts, or warranty inquiries, please contact your authorized Spinner dealer or the manufacturer directly. When contacting support, please have your product model number (ST1650-Z) and proof of purchase available to expedite the process.

