
1. Introduction
This manual provides essential information for the safe and efficient operation of your Hantek HDP180V8S DC Power Supply. This adjustable switching bench power supply offers a stable output of 0-80V and 0-8A, featuring a 4-digit LED display for precise voltage and current readings. It includes various protection functions and an accurate encoder adjustment knob for fine control. Please read this manual thoroughly before use and retain it for future reference.

Figure 1: Hantek HDP180V8S DC Power Supply
This image shows the front view of the Hantek HDP180V8S DC Power Supply, displaying its digital readouts for voltage and current, control knobs, and output terminals.
2. Safety Instructions
To prevent electric shock, fire, or damage to the product, observe the following safety precautions:
- Ensure the power supply is connected to a grounded outlet.
- Do not operate the device in wet or damp conditions.
- Avoid blocking ventilation openings. Ensure adequate airflow around the unit.
- Do not open the casing; there are no user-serviceable parts inside. Refer servicing to qualified personnel.
- Verify the input voltage selector (115V/230V) on the rear panel matches your local power supply before connecting the power cord.
- Always turn off the power supply and disconnect the load before making or changing connections.
- Do not exceed the maximum rated output voltage or current.
3. Product Overview
3.1 Key Features
- High Precision: 4-digit LED display with 10mV/10mA resolution.
- Constant Voltage (C.V.) & Constant Current (C.C.) Modes: Automatic switching based on load.
- Compact Design: Suitable for laboratory, school, repair, and DIY applications.
- USB Quick Charging: Standard USB output (5-12V) supporting various fast charging protocols.
- Reliable Safety: Over voltage, over current, overload, overheating, and short circuit protection.
- Low Noise: Temperature-controlled fan for quiet operation.
- Computer Control: Fully isolated serial port for software control and multi-power supply management.
- Memory Functions: 10 groups of data storage/retrieval.
- Panel Lock: One-key panel lock to prevent accidental adjustments.
3.2 Front Panel Components

Figure 2: Front Panel Layout
This diagram illustrates the various controls and indicators on the front panel of the HDP180V8S power supply.
- Voltage Display: Shows the output voltage.
- Current Display: Shows the output current.
- Save and Recall Keys (M1-M10): Used to store and recall preset voltage/current values.
- Shift Key: Used in conjunction with other keys for advanced functions.
- On/Off Key: Toggles the power output.
- Output Terminal (+/-): Connects to the load.
- Constant Voltage Output (CV) Indicator: Lights up when the unit is in Constant Voltage mode.
- Keyboard Lock Sign: Indicates when the panel controls are locked.
- Constant Current Output (CC) Indicator: Lights up when the unit is in Constant Current mode.
- Over Voltage Protection (OVP) Indicator: Lights up when OVP is active.
- Voltage Adjustment Knob: Adjusts the output voltage.
- Over Current Protection (OCP) Indicator: Lights up when OCP is active.
- Current Adjustment Knob: Adjusts the output current.
- Keyboard Lock Button: Activates/deactivates the panel lock.
- USB Charge Port: Provides quick charging output for compatible devices.
3.3 Rear Panel Components
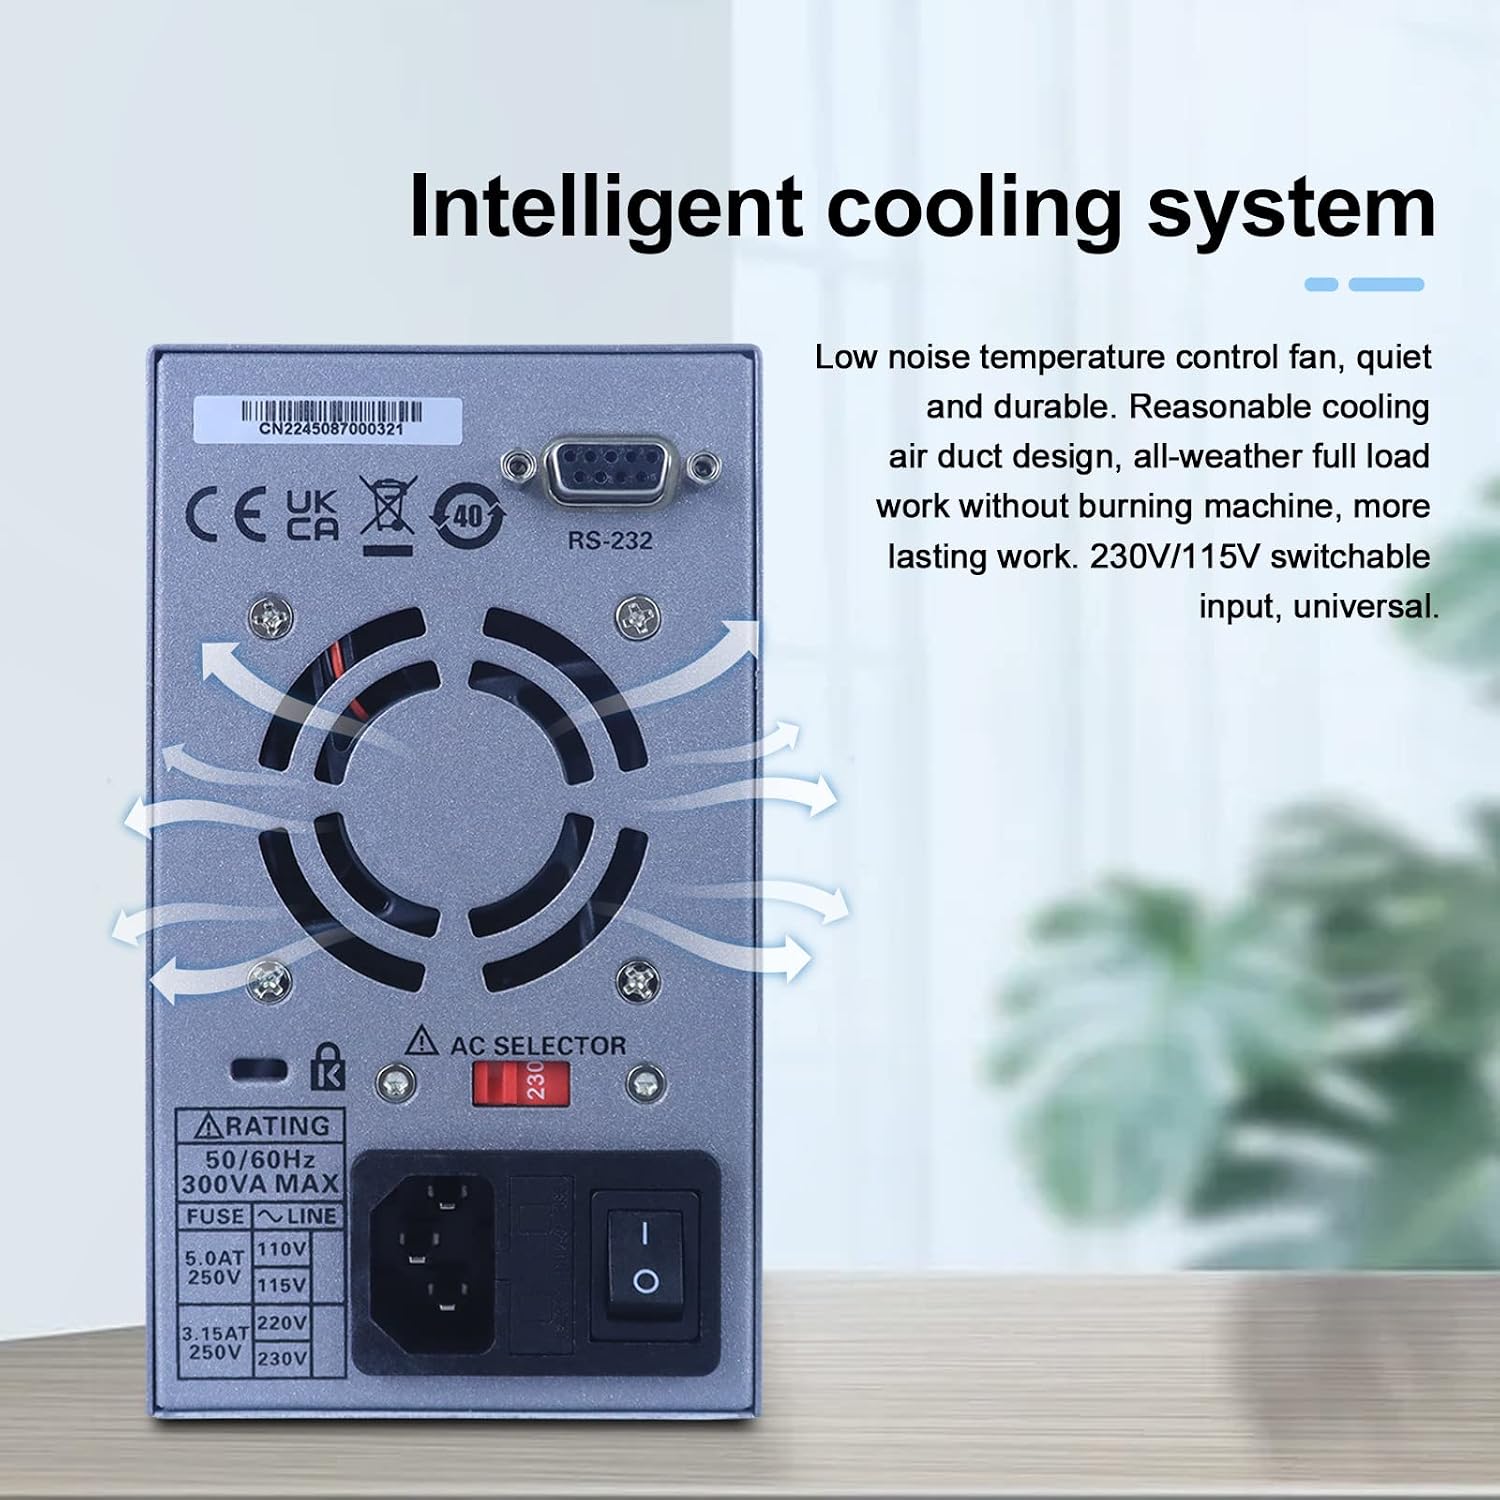
Figure 3: Rear Panel Layout
This image displays the rear panel of the power supply, including the cooling fan, AC input, and RS-232 port.
- Cooling Fan: Provides active cooling for internal components.
- AC Input Socket: For connecting the main power cord.
- Voltage Selector Switch (115V/230V): Selects the appropriate input voltage.
- RS-232 Port: For computer connectivity and control.
4. Setup
4.1 Unpacking and Inspection
Upon receiving your HDP180V8S, carefully unpack all components and inspect for any signs of damage. If any damage is found, contact your supplier immediately.

Figure 4: Packing List
The image displays the contents of the package: the Hantek HDP180V8S power supply, an input power cord, and a set of output power cords (alligator clips).
The package should include:
- 1 x Hantek HDP180V8S DC Power Supply
- 1 x Input Power Cord
- 1 set of Output Power Cords (alligator clips)
- 1 x User Manual
4.2 Power Connection
- Before connecting the power cord, ensure the voltage selector switch on the rear panel is set to match your local AC power supply (115V or 230V).
- Connect the provided input power cord to the AC input socket on the rear panel of the power supply.
- Plug the other end of the power cord into a grounded AC outlet.
4.3 Load Connection
Connect your load to the red (+) and black (-) output terminals on the front panel using the provided output power cords. Ensure proper polarity. For safety, always connect the load with the power output turned OFF.
5. Operating Instructions
5.1 Powering On/Off
Press the main power switch on the rear panel to turn the unit on. The front panel LED display will illuminate. To turn off, press the main power switch again.
5.2 Setting Voltage and Current
- With the output OFF (ensure the ON/OFF button is not illuminated), use the Voltage Adjustment Knob to set the desired output voltage. Rotate clockwise to increase, counter-clockwise to decrease.
- Use the Current Adjustment Knob to set the desired current limit. This sets the maximum current the supply will deliver.
- Press the ON/OFF button to enable the output. The display will show the actual output voltage and current.
5.3 Constant Voltage (CV) and Constant Current (CC) Modes
The HDP180V8S automatically switches between Constant Voltage (CV) and Constant Current (CC) modes depending on the load. The corresponding CV or CC indicator on the front panel will light up to show the active mode.
- CV Mode: The output voltage remains constant at the set value, and the output current varies according to the load resistance.
- CC Mode: The output current remains constant at the set limit, and the output voltage varies according to the load resistance. This occurs when the load resistance is too low for the set voltage, causing the current to reach its limit.
5.4 Memory Functions (M1-M10)
The power supply allows you to store and recall up to 10 sets of voltage and current parameters.
- To Save: Set the desired voltage and current. Press and hold the Shift key, then press one of the M1-M10 keys until the display flashes, indicating the parameters are saved.
- To Recall: Press the desired M1-M10 key. The stored voltage and current will be loaded.
5.5 USB Quick Charging Function
The front panel features a USB quick charging port. Connect your compatible device to this port for fast charging. The power supply automatically recognizes various fast charging protocols and adjusts the output voltage (5-12V) and current accordingly.

Figure 5: USB Quick Charging
This image demonstrates the HDP180V8S power supply's USB quick charging feature, with a smartphone connected to the front USB port.
5.6 Panel Lock Function
To prevent accidental changes to settings, use the panel lock function. Press the Keyboard Lock button (often labeled with a lock icon) to activate or deactivate the lock. When active, the Keyboard Lock Sign will illuminate, and most front panel controls will be unresponsive.
5.7 Computer Control
The HDP180V8S supports computer control via its RS-232 serial port. This allows for remote control, data logging, and multi-power supply management using compatible software. Refer to the software documentation for detailed instructions on installation and usage.

Figure 6: Computer Control Interface
The image shows the HDP180V8S power supply connected to a computer, demonstrating its capability for software control and managing multiple power supplies simultaneously.
6. Maintenance
6.1 Cleaning
Regularly clean the exterior of the power supply with a soft, dry cloth. Do not use abrasive cleaners or solvents. Ensure the ventilation openings are free from dust and debris to maintain optimal cooling performance.
6.2 Storage
When not in use for extended periods, store the power supply in a cool, dry environment, away from direct sunlight and extreme temperatures.
6.3 Cooling System
The HDP180V8S features an intelligent cooling system with a low-noise temperature control fan. This system ensures efficient heat dissipation, allowing for continuous operation under full load without overheating.

Figure 7: Intelligent Cooling System
This internal view highlights the cooling fan and the designed airflow path within the HDP180V8S power supply, ensuring efficient heat management.
7. Troubleshooting
| Problem | Possible Cause | Solution |
|---|---|---|
| No power/display off | Power cord not connected; Rear power switch off; Incorrect voltage selector; Blown fuse. | Check power cord connection; Ensure rear power switch is ON; Verify voltage selector setting; Replace fuse (refer to qualified personnel). |
| No output voltage/current | Output OFF; Load disconnected or faulty; OVP/OCP active. | Press ON/OFF button; Check load connections; Reduce voltage/current settings or check load for short circuit. |
| Voltage/Current cannot be adjusted | Panel lock active. | Press the Keyboard Lock button to deactivate the lock. |
| Overheating | Blocked ventilation; Excessive load. | Ensure clear airflow around the unit; Reduce load or operating time. |
8. Specifications
| Parameter | Value |
|---|---|
| Output Voltage | 0-80V |
| Output Current | 0-8A |
| Wattage | 170 watts |
| Display | 4-Digit LED (10mV/10mA resolution) |
| Input Voltage (AC) | 100-120V / 200-240V (switchable) |
| Cooling Method | Air (Temperature-controlled fan) |
| USB Quick Charge Output | 5-12V (supports various protocols) |
| Communication Interface | RS-232 |
| Protection Functions | OVP, OCP, Overload, Overheating, Short Circuit |
| Item Weight | 4.8 pounds |
| Package Dimensions | 5.9 x 5.9 x 3.2 inches |
9. Warranty and Support
Hantek products are designed for reliability and performance. This product comes with standard manufacturer support. For technical assistance, troubleshooting beyond this manual, or warranty inquiries, please contact Hantek customer support through their official channels or your point of purchase. Please have your product model number (HDP180V8S) and purchase information ready when contacting support.