
1. Introduction
This manual provides detailed instructions for the installation, operation, and maintenance of your COUGAR MX360 RGB Mid Tower PC Case. Please read this manual thoroughly before beginning installation to ensure proper setup and to maximize the performance and longevity of your system components.

Figure 1.1: Angled front view of the COUGAR MX360 RGB Mid Tower PC Case, showcasing its tempered glass side panel and integrated RGB lighting on the front panel.
2. Features
- Dynamic RGB Lighting: Integrated RGB lighting on the front panel for customizable aesthetics.
- Tempered Glass Side Panel: Provides a clear view of internal components.
- Optimized Airflow: Designed for efficient cooling with support for multiple fans and radiators.
- Versatile Storage Options: Supports multiple 3.5" HDDs and 2.5" SSDs.
- Convenient I/O Panel: Easily accessible ports including USB 3.0, USB 2.0, and audio jacks.
- Motherboard Compatibility: Supports Mini ITX, Micro ATX, and ATX motherboards.
3. Package Contents
Please verify that all components are present before proceeding with installation. The package should contain:
- COUGAR MX360 RGB Mid Tower PC Case
- Accessory Box (containing screws, standoffs, cable ties, and a user manual)
If any items are missing or damaged, please contact your retailer or COUGAR customer support.
4. Setup and Installation Guide
4.1. Preparation
Before starting, ensure you have the following:
- Phillips head screwdriver
- Anti-static wrist strap (recommended)
- Your PC components (motherboard, CPU, GPU, PSU, storage drives, RAM)
Place the case on a flat, stable surface. Remove the tempered glass side panel by unscrewing the thumb screws at the rear of the case and carefully sliding the panel off.
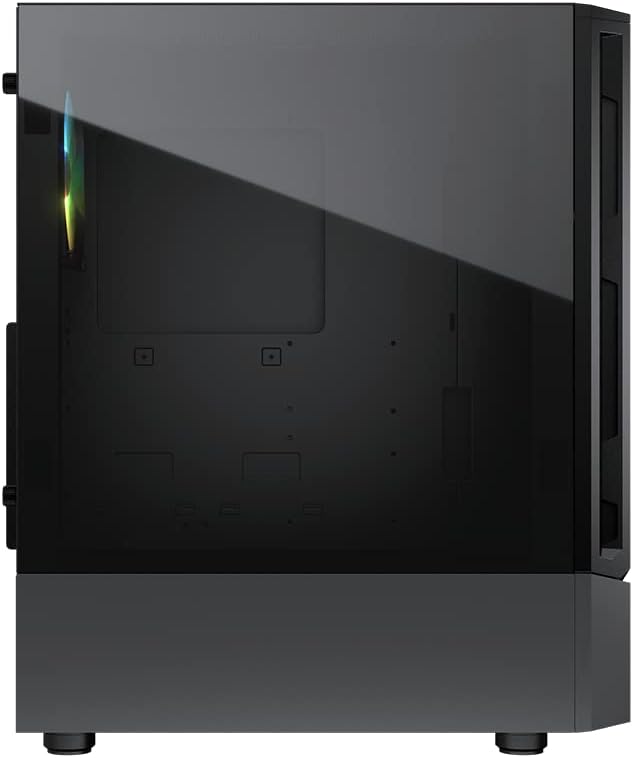
Figure 4.1: Left side view of the COUGAR MX360 RGB PC Case, showing the tempered glass panel that can be removed for component installation.
4.2. Motherboard Installation
Install the I/O shield into the rear opening of the case. Align your motherboard with the pre-installed standoffs. If your motherboard form factor (Mini ITX, Micro ATX, ATX) requires additional standoffs, install them in the appropriate holes. Secure the motherboard with the provided screws.

Figure 4.2: Interior view of the COUGAR MX360 RGB PC Case with the side panel removed, illustrating the spacious layout for component installation, including motherboard tray and fan mounts.
4.3. Power Supply Unit (PSU) Installation
The MX360 RGB supports bottom-mounted PSUs. Slide your PSU into the dedicated compartment at the bottom rear of the case. Secure it with screws from the rear of the case.
4.4. Storage Drive Installation
The case supports 2 x 3.5" drive bays and 2+1 (converted from 3.5" drive bay) 2.5" SSD trays. Install your hard drives or solid-state drives into the designated bays and secure them with the appropriate screws.
4.5. Expansion Card Installation
Remove the necessary PCIe slot covers from the rear of the case. Insert your graphics card or other expansion cards into the motherboard's PCIe slots and secure them with screws.
4.6. Cooling System Installation
The case supports various cooling configurations:
- Front: 3 x 120mm or 2 x 140mm fans. Water cooling radiators up to 360mm.
- Top: 2 x 120mm or 2 x 140mm fans. Water cooling radiators up to 240mm.
- Rear: 1 x 120mm fan. Water cooling radiators up to 120mm.
Install your chosen fans or radiators into the appropriate mounting points and connect them to your motherboard or fan controller.
4.7. Front I/O Panel Connections
Connect the front panel cables to your motherboard. These include:
- USB 3.0 (2 ports)
- USB 2.0 (1 port)
- Microphone and Audio jacks
- Power switch, Reset switch, HDD LED, Power LED
- RGB Button (for controlling integrated lighting)
Refer to your motherboard manual for the correct pin assignments.

Figure 4.3: Top I/O panel of the COUGAR MX360 RGB PC Case, featuring USB 3.0, USB 2.0, audio ports, and the power/reset buttons.
4.8. Cable Management
Utilize the cable routing cutouts and tie-down points behind the motherboard tray to organize and secure cables. Proper cable management improves airflow and aesthetics.
5. Operating the RGB Lighting
The COUGAR MX360 RGB features integrated RGB lighting on its front panel. This lighting can be controlled via a dedicated RGB button on the top I/O panel or synchronized with compatible motherboards (RGB Sync with M/B: Yes).
- RGB Button Control: Press the RGB button on the top panel to cycle through various lighting effects and colors.
- Motherboard Sync: Connect the case's RGB cable to a compatible 5V 3-pin addressable RGB header on your motherboard. Use your motherboard's RGB software to control the lighting effects.
6. Maintenance
Regular maintenance helps ensure optimal performance and longevity of your PC components.
- Dust Filters: The case includes removable dust filters (e.g., on the top and bottom). Clean these filters periodically by removing them and gently brushing or washing off accumulated dust. Ensure they are completely dry before re-installing.
- Interior Cleaning: Use compressed air to remove dust from internal components and fan blades. Ensure the system is powered off and unplugged before cleaning.
- Exterior Cleaning: Wipe the exterior surfaces with a soft, damp cloth. Avoid abrasive cleaners or solvents.
7. Troubleshooting
If you encounter issues with your PC build, consider the following common troubleshooting steps:
- No Power: Ensure all power cables (24-pin ATX, 8-pin CPU, GPU power) are securely connected. Check that the PSU switch is in the 'ON' position. Verify front panel power switch connections to the motherboard.
- Fans Not Spinning: Check fan connections to the motherboard or fan controller. Ensure fan headers are enabled in BIOS/UEFI.
- RGB Lighting Not Working: Verify the RGB cable connection to the motherboard or controller. If using motherboard sync, ensure the correct software is installed and configured. Try cycling through effects with the case's RGB button.
- Overheating: Ensure all fans are installed correctly and spinning. Check for obstructions to airflow. Clean dust filters and internal components.
For persistent issues, consult your component manuals or COUGAR customer support.
8. Specifications
The following table details the technical specifications of the COUGAR MX360 RGB Mid Tower PC Case:

Figure 8.1: Detailed specifications table for the COUGAR MX360 RGB PC Case.
| Feature | Specification |
|---|---|
| Product Name | MX360 RGB |
| Model No. | CGR-SCC6G-RGB (385CC60.0001) |
| Case Form Factor | Mid Tower |
| Motherboard Compatibility | Mini ITX, Micro ATX, ATX |
| Dimensions (WxHxD) | 210 x 460 x 378 mm (8.3 x 18.1 x 14.9 inches) |
| I/O Panel | USB 3.0 x 2, USB 2.0 x 1, Mic x 1, Audio x 1, RGB Button |
| 3.5" Drive Bay | 2 |
| 2.5" Drive Bay | 2+1 (converted from 3.5" drive bay) |
| Expansion Slots | 7 |
| Cooling Fan Support - Front | 120mm x 3 / 140mm x 2 |
| Cooling Fan Support - Top | 120mm x 2 / 140mm x 2 |
| Cooling Fan Support - Rear | 120mm x 1 |
| Pre-installed Fans - Rear | 120mm ARGB fan x 1 |
| Pre-installed Fans - Speed | 1000 ± 100 RPM |
| Pre-installed Fans - Connector | 5V 3 Pin (ARGB) / 3 Pin (Fan) |
| Maximum Number of Fans | 6 Max. |
| Water Cooling Support - Front | 360mm / 280mm / 240mm / 140mm / 120mm |
| Water Cooling Support - Top | 240mm / 120mm |
| Water Cooling Support - Rear | 120mm |
| Transparent Left Panel | Tempered Glass |
| RGB Sync with M/B | Yes |
| Max. Graphics Card Length | 315 mm (12.4 inches) |
| Max. CPU Cooler Height | 170 mm (6.7 inches) |
| Max. PSU Length | 160 mm (6.3 inches) |
Note: When installing a 360mm radiator at the front, the maximum PSU length is 140mm.
9. Warranty and Support
COUGAR products are designed and manufactured to high-quality standards. For information regarding warranty terms and conditions, please refer to the warranty card included with your product or visit the official COUGAR website. For technical support or inquiries, please contact COUGAR customer service through their official channels.