1. Introduction
Thank you for purchasing the Shanrya Digital Mirror Alarm Clock. This manual provides essential information for the proper setup, operation, and maintenance of your device. Please read these instructions carefully before use and retain them for future reference.

Figure 1: Front view of the Shanrya Digital Mirror Alarm Clock displaying 4:30 in red LED digits.
2. Setup
2.1 Package Contents
- Shanrya Digital Mirror Alarm Clock
- USB Power Cable
- User Manual (this document)
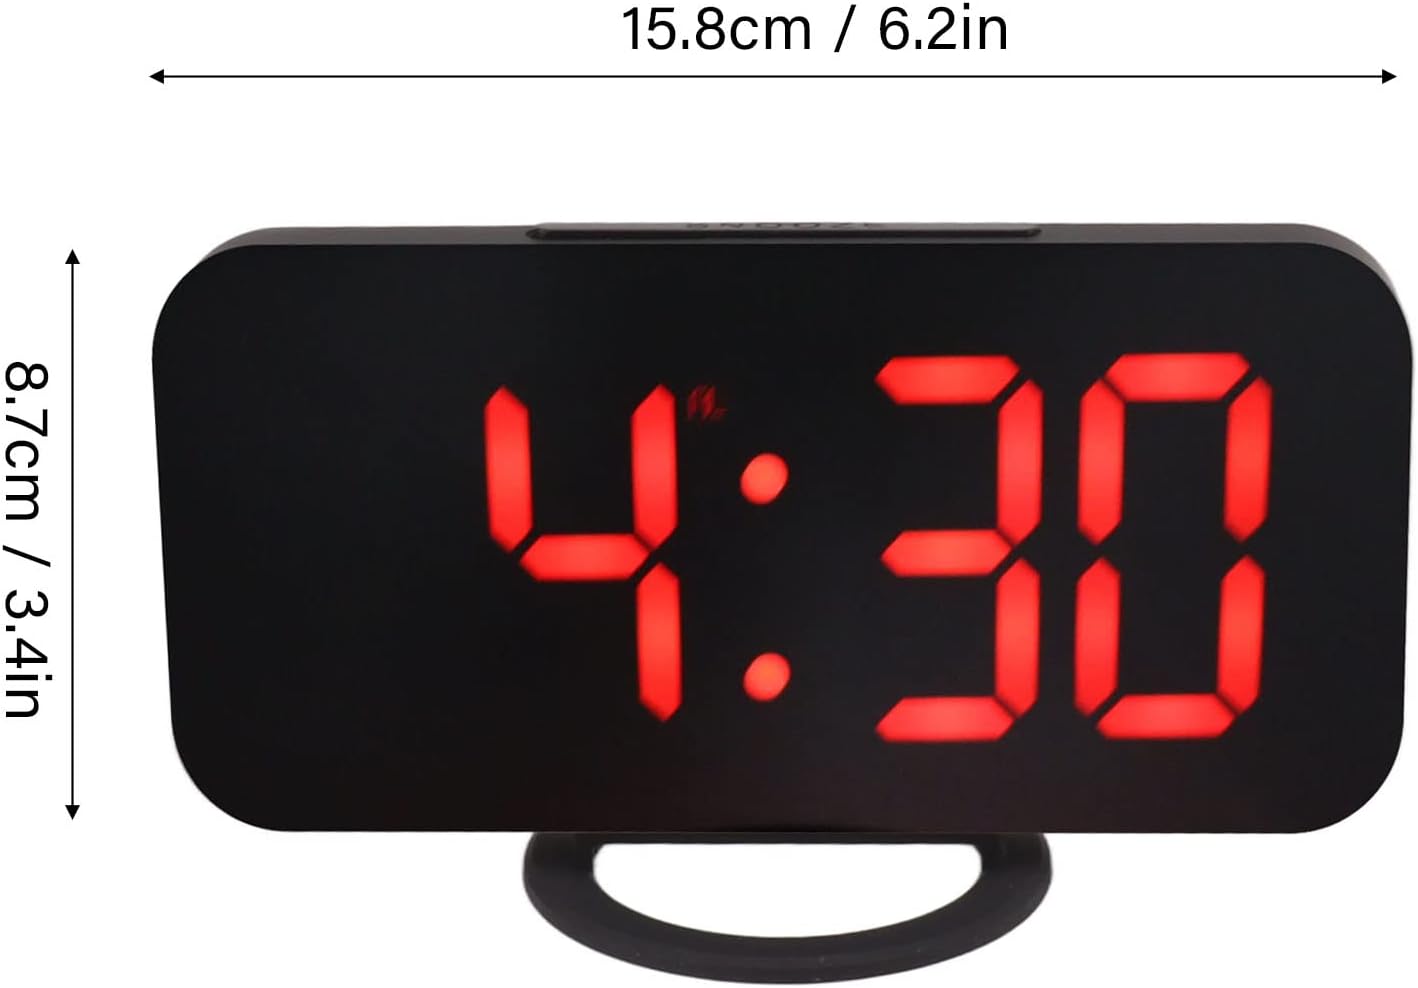
Figure 2: The alarm clock shown with its USB power cable, ready for connection.
2.2 Power Connection
- Connect the small end of the provided USB power cable to the DC 5V input port on the back of the alarm clock.
- Connect the standard USB end of the cable to a USB power adapter (not included) or a powered USB port.
- The display will light up, indicating the clock is powered on.
Note: This clock requires continuous power via USB. It does not operate on batteries for primary function, but may have a small internal battery for time memory during power outages (not user-replaceable).
3. Operating Instructions
3.1 Button Functions
The clock features several buttons, typically located on the top or side. Refer to Figure 3 for button identification.

Figure 3: Detailed view of the clock's control buttons and examples of different display brightness levels.
- MODE Button: Used to switch between time display, alarm setting, and other modes.
- UP/DOWN Buttons: Used to adjust values (time, alarm) or brightness levels.
- SNOOZE Button: Activates the snooze function when the alarm sounds.
3.2 Setting the Time
- Press the MODE button until the time display flashes.
- Use the UP and DOWN buttons to adjust the hour.
- Press MODE again to switch to minute adjustment.
- Use the UP and DOWN buttons to adjust the minutes.
- Press MODE to confirm and exit time setting mode.
3.3 Setting the Alarm
- Press the MODE button repeatedly until the alarm icon (e.g., a bell) appears and the alarm time flashes.
- Use the UP and DOWN buttons to set the desired alarm hour.
- Press MODE again to switch to minute adjustment.
- Use the UP and DOWN buttons to set the desired alarm minutes.
- Press MODE to confirm and activate the alarm. The alarm icon will remain displayed.
- To deactivate the alarm, repeat the steps and press MODE until the alarm icon disappears.
3.4 Snooze Function
When the alarm sounds, press the SNOOZE button (usually located on top of the clock) to temporarily silence the alarm. The alarm will sound again after a preset interval (e.g., 5-10 minutes). To turn off the alarm completely, press any other button or let it ring for its full duration.
3.5 Brightness Adjustment
The clock offers multiple brightness levels for its LED display, including manual adjustment, automatic adjustment, and a night mode. This allows for optimal visibility in various lighting conditions.
- Manual Adjustment: In time display mode, press the UP or DOWN buttons to cycle through different brightness levels (e.g., Dark, Mid Gear, Bright).
- Automatic Adjustment: Some models may feature an ambient light sensor that automatically adjusts display brightness based on room lighting. Refer to Figure 3 for visual representation of brightness levels.
- Night Mode: A specific setting that dims the display significantly during predefined night hours to prevent disturbance. Consult the specific button sequence for your model to activate/deactivate night mode.
4. Maintenance
4.1 Cleaning
To clean the clock, gently wipe the surface with a soft, dry, or slightly damp cloth. Do not use abrasive cleaners, solvents, or chemical sprays, as these can damage the mirror finish and electronic components.
4.2 Storage
If storing the clock for an extended period, disconnect it from the power source and store it in a cool, dry place away from direct sunlight and extreme temperatures.
5. Troubleshooting
| Problem | Possible Cause | Solution |
|---|---|---|
| Display is blank or not lighting up. | No power or loose connection. | Ensure the USB cable is securely connected to both the clock and a powered USB port/adapter. Try a different USB port or adapter. |
| Alarm does not sound. | Alarm not set or deactivated. Volume too low (if applicable). | Verify the alarm is set and the alarm icon is displayed. Check if there's a volume setting (though most digital clocks have fixed alarm volume). |
| Time is incorrect. | Time not set correctly or power interruption. | Reset the time according to section 3.2. If power was interrupted, the clock may need to be reset. |
| Display is too bright or too dim. | Brightness setting needs adjustment. | Adjust the brightness manually using the UP/DOWN buttons as described in section 3.5. |
6. Specifications
- Model Number: Shanrya1am475rqfe-12
- ASIN: B0BVC2VWF3
- Brand: Shanrya
- Display Type: Digital LED (Red)
- Features: Alarm, Snooze, Dimmable Display (Manual, Auto, Night Mode)
- Power Source: DC 5V via USB cable
- Dimensions: Approximately 15.8 cm (6.2 in) x 8.7 cm (3.4 in) (Width x Height)
- First Available Date: March 25, 2023

Figure 4: Diagram illustrating the approximate dimensions of the alarm clock.
7. Warranty and Support
This product is covered by a standard manufacturer's warranty. For specific warranty terms and conditions, please refer to the documentation provided at the time of purchase or contact your retailer.
For technical support or inquiries, please contact the seller or manufacturer through the platform where the product was purchased. Please have your model number (Shanrya1am475rqfe-12) and ASIN (B0BVC2VWF3) ready when contacting support.


