
1. Product Overview
The VEVOR Sewer Camera (Model WP9600F) is a professional pipeline inspection system designed for examining sewer lines, drain pipes, and other hard-to-reach areas. It features a 9-inch 720p LCD screen, a 1-megapixel IP68 waterproof camera with 12 adjustable LED lights, and a 300 ft (91.5 m) semi-rigid cable. The system includes DVR functionality for recording video and capturing photos, stored on a 16 GB SD card. A 4500mAh lithium battery provides up to 6 hours of continuous operation.

Image: The VEVOR Sewer Camera system, showing the monitor, control unit, and cable reel.
2. Components and Features
- 9-inch 720p LCD Screen: Provides clear and vivid images for detailed inspection.
- IP68 Waterproof Camera: Equipped with a 1-megapixel sensor and 12 adjustable LED lights for illumination in dark environments. Features a 303 stainless steel housing and sapphire lens for durability.
- 300 ft (91.5 m) Semi-Rigid Cable: Flexible yet robust cable with length markings for accurate distance measurement. Includes a cable reel for organized storage and deployment.
- DVR Functionality: Allows for video recording and photo capture.
- 16 GB SD Card: Included for storing inspection footage and images.
- 4500mAh Lithium Battery: Offers up to 6 hours of continuous working time.
- Compact and Portable Design: Housed in a durable case for easy transport and protection.

Image: The 9-inch 720p LCD monitor with controls and an inserted 16GB SD card.

Image: The IP68 waterproof camera head with 12 adjustable LED lights for dark spaces.
3. Setup Instructions
- Unpack Components: Carefully remove all items from the packaging. Verify that all listed components are present: camera unit, monitor, cable reel, battery, 2 camera covers, 16GB SD card, and power adapter.
- Charge Battery: Connect the power adapter to the battery unit and a power outlet. Ensure the battery is fully charged before initial use. The battery provides approximately 6 hours of operation.
- Assemble System:
- Place the monitor unit securely on the cable reel frame.
- Connect the camera cable from the reel to the designated input on the monitor/control unit.
- Insert the 16GB SD card into the designated slot on the monitor unit.
- Power On: Press the power button on the monitor unit to turn on the system.
- Initial Settings: Adjust language, brightness, and other display settings as needed using the control buttons on the monitor.
Video: Official VEVOR 9-inch Sewer Camera Operation Guide. This video demonstrates the setup and basic operation of the camera system.
4. Operating Instructions
4.1 Deploying the Camera
- Prepare Inspection Area: Ensure the access point to the pipe is clear and safe.
- Insert Camera: Carefully feed the camera head into the pipe. Use the cable reel to control the cable's length and direction.
- Monitor Footage: Observe the live video feed on the 9-inch LCD screen.
- Adjust LED Lights: Use the adjustment knob on the control unit to increase or decrease the brightness of the 12 LED lights on the camera head for optimal visibility in dark pipes.
- Navigate: Gently push and guide the cable through the pipe. The semi-rigid cable allows for navigation around bends. Avoid bending the cable more than 90 degrees sharply to prevent damage.
- Read Length Markings: The cable features clear length markings to help estimate the distance the camera has traveled into the pipe.
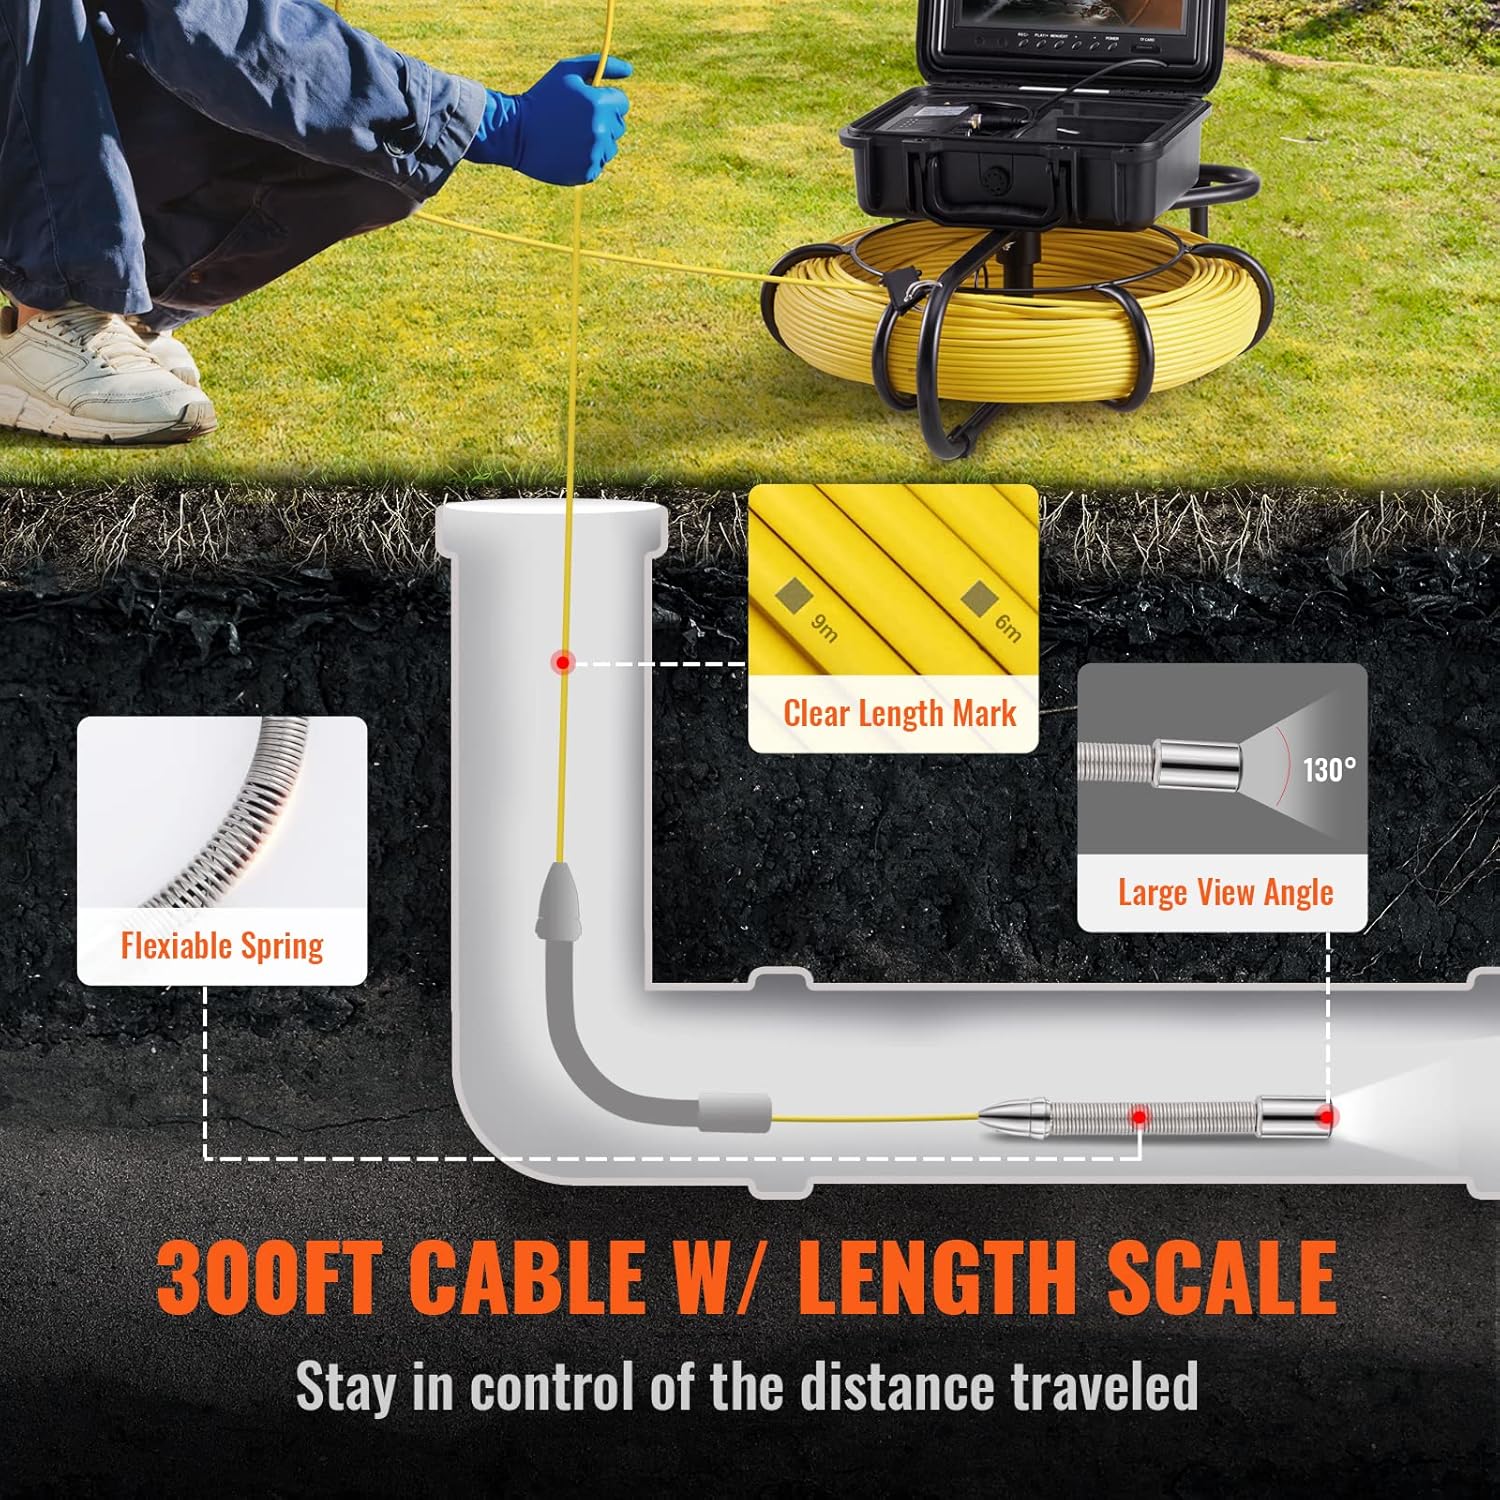
Image: Demonstrates feeding the camera cable into a pipe, highlighting the length markings.
Video: VEVOR 9" 720p Pipe Inspection Camera in action. This video shows the camera being used for pipe inspection.
4.2 Recording and Capturing
- Start Recording: Press the "REC/-" button on the monitor to begin video recording. Press it again to stop.
- Capture Photo: Use the designated button (often labeled "PHOTO" or similar) to capture still images during inspection.
- Review Footage: Access the recorded videos and photos via the menu options on the monitor.
- Data Transfer: To transfer files, remove the SD card and insert it into a computer, or connect the monitor unit to a computer via USB (if supported).

Image: Illustration of transferring recorded data from the SD card to a computer for analysis.
5. Maintenance
- Cleaning the Camera Head: After each use, especially in dirty environments, gently clean the camera lens and housing with a soft, damp cloth. Avoid abrasive cleaners.
- Cable Care: Wind the cable neatly onto the reel after use. Avoid kinks or sharp bends that could damage the internal wiring.
- Monitor Cleaning: Wipe the screen with a soft, lint-free cloth. Do not use harsh chemicals.
- Battery Maintenance: Store the battery in a cool, dry place. If not used for extended periods, charge it periodically to maintain battery health.
- Storage: Store the entire system in its protective case in a dry, temperature-controlled environment to prevent damage.
6. Troubleshooting
| Problem | Possible Cause | Solution |
|---|---|---|
| No image on screen |
|
|
| Poor image quality |
|
|
| Cannot record video/photos |
|
|
| Short battery life |
|
|
7. Specifications
| Feature | Detail |
|---|---|
| Model Number | WP9600F |
| Screen Size | 9 inches |
| Video Capture Resolution | 720p |
| Photo Sensor Resolution | 1 MP |
| Cable Length | 300 ft (91.5 m) |
| Camera Diameter | 0.9 inches (23 mm) |
| Water Resistance Level | IP68 Waterproof |
| LED Lights | 12 adjustable LEDs |
| Battery Capacity | 4500mAh |
| Battery Average Life | 6 hours |
| Media Type | SD Card (16 GB included) |
| Video Capture Format | MP4 |
| File Format (Photos) | JPEG |
| Connectivity Technology | USB |
| Item Weight | 20.9 pounds |
| Item Dimensions (D x W x H) | 5.9"D x 12.6"W x 20"H |
8. Warranty and Support
This VEVOR Sewer Camera (Model WP9600F) comes with a 2-Year Warranty. For warranty claims, technical assistance, or any questions regarding the product, please contact VEVOR customer support. You can find contact information on the official VEVOR website or through your purchase platform.
For additional resources and product information, visit the official VEVOR store: VEVOR Store on Amazon.


