
SZFZMZ ZWS339
SZFZMZ Wireless Weather Station User Manual
Model: ZWS339
Brand: SZFZMZ
1. Introduction
This user manual provides detailed instructions for the setup, operation, and maintenance of your SZFZMZ Wireless Weather Station. This device offers comprehensive indoor and outdoor environmental monitoring, including temperature, humidity, and weather forecasting, along with an atomic clock function.
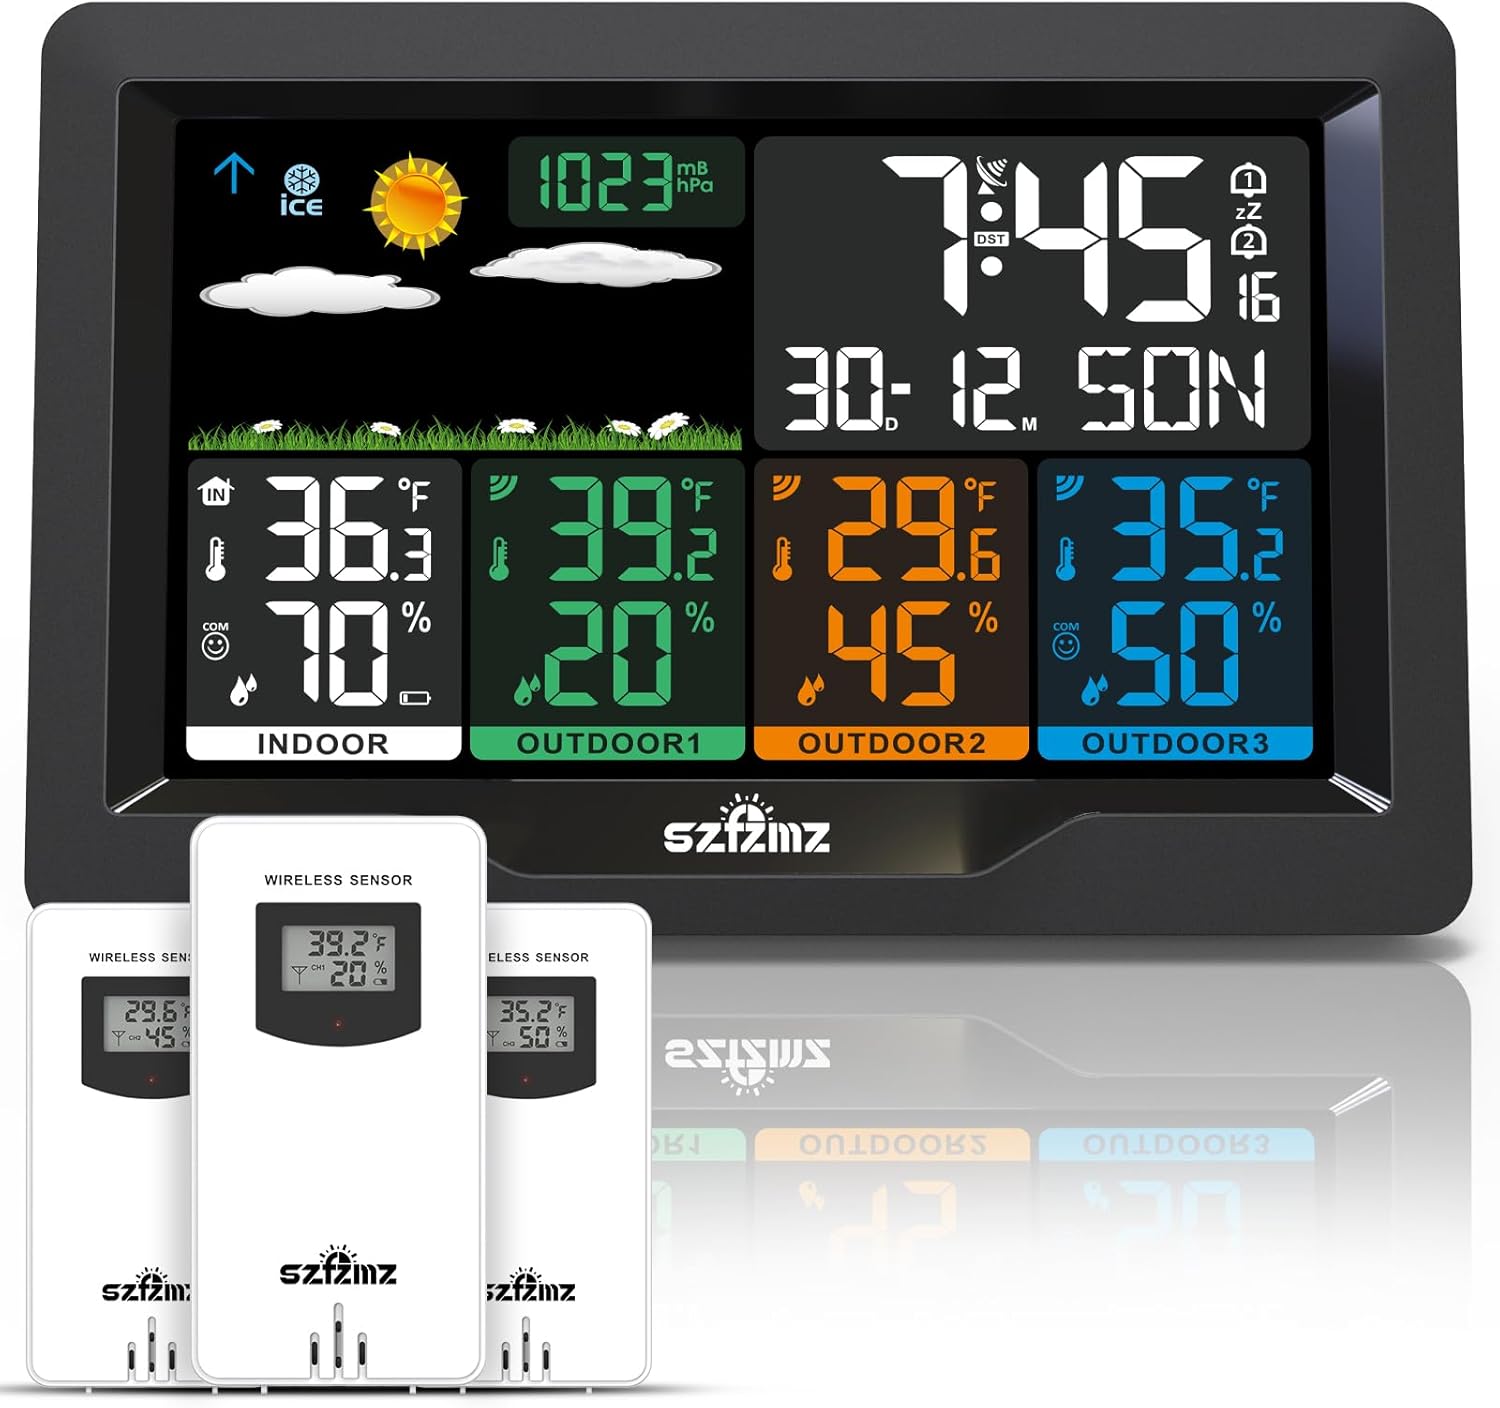
Image: The main weather station display unit with three wireless remote sensors.
2. Package Contents
Please check the package contents to ensure all items are present and in good condition:
- 1 x SZFZMZ Weather Station Main Unit (Model: ZWS339)
- 3 x Wireless Remote Sensors
- 1 x USB Power Cable (for main unit)
- 1 x User Manual (this document)

Image: Contents of the weather station package, showing the main unit and three remote sensors.
3. Key Features
- Large Color LCD Display
- Indoor/Outdoor Temperature and Humidity Monitoring
- Weather Forecast for the next 8-12 hours
- WWVB Radio Atomic Clock for accurate time synchronization
- Dual Alarm Function with Snooze
- Adjustable Backlight
- Supports up to 3 Wireless Remote Sensors
- Comfort Indicator
- Barometric Pressure Display
- Max/Min Temperature and Humidity Record

Image: Visual representation of the weather station's key features and display sections.
4. Setup Guide
4.1 Powering the Main Unit
The main unit can be powered by the included USB power cable or by batteries (not included).
- USB Power: Connect the USB power cable to the main unit's USB port and plug the adapter into a standard wall outlet. The backlight will remain continuously on when powered by USB.
- Battery Power: Open the battery compartment on the back of the main unit. Insert 2 x AA batteries (not included), observing the correct polarity (+/-). When powered by batteries, the backlight will illuminate for 15 seconds after pressing any button.

Image: Instructions for connecting the USB power adapter and installing AA batteries into the main unit.
4.2 Installing Batteries in Remote Sensors
Each wireless remote sensor requires 2 x AA batteries (not included).
- Open the battery compartment on the back of each remote sensor.
- Insert 2 x AA batteries, ensuring correct polarity (+/-).
- Close the battery compartment securely.
4.3 Sensor Placement and Channel Selection
Place the remote sensors in desired outdoor or indoor locations within 200 feet (60 meters) of the main unit. Avoid direct sunlight and rain for outdoor sensors. Each sensor has a channel switch (1, 2, or 3) inside the battery compartment. Set each sensor to a unique channel.

Image: Illustration of three remote sensors placed in various indoor and outdoor environments, demonstrating the 200ft/60m transmission range.

Image: A remote sensor next to the main unit, highlighting the wireless connection and 200ft/60m range.

Image: Various suggested locations for placing the three remote sensors, such as living room, baby room, kitchen, office, garden, and garage.
4.4 Main Unit Placement
The main unit offers two mounting options:
- Tabletop Stand: Use the integrated stand on the back of the unit to place it on a flat surface.
- Wall Mount: Utilize the hanging hole on the back to mount the unit on a wall using a screw (not included).

Image: Visual guide to the two mounting options: using the built-in stand for tabletop placement or the hanging hole for wall mounting.
4.5 Initial Synchronization
After powering on both the main unit and the remote sensors, the main unit will automatically search for and connect to the sensors. This process may take a few minutes. Ensure sensors are within range.
5. Operating Instructions
5.1 Time and Date Setting (Atomic Clock)
The weather station features a WWVB Radio Atomic Clock for automatic time synchronization. Upon initial power-up or after a reset, the unit will attempt to receive the WWVB signal. This process can take several hours, especially in areas with weak signals. You can manually set the time if needed.

Image: The weather station display highlighting the WWVB Radio Atomic Clock feature.
Refer to the specific buttons on your device (usually labeled "SET", "MODE", or similar) for manual time and date adjustment. Typically, you press and hold a "SET" button to enter setting mode, then use arrow keys to adjust values and "SET" again to confirm.
5.2 Temperature and Humidity Display
The main unit displays indoor temperature and humidity, along with readings from up to three outdoor sensors (Outdoor1, Outdoor2, Outdoor3). You can switch between Celsius and Fahrenheit by pressing a dedicated button (often labeled "C/F" or similar).
5.3 Weather Forecast
The weather station predicts the weather for the next 8-12 hours based on barometric pressure changes. The display will show various icons representing conditions such as sunny, partly cloudy, cloudy, rainy, heavy rainy, and snowy.

Image: Visual guide to the weather forecast icons displayed on the station, including Sunny, Slightly Cloudy, Cloudy, Rainy, Heavy Rainy, and Snowy.

Image: A banner illustrating the weather forecast feature with various weather icons and corresponding outdoor scenes.
5.4 Comfort Indicator
The display includes a comfort indicator (smiley face icons) that reflects the indoor humidity and temperature levels, indicating whether the environment is comfortable, too dry, or too wet.

Image: The comfort status indicator on the weather station, showing different facial expressions to denote comfortable, too dry, or too wet conditions.
5.5 Dual Alarm Function
The weather station is equipped with a dual alarm feature, allowing you to set two separate alarms. Instructions for setting and activating alarms are typically found by pressing a dedicated "ALARM" or "MODE" button and following the on-screen prompts.

Image: The weather station displaying the dual alarm feature, suggesting its use for a healthier lifestyle.
5.6 Adjustable Backlight
The main unit's backlight can be adjusted for brightness. When powered by the USB adapter, the backlight remains continuously on. When powered by batteries, the backlight activates for 15 seconds with a button press. Adjustments are typically made via a dedicated "LIGHT" or "SNOOZE/LIGHT" button.

Image: The weather station demonstrating various adjustable backlight brightness levels.
6. Maintenance
6.1 Battery Replacement
Replace batteries in both the main unit and remote sensors when the low battery indicator appears on the display. Always replace all batteries in a set at the same time with new ones of the same type.
6.2 Cleaning
Wipe the main unit and sensors with a soft, damp cloth. Do not use abrasive cleaners or solvents, as they may damage the display or casing. Ensure no moisture enters the battery compartments or electronic components.
6.3 Sensor Care
For outdoor sensors, periodically check for debris or obstructions around the ventilation openings. While designed for outdoor use, prolonged exposure to extreme weather conditions (e.g., heavy rain, direct intense sunlight, extreme cold) may affect performance and lifespan. Consider placing sensors in a sheltered location.
7. Troubleshooting
| Problem | Possible Cause | Solution |
|---|---|---|
| No display on main unit | No power; incorrect battery installation; faulty power adapter. | Check USB power connection or replace batteries, ensuring correct polarity. |
| Outdoor readings not displayed or inaccurate | Sensor out of range; low sensor battery; incorrect channel setting; interference. | Move sensor closer to main unit; replace sensor batteries; ensure sensor channel matches main unit; avoid placing near large metal objects or electronics. |
| Atomic clock not syncing | Weak WWVB signal; interference; incorrect time zone setting. | Place unit near a window; avoid electronic interference; manually set time if signal is consistently weak. |
| Weather forecast inaccurate | Local weather changes rapidly; unit needs more time to calibrate. | Allow 24-48 hours for initial calibration. Forecasts are based on barometric pressure trends and are not always precise for sudden changes. |
8. Specifications
| Feature | Detail |
|---|---|
| Model Number | ZWS339 |
| Brand | SZFZMZ |
| Power Source (Main Unit) | USB Power Cable (included) or 2 x AA Batteries (not included) |
| Power Source (Sensors) | 2 x AA Batteries per sensor (not included) |
| Connectivity Technology | Wireless |
| Wireless Transmission Range | Up to 200 feet (60 meters) in open air |
| Temperature Accuracy | ±1 °C |
| Upper Temperature Rating | 60 Degrees Celsius |
| Display Type | LCD Color Display |
| Product Dimensions (Main Unit) | 0.6"D x 8.07"W x 5.11"H (approx.) |
| Item Weight | 1.34 pounds (approx.) |

Image: Dimensions of the SZFZMZ Multi-function Weather Station main unit.
9. Warranty and Support
For warranty information and customer support, please refer to the documentation included with your product or visit the official SZFZMZ website. Keep your purchase receipt for warranty claims.
Online User Manual: A PDF version of the user manual may be available for download from the manufacturer's website or the product's Amazon listing page.
Contact Support: If you encounter issues not covered in this manual, please contact SZFZMZ customer support through their official channels.
Related documentsZWS339

Ask a question about this manual
Ask about setup, troubleshooting, compatibility, parts, safety, or missing instructions. Manuals+ will review the question and use this page’s manual context to help answer it.