1. Introduction
The LeeKooLuu LK11 OBD2 Scanner is a diagnostic tool designed to read and clear diagnostic trouble codes (DTCs) from your vehicle's engine control unit (ECU). It supports all OBD II compliant vehicles, allowing users to quickly identify the cause of a 'Check Engine' light, view freeze frame data, check I/M readiness status, and access vehicle information. This manual provides detailed instructions for the proper use and maintenance of your LK11 scanner.
2. What's in the Box
- LeeKooLuu LK11 OBD2 Scanner
3. Key Features
The LK11 OBD2 Scanner offers several essential diagnostic functions:
- Read Codes: Retrieves generic (P0, P2, P3, and U0) and manufacturer-specific (P1, P3, and U1) codes.
- Erase Codes: Clears Diagnostic Trouble Codes (DTCs) and resets the 'Check Engine' light.
- View Freeze Frame: Displays a snapshot of operating conditions at the time an emission-related fault occurred.
- I/M Readiness: Checks the status of emission-related monitors to determine if they have run and completed their diagnostic testing.
- DTC Lookup: Provides definitions for diagnostic trouble codes directly on the device.
- Vehicle Information: Retrieves the Vehicle Identification Number (VIN), Calibration ID (CALID), and Calibration Verification Number (CVN).

Image: The LK11 scanner's main menu showing options for Read Codes, Erase Codes, Freeze Frame, and Vehicle Information.
4. Setup
- Locate the OBD2 Port: The 16-pin OBD2 Data Link Connector (DLC) is typically located under the dashboard on the driver's side. Refer to your vehicle's service manual for the exact location.
- Connect the Scanner: With the vehicle's ignition off, firmly plug the LK11 scanner's cable into the vehicle's OBD2 DLC.
- Turn on Ignition: Turn the vehicle's ignition to the 'ON' position (do not start the engine). The scanner will power on automatically.
5. Operating Instructions
5.1. Navigation
The LK11 scanner features four buttons for navigation:
- UP/DOWN Buttons: Used to scroll through menu options and data.
- OK Button: Confirms a selection or enters a submenu.
- EXIT Button: Returns to the previous menu or exits a function.
5.2. Read Codes
- From the main menu, select 'Read Codes' and press 'OK'.
- The scanner will communicate with the vehicle and display any stored DTCs.
- Use the UP/DOWN buttons to scroll through multiple codes if present.
5.3. Erase Codes
Caution: Clearing DTCs will also clear freeze frame data and reset I/M readiness monitors. Ensure you have recorded any necessary information before proceeding.
- From the main menu, select 'Erase Codes' and press 'OK'.
- Confirm your decision when prompted.
- The 'Check Engine' light should turn off if the fault is no longer present.

Image: Illustration of the 'Check Engine' light being turned off after erasing fault codes with the LK11 scanner.
5.4. View Freeze Frame
- From the main menu, select 'View Freeze Frame' and press 'OK'.
- The scanner will display various engine parameters recorded at the moment a fault code was set, such as Engine RPM, Vehicle Speed, Engine Load, Fuel Pressure, and Coolant Temperature.
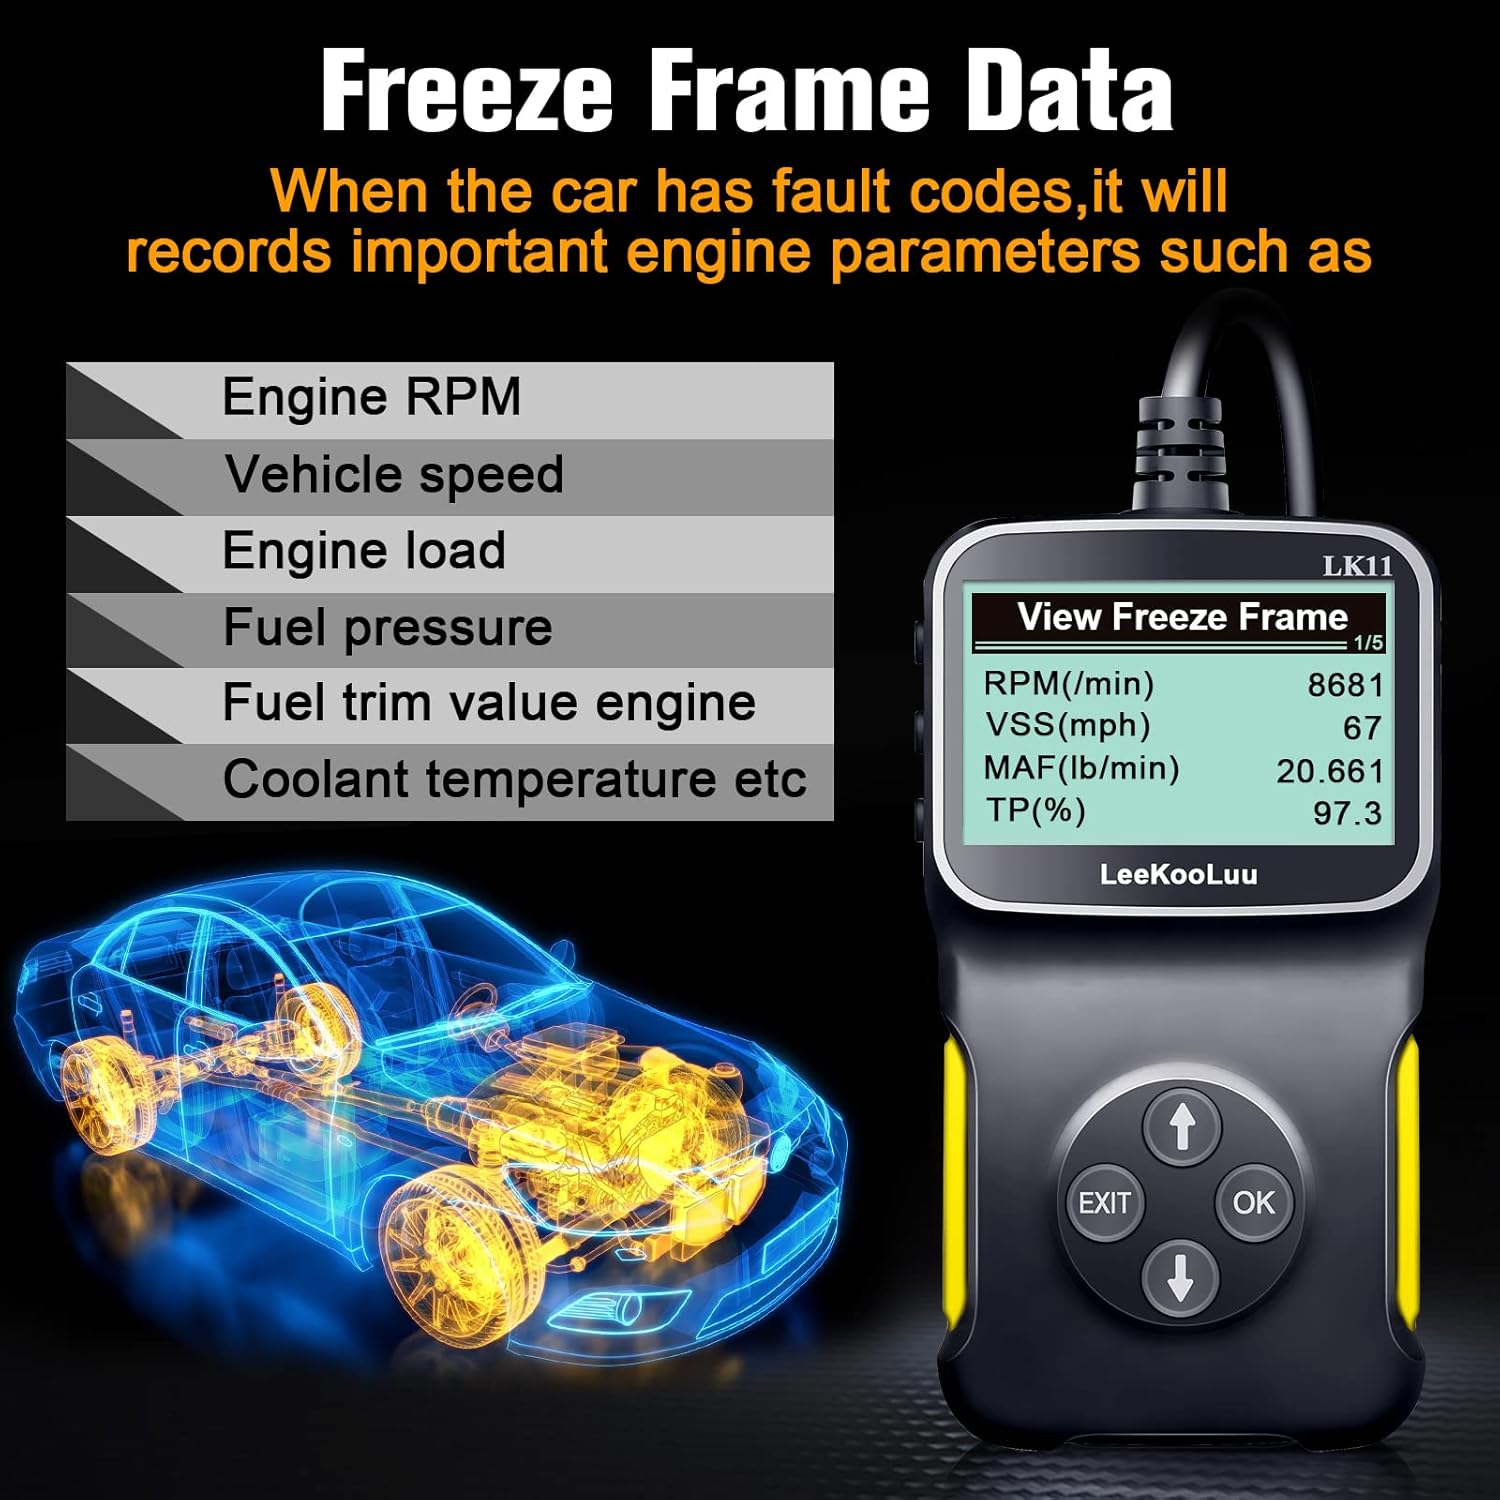
Image: The LK11 scanner displaying various engine parameters as part of Freeze Frame Data.
5.5. I/M Readiness
- From the main menu, select 'I/M Readiness' and press 'OK'.
- The scanner will display the status of various emission monitors (e.g., O2 Sensor Monitor, Catalyst Monitor). 'OK' indicates the monitor has completed its test, while 'INC' (Incomplete) means it has not.

Image: The I/M Monitor Readiness function helps determine if a vehicle is ready for an emissions test.
5.6. DTC Lookup
- From the main menu, select 'DTC Lookup' and press 'OK'.
- Enter the 5-character DTC using the UP/DOWN buttons to select characters and 'OK' to confirm each.
- The scanner will display a brief description of the code.

Image: The DTC Lookup feature on the LK11 scanner, explaining the structure of diagnostic trouble codes.
5.7. Vehicle Information
- From the main menu, select 'Vehicle Information' and press 'OK'.
- The scanner will display the VIN, CALID, and CVN of the vehicle.
6. Maintenance
- Cleaning: Use a soft, damp cloth to clean the scanner's exterior. Do not use abrasive cleaners or solvents.
- Storage: Store the scanner in a dry, cool environment, away from direct sunlight and extreme temperatures.
- Cable Care: Avoid bending or twisting the cable excessively to prevent damage.
7. Troubleshooting
- Scanner does not power on:
- Ensure the scanner is firmly connected to the vehicle's OBD2 port.
- Verify the vehicle's ignition is in the 'ON' position.
- Check the vehicle's fuse for the OBD2 port (consult your vehicle's manual).
- 'Link Error' or 'No Communication':
- Confirm the vehicle is OBD II compliant (most vehicles manufactured after 1996 in the US).
- Check for a damaged OBD2 cable or connector.
- Ensure the vehicle's battery has sufficient charge.
- Try connecting the scanner to a different OBD II compliant vehicle to rule out scanner malfunction.
- Incorrect or no data displayed:
- Ensure the vehicle's ignition is on and the engine is not running (unless specifically instructed for certain tests).
- Verify the scanner's firmware is up to date (if applicable, check manufacturer's website).
8. Specifications
| Feature | Detail |
|---|---|
| Model | LK11-1 |
| Item Weight | 7.4 ounces |
| Package Dimensions | 7.83 x 5.2 x 1.46 inches |
| Screen Size | 2.8 Inches |
| Supported Protocols | SAE J1850 PWM, SAE J1850 VPW, ISO9141-2, ISO14230-4 KWP (5 Baud Init), ISO14230-4 KWP (Fast Init), ISO15765-4 CAN (11BIT ID, 500 KBAUD), ISO15765-4 CAN (29BIT ID, 500 KBAUD), ISO15765-4 CAN (11BIT ID, 250 KBAUD), ISO15765-4 CAN (29BIT ID, 250 KBAUD) |

Image: The LK11 scanner highlighting its physical design and a list of supported OBD II communication protocols.
9. Warranty Information
The LeeKooLuu LK11 OBD2 Scanner is covered by a standard manufacturer's warranty. For specific details regarding warranty duration, coverage, and claims process, please refer to the warranty card included with your product or visit the official LeeKooLuu website.
10. Support
For technical assistance, troubleshooting guidance, or customer service inquiries regarding your LeeKooLuu LK11 OBD2 Scanner, please contact LeeKooLuu directly. Contact information can typically be found on the product packaging, in the included documentation, or on the official LeeKooLuu website.


