Minolta X-700 35mm Film SLR Camera Instruction Manual
Model: X-700 | Lens: Minolta MD 50mm 1:2
Introduction
This manual provides detailed instructions for the proper use and care of your Minolta X-700 35mm Film Single-Lens Reflex (SLR) camera, equipped with a Minolta MD 50mm 1:2 manual focus lens. Please read this manual thoroughly to ensure optimal performance and longevity of your equipment.
Camera Components Overview
Familiarize yourself with the main parts and controls of your Minolta X-700 camera and MD 50mm 1:2 lens.

Figure 1: Front view of the Minolta X-700 camera with the Minolta MD 50mm 1:2 lens attached. This image displays the lens barrel, aperture ring, focus ring, and the camera's main body with the Minolta logo and X-700 model designation.

Figure 2: Angled front view of the Minolta X-700 camera, providing a clearer perspective of the lens and the camera's grip texture. The lens features markings for aperture and focus distance.

Figure 3: Close-up of the front-left side of the Minolta X-700, showing the X-700 branding and the A.S.T./AEL switch, which controls the exposure lock function.

Figure 4: Top view of the Minolta X-700 camera, highlighting the shutter speed dial, film advance lever, and the hot shoe for external flash units. The shutter speed dial includes settings for automatic exposure (P, A) and manual speeds.
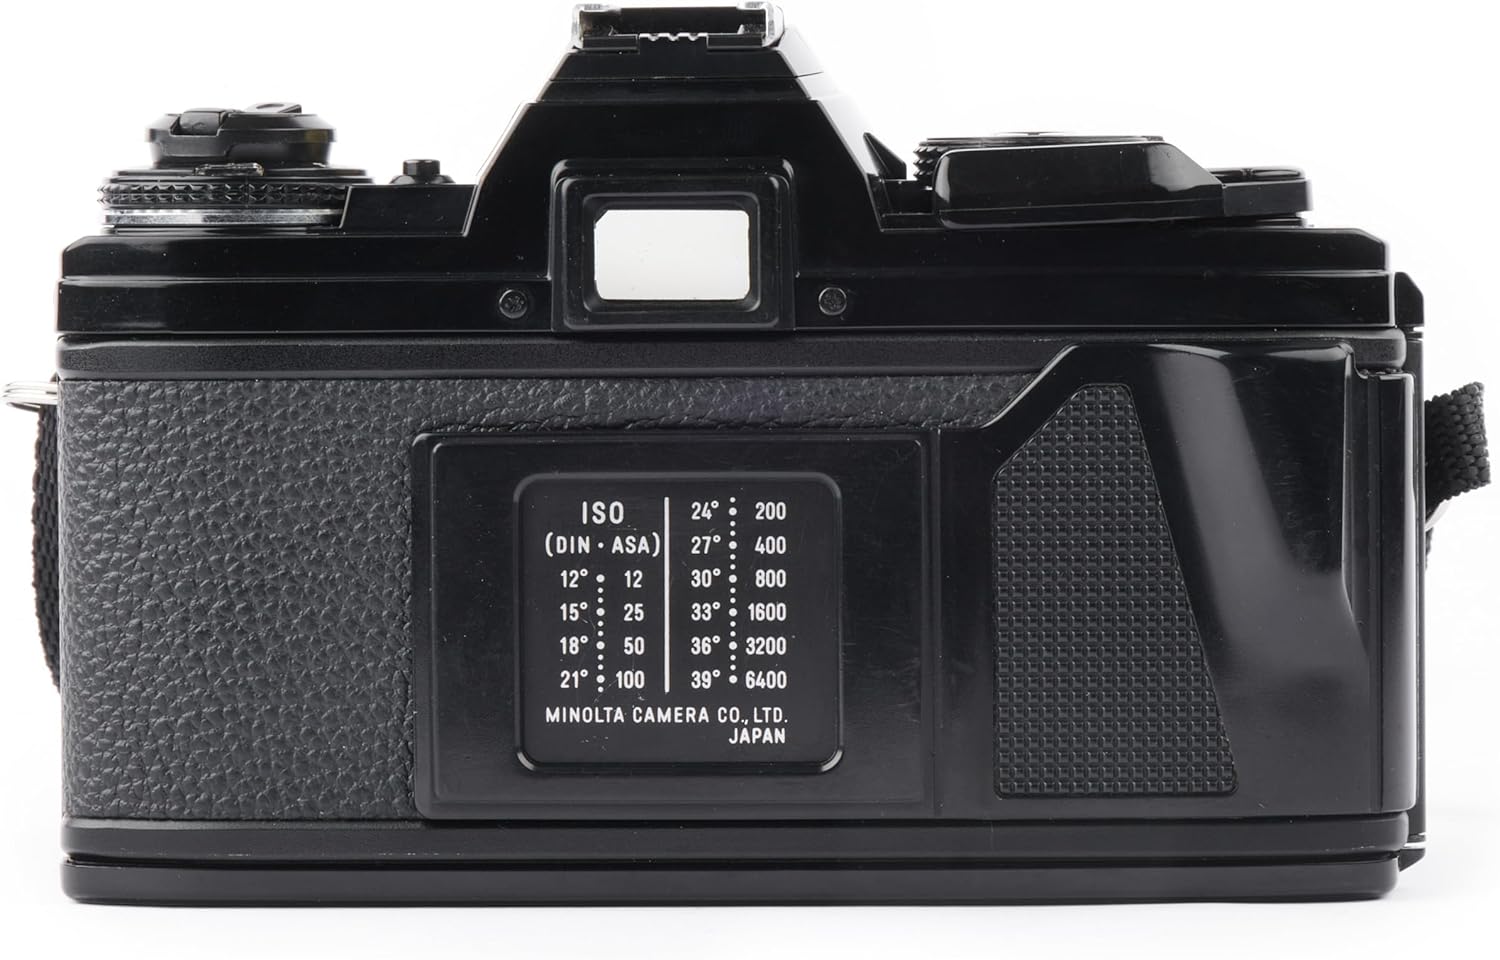
Figure 5: Rear view of the Minolta X-700 camera, showing the film door and an integrated ISO/DIN conversion chart for quick reference when setting film speed.

Figure 6: Interior view of the Minolta X-700 film compartment with the back open. This shows the shutter curtain, film take-up spool, and the film pressure plate, essential for proper film loading.
Setup
1. Battery Installation
- Locate the battery compartment cover, typically on the bottom of the camera body.
- Open the cover using a coin or similar tool.
- Insert two 1.5V Alkaline batteries (e.g., LR44 or SR44 equivalent), ensuring correct polarity (+/-).
- Replace the battery compartment cover securely.
2. Lens Attachment
- Align the red dot on the Minolta MD 50mm 1:2 lens barrel with the red dot on the camera's lens mount.
- Gently insert the lens into the camera mount.
- Rotate the lens clockwise until it clicks into place, indicating it is securely locked.
3. Film Loading
- Open the camera back by pulling up the film rewind knob.
- Place a 35mm film cassette into the film chamber on the left side.
- Pull the film leader across to the take-up spool on the right and insert it into one of the slots.
- Advance the film slightly using the film advance lever to ensure it catches on the take-up spool.
- Close the camera back firmly until it latches.
- Advance the film two frames, pressing the shutter release button each time, to wind past the exposed leader. The frame counter should show '1'.
Operating the Camera
1. Setting Film Speed (ISO/ASA)
The Minolta X-700 requires you to manually set the film speed (ISO/ASA) to ensure accurate exposure metering. This is typically done by lifting and rotating the outer ring of the shutter speed dial.
- Lift the outer ring of the shutter speed dial.
- Rotate it until the arrow aligns with the ISO rating of your loaded film (e.g., 100, 200, 400).
- Release the ring to lock the setting.
2. Focusing
The Minolta MD 50mm 1:2 lens is a manual focus lens. You must adjust focus manually.
- Look through the viewfinder.
- Rotate the focus ring on the lens barrel until your subject appears sharp in the split-image or microprism focusing aid in the center of the viewfinder.
3. Exposure Control
The X-700 offers several exposure modes:
- Program (P) Mode: Set the shutter speed dial to 'P'. The camera automatically selects both shutter speed and aperture for correct exposure.
- Aperture Priority (A) Mode: Set the shutter speed dial to 'A'. You select the aperture on the lens, and the camera automatically selects the appropriate shutter speed.
- Manual (M) Mode: Set the shutter speed dial to a specific speed (e.g., 1/125, 1/60). You also manually set the aperture on the lens. The viewfinder will indicate if your chosen settings result in correct exposure.
4. Taking a Picture
- Ensure the camera is powered on (if applicable, check battery).
- Advance the film using the film advance lever until it stops.
- Compose your shot through the viewfinder.
- Focus the lens manually.
- Set your desired exposure mode and settings.
- Gently press the shutter release button to take the picture.
5. Rewinding and Unloading Film
- Once all frames on the film roll have been exposed, press the film rewind release button (usually on the bottom of the camera).
- Fold out the crank on the film rewind knob and turn it clockwise until you feel the tension release, indicating the film is fully rewound into its cassette.
- Pull up the film rewind knob to open the camera back.
- Remove the film cassette and close the camera back.
Maintenance
1. Cleaning
- Camera Body: Use a soft, dry cloth to wipe the camera body. For stubborn dirt, a slightly damp cloth can be used, followed by a dry one. Avoid harsh chemicals.
- Lens: Use a lens brush or blower to remove dust. For smudges, use a specialized lens cleaning solution and a microfiber lens cloth. Clean gently in a circular motion from the center outwards. Avoid touching the lens surface with your fingers.
- Viewfinder: Use a soft brush or air blower to remove dust. Avoid wiping the viewfinder glass directly.
2. Storage
- Store the camera in a cool, dry place, away from direct sunlight and extreme temperatures.
- If storing for an extended period, remove the batteries to prevent leakage.
- Keep the lens capped to protect the front and rear elements.
Troubleshooting
| Problem | Possible Cause | Solution |
|---|---|---|
| Camera does not power on / Shutter does not fire | Dead or incorrectly installed batteries. | Check battery polarity; replace with fresh Alkaline batteries. |
| Film does not advance | Film not properly loaded onto take-up spool. | Open camera back in a darkroom or changing bag, re-load film, ensuring leader is securely attached to the take-up spool. |
| Photos are blurry | Incorrect focus; camera shake; subject movement. | Ensure accurate manual focusing. Use a faster shutter speed or tripod to prevent camera shake. |
| Photos are too dark (underexposed) | Insufficient light; incorrect exposure settings; incorrect ISO setting. | Increase aperture (smaller f-number), decrease shutter speed, or use flash. Verify ISO setting matches film. |
| Photos are too bright (overexposed) | Too much light; incorrect exposure settings; incorrect ISO setting. | Decrease aperture (larger f-number), increase shutter speed. Verify ISO setting matches film. |
Specifications
| Feature | Detail |
|---|---|
| Brand | Minolta |
| Model Name | X-700 |
| Compatible Mountings | Minolta MD |
| Photo Sensor Size | Full Frame (35mm) |
| Max Shutter Speed | 1/1000 seconds |
| Min Shutter Speed | 0.001 seconds |
| Maximum Aperture (Lens) | 2 Millimeters (f/2.0) |
| Minimum Focal Length (Lens) | 35 Millimeters |
| Maximum Focal Length (Lens) | 50 Millimeters |
| Auto Focus Technology | Manual |
| Exposure Control | Automatic, Manual |
| Metering Methods | Average |
| Viewfinder | Optical |
| Battery Type | Alkaline (LR44/SR44 equivalent) |
| Item Weight | 1 Pounds |
| Water Resistance Level | Not Water Resistant |
Warranty and Support
Warranty Information
This Minolta X-700 camera comes with a 90 days limited warranty. Please refer to your purchase documentation for specific terms and conditions regarding warranty claims and coverage.
Customer Support
For technical assistance, troubleshooting beyond this manual, or warranty service, please contact the seller or the manufacturer's authorized service center. Keep your purchase receipt and warranty information readily available.