1. Introduction
This manual provides comprehensive instructions for the assembly, installation, operation, and maintenance of your Mars Gaming MCV4 Black Custom XXL E-ATX Gaming Tower. Please read this manual thoroughly before beginning installation to ensure proper setup and optimal performance. The MCV4 is designed for enthusiasts seeking a high-capacity, modular chassis with extensive cooling support and a clear view of internal components.
2. Safety Information
Always observe the following safety precautions:
- Disconnect all power sources before opening the computer case or performing any installation.
- Handle components with care to prevent damage from static electricity. Use an anti-static wrist strap if available.
- Avoid placing the case in areas with excessive dust, humidity, or extreme temperatures.
- Ensure proper ventilation around the case to prevent overheating.
- Keep small parts and tools away from children.
- Do not attempt to modify the case structure, as this may void your warranty and pose safety risks.
3. Package Contents
Verify that all items are present in your package:
- Mars Gaming MCV4 Black Custom XXL E-ATX Gaming Tower Chassis
- Accessory Box (screws, standoffs, cable ties, etc.)
- User Manual (this document)
Note: Fans, vertical graphics card support/cable, and other customisable extras are not included as standard with the MCV4 chassis.
4. Product Overview
The Mars Gaming MCV4 is a high-performance gaming tower designed for extensive customization and optimal component display. Its key features include:
- Frameless Continuous Tempered Glass: Front and side panels offer an unobstructed view of internal components.
- XXL E-ATX Capacity: Supports motherboards up to E-ATX size and provides ample space for large components.
- Modular Dual Chamber Structure: Separates the power supply and storage drives into a hidden compartment for improved airflow and aesthetics.
- Full Liquid Cooling Support: Designed to accommodate multiple radiators and custom liquid cooling loops.

Figure 4.1: Mars Gaming MCV4 Black Gaming Tower showcasing its internal layout and tempered glass panels.
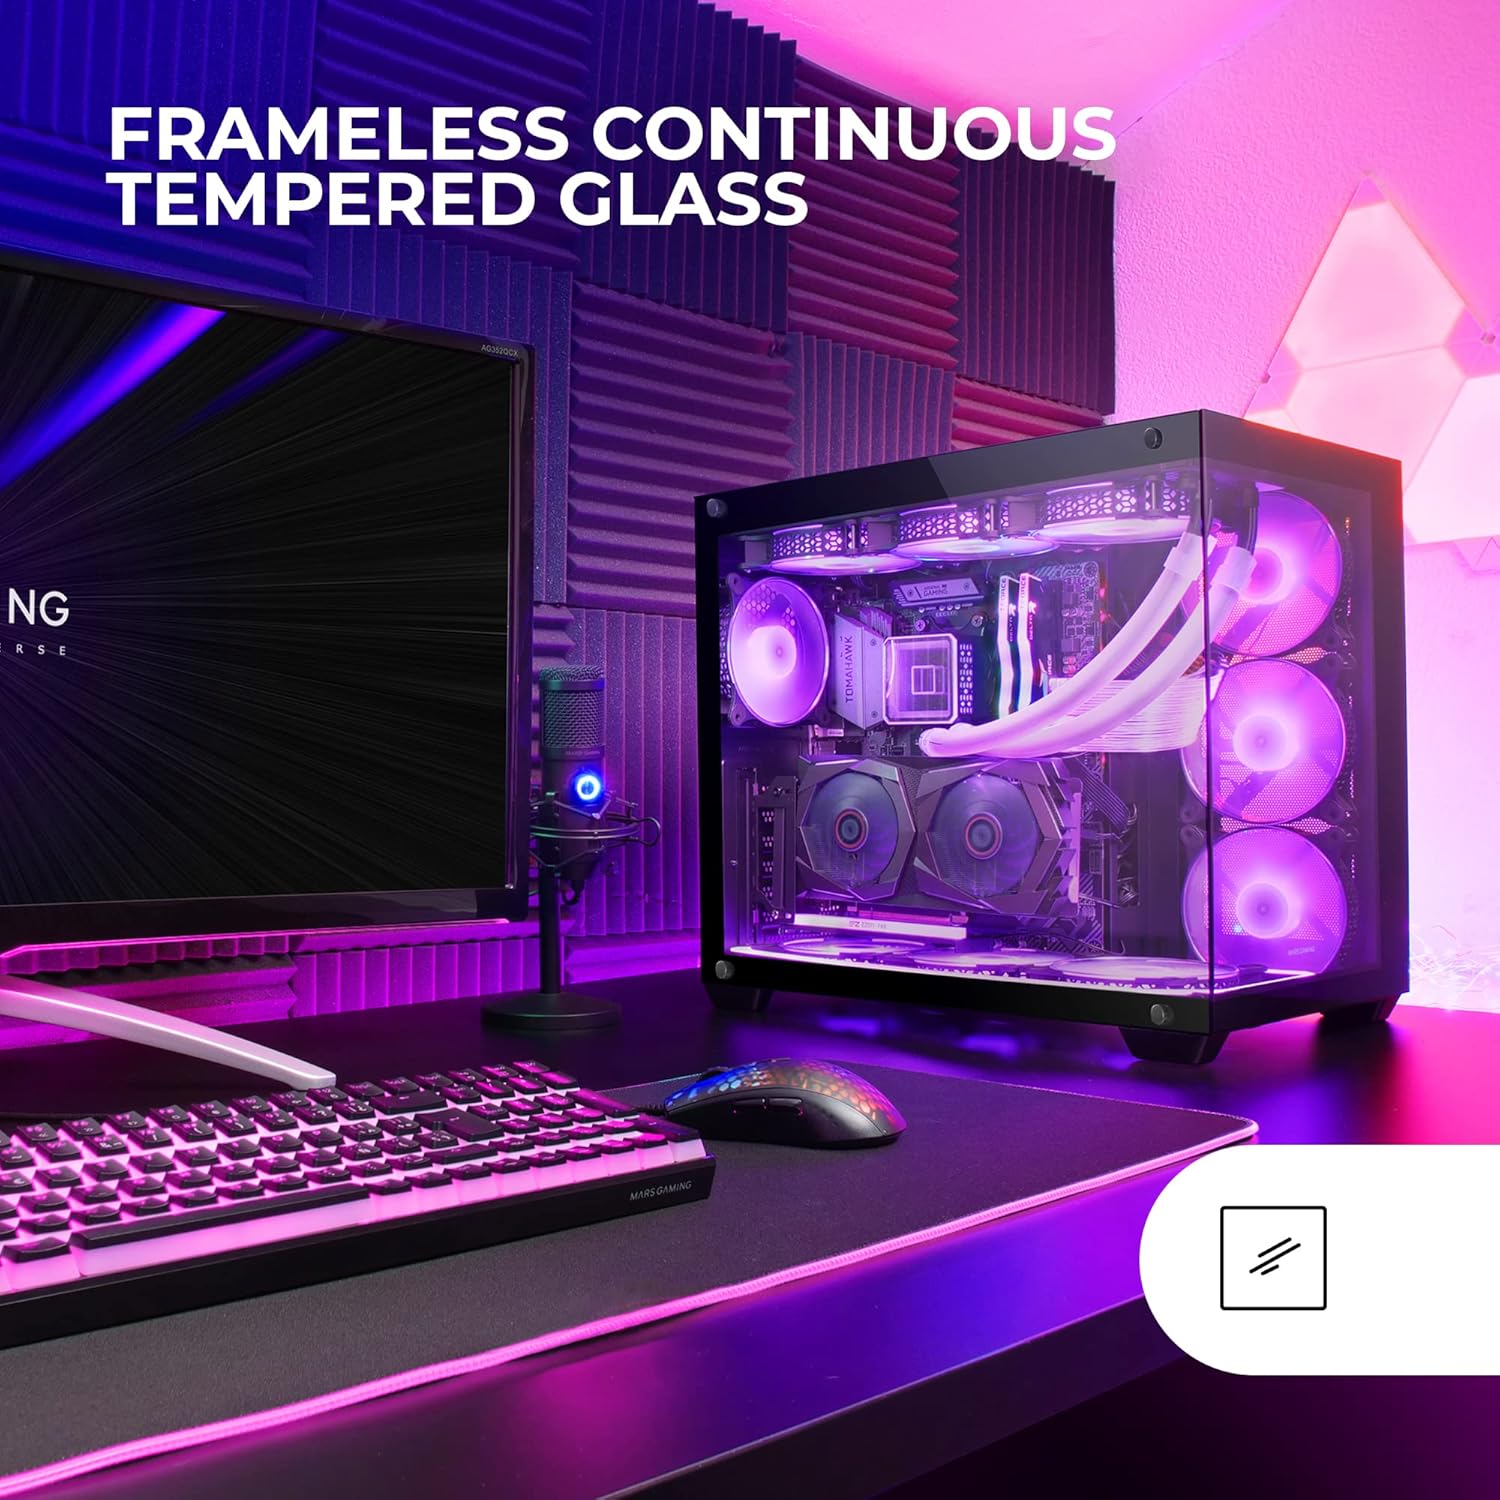
Figure 4.2: Close-up view of the frameless continuous tempered glass design, highlighting the clear visibility of internal hardware.
5. Setup and Installation
5.1 Preparing the Chassis
- Carefully remove the chassis from its packaging.
- Place the chassis on a stable, flat surface.
- Identify and remove the tempered glass side panels. Typically, these are secured with thumbscrews or a latch mechanism. Store them safely to prevent damage.
5.2 Motherboard Installation
The MCV4 supports E-ATX, ATX, Micro-ATX, and Mini-ITX motherboards.
- Install the necessary motherboard standoffs into the chassis tray according to your motherboard's form factor.
- Carefully align your motherboard with the standoffs and the I/O shield opening at the rear of the case.
- Secure the motherboard with screws. Do not overtighten.
5.3 Power Supply Unit (PSU) Installation
The MCV4 features a dual-chamber design, with the PSU located in a separate compartment.
- Locate the PSU mounting area in the rear chamber of the chassis.
- Slide your PSU into position, ensuring the fan faces the designated intake (usually downwards or towards the side panel).
- Secure the PSU with screws from the rear of the chassis.
5.4 Storage Drive Installation
The chassis supports multiple storage drives (HDDs/SSDs).
- Identify the drive bays or mounting points for 2.5" SSDs and 3.5" HDDs, typically located in the rear chamber.
- Mount your drives using the provided screws or tool-less mechanisms.
5.5 Graphics Card (VGA) Installation
The MCV4 supports graphics cards up to 418mm long and 157mm wide. It allows for both horizontal and vertical mounting (vertical adapter not included).
- Remove the necessary PCIe slot covers from the rear of the chassis.
- Insert your graphics card into the appropriate PCIe slot on the motherboard.
- Secure the graphics card with screws.
- If installing vertically, ensure you have the compatible vertical mounting adapter and riser cable (not included).
5.6 Fan and Radiator Installation
The MCV4 supports up to 10 fans and various liquid cooling radiator configurations.
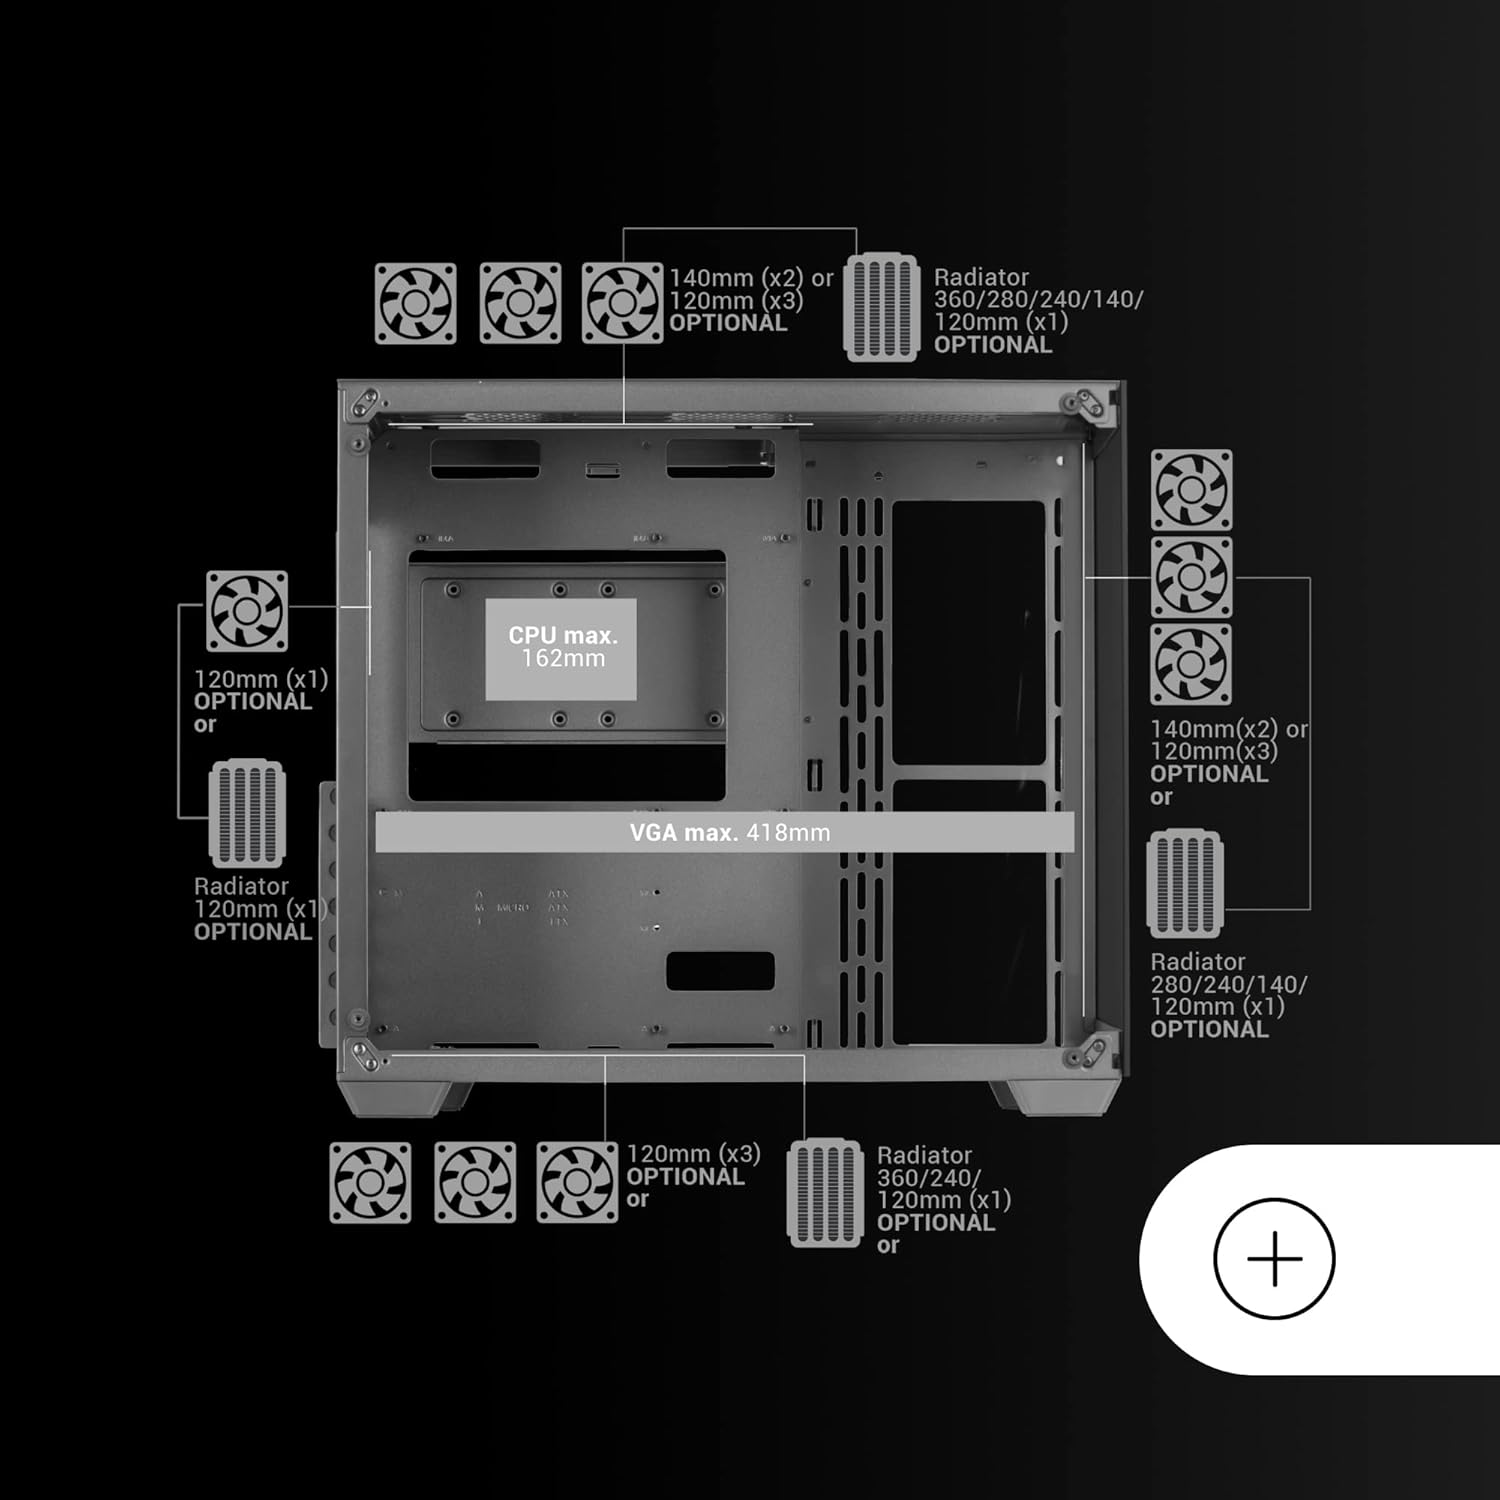
Figure 5.1: Fan and radiator compatibility diagram for the MCV4 chassis, illustrating various mounting points and sizes.
- Top: Up to 3x 120mm or 2x 140mm fans, or radiators up to 360mm/280mm.
- Side: Up to 3x 120mm or 2x 140mm fans, or radiators up to 360mm/280mm.
- Bottom: Up to 3x 120mm fans, or radiators up to 360mm/240mm.
- Rear: 1x 120mm fan or 120mm radiator.
Install fans and radiators using the appropriate screws, ensuring correct airflow direction for optimal cooling.

Figure 5.2: The MCV4 chassis configured with a custom liquid cooling setup, demonstrating its extensive support for advanced cooling solutions.
5.7 Cable Management
Utilize the cable routing cutouts and tie-down points in the rear chamber to manage cables effectively. This improves airflow and maintains a clean aesthetic.
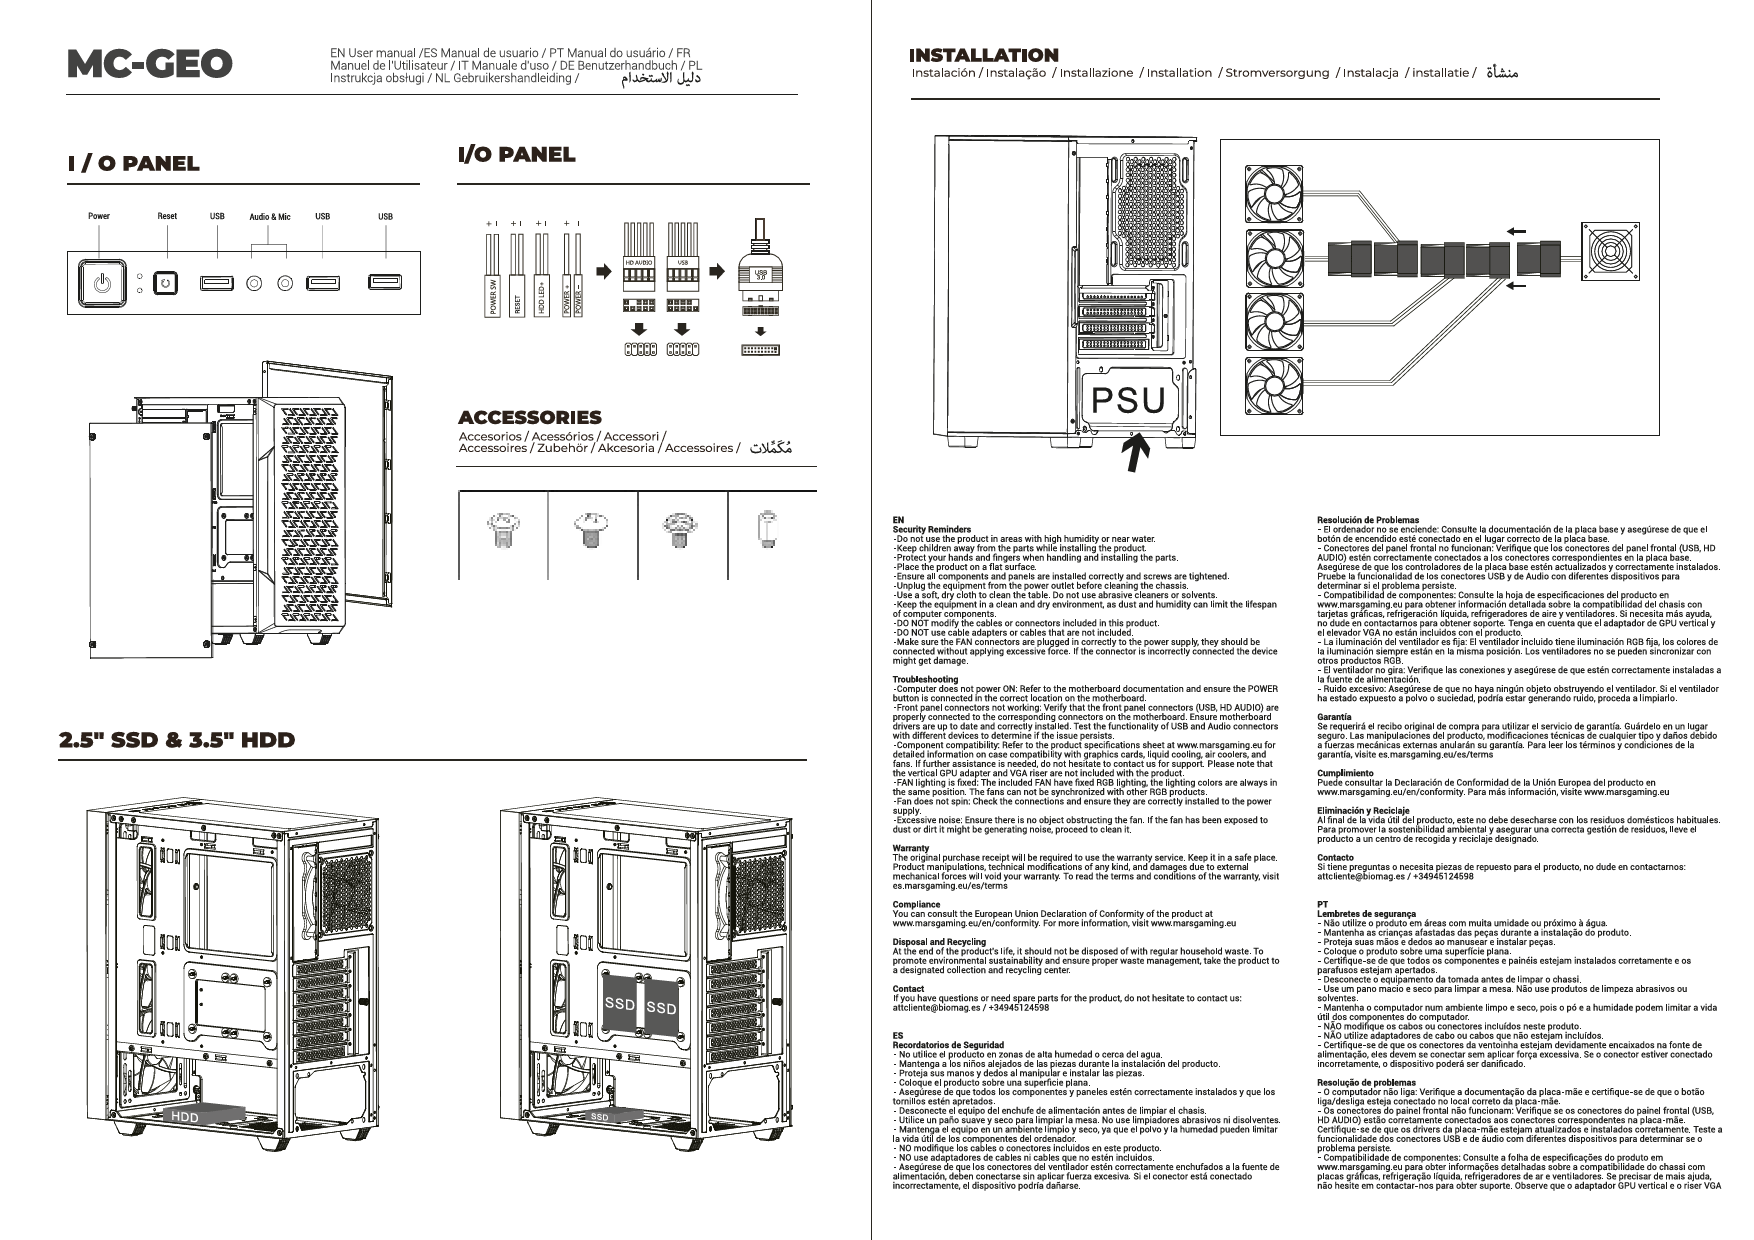
5.8 Connecting Front Panel I/O
Connect the front panel cables (USB 2.0, USB 3.0, HD Audio, Power Switch, Reset Switch, Power LED, HDD LED) to their respective headers on your motherboard. Refer to your motherboard manual for exact header locations.
6. Operating the System
Once all components are installed and connections are secure, replace the side panels. Connect your peripherals, monitor, and power cable. Press the power button on the front panel to start your system. Monitor temperatures and fan speeds to ensure optimal performance and cooling.
7. Maintenance
- Dust Cleaning: Regularly clean dust filters (if present) and internal components using compressed air. Dust accumulation can impede airflow and reduce cooling efficiency.
- Panel Cleaning: Use a soft, lint-free cloth and a mild glass cleaner (for tempered glass) or water to clean the exterior panels. Avoid abrasive cleaners.
- Cable Management Check: Periodically check cable routing to ensure no cables are obstructing fans or airflow.
8. Troubleshooting
If you encounter issues, consider the following common troubleshooting steps:
- System Not Powering On:
- Ensure the PSU is switched on and properly connected to the wall outlet and motherboard.
- Verify all front panel power switch connections to the motherboard.
- Check all internal power cables (24-pin ATX, CPU, GPU) are securely seated.
- No Display Output:
- Confirm your monitor is connected to the graphics card, not the motherboard's integrated graphics (unless you are using integrated graphics).
- Reseat the graphics card and RAM modules.
- Overheating:
- Ensure all case fans are spinning and oriented correctly for optimal airflow.
- Check CPU cooler and GPU cooler for proper installation and fan operation.
- Clean any dust buildup from fans and radiators.
9. Specifications
| Feature | Detail |
|---|---|
| Model Name | MCV4 |
| Brand | Mars Gaming |
| Case Type | Tower |
| Motherboard Compatibility | Extended ATX, ATX, Micro-ATX, Mini-ITX |
| Material | Tempered Glass |
| Color | Black |
| Product Dimensions (LxWxH) | 15.75 x 11.38 x 17.32 inches |
| Item Weight | 14.3 pounds |
| Max VGA Length | 418mm |
| Max VGA Width | 157mm |
| Max CPU Cooler Height | 162mm |
| USB 2.0 Ports | 1 |
| USB 3.0 Ports | 1 |
| Cooling Method | Water / Air |
| Fan Size Support | 120mm, 140mm |
10. Warranty and Support
Mars Gaming products are manufactured to high quality standards. For information regarding warranty coverage, technical support, or service, please refer to the official Mars Gaming website or contact your local retailer. Keep your proof of purchase for warranty claims.