MC-3TCOREM PC Case
User Manual and Installation Guide
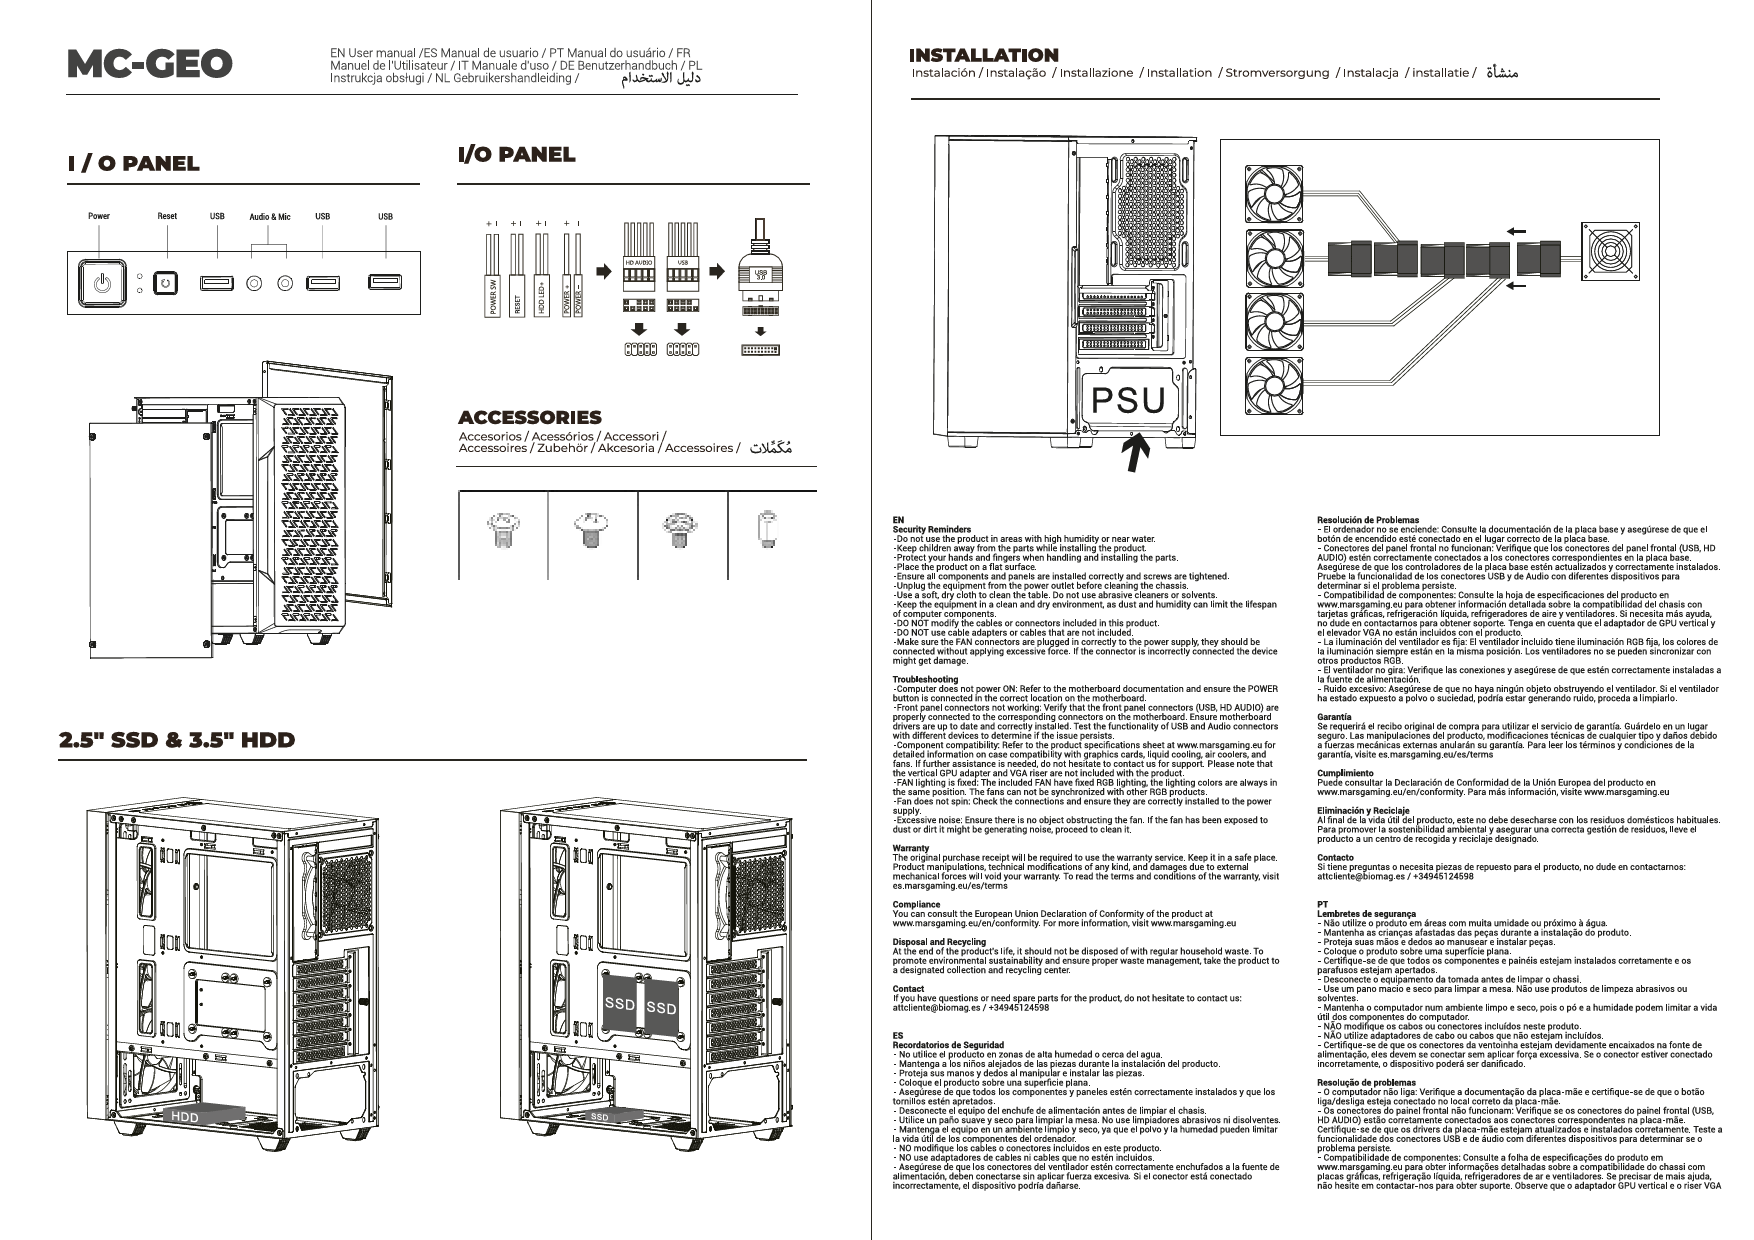
I/O Panel
The front I/O panel provides the following connections:
- Power Button
- Reset Button
- Audio & Mic Jacks
- USB Ports
- USB-C Port
Accessories
Included accessories typically consist of various screws and standoffs for mounting components.
- Mounting screws for motherboard, drives, and other components.
- Standoffs for motherboard installation.
Component Installation
Power Supply Installation
Install the power supply unit (PSU) into its designated bay, usually located at the bottom rear of the case. Secure it with screws.
Motherboard Installation
Mount the motherboard onto the pre-installed standoffs within the case. Align the motherboard's screw holes with the standoffs and secure it with screws.
Graphic Card Installation
Insert the graphics card into the appropriate PCIe slot on the motherboard. Secure the card to the case chassis using the provided expansion slot screws.
2.5" SSD & 3.5" HDD Installation
Install 2.5-inch Solid State Drives (SSDs) and 3.5-inch Hard Disk Drives (HDDs) into their respective drive bays. Secure them using screws or tool-less mounting mechanisms.
Security Reminders
- Do not use the product in areas with high humidity or near water.
- Keep children away from the parts while installing the product.
- Protect your hands and fingers when handling and installing the parts.
- Place the product on a flat surface.
- Ensure all components and panels are installed correctly and screws are tightened.
- Unplug the equipment from the power outlet before cleaning the chassis.
- Use a soft, dry cloth to clean the chassis. Do not use abrasive cleaners or solvents.
- Keep the equipment in a clean and dry environment, as dust and humidity can limit the lifespan of computer components.
Troubleshooting
Computer does not power ON:
Refer to the motherboard documentation and ensure the POWER button is connected in the correct location on the motherboard.
Front panel connectors not working:
Verify that the front panel connectors (USB, HD AUDIO) are properly connected to the corresponding connectors on the motherboard. Ensure motherboard drivers are up to date and correctly installed. Test the functionality of USB and Audio connectors with different devices to determine if the issue persists.
Component compatibility:
Refer to the product specifications sheet at www.marsgaming.eu for detailed information on case compatibility with graphics cards, liquid cooling, air coolers, and fans. If further assistance is needed, contact Mars Gaming support. Note that the vertical GPU adapter and VGA riser are not included with the product.
Warranty
The original purchase receipt is required for warranty service. Keep it in a safe place. Product manipulations, technical modifications, and damages due to external mechanical forces will void the warranty. For terms and conditions, visit es.marsgaming.eu/es/terms.
Compliance
The European Union Declaration of Conformity can be consulted at www.marsgaming.eu/en/conformity. For more information, visit www.marsgaming.eu.
Disposal and Recycling
At the end of its product life, it should not be disposed of with regular household waste. To promote environmental sustainability and ensure proper waste management, take the product to a designated collection and recycling center. ♻️
Contact
For questions or spare parts, contact Mars Gaming:
Email: attcliente@biomag.es
Phone: +34945124598
Address: Biomag S. L., Barratxi 39, Pab. 3, 01013, Vitoria, SPAIN
Made In China
Certifications: CE, FC, RoHS