1. Introduction
This manual provides detailed instructions for the assembly, operation, and maintenance of your MELLCOM 12'x12' Hardtop Gazebo. Designed with a wooden finish coated aluminum frame and a galvanized steel double roof, this gazebo offers a durable and elegant outdoor living space. Please read all instructions carefully before beginning assembly.

Figure 1: MELLCOM 12'x12' Hardtop Gazebo in a backyard setting.
2. Safety Information
- Always check snow and wind specifications for your region before installation.
- Carefully check all instructions and accessories before and during assembly.
- Ensure tight installation for waterproofing and structural integrity.
- Be cautious of high temperatures, especially during summer months.
- Verify item dimensions to ensure proper placement and clearance.
- Anchor the gazebo sturdily to the ground to prevent wind damage.
- Consult local guidelines for building codes and permits before installation.
- A minimum of 3-5 people are recommended for safe and efficient assembly.
3. Package Contents
Your MELLCOM Hardtop Gazebo comes in multiple boxes (typically 3). Please unpack all components and verify against the included parts list in your physical manual. Ensure all hardware and parts are present and undamaged before beginning assembly.

Figure 2: All components of the gazebo laid out for inspection before assembly.
4. Setup and Installation
The installation process typically requires 3-5 people and can take approximately 3 hours. Prepare necessary tools such as a wrench, electric screwdriver, and step ladder. Arrange all parts by serial number for easier assembly.
4.1. Pillar Base Installation
Attach the pillar bases to the main wooden-finish posts using the provided screws and an electric screwdriver. Ensure a secure fit for stability.
Video 1: Demonstrates the installation of the pillar bases to the main posts.
4.2. Crossbeam and Frame Assembly
Assemble the crossbeams and connect them to the main posts. The triangular support structure enhances overall stability. Ensure all connections are tightly secured.

Figure 3: Illustration of the triangular support structure for the gazebo frame.
4.3. Roof Frame and Panel Installation
Install the roof frame components, followed by the galvanized steel roof panels. The double-top design facilitates ventilation and cooling. Carefully align and secure each panel.
Video 2: Step-by-step guide for installing the roof frame and panels.
4.4. Water Gutter System
The gazebo features a professional drainage system. Water flows from the edge of the roof into the pole and then to the ground, enhancing snow load capacity and reducing issues during rainy or snowy seasons.

Figure 4: Detail of the integrated rain gutter system.
5. Operating Instructions
5.1. Curtains and Nettings
The gazebo includes a double-track system for curtains and nettings, allowing for easy sliding. Use the provided binding belts on each post to secure any layer as desired. This system offers flexibility for privacy, insect protection, and airflow.

Figure 5: Double-track system, top hooks, and Velcro straps for curtains and nettings.
5.2. Accessory Hooks
"U" and "J" hooks are located on the top roof frame. These hooks can be used to hang lights, fans, or other decorative items to enhance your gazebo experience.
6. Maintenance
- Frame: The wooden-looking powder-coated aluminum frame is designed for durability and resistance to decay, cracking, and rust. Periodically inspect the frame for any signs of wear or damage and tighten any loose screws.
- Roof: The galvanized steel roof is fade-resistant and rust-resistant. Clean the roof periodically to remove debris, leaves, and dirt to maintain its appearance and functionality.
- Curtains & Nettings: Clean curtains and nettings as needed according to fabric care instructions. Store them during extreme weather conditions to prolong their lifespan.
- Weather Protection: While the gazebo is sturdy and designed to withstand snow and wind, it is advisable to remove heavy snow accumulation from the roof to prevent structural strain. Ensure the gazebo is properly anchored, especially in windy conditions.
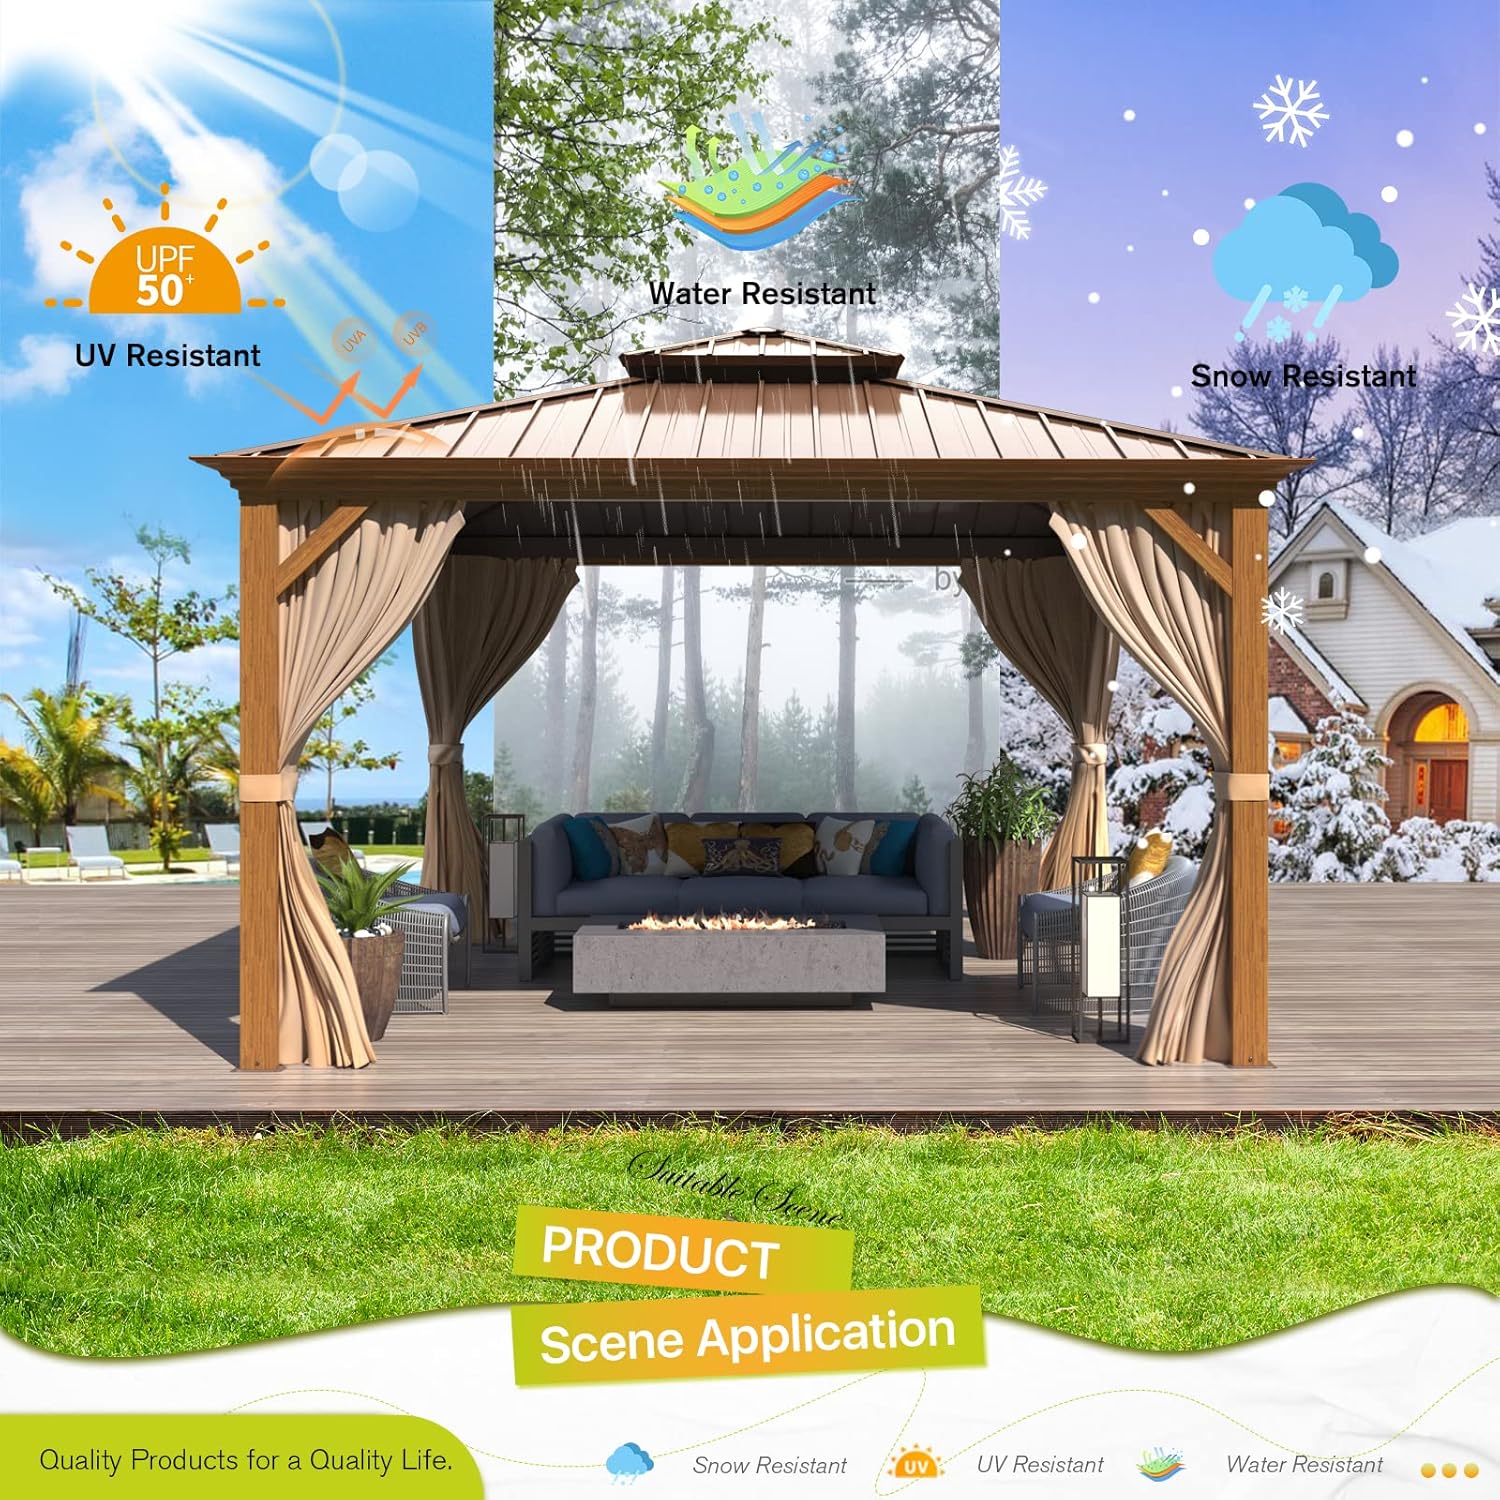
Figure 6: Gazebo features demonstrating resistance to various weather elements.
7. Troubleshooting
- Loose Connections: If the gazebo feels unstable, check all screws and bolts and tighten them as necessary.
- Water Leakage: Ensure all roof panels are correctly installed and sealed. Verify the water gutter system is clear of debris.
- Damaged Parts: If any parts are damaged during shipping or assembly, please contact MELLCOM customer service for assistance.
- Difficulty with Assembly: Refer to the installation videos and detailed instructions. If issues persist, consider seeking professional assistance or contacting customer support.
8. Specifications
| Feature | Detail |
|---|---|
| Brand | MELLCOM |
| Model | 12'x12'-Double Roof (ASIN: B0BTM3LRGT) |
| Material | Wood Grain Aluminum Frame, Galvanized Steel Roof |
| Product Dimensions | 144"L x 144"W x 123.6"H (12'L x 12'W x 10.3'H) |
| Item Weight | 269.4 Pounds |
| Water Resistance Level | Waterproof |
| Ultraviolet Light Protection | 0.99 (High UV Protection) |
| Assembly Required | Yes |
| Occupancy | 6 people |

Figure 7: Detailed product dimensions.
9. Warranty and Support
For warranty information, replacement parts, or any other inquiries, please contact MELLCOM customer service. Refer to your purchase documentation for specific warranty terms and contact details. You can also visit the official MELLCOM store on Amazon for more information: MELLCOM Store.