1. Introduction
Thank you for choosing the AONIMI 42800mAh Solar Charger Power Bank. This robust and versatile portable charger is designed to keep your devices powered in various environments, especially outdoors. Featuring a massive 42800mAh capacity, multiple output ports, and an integrated LED flashlight, it is an ideal companion for camping, hiking, travel, and daily use. This manual provides essential information on how to safely and effectively use and maintain your power bank.
2. Safety Information
Please read all safety instructions carefully before using the product to ensure safe and optimal performance.
- Do not expose the power bank to extreme temperatures (above 60°C/140°F) or direct sunlight for prolonged periods, as this may damage the battery.
- Avoid dropping, disassembling, or attempting to repair the device yourself. Refer to qualified service personnel for any repairs.
- Keep the power bank away from water, moisture, and flammable materials. While it is IP67 waterproof, prolonged submersion is not recommended.
- The solar charging feature is intended for emergency use only. For daily charging, always use a wall adapter and cable to ensure efficient and complete charging.
- This power bank features a built-in intelligent chip that protects against over-discharge, over-charge, short-circuit, and overheating.
- Use only certified charging cables and adapters to prevent damage to the power bank and connected devices.

Figure 2.1: Superior Safety Protection features of the power bank.
3. Package Contents
Please check the package for the following items:
- 1 x AONIMI 42800mAh Solar Charger Power Bank
- 1 x USB-C Charging Cable
- 1 x User Manual (this document)

Figure 3.1: Contents included in the product package.
4. Product Overview
The AONIMI Solar Charger Power Bank is designed for durability and multi-device compatibility. It features a large solar panel on one side for emergency charging and multiple output ports for various devices.

Figure 4.1: Front view of the AONIMI Solar Charger Power Bank.
Key Components:
- Solar Panel: Located on the top surface, used for emergency solar charging.
- USB-A Output Ports (x4): Standard USB ports for charging most mobile devices.
- USB-C Input/Output Port (x1): A versatile port for both charging the power bank and charging compatible devices with Power Delivery (PD).
- LED Indicators: Display the remaining battery capacity and charging status.
- LED Flashlight: Integrated high-brightness flashlight for illumination.
- Power Button: Activates the power bank and controls the flashlight.
5. Setup
Before first use, it is crucial to fully charge your AONIMI Solar Charger Power Bank using a wall adapter.
Initial Charging:
- Connect the provided USB-C cable to the USB-C port on the power bank.
- Plug the other end of the USB-C cable into a compatible USB wall adapter (not included).
- Plug the wall adapter into a power outlet.
- The LED indicators will light up, showing the charging progress. All four LEDs will be solid when fully charged.
- Allow the power bank to charge completely before its first use. This ensures optimal battery performance and longevity.

Figure 5.1: Primary charging method via USB wall adapter (left) versus emergency solar charging (right).
6. Operating Instructions
6.1 Charging External Devices
The power bank can charge up to five devices simultaneously using its multiple output ports.
- Connect your device's charging cable to one of the USB-A output ports or the USB-C input/output port on the power bank.
- Connect the other end of the cable to your mobile device.
- The power bank will automatically begin charging your device. The LED indicators will show the remaining battery level.
- To stop charging, simply disconnect your device.
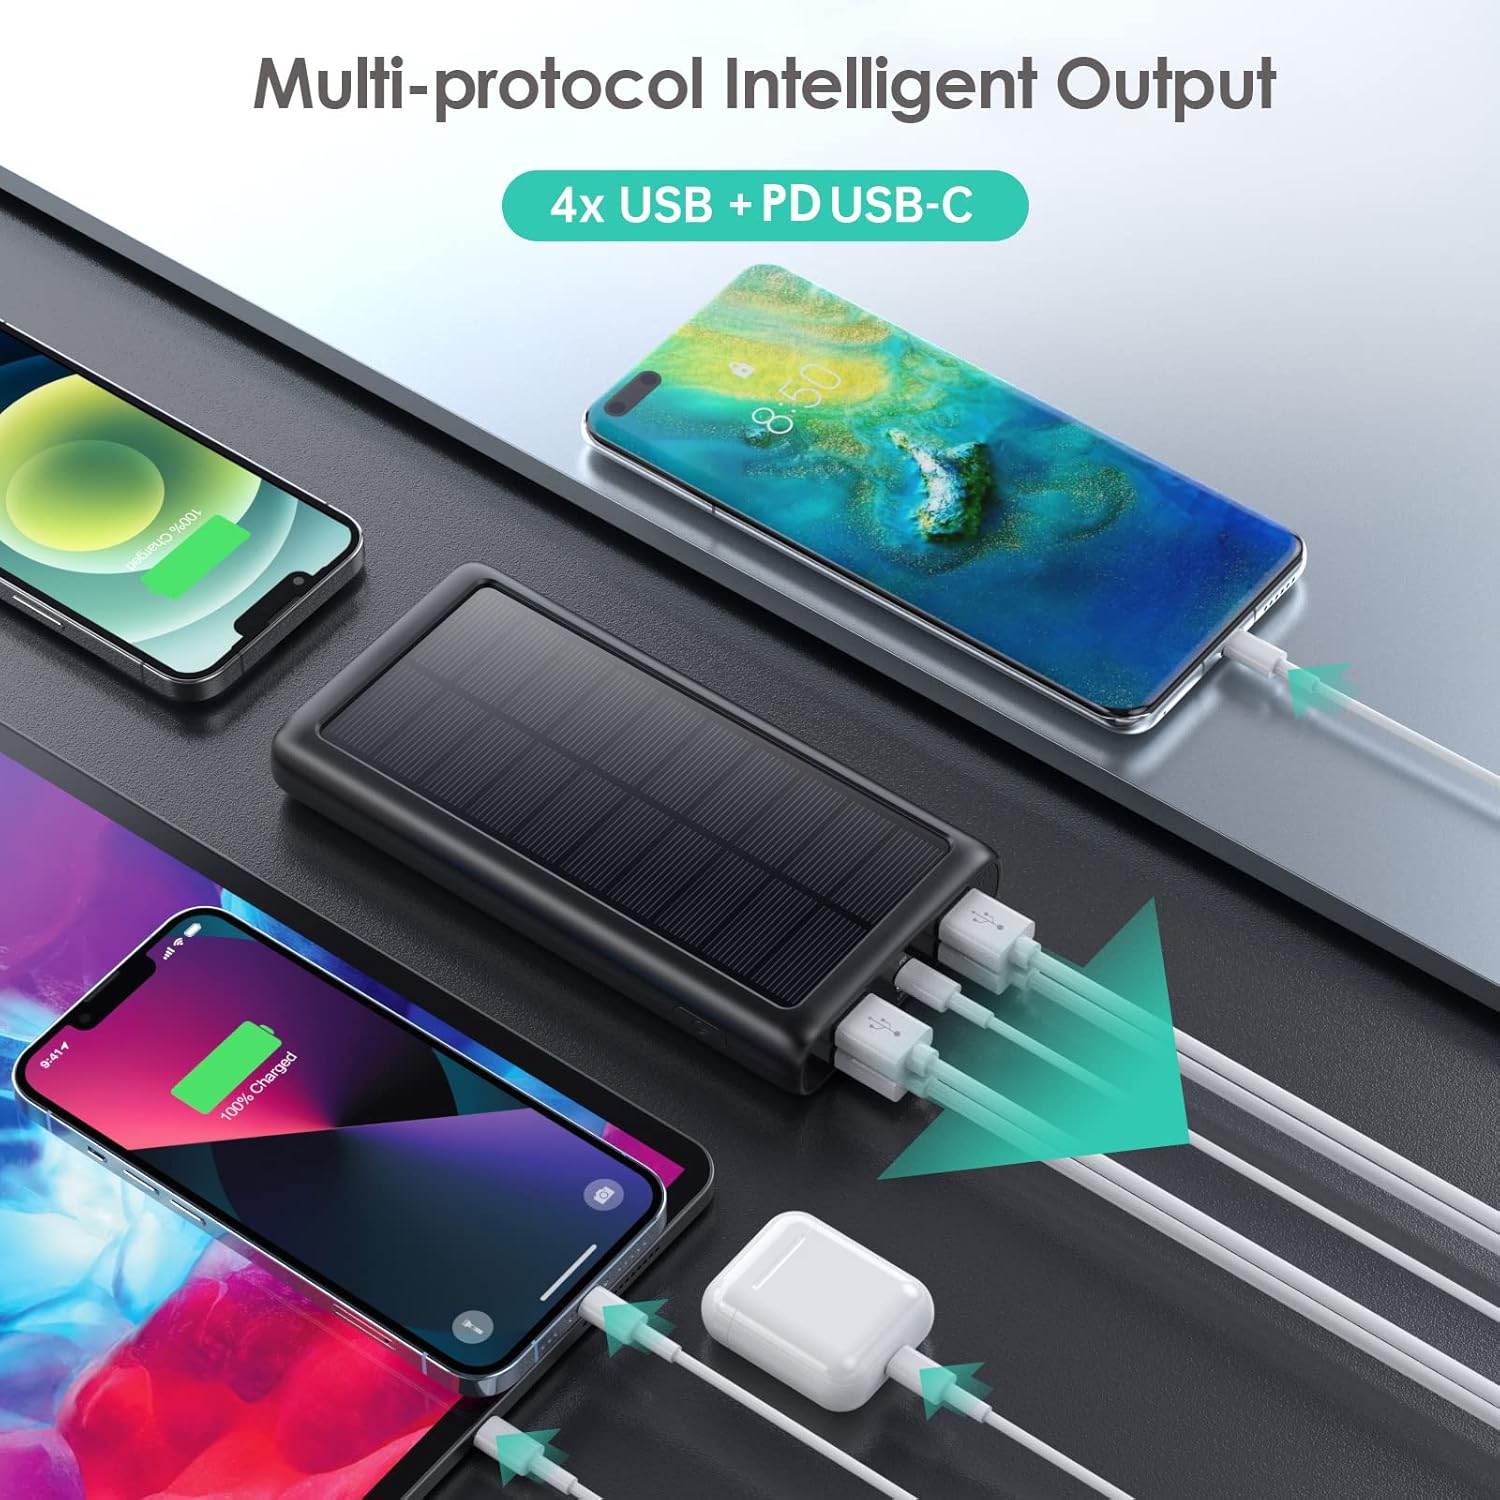
Figure 6.1: Charging multiple devices simultaneously.
6.2 Recharging the Power Bank
There are two ways to recharge your power bank:
A. Via USB-C Wall Adapter (Recommended)
This is the fastest and most efficient way to charge the power bank.
- Connect the USB-C cable to the power bank's USB-C port and a compatible wall adapter.
- The LED indicators will flash to show charging status and become solid when fully charged.
B. Via Solar Panel (Emergency Use Only)
The solar panel is designed for emergency power replenishment when no other power source is available. Due to variations in sunlight intensity and conversion rates, solar charging is significantly slower than wall charging.
- Place the power bank in direct sunlight. Ensure the solar panel is facing the sun.
- A green indicator light will illuminate to confirm solar charging is active.
- The LED battery indicators will show slow charging progress.
6.3 Using the LED Flashlight
The integrated LED flashlight is a useful feature for outdoor activities or emergencies.
- To turn on the flashlight: Double-press the power button quickly.
- To cycle through modes: Once the flashlight is on, single-press the power button to switch between Strong Light, SOS, and Strobe modes.
- To turn off the flashlight: Double-press the power button quickly again.

Figure 6.2: The LED flashlight in use, demonstrating its various modes.
7. Maintenance
Proper care and maintenance will extend the lifespan of your power bank.
- Cleaning: Wipe the power bank with a soft, dry cloth. Do not use harsh chemicals or abrasive cleaners.
- Storage: Store the power bank in a cool, dry place away from direct sunlight and extreme temperatures. If storing for long periods, charge it to about 50-75% capacity every 3 months to prevent battery degradation.
- Durability: The power bank is IP67 rated, meaning it is protected against dust ingress and can withstand immersion in water up to 1 meter for 30 minutes. It is also shockproof. However, avoid intentional abuse or prolonged exposure to harsh conditions.

Figure 7.1: The power bank's IP67 waterproof, dustproof, and shockproof capabilities.
8. Troubleshooting
If you encounter issues with your power bank, please refer to the following common problems and solutions:
| Problem | Possible Cause | Solution |
|---|---|---|
| Power bank not charging | Loose cable connection; faulty cable/adapter; power bank fully discharged. | Ensure cables are securely connected. Try a different USB-C cable and wall adapter. If fully discharged, it may take longer to initiate charging. |
| Devices not charging from power bank | Power bank is out of charge; loose cable connection; incompatible device. | Recharge the power bank. Ensure device charging cable is securely connected. Verify device compatibility (most USB/Type-C charged devices are supported). |
| Solar charging is very slow | Solar charging is an emergency feature; low sunlight intensity; panel not in direct sun. | This is normal. Solar charging is significantly slower than wall charging. Ensure the panel is in direct, strong sunlight. Use wall charging for primary power. |
| Flashlight not working | Incorrect operation; power bank is out of charge. | Double-press the power button quickly to activate. Ensure the power bank has sufficient charge. |
9. Specifications
| Feature | Specification |
|---|---|
| Model Number | HX200K3 |
| Battery Capacity | 42800mAh |
| Input (Type-C) | 5V/3A |
| Input (Solar Panel) | Emergency power sources only |
| Output (Type-C) | 5V/3A |
| Output (USB-A x4) | 5V/2.1A (each) |
| Dimensions | 16 x 8.23 x 2.54 cm (5.91 x 2.95 x 0.6 inch) |
| Weight | 372 g |
| Waterproof Rating | IP67 |
| Special Features | LED Flashlight (Strong, SOS, Strobe), Multi-Protection System |
10. Warranty and Support
AONIMI is committed to providing high-quality products and excellent customer service.
- This product comes with lifetime technical support.
- For any questions, concerns, or technical assistance, please contact AONIMI customer service.
- Please refer to your purchase platform or product packaging for specific warranty details and contact information.