1. Introduction
This manual provides detailed instructions for the setup, operation, and maintenance of your Adler AD 1196B Digital Alarm Clock. Please read this manual thoroughly before using the device to ensure proper function and longevity.
2. Product Overview
2.1 Key Features
- Digital time display with 12/24 hour format.
- Backlit display for easy viewing, automatically turns off after 4 seconds.
- Three independent alarm time settings.
- Three alarm activation settings: 5 days (weekday), 6 days (weekday + Saturday), 7 days (every day).
- Displays current time, date, indoor temperature, and humidity.
- Battery-powered for portability and backup during power outages.
2.2 Package Contents
- Adler AD 1196B Digital Alarm Clock Unit
- User Manual
Note: 2x AA batteries are required and not included in the package.

Figure 1: Front view of the Adler AD 1196B Digital Alarm Clock, displaying 12:00, 26°C, 56% humidity, and the current date.
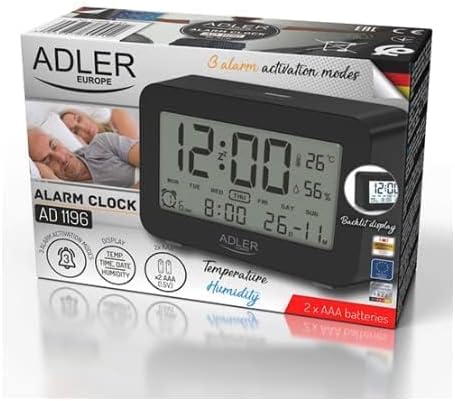
Figure 2: The Adler AD 1196B Digital Alarm Clock shown in its retail packaging, highlighting key features.
3. Setup
3.1 Battery Installation
- Locate the battery compartment cover on the back of the alarm clock.
- Slide or lift the cover to open the compartment.
- Insert two (2) AA batteries, ensuring the correct polarity (+ and -) as indicated inside the compartment.
- Replace the battery compartment cover securely.
The clock will power on automatically once batteries are inserted. The display will show default settings or begin flashing.
3.2 Initial Power On
Upon successful battery installation, the display will illuminate. You may need to press a button (e.g., "MODE" or "SET") to activate the display if it remains blank after battery insertion. The backlight will activate briefly and then turn off.
4. Operating Instructions
Familiarize yourself with the control buttons, typically located on the back or top of the device. Common buttons include: MODE, SET, UP/+, DOWN/-, ALARM.
4.1 Setting the Time
- Press and hold the SET button (or MODE button, depending on model) until the hour digits begin to flash.
- Use the UP/+ or DOWN/- buttons to adjust the hour.
- Press SET (or MODE) again to move to the minute setting.
- Use the UP/+ or DOWN/- buttons to adjust the minutes.
- Continue pressing SET (or MODE) to cycle through 12/24 hour format, and then to exit time setting mode.
4.2 Setting the Date
- From normal time display, press the MODE button repeatedly until the date display starts flashing or you enter date setting mode.
- The year digits may flash first. Use UP/+ or DOWN/- to adjust the year.
- Press MODE to move to the month setting, then adjust with UP/+ or DOWN/-.
- Press MODE to move to the day setting, then adjust with UP/+ or DOWN/-.
- Press MODE again to confirm and exit date setting.
4.3 Setting Alarms (Alarm 1, Alarm 2, Alarm 3)
The AD 1196B features three independent alarms. The process is similar for each.
- Press the ALARM button once to view Alarm 1. Press again for Alarm 2, and a third time for Alarm 3.
- While viewing the desired alarm (e.g., AL1), press and hold the SET button until the alarm hour digits flash.
- Use UP/+ or DOWN/- to set the alarm hour.
- Press SET to move to the alarm minute setting.
- Use UP/+ or DOWN/- to set the alarm minutes.
- Press SET again to confirm the alarm time.
- To activate/deactivate an alarm, press the ALARM button repeatedly until the alarm icon (e.g., bell symbol) appears or disappears next to the corresponding alarm number (AL1, AL2, AL3).
4.4 Alarm Activation Modes (5, 6, 7 Days)
After setting an alarm time, you can choose its activation frequency:
- While in alarm setting mode (after setting minutes for an alarm), press SET one more time. The display will show a day indicator (e.g., "5 DAY", "6 DAY", "7 DAY").
- Use UP/+ or DOWN/- to cycle through the options:
- 5 DAY: Alarm sounds Monday to Friday.
- 6 DAY: Alarm sounds Monday to Saturday.
- 7 DAY: Alarm sounds every day of the week.
- Press SET to confirm your selection and exit alarm setting for that specific alarm.
4.5 Backlight Function
The display features a backlight for improved visibility in low light conditions. The backlight automatically activates when a button is pressed and turns off after approximately 4 seconds to conserve battery power.
4.6 Temperature and Humidity Display
The alarm clock continuously displays the current indoor temperature (in Celsius) and relative humidity percentage. No specific action is required to view these readings; they are shown on the main display.
5. Maintenance
5.1 Cleaning
To clean the alarm clock, gently wipe the surface with a soft, dry cloth. Do not use abrasive cleaners, solvents, or chemical sprays, as these may damage the display or casing.
5.2 Battery Replacement
When the display becomes dim or the clock functions erratically, it is time to replace the batteries. Follow the battery installation steps in Section 3.1. Always replace both batteries with new AA batteries of the same type. Dispose of old batteries responsibly according to local regulations.
6. Troubleshooting
| Problem | Possible Cause | Solution |
|---|---|---|
| Display is blank or dim. | Batteries are low or incorrectly installed. | Replace batteries with new AA batteries, ensuring correct polarity. |
| Alarm does not sound. | Alarm is not activated or set incorrectly. | Ensure the alarm icon is visible on the display. Verify the alarm time and activation mode (5, 6, or 7 days) are set correctly. |
| Time/Date is incorrect. | Time/Date was not set or reset after battery change. | Follow instructions in Section 4.1 and 4.2 to set the correct time and date. |
| Temperature/Humidity readings seem inaccurate. | Clock is placed near a heat source, vent, or in direct sunlight. | Relocate the clock to a stable environment away from extreme temperature or humidity fluctuations. Allow time for readings to stabilize. |
7. Specifications
- Model: AD 1196B
- Power Source: 2 x AA Batteries (not included)
- Display Type: Digital LCD with Backlight
- Functions: Time, Date, Day of Week, Temperature (°C), Humidity (%), 3 Alarms with 3 Activation Modes
- Backlight Duration: Approximately 4 seconds
- Material: Plastic
- Dimensions (W x D x H): 11 cm x 3.81 cm x 5 cm
- Weight: 1.6 kg
8. Warranty and Support
For warranty information or technical support, please refer to the warranty card included with your product or contact the manufacturer directly. Keep your purchase receipt as proof of purchase.
Manufacturer: Adler


