
Displays2go D2G38844
Displays2go 24" x 36" White Letter Board Instruction Manual
Model: D2G38844
Product Overview
This manual provides instructions for the Displays2go 24" x 36" White Letter Board with Spring Base. This double-sided, floor-standing sign is designed for outdoor use, featuring a durable aluminum frame and a wind-resistant spring base. It includes a 320-piece letter and symbol set for customizable messaging.
Key Features:
- 24" x 36" Silver Snap Frame
- 2-Sided Design with Two Letter Boards
- Springboard Base for wind resistance
- 320 Included Letters & Symbols
- Protective PVC Lens
- Double-Sided, Wind Resistant, Outdoor Placement

Image: Front view of the Displays2go 24" x 36" White Letter Board, showcasing its double-sided display with a sample message and the spring base.
Package Contents
Please verify that all components are present before beginning assembly.
- (1) 24" x 36" Double-Sided Letter Board Frame
- (1) Spring Base Assembly
- (2) White Letter Boards (pre-installed)
- (1) Set of 320 Letters and Symbols
- (2) Protective PVC Lenses (pre-installed)
- Necessary hardware for assembly

Image: A collection of red and black letters, numbers, and symbols, indicating the included 320-piece set for customizing messages on the letter board.
Setup and Assembly
Follow these steps to assemble your Displays2go Letter Board.
- Unpack Components: Carefully remove all parts from the packaging. Lay them out on a clean, flat surface to ensure all components are present and undamaged.
- Attach Frame to Base: Align the mounting points on the bottom of the letter board frame with the corresponding holes on the spring base assembly. Secure the frame to the base using the provided bolts and nuts. Ensure all connections are tightened securely to prevent wobbling.
- Position the Sign: Once assembled, place the letter board in your desired outdoor or indoor location. Ensure the base is on a stable, level surface. The spring base is designed to allow the sign to sway in windy conditions, reducing the risk of tipping.
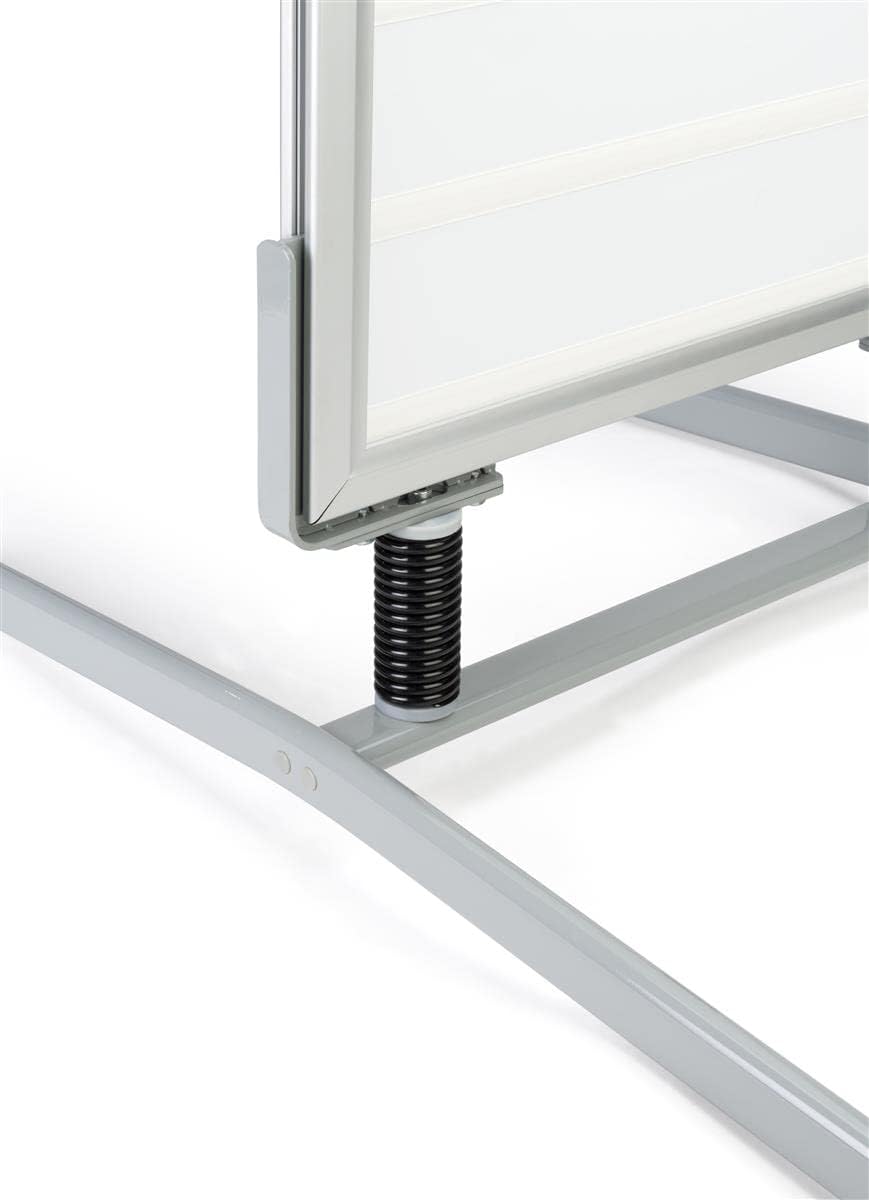
Image: Detail of the spring base connection, showing the black spring and silver mounting hardware that allows the sign to flex in wind.
Operating Instructions
This section details how to change messages and maintain your letter board.
Changing Letters and Messages
- Open Snap Frame: To access the letter board, gently open the snap-open aluminum frame on the desired side. The frame edges will pivot outwards, revealing the letter board and protective PVC lens.
- Remove PVC Lens: Carefully lift and remove the clear PVC protective lens.
- Arrange Letters: Place the desired letters and symbols from the included set into the grooves of the white letter board. Ensure they are securely seated.
- Replace PVC Lens and Close Frame: Once your message is complete, carefully place the PVC lens back over the letters. Then, snap the aluminum frame edges back into place, ensuring they are fully closed to secure the lens and letter board.

Image: A hand pulling open the silver snap frame, illustrating the mechanism for accessing the letter board.
Double-Sided Display
The letter board features a double-sided design, allowing you to display different messages on each side or the same message for maximum visibility from multiple directions.

Image: The back side of the letter board, showing a blank white surface ready for message customization, highlighting its double-sided capability.
Maintenance
Regular maintenance will help prolong the life and appearance of your letter board.
- Cleaning the Frame and Lens: Use a soft, damp cloth to wipe down the aluminum frame and PVC lens. For stubborn marks, a mild, non-abrasive cleaner can be used. Avoid harsh chemicals or abrasive materials that could scratch the surfaces.
- Cleaning Letter Boards: The white letter boards can be wiped clean with a damp cloth. Ensure they are dry before re-inserting letters.
- Letter Storage: Store unused letters and symbols in a dry, safe place to prevent loss or damage.
- Base Inspection: Periodically check the spring base and all connections for tightness. Re-tighten any loose bolts or nuts to ensure stability.
Troubleshooting
| Problem | Possible Cause | Solution |
|---|---|---|
| Sign wobbles excessively or tips over in wind. | Loose base connections; extreme wind conditions; uneven surface. | Ensure all bolts connecting the frame to the base are tightened. Relocate the sign to a more sheltered area during extreme weather. Place on a level surface. |
| Letters do not stay in grooves. | Letters are worn or damaged; grooves are dirty. | Clean the grooves on the letter board. Replace damaged letters if necessary. |
| Frame does not snap shut securely. | Debris in the frame mechanism; frame bent; PVC lens not seated correctly. | Check for and remove any debris. Ensure the PVC lens is properly aligned. If the frame is bent, contact support. |
Specifications
| Attribute | Detail |
|---|---|
| Model Number | D2G38844 |
| Overall Dimensions (W x H x D) | 28.0" x 48.0" x 39.3" |
| Base Dimensions (W x H x D) | 26.8" x 8.5" x 39.3" |
| Viewable Area (W x H) | 23.5" x 35.5" |
| Media Size | 24" x 36" |
| Weight | 28.5 lbs |
| Material | Aluminum, Plastic |
| Color | Silver Frame, White Letter Board |
| Placement Type | Floor Standing, Outdoor Rated |
| Letter Set Included | 320 Letters & Symbols (3.6" height) |
| Lens Material | PVC |
Warranty Information
Displays2go products typically come with a manufacturer's warranty covering defects in materials and workmanship. For specific warranty terms and conditions, please refer to the documentation included with your purchase or visit the official Displays2go website. Keep your proof of purchase for warranty claims.
Customer Support
If you have any questions, require assistance with assembly, or need to report a damaged or missing part, please contact Displays2go customer support:
- Website: www.displays2go.com
- Phone: Refer to the Displays2go website for current contact numbers.
- Email: Refer to the Displays2go website for current contact email.
When contacting support, please have your model number (D2G38844) and purchase information ready.
Ask a question about this manual
Ask about setup, troubleshooting, compatibility, parts, safety, or missing instructions. Manuals+ will review the question and use this page’s manual context to help answer it.