
GIGABYTE B760M AORUS ELITE AX
Contents
GIGABYTE B760M AORUS ELITE AX Motherboard User Manual
Model: B760M AORUS ELITE AX
1. Product Overview
The GIGABYTE B760M AORUS ELITE AX is a high-performance motherboard designed for 13th and 12th Gen Intel Core Series Processors. It features advanced power delivery, cutting-edge thermal solutions, and next-generation connectivity to optimize your system's performance.
Key features include:
- Intel LGA 1700 Socket: Supports 13th and 12th Gen Intel Core Series Processors
- DDR5 Compatible: Dual Channel DDR5, 4 DIMMs
- Commanding Power Design: 12+1+1 Twin Hybrid Phases Digital Power Design with 60A DrMOS
- Cutting-Edge Thermal Design: Fully Covered MOSFET Heatsinks, Ultra Durable PCIe Armor, Aluminum I/O Cover, M.2 Thermal Guard, 6-Layer & 2X Copper PCB
- Next Gen Connectivity: PCIe 4.0, NVMe PCIe 4.0 M.2, USB 3.2 Gen 2 Type-C, PCIe EZ-Latch
- Fast Networking: 2.5GbE LAN, Intel WiFi 6E
- Fine Tuning Features: RGB FUSION 2.0, Supports Addressable LED & RGB LED Strips, Smart Fan 6, Q-Flash Plus Update BIOS without installing CPU, Memory, and GPU
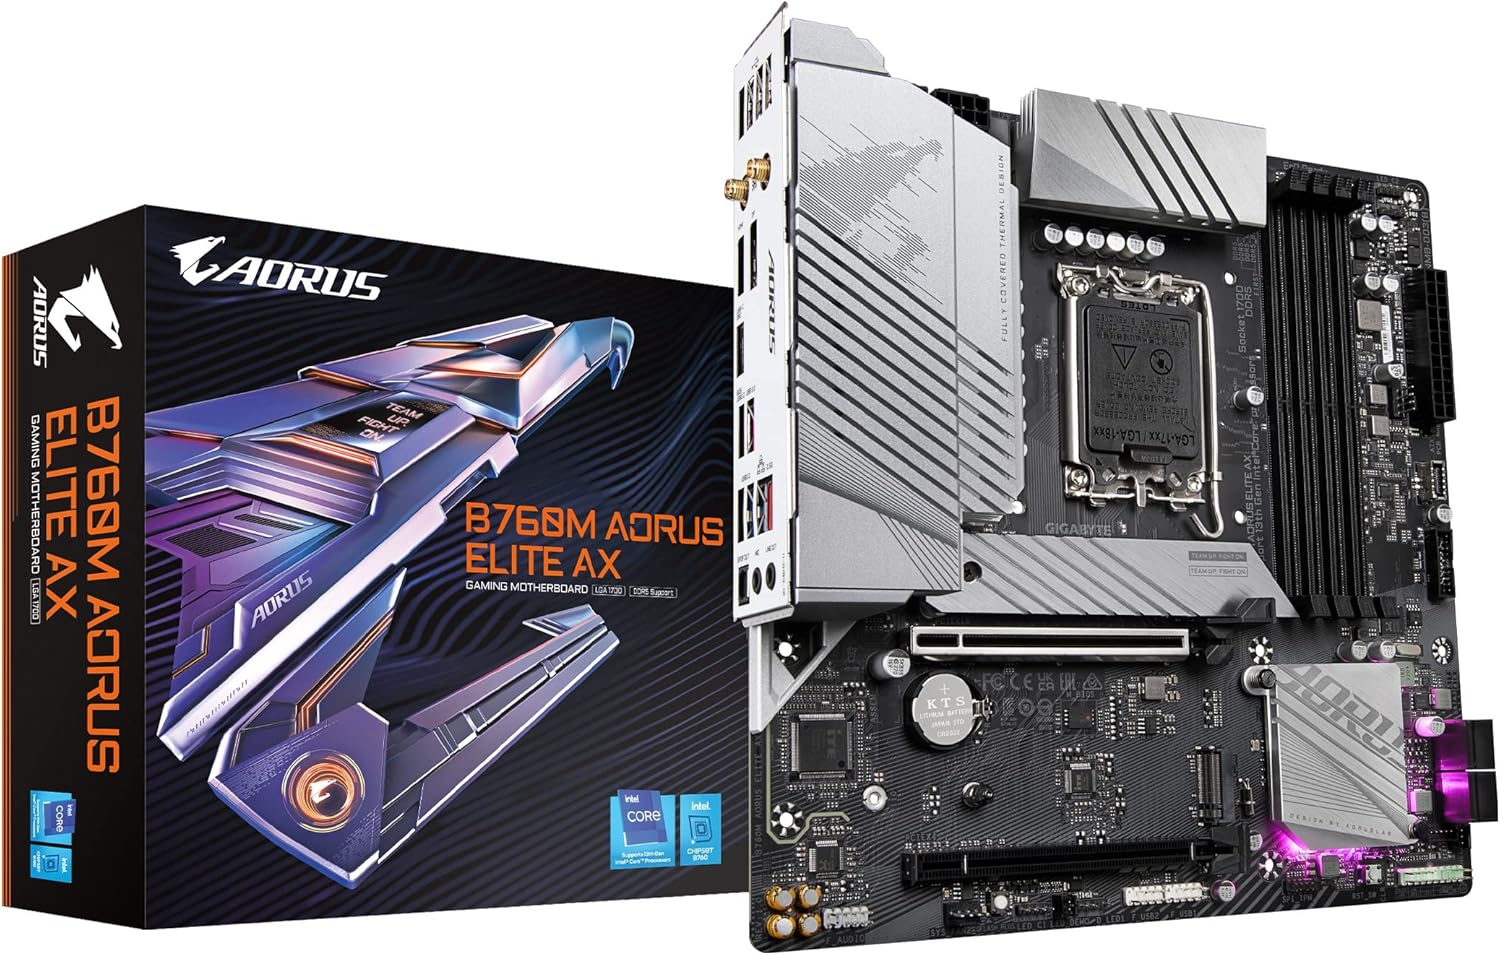
Figure 1: GIGABYTE B760M AORUS ELITE AX Motherboard and its retail packaging.
2. Setup and Installation
Proper installation is crucial for optimal performance and system stability. Follow these guidelines for setting up your motherboard.
2.1 Preparing for Installation
- Ensure your power supply is disconnected from the wall outlet.
- Work on a clean, static-free surface. Use an anti-static wrist strap if available.
- Gather all necessary components: CPU, CPU cooler, RAM, storage devices (M.2 SSDs, SATA drives), graphics card, and power supply.
2.2 CPU Installation (LGA 1700 Socket)
- Locate the LGA 1700 CPU socket on the motherboard.
- Gently push down the load lever and pull it to the side to open the CPU socket retention frame.
- Carefully align the triangular mark on the CPU with the corresponding mark on the socket.
- Place the CPU into the socket without forcing it.
- Close the retention frame and secure it by pushing the load lever back into place.

Figure 2: Top view of the motherboard, highlighting the LGA 1700 CPU socket.
2.3 RAM Installation (DDR5)
- Identify the DDR5 DIMM slots. This motherboard supports Dual Channel DDR5 across 4 DIMMs.
- Open the clips at both ends of the DIMM slot.
- Align the notch on the DDR5 memory module with the key in the DIMM slot.
- Insert the memory module firmly into the slot until the clips snap into place. Ensure both clips are fully closed.
2.4 M.2 SSD Installation (PCIe EZ-Latch)
This motherboard features the M.2 EZ-Latch Plus for tool-less M.2 SSD installation.
- Locate the M.2 slots on the motherboard.
- Insert the M.2 SSD into the slot at an angle.
- Gently push down the M.2 SSD until it is flat against the motherboard.
- Secure the M.2 SSD using the EZ-Latch mechanism. No screw is required.
Video 1: This video demonstrates the easy installation of an M.2 SSD using the EZ-Latch Plus feature on a GIGABYTE AORUS motherboard, showing the tool-less process.

Figure 3: Angled view of the motherboard, showing various components and slots.
3. Operating Your Motherboard
Once all components are installed and connected, you can power on your system. The motherboard's BIOS (Basic Input/Output System) is the first software that runs when you turn on your computer.
3.1 BIOS/UEFI Settings
- To enter the BIOS/UEFI setup, press the DEL key repeatedly during the system's boot-up process.
- The BIOS/UEFI interface allows you to configure various system settings, including boot order, CPU and memory frequencies, fan speeds (Smart Fan 6), and more.
- Refer to the detailed user manual (PDF) for comprehensive BIOS/UEFI settings and options.
3.2 Q-Flash Plus
The Q-Flash Plus feature allows you to update the BIOS without installing the CPU, memory, or graphics card. This is useful for compatibility with newer CPUs or for recovering from a corrupted BIOS.
- Download the latest BIOS file from the GIGABYTE website.
- Rename the downloaded BIOS file to GIGABYTE.bin and save it to the root directory of a USB flash drive (FAT32 format).
- Insert the USB flash drive into the dedicated Q-Flash Plus USB port on the motherboard's rear I/O panel.
- Press the Q-Flash Plus button. The QFLED will flash during the BIOS matching and updating process.
- Wait until the QFLED stops flashing, indicating the BIOS update is complete.

Figure 4: Rear I/O panel, showing various ports including the dedicated Q-Flash Plus USB port.
4. Maintenance
Regular maintenance helps ensure the longevity and stable operation of your motherboard.
- Dust Removal: Periodically clean dust from the motherboard and components using compressed air. Ensure the system is powered off and unplugged before cleaning.
- BIOS Updates: Keep your BIOS updated to the latest version to benefit from performance improvements, bug fixes, and compatibility enhancements. Refer to the Q-Flash Plus section for instructions.
- Driver Updates: Regularly update chipset, LAN, audio, and other drivers from the GIGABYTE official website to ensure optimal performance and stability.
5. Troubleshooting
This section provides solutions to common issues you might encounter.
| Problem | Possible Cause | Solution |
|---|---|---|
| System does not power on. | Power cables not connected properly, faulty power supply. | Check all power connections (24-pin ATX, 8-pin CPU). Test power supply. |
| No display output. | Graphics card not seated correctly, monitor cable loose, faulty RAM. | Reseat graphics card and RAM. Check monitor cable connections. Try one RAM stick at a time. |
| System unstable or crashes. | Overheating, incompatible RAM, outdated BIOS/drivers. | Ensure proper cooling. Verify RAM compatibility. Update BIOS and drivers. |
| M.2 SSD not detected. | Incorrect installation, M.2 slot disabled in BIOS, driver issue. | Ensure M.2 SSD is fully seated. Check BIOS settings for M.2 slot. Install necessary drivers. |
For more complex issues, consult the official GIGABYTE support resources or the full user manual.
6. Specifications
Detailed technical specifications for the GIGABYTE B760M AORUS ELITE AX Motherboard.
| Feature | Detail |
|---|---|
| Brand | GIGABYTE |
| Series | B760M AORUS ELITE AX |
| CPU Socket | LGA 1700 |
| Compatible Processors | 13th and 12th Gen Intel Core |
| Chipset Type | Intel B760 |
| RAM Memory Technology | DDR5 |
| Memory Speed | Up to 7800 MHz (OC) |
| Wireless Type | 802.11a/b/g/n/ac, Bluetooth, Intel WiFi 6E |
| LAN | 2.5GbE LAN |
| Product Dimensions (LxWxH) | 10.62 x 10.55 x 2.67 inches |
| Item Weight | 2.2 pounds |
7. Warranty and Support
For detailed warranty information, technical support, and additional resources, please refer to the official GIGABYTE channels.
- Official User Manual (PDF): For comprehensive instructions and detailed diagrams, download the full user manual: Download PDF Manual
- GIGABYTE Brand Store: Explore other GIGABYTE products and find support information on their official store page: Visit GIGABYTE Store
- Online Support: Visit the GIGABYTE official website for drivers, BIOS updates, FAQs, and customer support contact information.
Ask a question about this manual
Ask about setup, troubleshooting, compatibility, parts, safety, or missing instructions. Manuals+ will review the question and use this page’s manual context to help answer it.