
Levenhuk TH50
Levenhuk Wezzer Teo TH50 Thermohygrometer Kit
User Manual
Introduction
The Levenhuk Wezzer Teo TH50 is a multi-functional thermohygrometer kit designed to monitor indoor and outdoor temperature and humidity. It features a main unit with a color display and a remote wireless sensor. In addition to environmental monitoring, the device includes a clock, alarm clock, and calendar functions, along with weather trend and moon phase displays.
This manual provides detailed instructions for the proper setup, operation, and maintenance of your Levenhuk Wezzer Teo TH50.
Package Contents
- Thermohygrometer Main Unit
- Wireless Remote Sensor
- USB Cable (for main unit power)
- User Manual
- Warranty Card

Image: The Levenhuk Wezzer Teo TH50 kit showing the main thermohygrometer unit, a white wireless remote sensor, a black USB cable, and the user manual.
Setup
1. Powering the Remote Sensor
- Open the battery compartment on the back of the wireless remote sensor.
- Insert 2 AAA batteries (not included), ensuring correct polarity (+/-).
- Close the battery compartment. The sensor will begin transmitting data.
2. Powering the Main Unit
The main unit can be powered by batteries or via a USB cable.
- Battery Power: Open the battery compartment on the back of the main unit. Insert 3 AAA batteries (not included), observing correct polarity.
- USB Power: Connect the provided USB cable to the DC 5V port on the back of the main unit and to a 5V, 1000mA USB power adapter (not included) or a compatible USB port.
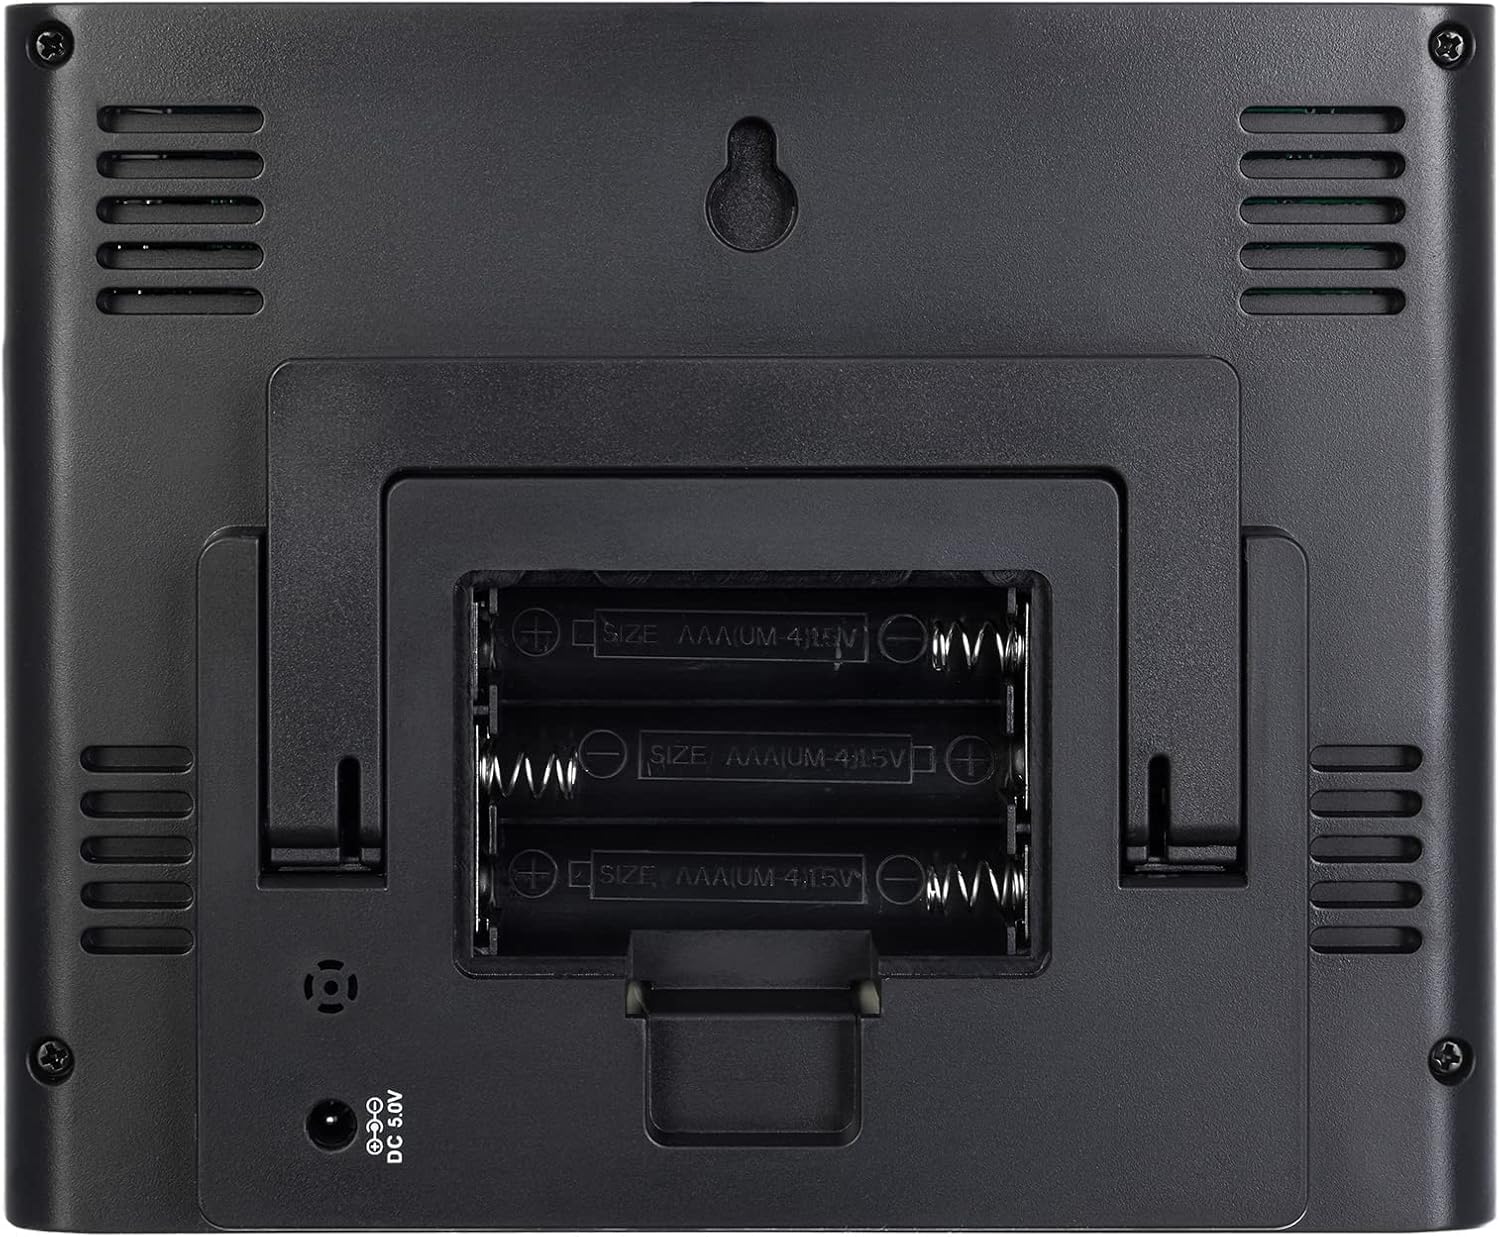
Image: Rear view of the main unit with the battery compartment cover removed, showing three AAA battery slots. The DC 5V power input is visible below the compartment.
3. Initial Pairing and Placement
- Once both units are powered, the main unit will automatically search for the remote sensor. This may take a few minutes.
- Place the main unit indoors in a central location, away from direct sunlight, heat sources, and drafts.
- Place the remote sensor outdoors in a shaded, dry location, protected from direct rain and sunlight. Ensure it is within the 80m (line-of-sight) radio signal radius of the main unit.
- The main unit can be placed on a tabletop using its integrated stand or mounted on a wall.

Image: Rear view of the main unit, showing the foldable stand extended for tabletop use and a wall-mount hole at the top.
Operating Instructions
Display Overview

Image: Front view of the Levenhuk Wezzer Teo TH50 main unit, displaying time, date, indoor and outdoor temperature and humidity, weather forecast, and moon phase on its color screen.
The main unit features a color screen displaying various information:
- Time and Date: Located at the top left.
- Outdoor (Remote) Temperature and Humidity: Displayed on the left side, labeled "REMOTE".
- Indoor Temperature and Humidity: Displayed on the right side, labeled "INDOOR".
- Weather Forecast: Central display with graphical icons (sun, clouds, rain).
- Moon Phase: Top right corner.
- Comfort Level: Indicators like "COMFORT OK", "TOO WET" for humidity.
- Trend Indicators: Arrows indicating rising, falling, or stable temperature/humidity.
- Low Battery Indicator: Appears when batteries need replacement.
Setting Time and Date
Specific buttons for setting time and date are typically located on the back or side of the main unit, or are touch-sensitive areas on the front. Refer to the icons on the display for guidance.
- Press and hold the "SET" button (or equivalent touch area) to enter time setting mode.
- Use the "UP" and "DOWN" buttons (or touch areas) to adjust values.
- Press "SET" again to confirm and move to the next setting (e.g., hour, minute, year, month, day, 12/24 hour format).
- Exit setting mode by pressing "SET" after the last setting or by waiting for automatic exit.
Setting the Alarm Clock
- Press the "ALARM" button (or equivalent) to view the alarm time.
- Press and hold "ALARM" to enter alarm setting mode.
- Adjust the hour and minute using the "UP" and "DOWN" buttons.
- Press "ALARM" to confirm each setting.
- Activate/deactivate the alarm by pressing the "ALARM" button once while viewing the alarm time. An alarm icon will appear on the display when active.
- The snooze function is typically activated by pressing any button (often a dedicated "SNOOZE/LIGHT" button) when the alarm sounds.
Temperature and Humidity Units
To switch between Celsius (°C) and Fahrenheit (°F) for temperature, locate the dedicated button (often labeled "°C/°F") or a touch area on the main unit and press it. Humidity is displayed in percentage (%).
Maximum and Minimum Values
The device records maximum and minimum temperature and humidity values. Press the "MAX/MIN" button (or equivalent) to cycle through current, maximum, and minimum readings. To reset these values, press and hold the "MAX/MIN" button while the maximum or minimum values are displayed.
Weather Trend and Forecast
The weather forecast is based on changes in atmospheric pressure. The display shows graphical icons (e.g., sunny, partly cloudy, cloudy, rainy) to indicate the predicted weather for the next 12-24 hours. Trend arrows next to temperature and humidity readings indicate whether these values are rising, falling, or remaining stable.
Maintenance
- Cleaning: Wipe the main unit and sensor with a soft, dry cloth. Do not use abrasive cleaners or solvents.
- Battery Replacement: Replace batteries in both units when the low battery indicator appears on the display. Always replace all batteries in a unit at the same time with new ones of the same type.
- Storage: If storing the device for an extended period, remove all batteries to prevent leakage. Store in a cool, dry place.
Troubleshooting
| Problem | Possible Cause | Solution |
|---|---|---|
| No display on main unit | Batteries are dead or incorrectly inserted; USB power not connected or faulty. | Check battery polarity and replace if necessary. Ensure USB cable is securely connected to a working power source. |
| No outdoor sensor reading | Sensor batteries are dead; sensor out of range; interference; sensor not paired. | Replace sensor batteries. Move sensor closer to the main unit. Avoid placing near electronic devices that may cause interference. Re-pair the sensor (refer to manual for specific pairing steps, usually involves pressing a button on the sensor and main unit). |
| Incorrect time/date | Time/date not set correctly. | Follow the "Setting Time and Date" instructions to adjust. |
| Inaccurate readings | Sensor exposed to direct sunlight, heat, or moisture; poor ventilation. | Relocate the sensor to a shaded, well-ventilated area protected from elements. Ensure main unit is not near heat/cold sources. |
Specifications
| Feature | Detail |
|---|---|
| Product Type | Thermohygrometer with Wireless Sensor |
| Indoor Temperature Range | -10°C to +50°C (14°F to 122°F) |
| Outdoor Temperature Range | -40°C to +70°C (-40°F to 158°F) |
| Humidity Measurement Range | 20% to 95% RH |
| Temperature Units | °C / °F selectable |
| Display Type | Color LCD with backlight |
| Radio Signal Frequency | 433.92 MHz |
| Radio Signal Radius | 80m (line-of-sight) |
| Main Unit Power Source | 3 x AAA batteries (not included) or USB cable (5V, 1000mA, adapter not included) |
| Remote Sensor Power Source | 2 x AAA batteries (not included) |
| Additional Features | Clock, Alarm Clock with Snooze, Calendar, Moon Phase, Weather Trend, Max/Min Value Display, Comfort Level Estimation, Low Battery Indicator |
| Dimensions (Main Unit) | Approx. 4.5 x 22 x 12.3 cm |
| Body Material | Plastic |
Warranty and Support
This product comes with a warranty as specified by the manufacturer. Please refer to the warranty card included in your package for detailed terms and conditions, including the warranty period and coverage.
For technical support, troubleshooting assistance beyond what is provided in this manual, or warranty claims, please contact Levenhuk customer service. Contact information can typically be found on the manufacturer's official website or on the warranty card.
You may also visit the product page on Amazon for additional information or to contact the seller.
Related documentsTH50


Ask a question about this manual
Ask about setup, troubleshooting, compatibility, parts, safety, or missing instructions. Manuals+ will review the question and use this page’s manual context to help answer it.