1. Introduction
This manual provides comprehensive instructions for the installation and operation of your LIGHTAILING LED Lighting Kit, specifically designed for the Lego 21318 Tree House model. This kit is intended to illuminate your Lego creation, transforming it into a dynamic display piece. Please read these instructions carefully before beginning installation to ensure proper setup and safe use.
Important Note: This product includes only the LED lighting kit. The Lego 21318 Tree House model itself is not included.

Image 1.1: The Lego 21318 Tree House model enhanced with the LIGHTAILING LED lighting kit.
2. Package Contents
Upon opening your LIGHTAILING LED Lighting Kit, please verify that all the following components are present:
- 1 x USB Light Kit (various LED lights and connecting wires)
- 1 x Battery Box (for power supply)
- 1 x Detailed Instruction Guide (paper manual)
- Required connecting cables and accessories
Batteries (AA type) are required for the battery box and are typically included. Please check the packaging for confirmation.
3. Safety Information
Adherence to the following safety guidelines is crucial for safe operation and to prevent damage to the product or injury:
- Power Supply: Use only AA batteries or a USB charger with a voltage of less than 5V. Higher voltages can cause burning or damage to the LED components.
- Handling: Handle the LED lights and wires with care. Avoid hard pulling, bending, or shaking, as this can damage the delicate wiring and connections.
- Material Safety: All accessories are made from safe materials.
- Age Recommendation: This product is recommended for ages 6 years and up.

Image 3.1: Product safety standards (RoHS, CE, CPC) and QR code for online resources.
4. Setup and Installation Guide
The installation process involves integrating the LED lights into your existing Lego 21318 Tree House model. Follow the detailed steps provided in the included paper instruction manual. For additional guidance, online installation videos and PDF instructions are available on the manufacturer's website. Refer to the QR code in Image 3.1 for access to these resources.
General Installation Steps:
- Preparation: Ensure your Lego 21318 Tree House model is fully assembled and stable.
- Identify Placement: Refer to the instruction guide to identify the specific locations for each LED light and wire.
- Connect Lights: Carefully attach the LED lights to the designated points on your Lego model.
- Route Wires: Route the ultra-fine alloy wiring discreetly through and around the Lego bricks to conceal them as much as possible.
- Connect to Power: Connect all light wires to the main USB light kit and then to the battery box or a compatible USB power source (less than 5V).
- Test: Before finalizing the setup, test the lights to ensure all connections are secure and functioning correctly.
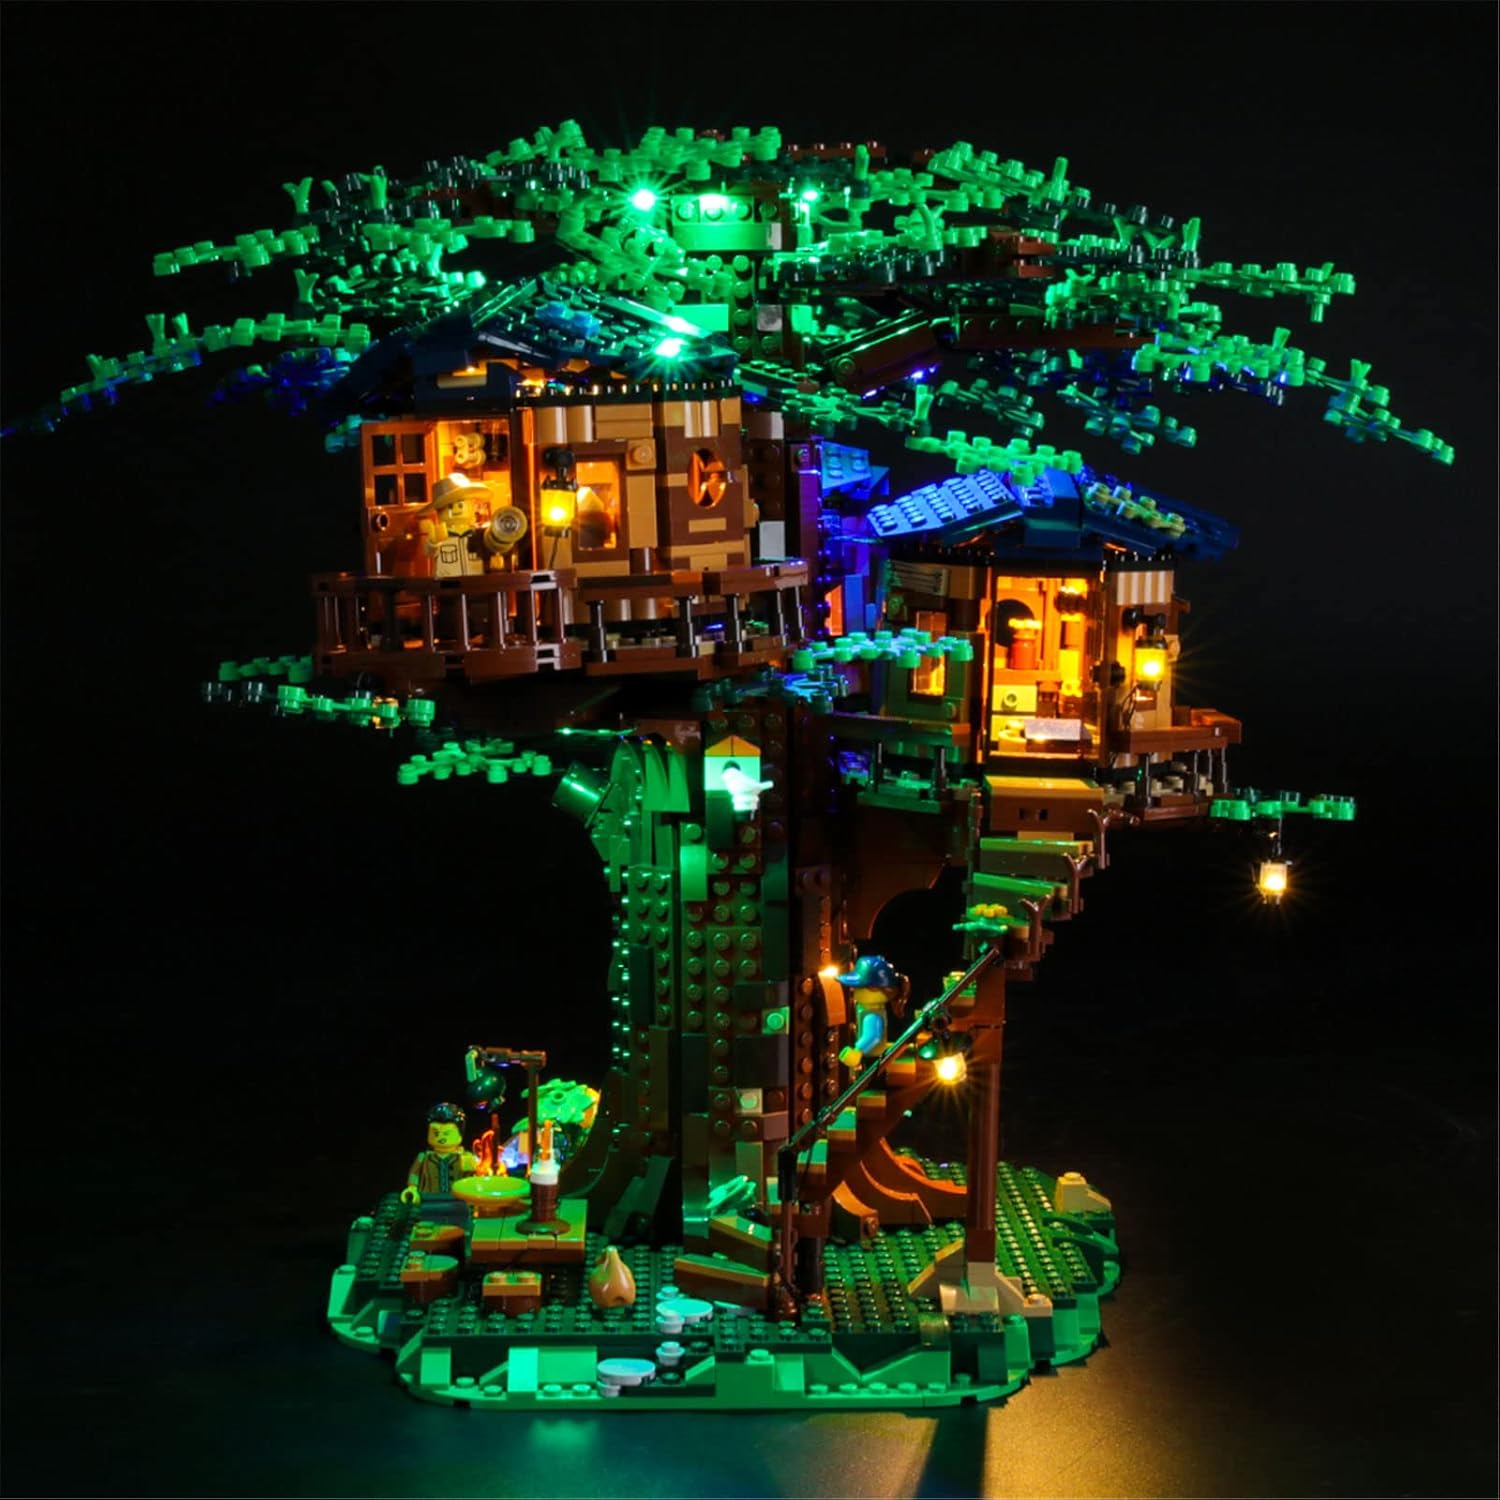
Image 4.1: Detailed view of installed lights within the Lego Tree House structure.
5. Operating Instructions
Once the LED lighting kit is fully installed and connected to a power source (either batteries in the battery box or a USB power adapter), operation is straightforward:
- Power On: If using the battery box, ensure batteries are correctly inserted and switch the power button to the 'ON' position. If using a USB power source, connect the USB cable to an active USB port.
- Power Off: To turn off the lights, switch the power button on the battery box to the 'OFF' position or disconnect the USB power cable.
6. Maintenance
To ensure the longevity and optimal performance of your LIGHTAILING LED Lighting Kit, consider the following maintenance tips:
- Cleaning: Gently dust the LED lights and wires with a soft, dry cloth. Avoid using liquids or abrasive cleaners.
- Wire Inspection: Periodically check the wiring for any signs of wear, fraying, or damage. Address any issues promptly to prevent short circuits.
- Battery Replacement: If using the battery box, replace batteries when lights dim or cease to function. Ensure correct polarity when inserting new batteries.
- Storage: If storing the Lego model with the lighting kit, ensure wires are not pinched or excessively bent.
7. Troubleshooting
If you encounter issues with your lighting kit, refer to the following common troubleshooting steps:
| Problem | Possible Cause | Solution |
|---|---|---|
| Lights do not turn on. | No power, loose connection, dead batteries. | Check battery box switch, replace batteries, ensure USB power is active, verify all wire connections. |
| Some lights are not working. | Damaged individual LED, loose connection to specific light. | Inspect the non-working light and its connections. Gently re-seat connections. |
| Lights are dim. | Low battery power. | Replace batteries in the battery box. |
| Flickering lights. | Loose connection, unstable power source. | Check all connections. Ensure power source is stable (e.g., fresh batteries, reliable USB port). |
If these steps do not resolve the issue, please contact customer support.
8. Specifications
- Product Dimensions: 6.5 x 4.72 x 1.57 inches
- Item Weight: 7.5 ounces
- Item Model Number: 21318
- Manufacturer Recommended Age: 6 years and up
- Power Input: Less than 5V (via AA batteries or USB)
- Manufacturer: LIGHTAILING
9. Warranty and Support
LIGHTAILING is committed to providing high-quality products and excellent customer service. Your LED lighting kit comes with a two-year free warranty from the date of purchase.
If you have any questions, require assistance with installation, or experience any issues with your product during the warranty period, please do not hesitate to contact us. Our customer support team is available to serve you wholeheartedly and will respond to your inquiries as soon as possible.
Contact Information: Please refer to the contact details provided in your product packaging or on the official LIGHTAILING website for customer support.


