
4D Build B0BRYGT4F7
4D Build Star Wars Darth Vader Cardstock 3D Model Kit Instruction Manual
Brand: 4D Build
Model: B0BRYGT4F7
Introduction
This manual provides detailed instructions for assembling your 4D Build Star Wars Darth Vader Cardstock 3D Model Kit. Designed for fans and collectors, this kit allows you to construct a detailed replica of Darth Vader's helmet using durable cardstock pieces. Follow these guidelines to ensure a successful and enjoyable building experience.
What's Included
Your 4D Build Darth Vader Cardstock 3D Model Kit contains all necessary components for assembly:
- 6 Cardstock Sheets with 83 punch-out pieces
- 1 Tube of Glue
- Detailed Instruction Manual
- Display Stand components
Assembly Instructions
No additional tools are required for assembly. Please follow the step-by-step instructions provided in the included manual carefully. Patience is key to achieving the best results.
Step 1: Prepare the Pieces
Carefully punch out all 83 pieces from the 6 cardstock sheets. Ensure clean edges for optimal fit. The pieces are made from durable cardstock, designed to withstand the assembly process.

Image: The kit includes everything needed, with thick cardstock pieces ready for assembly.
Step 2: Follow the Manual
Refer to the detailed instruction manual for the correct sequence and method of connecting the pieces. Each piece is numbered for easy identification and placement. The manual provides clear graphics to guide you through each stage of construction.

Image: Overview of the assembly process, demonstrating how pieces connect to form the helmet.
Step 3: Secure Connections with Glue
Use the provided glue to secure connections as indicated in the instructions. Apply a small amount of glue to the tabs or designated areas to ensure a strong and lasting bond. Allow sufficient drying time between steps if necessary.

Image: A person's hands carefully fitting together pieces of the Darth Vader helmet, illustrating the assembly process.
Step 4: Final Assembly and Display
Once all pieces are assembled, attach the finished Darth Vader helmet to its included display stand. The stand is designed to securely hold your model for presentation.
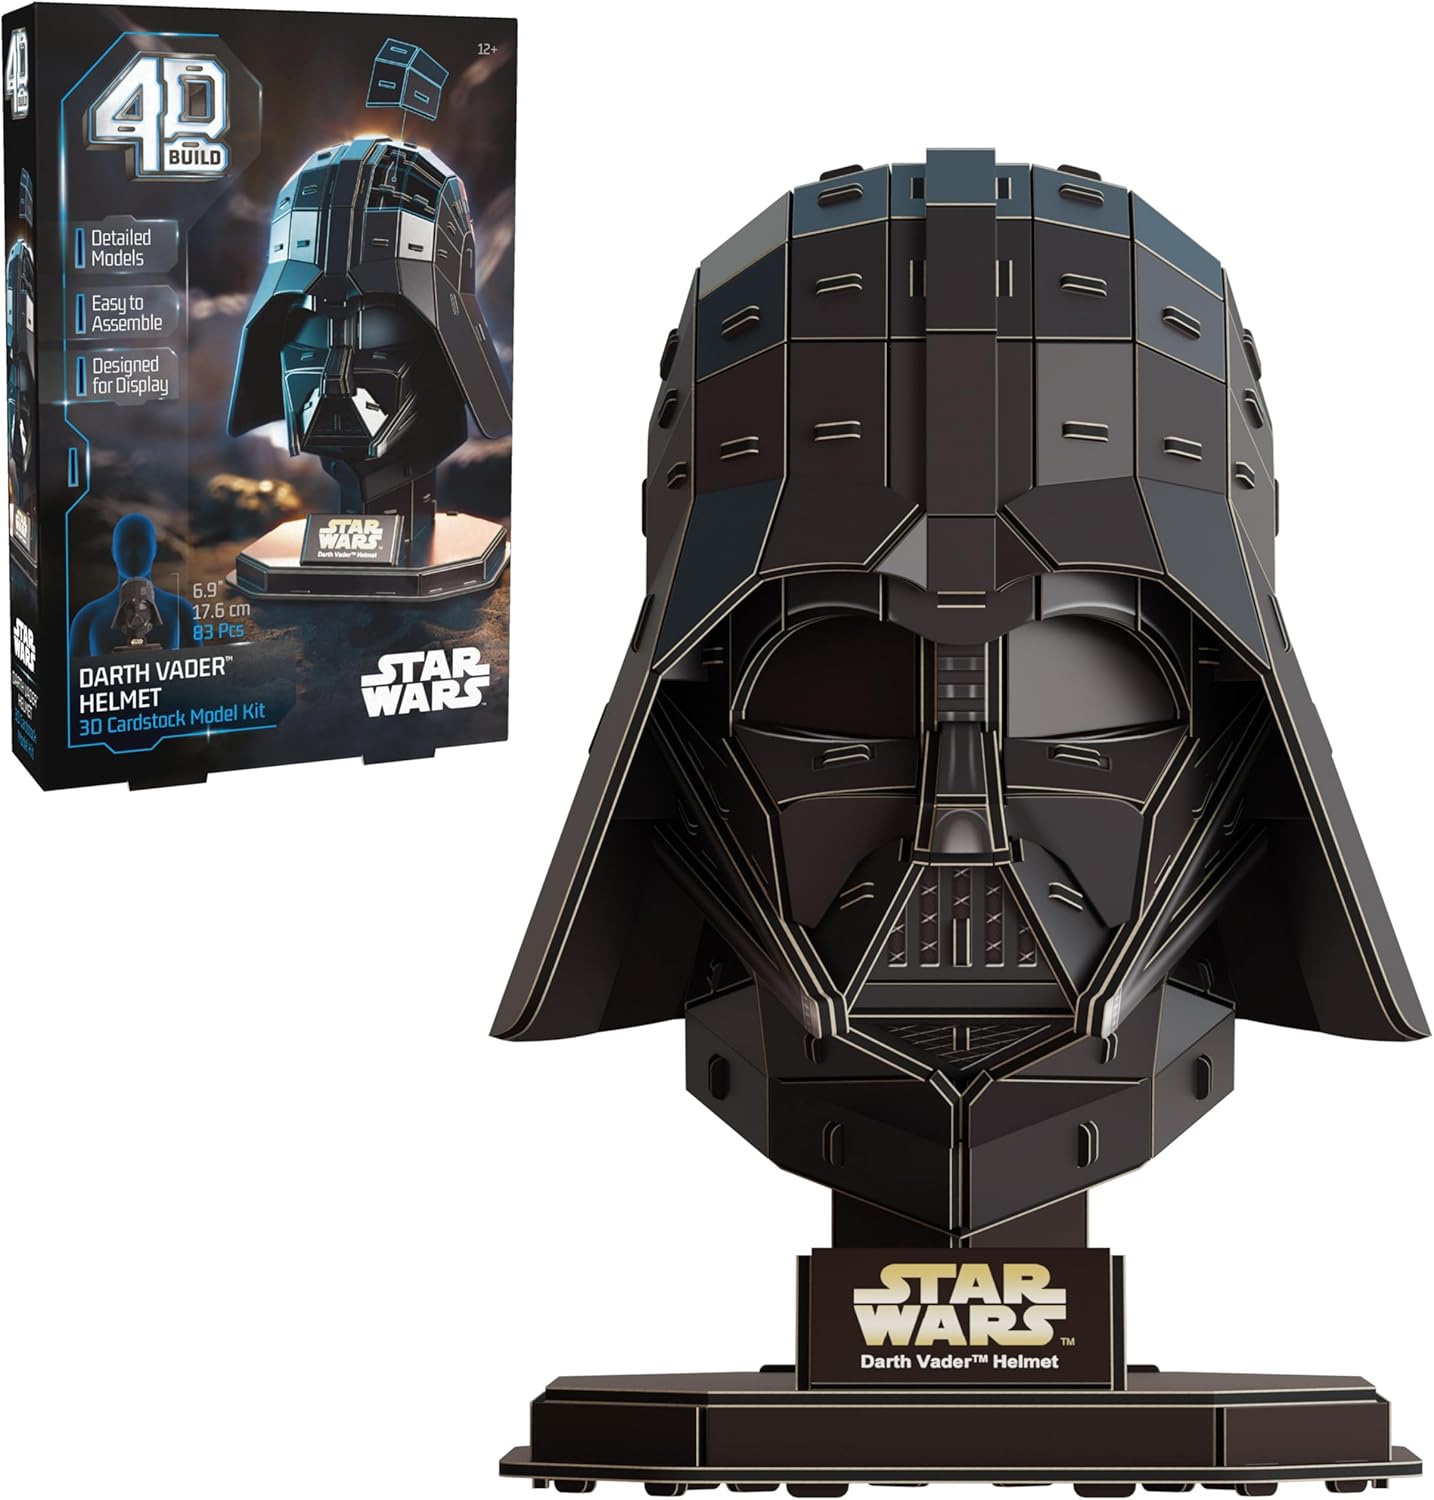
Image: The completed Darth Vader helmet model, showcasing its detailed design and dimensions on the display stand.
Assembly Video Overview
Video: A brief overview of the 4D Build Star Wars model kits, demonstrating the assembly process and finished products.
Display and Usage
Your assembled Darth Vader helmet is designed for display. Its dimensions are approximately 5.2 inches (L) x 4.9 inches (W) x 6.9 inches (H). It makes an excellent decorative piece for desks, shelves, or any room where you wish to showcase your Star Wars fandom.

Image: The Darth Vader helmet model displayed as a decorative item on a desk.

Image: Detailed features of the Darth Vader helmet model, including its visor and overall shape.
Maintenance
To maintain the quality and appearance of your cardstock model, keep it in a dry environment away from direct sunlight and excessive humidity. Dust gently with a soft, dry cloth as needed. Avoid exposure to liquids or harsh cleaning agents.
Troubleshooting
If any pieces do not hold together securely after initial assembly, apply a small amount of the included glue or a suitable craft adhesive to reinforce the connection points. Ensure sufficient drying time for the adhesive to set completely.
Product Specifications
| Feature | Detail |
|---|---|
| Brand | 4D Build |
| Model Name | Darth Vader 83 Pcs |
| Material Type | Cardstock |
| Number of Pieces | 83 |
| Item Dimensions (L x W x H) | 5.2 x 4.9 x 6.9 inches (13.3 cm x 12.5 cm x 17.6 cm) |
| Age Range (Description) | Kid (Ages 12 & Up) |
| Included Components | 6 Cardstock Sheets, Glue, Instructions |
Warranty and Support
This product is sold without a manufacturer's warranty. For any questions or support regarding assembly, please refer to the contact information provided on the product packaging or visit the official 4D Build website.
Related documentsB0BRYGT4F7


Ask a question about this manual
Ask about setup, troubleshooting, compatibility, parts, safety, or missing instructions. Manuals+ will review the question and use this page’s manual context to help answer it.