
1. Introduction
This manual provides comprehensive instructions for the installation, operation, and maintenance of your Hapadif Motorized Automatic Blinds, Model M100. Please read this manual thoroughly before installation and use to ensure proper function and longevity of your product.
The Hapadif M100 blinds feature motorized operation, remote control, and options for smart home integration. They are designed with a 100% blackout fabric for light control and privacy.
2. Safety Information
- Keep the remote control and batteries out of reach of children.
- Ensure all mounting hardware is securely fastened to prevent the blinds from falling.
- Do not attempt to manually force the blinds up or down when the motor is engaged.
- Avoid exposing the motor unit to water or excessive moisture.
- Only use the specified battery type (6xAA) for replacement.
3. Package Contents
Verify that all components are present before beginning installation:
- Motorized Roller Blind Unit
- Wireless Remote Control
- Mounting Brackets and Hardware
- User Manual (this document)
- AA Batteries (6x)
4. Installation
4.1. Measuring for Installation
Accurate measurements are crucial for proper fit and function. Determine whether you will use an Inside Mount or Outside Mount installation.

Figure 4.1: Inside Mount Measurement Guide. This image illustrates how to measure the width and height of a window recess for an inside mount installation. For inside mount, measure the minimum window width and subtract 1/4 inch for the order width. Window depth must be at least 2 inches.

Figure 4.2: Outside Mount Measurement Guide. This image demonstrates how to measure the window frame for an outside mount installation. For outside mount, measure the maximum window width and add 4 inches for the order width.

Figure 4.3: Shade Width Selection Guide. This table provides guidance on selecting the correct shade width and corresponding fabric width based on your window measurements for both inside and outside mount installations.
4.2. Mounting Instructions
Follow these general steps for mounting. Specific hardware and tools may vary.
- Mark Bracket Positions: Hold the blind in the desired position and mark where the mounting brackets will be installed. Ensure marks are level.
- Drill Pilot Holes: Use an appropriate drill bit to create pilot holes at the marked positions.
- Attach Brackets: Securely fasten the mounting brackets using the provided screws.
- Install Blinds: Carefully attach the blind unit to the installed brackets. Ensure it clicks into place securely.

Figure 4.4: Inside Mount Installation Steps. This image provides a visual sequence for installing the blinds using an inside mount method, showing drilling, bracket attachment, and final blind placement.

Figure 4.5: Outside Mount Installation Steps. This image illustrates the steps for installing the blinds using an outside mount method, including drilling, securing brackets, and mounting the blind unit.
5. Operation
5.1. Battery Installation and Replacement
The blinds are powered by 6 AA batteries, which typically provide 4-6 months of operation. When the blinds stop responding or operate slowly, it is time to replace the batteries.
- Locate the battery compartment on the blind unit.
- Open the compartment and remove the old batteries.
- Insert 6 new AA batteries, ensuring correct polarity.
- Close the battery compartment securely.

Figure 5.1: Battery Compartment Details. This image illustrates the location of the battery compartment and specifies the use of 6 dry AA batteries for power, indicating an approximate 6-month operational life.
5.2. Remote Control Operation
The included wireless remote control allows for easy adjustment of the blinds.
- Up Button: Raises the blinds.
- Down Button: Lowers the blinds.
- Stop Button: Halts the blinds at their current position.
- Refer to the remote's specific instructions for programming multiple blinds or setting preferred positions.

Figure 5.2: Remote Control in Use. This image depicts a remote control being used to operate the motorized blinds in a room, demonstrating the wireless functionality.
5.3. Smart Home Integration (Optional)
For smart home integration, an optional hub is required. This hub enables control via a mobile application and voice commands through compatible smart assistants.
- App Control: Once the hub is set up and connected, download the corresponding mobile application to control your blinds from your smartphone or tablet.
- Voice Control: Link the hub to your preferred voice assistant (e.g., Alexa, Google Assistant) to operate the blinds using voice commands.
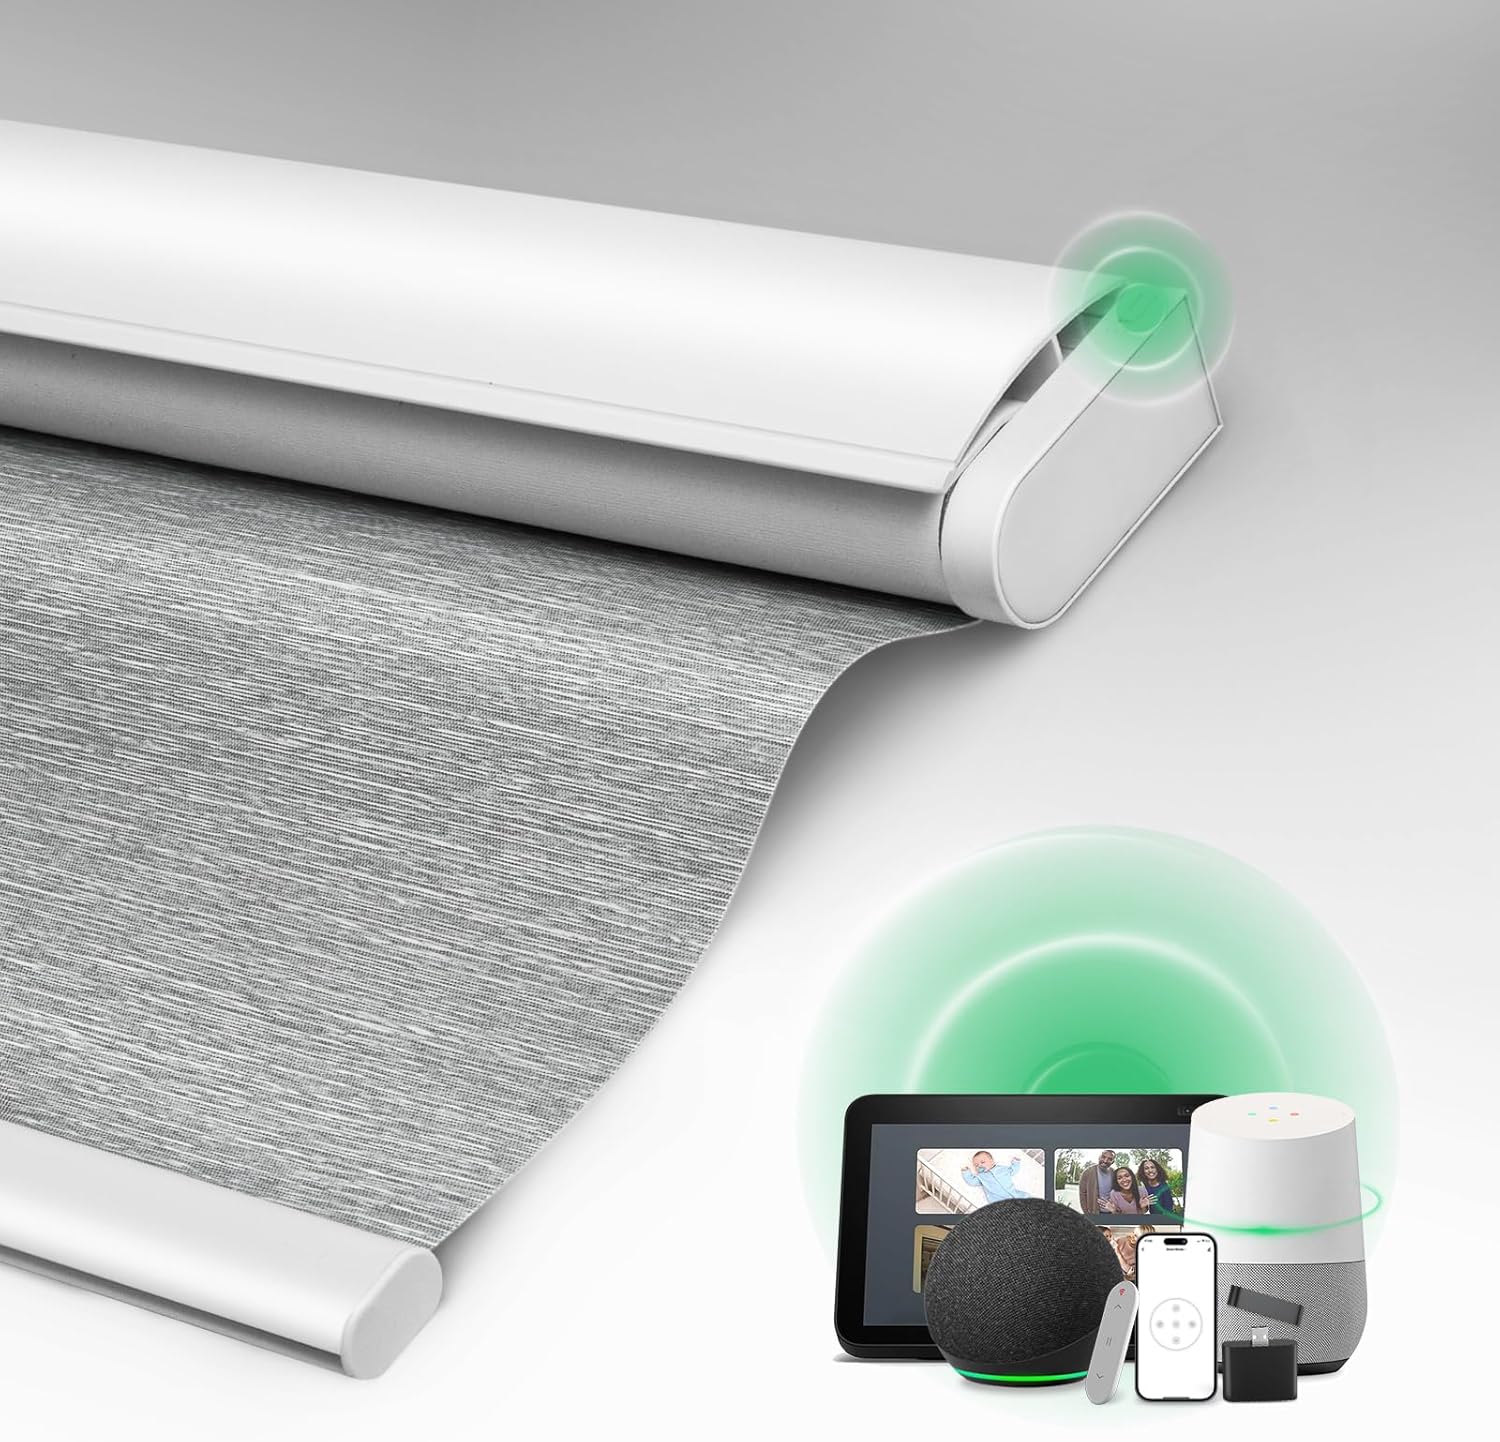
Figure 5.3: Smart Home Compatibility. This image displays the motorized blind alongside various smart home devices, illustrating its potential for integration with smart home ecosystems for enhanced control.

Figure 5.4: Voice Control in Action. This image shows a person interacting with a smart speaker to control the blinds using voice commands, highlighting the convenience of smart home integration.
6. Maintenance
To maintain the appearance and function of your Hapadif Motorized Automatic Blinds:
- Cleaning: The fabric is designed for spot cleaning only. Use a soft, damp cloth with mild soap for any stains. Do not immerse the fabric in water or use harsh chemicals.
- Dusting: Regularly dust the blinds with a soft brush or vacuum with a brush attachment to prevent dust buildup.
- Motor Unit: Keep the motor unit free from dust and debris. Do not attempt to lubricate or disassemble the motor.
7. Troubleshooting
If you encounter issues with your blinds, refer to the following troubleshooting guide:
| Problem | Possible Cause | Solution |
|---|---|---|
| Blinds do not respond to remote. | Dead batteries in blinds or remote. Remote out of range. Obstruction. | Replace batteries in both the blinds and the remote. Ensure remote is within operating range. Check for any physical obstructions. |
| Blinds move slowly or intermittently. | Low batteries in blinds. | Replace the 6 AA batteries in the blind unit. |
| Blinds make unusual noise during operation. | Obstruction in the track. Motor issue. | Inspect the blind track for any foreign objects. If the noise persists, contact customer support. |
| Blinds do not stop at desired position. | Limit settings need adjustment. | Refer to the remote control's specific instructions for adjusting upper and lower limit settings. |
8. Specifications
- Brand: Hapadif
- Model Number: M100
- Operation Mode: Automatic
- Closure Type: Motorized
- Control Type: Motorized Remote Control (Optional App/Voice Control with Hub)
- Power Source: 6 x AA Batteries
- Battery Life: Approximately 4-6 months
- Fabric: 100% Blackout, UV Protection, Insulating, Textured Finish
- Product Care: Spot Clean Only
- Item Weight: 5.94 pounds
- Package Dimensions: 41.75 x 3.5 x 2.75 inches
9. Warranty and Support
For warranty information or technical support, please refer to the product packaging or contact Hapadif customer service through the retailer where the product was purchased. Keep your purchase receipt as proof of purchase.