
Introduction
The BSIDE A1 Smart Digital Multimeter is a professional, dual-mode testing device designed for electricians and DIY enthusiasts. It offers automatic identification of measurement types, a large LCD display with three result screens, and a triple-mode alarm system for enhanced safety and ease of use. This manual provides comprehensive instructions for the safe and effective operation, maintenance, and troubleshooting of your BSIDE A1 Multimeter.
Safety Information
Always adhere to basic safety precautions when using electrical testing equipment to reduce the risk of fire, electric shock, or personal injury. Read all instructions before use.
- Do not exceed the maximum voltage ratings specified for the device.
- Ensure test leads are in good condition and properly connected before each measurement.
- Do not use the multimeter if it appears damaged or if the casing is open.
- Avoid touching exposed wires or circuit components during measurements.
- Always disconnect power to the circuit before making resistance or continuity measurements.
- Use caution when working with voltages above 30V AC RMS, 42V peak, or 60V DC, as these pose a shock hazard.
- Replace batteries promptly when the low battery indicator appears to ensure accurate readings.
Package Contents
Verify that all items listed below are present in your package:
- 1 x BSIDE A1 Smart Digital Multimeter
- 1 x Test Lead Set (Red and Black)
- 2 x AAA Batteries (1.5V)
- 1 x Carrying Case
- 1 x Screwdriver
- 1 x User Manual
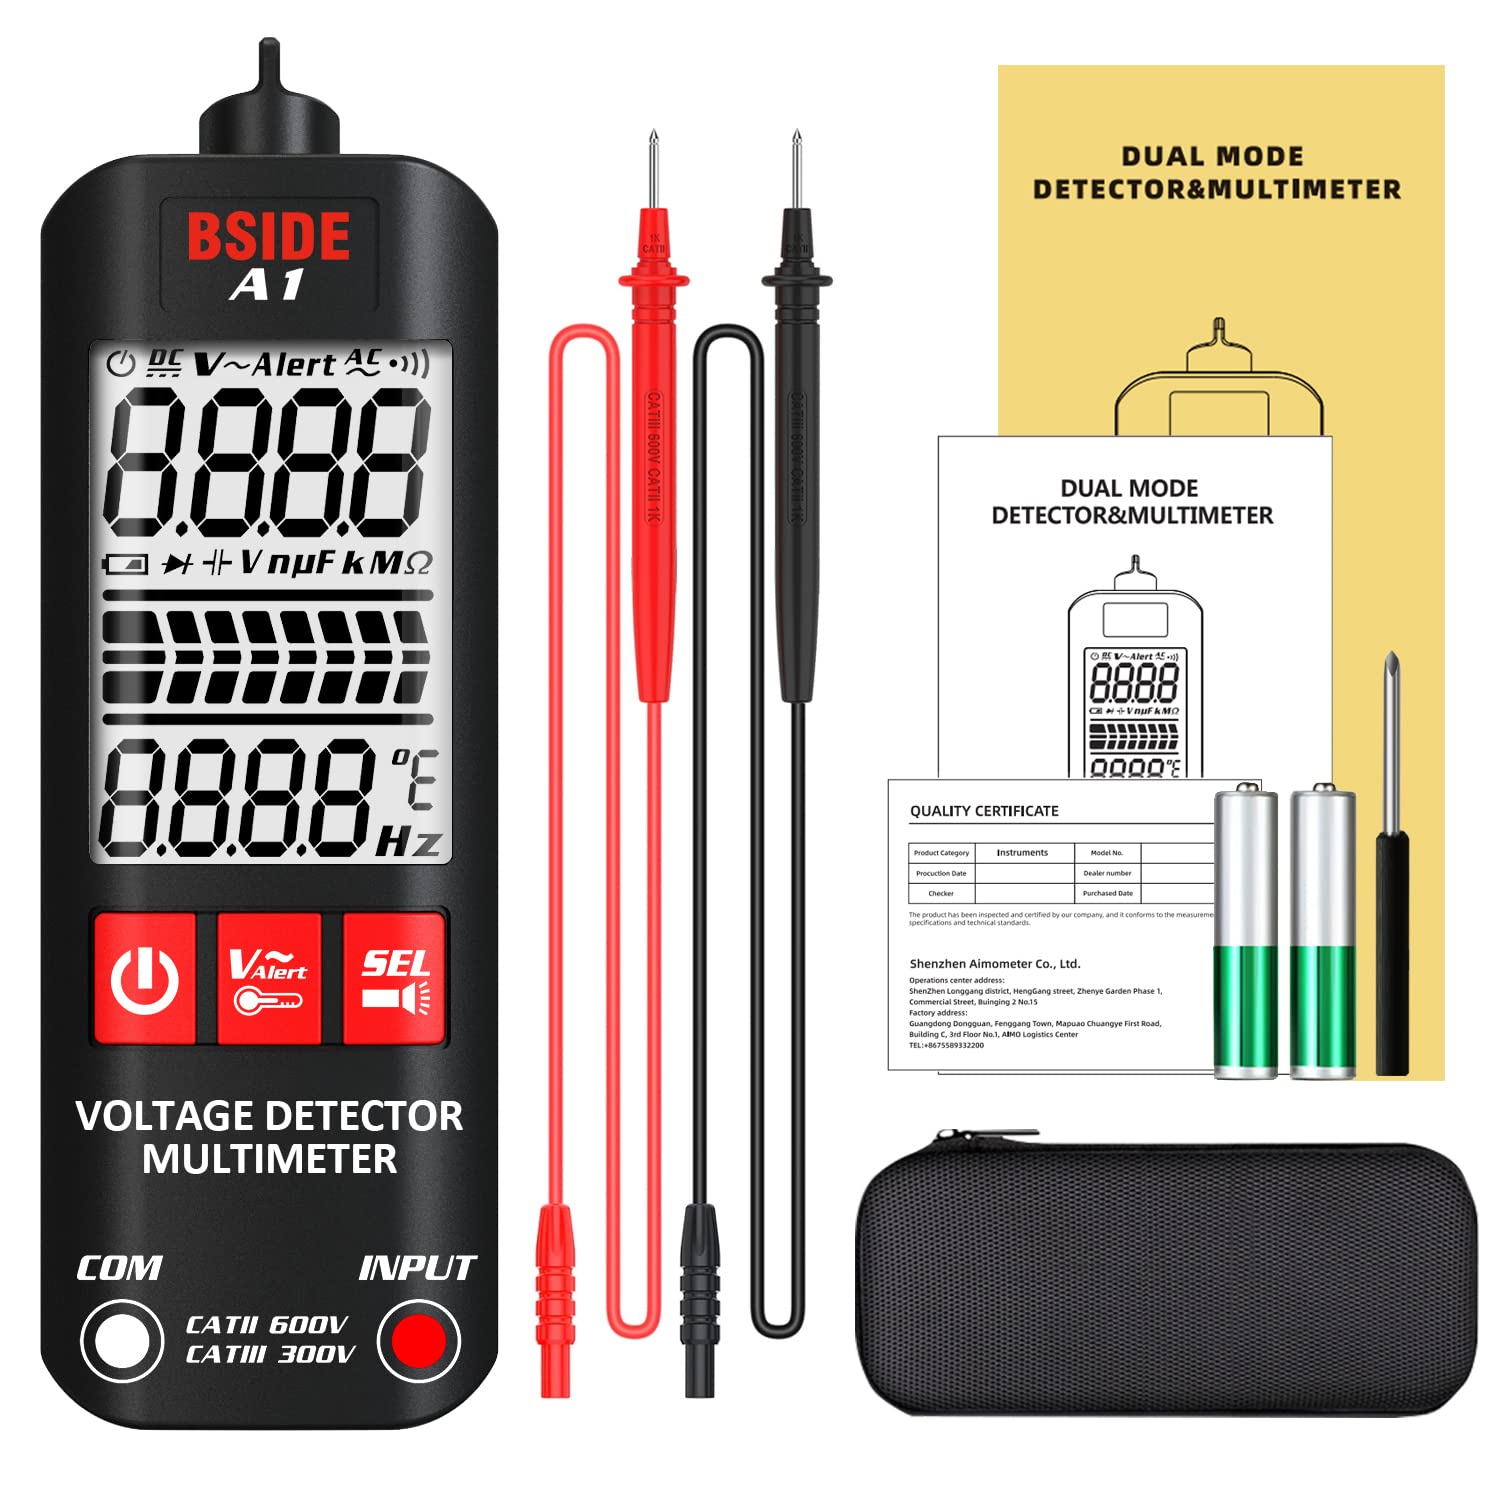
Image: The complete package contents of the BSIDE A1 Multimeter, showing the device, test leads, batteries, a protective case, a small screwdriver, and the instruction manual.
Product Overview
The BSIDE A1 Multimeter features a compact design with a large, easy-to-read LCD display. It integrates multiple functions into a single device, making it versatile for various electrical measurements.

Image: The BSIDE A1 Digital Multimeter, displaying its main unit, red and black test leads, two AAA batteries, and a black zippered carrying case. The multimeter's screen shows "8.8.8.8" and various measurement symbols.
Key Features:
- Large LCD Display: 2.2-inch screen with 2000 counts for clear readings.
- Triple Display Results: Shows multiple parameters simultaneously.
- Automatic Mode Selection: Smart technology automatically identifies AC/DC voltage, resistance, and continuity.
- Triple Mode Alarm: Backlight flashing, analog bar display, and continuous buzzer for voltage detection.
- V-Alert (NCV) Function: Non-contact voltage detection for safety.
- Live Wire Check: Distinguishes live and neutral wires.
- Bright LED Flashlight: Integrated flashlight for working in low-light conditions.
- Data Hold: Freezes the current reading on the display.
- Auto Power Off: Conserves battery life.
- Low Battery Indicator: Alerts when batteries need replacement.

Image: A close-up of the BSIDE A1 Multimeter's display, highlighting the various measurement icons available for automatic mode selection, including DC Voltage, AC Voltage, Resistance, Frequency, Continuity, True RMS, NCV, Live Wire, and Auto mode.

Image: The BSIDE A1 Multimeter's display demonstrating its red and green backlight feature. The green backlight indicates a "Low" reading, while the red backlight indicates a "High" reading, improving readability in various conditions.

Image: The BSIDE A1 Digital Multimeter held in hand, with its bright LED flashlight illuminated at the top, demonstrating its utility for testing in dark or poorly lit environments.
Setup
Battery Installation:
The BSIDE A1 Multimeter requires two 1.5V AAA batteries. These are included in the package.
- Locate the battery compartment cover on the back of the multimeter.
- Use the provided screwdriver to loosen the screw securing the battery cover.
- Remove the battery cover.
- Insert two AAA batteries, ensuring correct polarity (+ and -) as indicated inside the compartment.
- Replace the battery cover and tighten the screw.
Connecting Test Leads:
Connect the test leads to the appropriate input jacks on the multimeter.
- Insert the black test lead into the "COM" (Common) jack.
- Insert the red test lead into the "INPUT" jack.
Operating Instructions
The BSIDE A1 Multimeter features an intelligent automatic mode that simplifies measurements. It can also be manually switched between functions.
Power On/Off:
- Press the Power button to turn the multimeter on.
- The device will automatically enter intelligent measurement mode.
- To turn off, press and hold the Power button, or it will auto-power off after a period of inactivity.
Automatic Measurement Mode:
In automatic mode, the multimeter intelligently identifies the type of measurement (AC/DC voltage, resistance, continuity) and displays the result. Simply connect the test leads to the circuit or component you wish to measure.
Manual Mode Selection:
Press the SEL button to cycle through different measurement functions manually if needed. The display will show the selected mode.
DC Voltage Measurement:
- Ensure the multimeter is in DC Voltage mode (or Auto mode).
- Connect the red test lead to the positive (+) side of the DC circuit and the black test lead to the negative (-) side.
- Read the voltage value on the display.
AC Voltage Measurement:
- Ensure the multimeter is in AC Voltage mode (or Auto mode).
- Connect the test leads across the AC voltage source.
- Read the voltage value on the display.
Resistance Measurement:
- Ensure the circuit or component is de-energized before measuring resistance.
- Ensure the multimeter is in Resistance mode (or Auto mode).
- Connect the test leads across the component whose resistance you want to measure.
- Read the resistance value in Ohms (Ω) on the display.
Frequency Measurement:
- Ensure the multimeter is in Frequency mode.
- Connect the test leads to the circuit where you want to measure frequency.
- Read the frequency value in Hertz (Hz) on the display.
Continuity Test:
- Ensure the circuit or component is de-energized.
- Ensure the multimeter is in Continuity mode (or Auto mode).
- Connect the test leads across the circuit path or component.
- If the resistance is less than 30Ω, the buzzer will sound, indicating continuity.
V-Alert (Non-Contact Voltage Detection):
This feature allows for safe detection of AC voltage without direct contact with live wires.
- Select the V-Alert mode using the V-Alert button.
- Move the top end of the multimeter close to the wire or outlet.
- The display will show "Lo" for low sensitivity or "Hi" for high sensitivity. The backlight will flash, and the buzzer will sound with increasing frequency as it approaches a live voltage source.

Image: The BSIDE A1 Multimeter held near a bundle of electrical wires, demonstrating its V-Alert (non-contact voltage detection) function. The multimeter's screen is illuminated in red, indicating a detected voltage, and shows "Lo" for low sensitivity.
Live/Neutral Wire Check:
This function helps distinguish between live and neutral wires by comparing the strength of the detected voltage signal.
- Select the Live Wire Check mode.
- Insert the red test lead into the socket or touch the wire.
- The multimeter will indicate whether the wire is live (stronger signal, red backlight) or neutral (weaker signal, green backlight).

Image: Two comparative views of the BSIDE A1 Multimeter performing a Live/Neutral wire check on wall outlets. The left image shows the multimeter indicating a "Neutral Wire" with a green screen, while the right image shows it indicating a "Live Wire" with a red screen, based on voltage signal strength.
Data Hold:
Press the HOLD button (often integrated with SEL or V-Alert button, refer to device markings) to freeze the current reading on the display. Press it again to release.
Application Example: Automotive Maintenance
The BSIDE A1 Multimeter is suitable for various applications, including automotive electrical system checks, such as measuring battery voltage.

Image: The BSIDE A1 Multimeter being used to measure the voltage of a car battery. The red and black test leads are connected to the battery terminals, and the multimeter's display shows a reading of "12.0 V" and a temperature of "28.8 °C".
Maintenance
Cleaning:
Wipe the multimeter casing with a damp cloth and mild detergent. Do not use abrasives or solvents. Ensure the device is completely dry before use.
Storage:
When not in use for extended periods, remove the batteries to prevent leakage. Store the multimeter in its carrying case in a cool, dry place, away from direct sunlight and extreme temperatures.
Battery Replacement:
Replace batteries when the low battery indicator appears on the display to ensure accurate measurements and proper operation.
Troubleshooting
| Problem | Possible Cause | Solution |
|---|---|---|
| Multimeter does not power on. | Dead or incorrectly installed batteries. | Check battery polarity; replace batteries. |
| Inaccurate readings. | Low battery; incorrect mode selection; damaged test leads. | Replace batteries; ensure correct mode; inspect/replace test leads. |
| No continuity beep. | Resistance too high; circuit not de-energized. | Ensure resistance is below 30Ω; de-energize circuit. |
| V-Alert not detecting. | Too far from source; low sensitivity setting. | Move closer to source; adjust sensitivity if applicable. |
Specifications
| Parameter | Value |
|---|---|
| Display | 2000 Counts, 2.2-inch LCD |
| DC Voltage | 500V (0.01V resolution) ±(0.8% + 3) |
| AC Voltage | 500V (0.01V resolution) ±(1.2% + 5) |
| Resistance | 0Ω-10MΩ (1Ω resolution) ±(1.2% + 3) |
| Frequency | 1000Hz (0.1Hz resolution) ±(2.0% + 3) |
| Continuity | Buzzer sounds at < 30Ω |
| V-Alert (NCV) | Yes |
| Live Wire Check | Yes |
| Power Supply | 2 x 1.5V AAA Batteries |
| Dimensions (L x W x H) | 127 x 42 x 25 mm (5 x 1.65 x 0.98 inches) |
| Weight | 67 g (2.36 oz) |
| Max Operating Voltage | 1000 Volts |
Warranty and Support
Information regarding the specific warranty period or customer support contact details for the BSIDE A1 Multimeter is not provided in the available product data. Please refer to the documentation included with your purchase or contact the seller/manufacturer directly for warranty claims and technical assistance.


