
Introduction
This instruction manual provides comprehensive guidance for the Fisher-Price Learning Fun DJ Game Table, model HRB60. It covers essential information regarding product setup, operational procedures, maintenance, and troubleshooting to ensure proper use and longevity of the toy. This interactive musical learning table is designed to engage young children with various activities and learning stages.

Figure 1: Overview of the Fisher-Price Learning Fun DJ Game Table, showcasing its main interactive components.
Setup
1. Unpacking and Initial Inspection
Carefully remove all components from the packaging. Inspect the toy for any signs of damage. Retain packaging materials for future reference or disposal.
2. Battery Installation
The Fisher-Price Learning Fun DJ Game Table requires batteries for operation. Locate the battery compartment, typically on the underside of the main unit. Insert the required batteries, ensuring correct polarity (+/-). Close the compartment securely.
3. Assembly (Legs)
The main unit does not require complex assembly. The table legs can be attached for standing play or removed for floor-level sitting play. To attach the legs, align them with the designated slots on the underside of the main unit and push firmly until they click into place. To remove, press the release buttons (if present) and pull the legs away. No tools are required for this process.

Figure 2: A child interacting with the DJ Game Table in its standing configuration. The legs are attached, allowing the child to stand and play comfortably.
4. Language Selection
To select the desired language (English, Italian, Spanish, Portuguese), locate the globe button on the unit. Press this button to cycle through the available language options until the preferred language is announced.
5. Volume Adjustment
The unit features two volume settings. Locate the volume control switch, typically marked with speaker icons, and adjust to the desired level.
Operating Instructions
The Fisher-Price Learning Fun DJ Game Table offers multiple interactive features designed for developmental play.
1. Power On/Off
Locate the power switch, usually on the side or back of the main unit. Slide the switch to the "On" position to activate the toy. Slide to "Off" when not in use to conserve battery life.
2. Smart Stages Learning Levels
The toy includes three Smart Stages learning levels, allowing content to adapt as the child grows. Locate the Smart Stages selector switch or button, often labeled "1, 2, 3". Select the appropriate level based on the child's age and developmental stage:
- Level 1: Explore - Focuses on basic sounds and first words.
- Level 2: Encourage - Introduces phrases and simple questions.
- Level 3: Pretend - Encourages imaginative play with songs and role-playing scenarios.
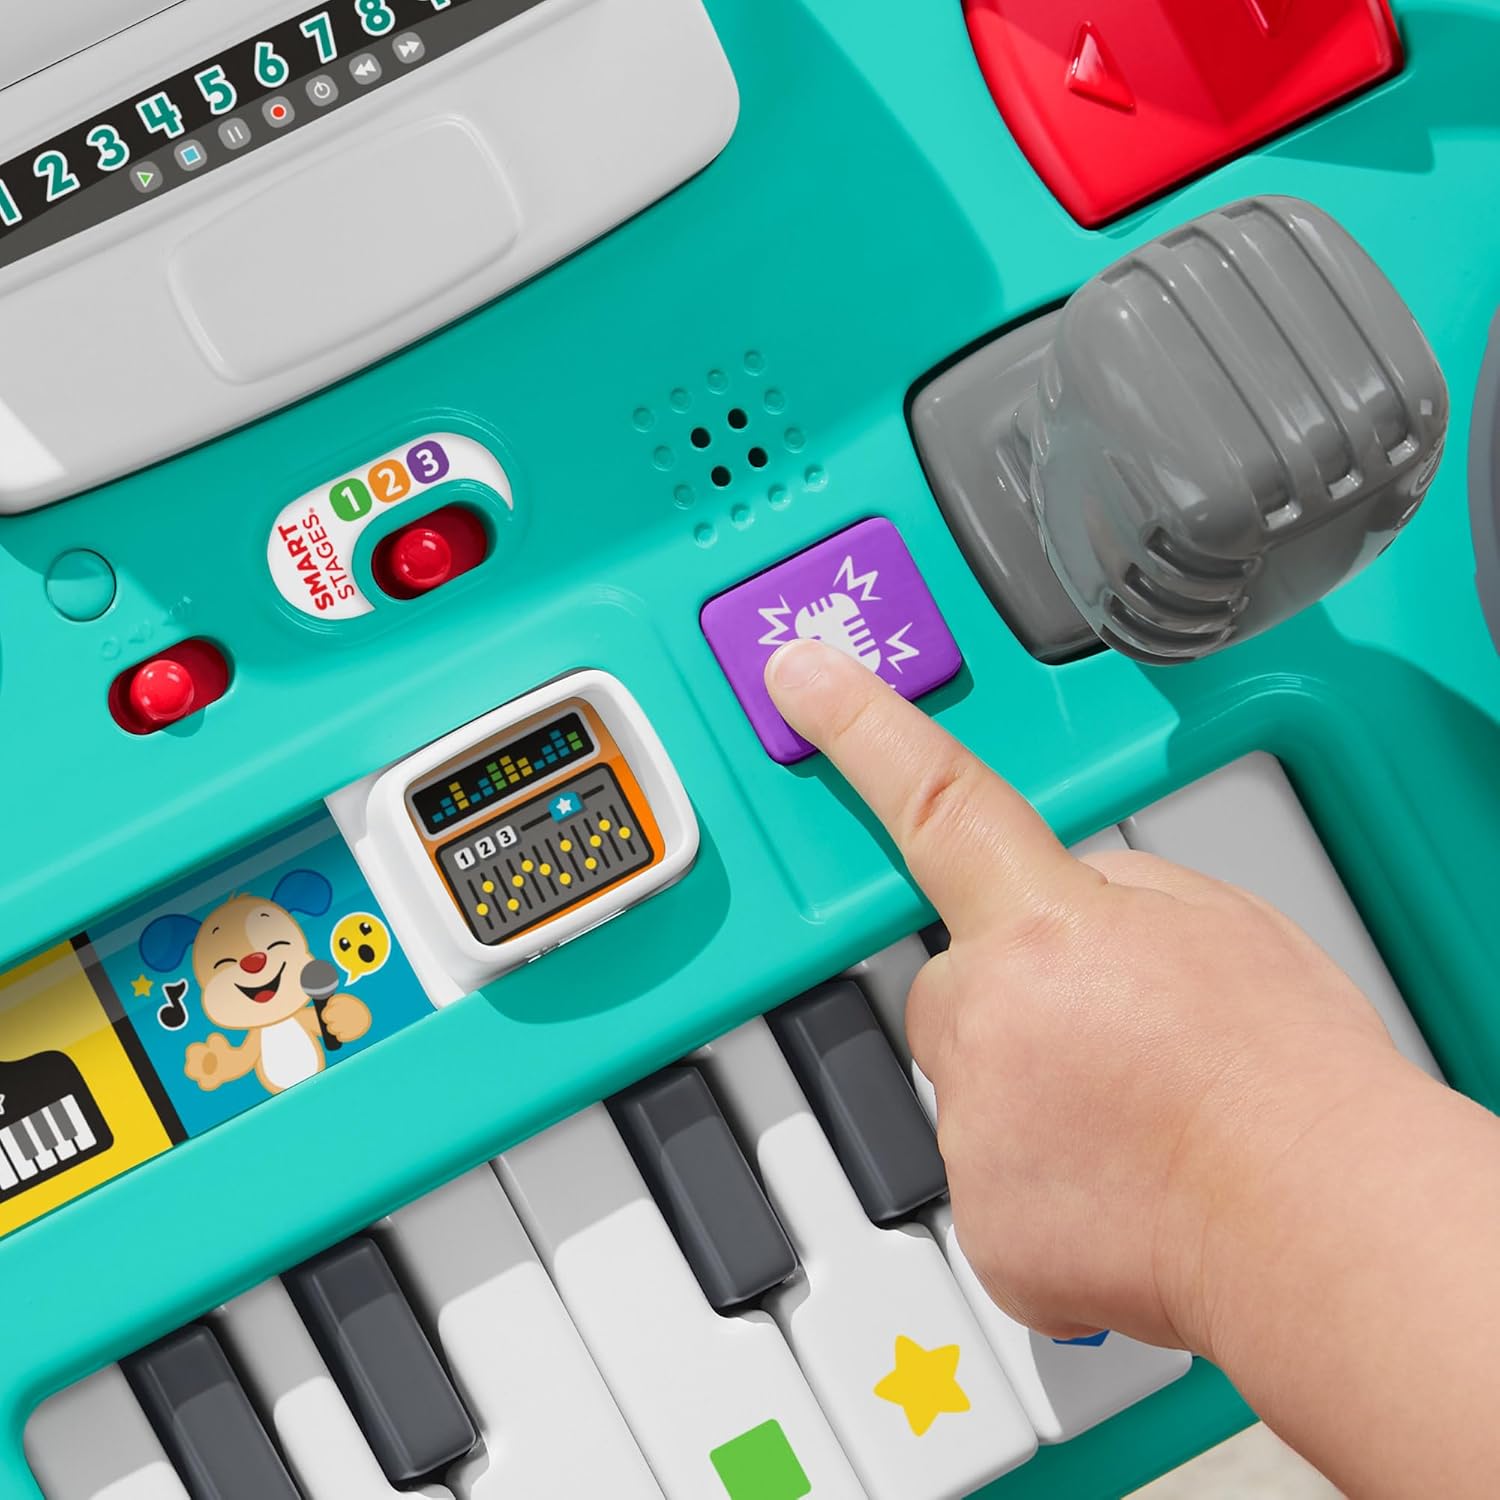
Figure 3: Detail of the Smart Stages button (labeled 1, 2, 3) and the interactive piano keys, which are central to the toy's musical and learning functions.
3. Play Modes
The DJ Game Table features three distinct play modes accessible via the musical keyboard:
- Piano Mode: Play various musical notes and melodies using the piano keys.
- Learning Mode: Engage with educational content, including alphabet, colors, shapes, and counting, often accompanied by songs and phrases.
- DJ Table Mode: Utilize the turntable and other DJ-themed controls to create mixes, add sound effects, and interact with pre-recorded tracks.
4. Interactive Activities
The toy includes 12 fine motor activities designed to develop dexterity and coordination. These include:
- Shape Sorters: Insert the colored shapes into their corresponding slots.
- Turntable: Spin the turntable for lights, learning content, and music.
- Microphone: Press the microphone button to record and remix sounds.
- Sliders and Buttons: Interact with various sliders, buttons, and switches to activate sounds, lights, and phrases.

Figure 4: Detailed view of the interactive shape sorters (red square, yellow triangle, orange circle) and numbered buttons, which are part of the 12 fine motor activities.

Figure 5: A child's hand engaging with the DJ turntable, which activates lights, sounds, and learning content.
Maintenance
1. Cleaning
To clean the DJ Game Table, wipe surfaces with a soft, damp cloth. Do not immerse the toy in water. Avoid using harsh chemicals or abrasive cleaners, as these may damage the plastic components or electronic circuits.
2. Storage
When not in use for extended periods, store the toy in a cool, dry place away from direct sunlight. Remove batteries if storing for several months to prevent leakage and potential damage.
Troubleshooting
- Toy does not turn on or has no sound:
Check that the power switch is in the "On" position. Verify that batteries are correctly installed and are not depleted. Replace with fresh batteries if necessary. Ensure the volume is not set to the lowest level.
- Incorrect language is playing:
Locate the globe button and press it repeatedly until the desired language is announced. If the issue persists, remove and reinsert batteries, then try selecting the language again.
- Lights or sounds are intermittent:
This may indicate low battery power. Replace all batteries with new ones. Ensure there is no obstruction to buttons or sensors.
Specifications
| Model Number: | HRB60 |
| Brand: | Fisher-Price |
| Product Dimensions: | 13.33 x 50.8 x 33.02 cm (5.25 x 20 x 13 inches) |
| Item Weight: | 2.56 kg (5.64 lbs) |
| Material Type: | Plastic |
| Color: | Green (Main unit) |
| Recommended Age: | 6 months - 3 years |
| Batteries Required: | Yes |
| Languages: | Multilingual (English, Italian, Spanish, Portuguese) |
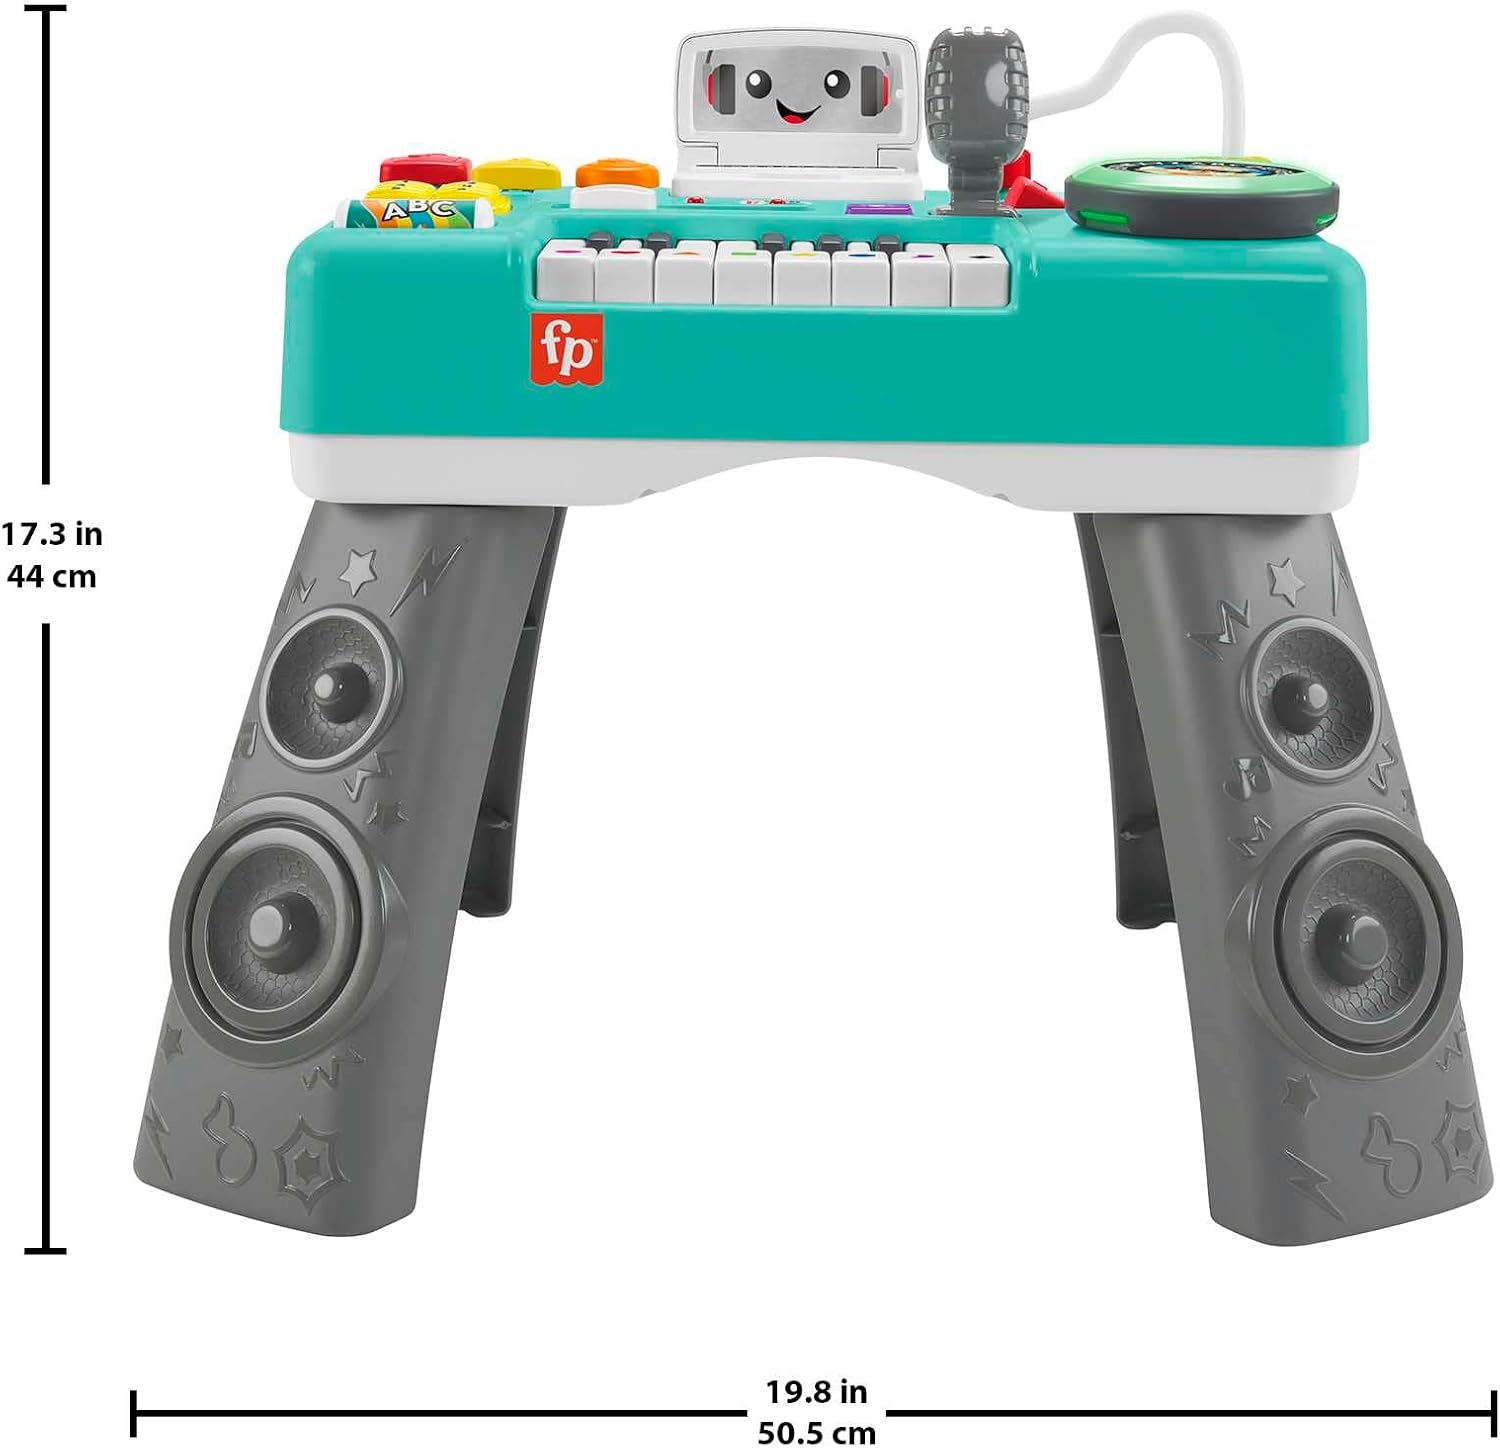
Figure 6: Visual representation of the product dimensions, indicating a height of 17.3 inches (44 cm) and a width of 19.8 inches (50.5 cm).
Warranty and Support
For warranty information or technical support, please refer to the official Fisher-Price website or contact their customer service department. Retain your proof of purchase for any warranty claims.
Manufacturer: Fisher-Price
