1. Introduction
The Acogedor DXP-20B Fiber Optic Power Meter is a portable and precise instrument designed for measuring optical power in fiber optic networks. It supports a wide range of wavelengths and is compatible with common fiber optic connectors, making it an essential tool for installation, maintenance, and troubleshooting of fiber optic communication systems.
2. Product Overview
2.1 Key Features
- ABS Material: Constructed from durable ABS material, providing impact and scratch resistance.
- Wide Measurement Range: Capable of measuring optical power from -70 dBm to +10 dBm.
- Accurate Performance: Delivers precise measurements with a low error margin of ±0.2dB.
- Multi-Wavelength Support: Supports 7 standard wavelengths: 850nm, 980nm, 1300nm, 1310nm, 1490nm, 1550nm, and 1625nm.
- Standard Interface: Equipped with a 2.5mm standard interface, compatible with SC, FC, and ST connectors.
2.2 Components
The package includes the following items:
- 1 x Acogedor DXP-20B Optical Power Meter
- 1 x SC Connector
2.3 Device Layout and Controls

Image: Front view of the Acogedor DXP-20B Fiber Optic Power Meter with labels indicating the receiver, working wavelength display, automatic shut down indicator, backlight indicator, dBm/dB/w display, switch button, auto zero button, working wavelength switch, dB/W switch, automatic switch, and backlight switch.
The device features a clear LCD display and intuitive buttons for easy operation:
- Receiver: Optical input port for connecting fiber optic cables.
- Display: Shows working wavelength, measured power in dBm or dB/W, and other status indicators.
- Power Button (Switch): Turns the device ON/OFF.
- LIGHT Button (Backlight Switch): Toggles the display backlight.
- AUTO OFF Button (Automatic Switch): Activates or deactivates the automatic shutdown feature.
- dB Button (dB/W Switch): Switches between dBm and dB/W measurement units.
- ZERO Button (Auto Zero): Used to set the current power reading as a reference (0 dB).
- Λ Button (Working Wavelength Switch): Cycles through the supported test wavelengths.

Image: The Acogedor DXP-20B Fiber Optic Power Meter shown with its protective rubber casing, illustrating its anti-drop design for enhanced durability.
3. Specifications
| Parameter | Value |
|---|---|
| Item Type | Optical Power Meter |
| Material | ABS |
| Test Accuracy | ±0.2dB |
| Test Range | (-70) to (+10)dBm |
| Working Temperature | -10°C to +60°C |
| Supported Wavelengths | 850nm, 980nm, 1300nm, 1310nm, 1490nm, 1550nm, 1625nm |
| Interface Type | 2.5mm Standard (FC, SC, ST Universal) |
| Power Source | 2 x AA Batteries (not included) |
| Item Weight | 280 g |
| Package Dimensions | 20.9 x 10.5 x 4.4 cm |
4. Setup
4.1 Battery Installation
- Locate the battery compartment on the back of the device.
- Open the battery compartment cover.
- Insert two (2) AA batteries, ensuring correct polarity (+/-).
- Close the battery compartment cover securely.
4.2 Initial Power On
After installing the batteries, press and hold the Power Button (labeled 'switch' or with a power symbol) to turn on the device. The LCD display will illuminate.
5. Operating Instructions
5.1 Connecting to Fiber Optic Cables

Image: The Acogedor DXP-20B Fiber Optic Power Meter demonstrating its 2.5mm standard interface, compatible with SC, FC, and ST connectors. An SC Square Head adapter is also shown.
- Ensure the fiber optic cable connector is clean. Use a fiber optic cleaning tool if necessary.
- Insert the fiber optic connector (FC, SC, or ST) into the 2.5mm standard interface receiver port at the top of the power meter. Ensure a snug fit.
5.2 Selecting Wavelength

Image: The Acogedor DXP-20B Fiber Optic Power Meter with a visual representation of the 7 supported test wavelengths: 850nm, 980nm, 1300nm, 1310nm, 1490nm, 1550nm, and 1625nm.
Press the Λ Button repeatedly to cycle through the available wavelengths (850nm, 980nm, 1300nm, 1310nm, 1490nm, 1550nm, 1625nm). Select the wavelength that matches the optical signal you are measuring.
5.3 Taking a Measurement
- Connect the fiber optic cable to the receiver port.
- Select the correct wavelength using the Λ Button.
- The optical power measurement will be displayed on the LCD screen in dBm or dB/W.
- Press the dB Button to switch between dBm and dB/W units if desired.
5.4 Using the ZERO Function
The ZERO Button allows you to set a reference power level. This is useful for relative power measurements (e.g., measuring loss). To use:
- Connect a known good fiber optic signal to the power meter.
- Press the ZERO Button. The display will show '0.00dB' or similar, indicating the current power level is now the reference.
- Any subsequent measurements will be displayed relative to this reference.
5.5 Backlight and Auto-Off
- Press the LIGHT Button to turn the display backlight ON or OFF.
- Press the AUTO OFF Button to activate or deactivate the automatic shutdown feature, which conserves battery life.
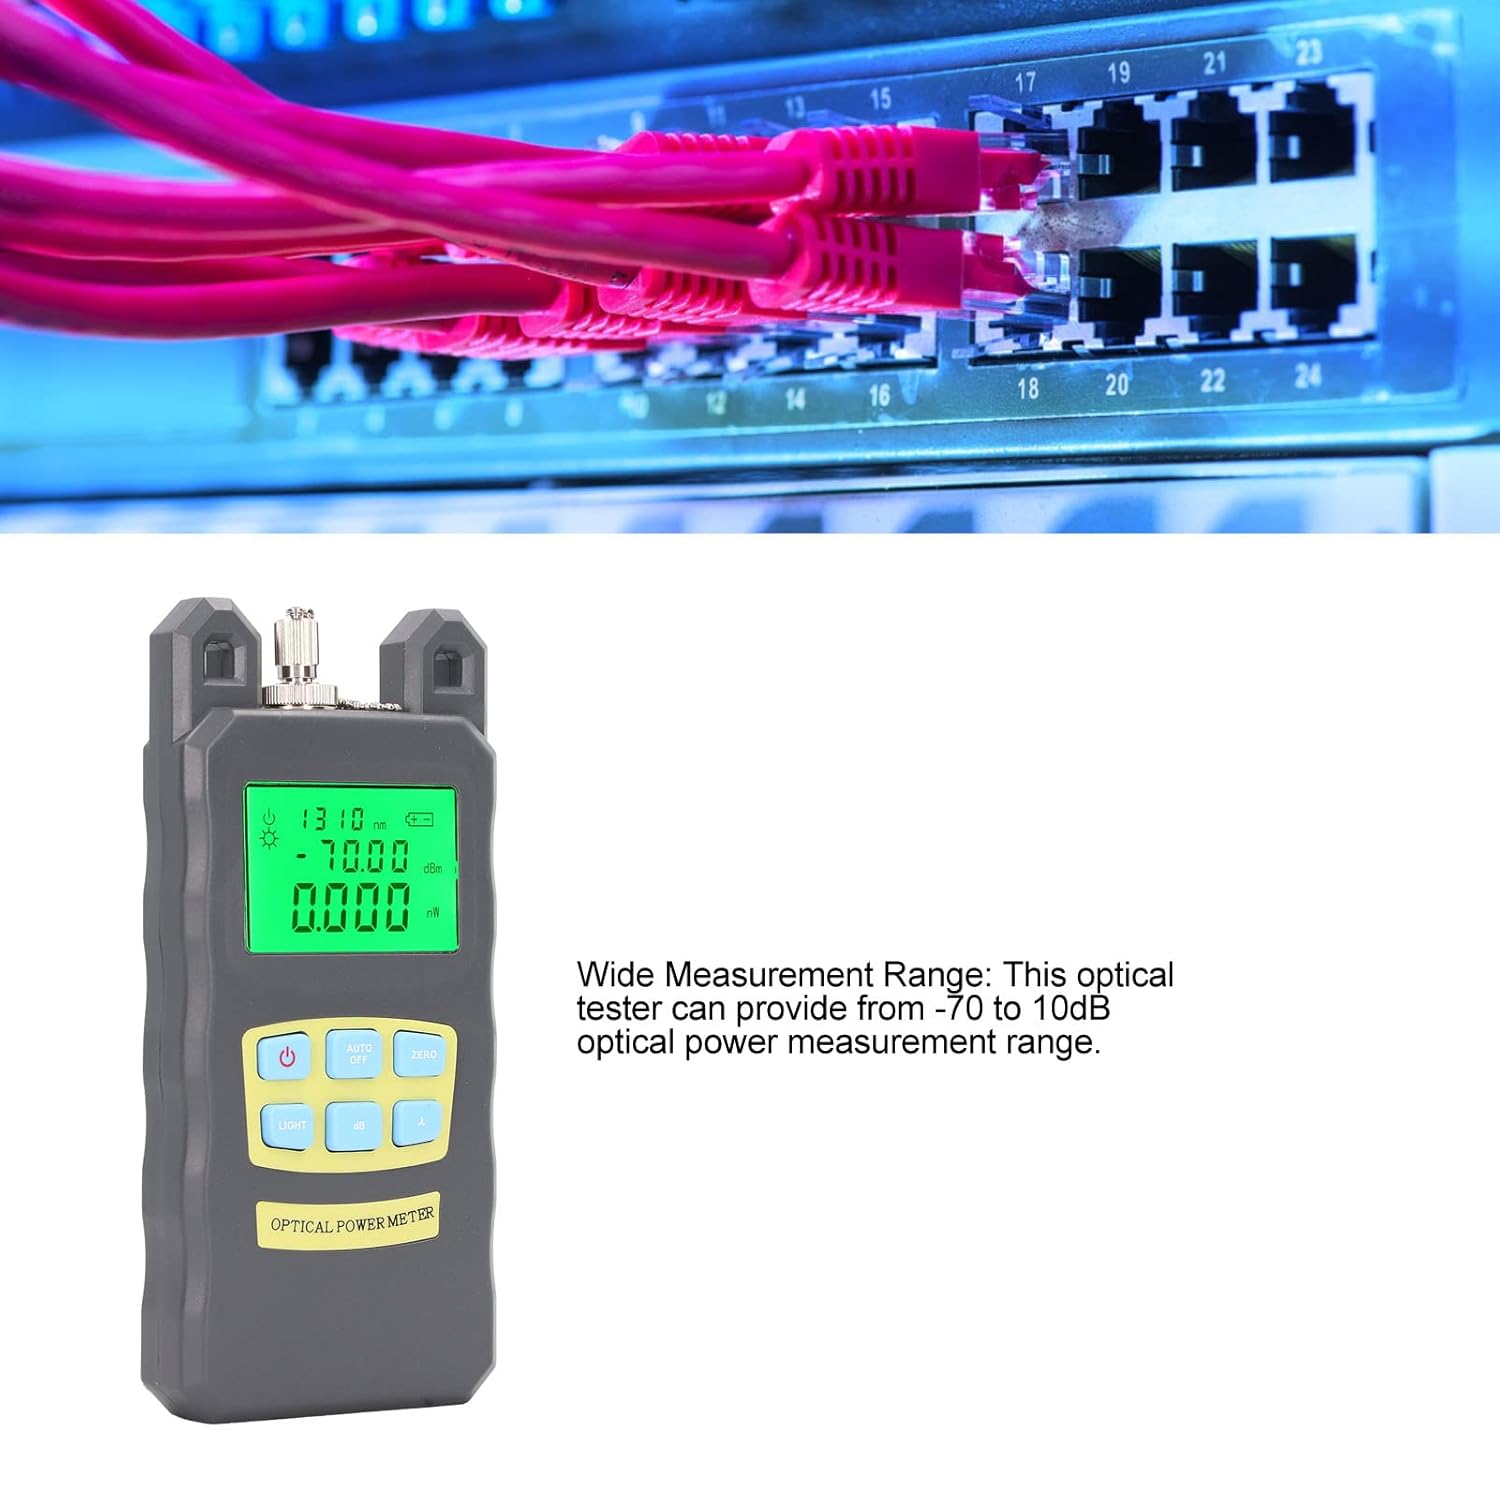
Image: The Acogedor DXP-20B Fiber Optic Power Meter positioned in front of network equipment, illustrating its application in measuring optical power within a fiber optic network.
6. Maintenance
6.1 Cleaning
- Keep the device clean and free from dust. Use a soft, dry cloth for cleaning the exterior.
- Regularly clean the optical receiver port using specialized fiber optic cleaning tools to ensure accurate measurements. Dust or debris in the port can significantly affect readings.
6.2 Storage
- When not in use for extended periods, remove the batteries to prevent leakage and damage to the device.
- Store the power meter in a cool, dry place, away from direct sunlight and extreme temperatures.
7. Troubleshooting
7.1 No Power
- Check if the batteries are correctly installed with the right polarity.
- Replace old or depleted batteries with new AA batteries.
- Ensure the power button is pressed and held sufficiently to turn on the device.
7.2 Inaccurate Readings
- Verify that the selected wavelength on the power meter matches the wavelength of the optical signal being tested.
- Clean the fiber optic connector and the power meter's receiver port. Contamination is a common cause of inaccurate readings.
- Ensure the fiber optic cable is properly seated in the receiver port.
- If using the ZERO function, ensure the reference point was set correctly.
7.3 Display Issues
- If the display is dim, activate the backlight using the LIGHT Button.
- If the display is blank or shows erratic characters, try replacing the batteries.
8. Warranty and Support
Specific warranty information for the Acogedor DXP-20B Fiber Optic Power Meter is not provided in this manual. Please refer to the product packaging, your purchase documentation, or contact Acogedor customer support for details regarding warranty coverage and technical assistance.
For further support, please visit the official Acogedor website or contact your local distributor.


