1. Product Overview
The JoFomp 13-inch Digital LED Wall Clock is a versatile timepiece designed for clear visibility and multiple functions. It features a large LED display, remote control operation, and various modes to enhance daily time management.
Key Features:
- Large 13-inch LED Display: Provides clear and comfortable visibility of time, date, and temperature.
- Multi-Function Modes: Includes clock, date, week, temperature, alarm, and countdown timer.
- Automatic Brightness Dimmer: Features 10 levels of adjustable brightness and a built-in light sensor for automatic adjustment.
- Remote Control: Allows convenient adjustment of settings without needing to physically access the clock.
- Dual Alarms: Supports setting two separate alarms for different schedules.
- Daylight Saving Time (DST): Automatic adjustment for DST.
- Battery Backup: Retains settings during power outages (display does not light up on battery power alone). Requires 2 AAA Alkaline batteries (not included).
- Power Source: Plug-in powered via USB port (5V/1A or 5V/2A adapter required, not included).

Image 1.1: Front view of the JoFomp Digital LED Wall Clock, showing its large display with time, day of the week, temperature, and date.
2. Setup Instructions
2.1 Unboxing and Initial Power-Up
- Carefully remove the clock and all accessories from the packaging.
- Connect the provided USB cable to the clock's power input port.
- Plug the USB cable into a 5V/1A or 5V/2A USB adapter (not included) and then into a power outlet. The clock display will illuminate.
2.2 Battery Backup Installation
For battery backup functionality (to retain settings during power outages), install 2 AAA Alkaline batteries (not included) into the battery compartment located on the back of the clock. Note: The display will not light up using battery power alone.

Image 2.1: Rear view of the clock, indicating the battery compartment and mounting options.
2.3 Mounting Options
- Wall Mount: Use the integrated keyholes on the back of the clock to hang it securely on a wall. Ensure the power cable can reach an outlet.
- Desk Placement: The clock can also be placed on any flat surface, such as a desk or nightstand.
Video 2.1: This video demonstrates the physical setup of the digital clock, including connecting the power cable and showing the mounting options on the back of the device.
3. Operating Instructions
The JoFomp Digital LED Wall Clock is operated primarily using the included remote control. Ensure the remote has working batteries.

Image 3.1: The remote control used to operate the clock's functions.
3.1 Setting Time and Date
- Press the SET button on the remote control to enter time setting mode.
- Use the + and - buttons to adjust the hour, minute, year, month, and day.
- Press SET again to confirm each setting and move to the next.
- To switch between 12-hour and 24-hour format, press the 12/24H button.
3.2 Adjusting Brightness
The clock offers 10 levels of adjustable brightness and an automatic dimming feature.
- Press the Brightness button (often indicated by a sun icon) on the remote to cycle through brightness levels or activate auto-dimming.
- In manual mode, use the + and - buttons to fine-tune the brightness.
- The built-in light sensor will automatically adjust the display brightness based on ambient light when auto-dimming is enabled.

Image 3.2: Illustration of the clock's 10-level brightness dimmer and auto-dimming function.
3.3 Setting Alarms
The clock supports setting two independent alarms.
- Press the ALARM button on the remote.
- Use the + and - buttons to set the desired alarm time.
- Press SET to confirm the time and move to the next alarm setting (if applicable).
- To activate or deactivate an alarm, press the corresponding alarm button (e.g., AL1 or AL2) on the remote. An alarm icon will appear on the display when active.
- To snooze, press the SNOOZE/DIMMER button when the alarm sounds.
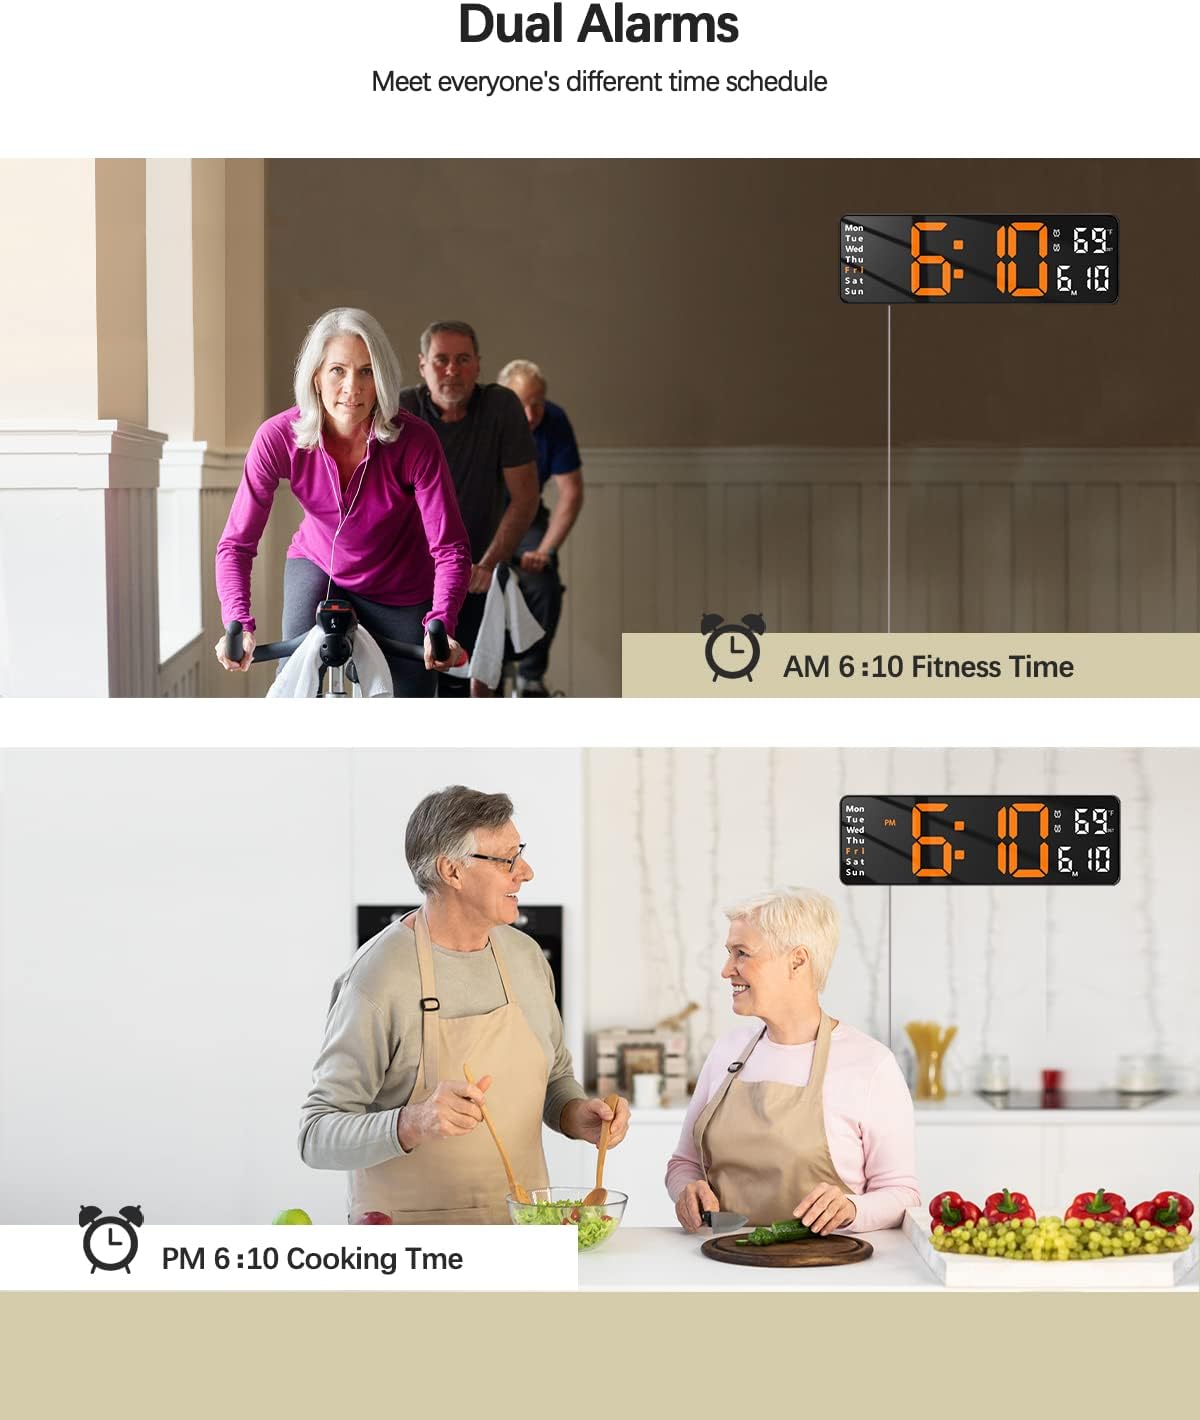
Image 3.3: The clock displaying two different alarm settings, illustrating its dual alarm capability.
3.4 Using the Timer Function
The clock includes both count-up and countdown timer functions.
- Countdown Timer: Press the TIMER button. Use the number buttons on the remote to input the desired countdown duration (e.g., 0500 for 5 minutes). Press OK to start.
- Count-Up Timer: Press the TIMER button twice. The display will show 00:00. Press OK to start counting up.
- Press OK again to pause/resume the timer. Press RESET to clear the timer.
3.5 Daylight Saving Time (DST)
The clock can automatically adjust for Daylight Saving Time.
- Press the DST button on the remote control to toggle the DST function On or Off.
- When enabled, the clock will automatically adjust by one hour during the spring forward and fall back periods.

Image 3.4: Visual representation of the Daylight Saving Time feature, showing how the clock adjusts for spring forward and fall back.
Video 3.1: This video provides a detailed demonstration of how to operate the JoFomp Digital Clock using its remote control, covering various settings and functions.
4. Maintenance
- Cleaning: Use a soft, dry cloth to clean the display and casing. Avoid abrasive cleaners or solvents.
- Power: Ensure the clock is always connected to a stable 5V power source.
- Battery Replacement: Replace the AAA backup batteries annually or when the battery icon indicates low power to ensure settings are retained during power interruptions.
5. Troubleshooting
- Display Not Lighting Up:
- Ensure the USB power cable is securely connected to both the clock and a working power adapter/outlet.
- Verify the power adapter is 5V/1A or 5V/2A.
- The clock display does not light up on battery backup power alone.
- Remote Control Not Responding:
- Check if the remote control batteries are correctly installed and have sufficient power. Replace if necessary.
- Ensure there are no obstructions between the remote and the clock's sensor.
- Incorrect Time/Date:
- Follow the "Setting Time and Date" instructions in Section 3.1 to manually adjust.
- If DST is enabled, ensure it's set correctly for your region.
- Alarm Not Sounding:
- Verify that the alarm is activated (alarm icon visible on display).
- Check the alarm volume settings if available (not explicitly mentioned, but a common feature).
6. Specifications
| Feature | Detail |
|---|---|
| Brand | JoFomp |
| Model Number | 6626-6629 |
| Display Type | Digital LED |
| Size | 13 INCH (12.6"W x 4.1"H) |
| Color | Orange (for this variant) |
| Power Source | Corded Electric (USB 5V/1A or 5V/2A adapter required) |
| Battery Backup | 2 AAA Alkaline batteries (not included) for settings retention |
| Mounting Type | Wall Mount, Desk Placement |
| Special Features | Remote Control, Auto-Dimming, DST, Dual Alarms, Timer, Temperature Display |
| Material | Acrylonitrile Butadiene Styrene |
| Item Weight | 1 Pounds |
7. Warranty and Support
For warranty information or technical support, please contact the manufacturer, JoFomp, or the seller, JFeng Direct, through their official channels. Keep your purchase receipt for any warranty claims.


