
Intelamp DE-005-10E
Intelamp DE-005-10E Solar Light with Motion Sensor and Remote Control User Manual
Model: DE-005-10E | Brand: Intelamp
1. Introduction
This manual provides detailed instructions for the installation, operation, and maintenance of your Intelamp DE-005-10E Solar Light. This solar-powered outdoor light features a 12000 mAh battery, a long-range motion sensor, and remote control functionality, designed for various outdoor applications.
2. Safety Instructions
- Ensure the solar panel is installed in a location that receives direct sunlight for optimal charging.
- Do not disassemble or modify the product. This may cause damage and void the warranty.
- Keep the product away from fire or high temperatures.
- Avoid submerging the light or solar panel in water, despite its water-resistant design.
- Handle the product with care to prevent physical damage.
- Dispose of batteries according to local regulations.
3. Package Contents
Verify that all components are present in the package:
- 1x Intelamp Solar Light Unit
- 1x Solar Panel with 5m Cable
- 1x Remote Control
- 1x AA Battery (for remote control, included)
- 1x Metal Mounting Bracket
- Screws and Wall Plugs for Installation

Figure 3.1: Overview of the Intelamp Solar Light components, including the main light unit, solar panel, remote control, and connection cable.
4. Product Overview
The Intelamp DE-005-10E is an outdoor solar-powered floodlight designed for security and illumination. It features a high-capacity 12000 mAh battery, 170 LED bulbs providing 3000 lumens of light, and a sensitive motion sensor with a 20-meter detection range. The included remote control allows for easy adjustment of lighting modes and brightness levels.

Figure 4.1: Product dimensions for the solar light unit (23.6cm x 19.3cm), solar panel (34cm x 23cm), and remote control (11.4cm x 6.4cm).
5. Installation
5.1 Choosing a Location
Select a location for the solar panel that receives maximum direct sunlight throughout the day to ensure optimal charging. The light unit can be installed separately, up to 5 meters away from the solar panel, thanks to the extended cable. Consider areas like gardens, fences, gates, paths, verandas, or parking lots.
5.2 Mounting the Solar Panel and Light Unit
- Prepare the Mounting Surface: Mark the drilling points for the metal mounting bracket on your chosen wall or surface.
- Drill Holes: Use an appropriate drill bit to create holes at the marked positions. Insert wall plugs if necessary.
- Attach the Bracket: Secure the metal mounting bracket using the provided screws.
- Mount the Solar Panel: Attach the solar panel to the bracket, ensuring it can be angled towards the sun.
- Mount the Light Unit: Attach the light unit to a desired location using its integrated bracket or by securing it to another surface. The light unit can be adjusted by 120 degrees for optimal illumination angle.
- Connect the Cable: Connect the 5-meter cable from the solar panel to the light unit. Ensure the connection is secure.

Figure 5.1: Examples of flexible installation options for the solar light, showing mounting on a brick wall, a tree, and under an eave with adjustable angle.
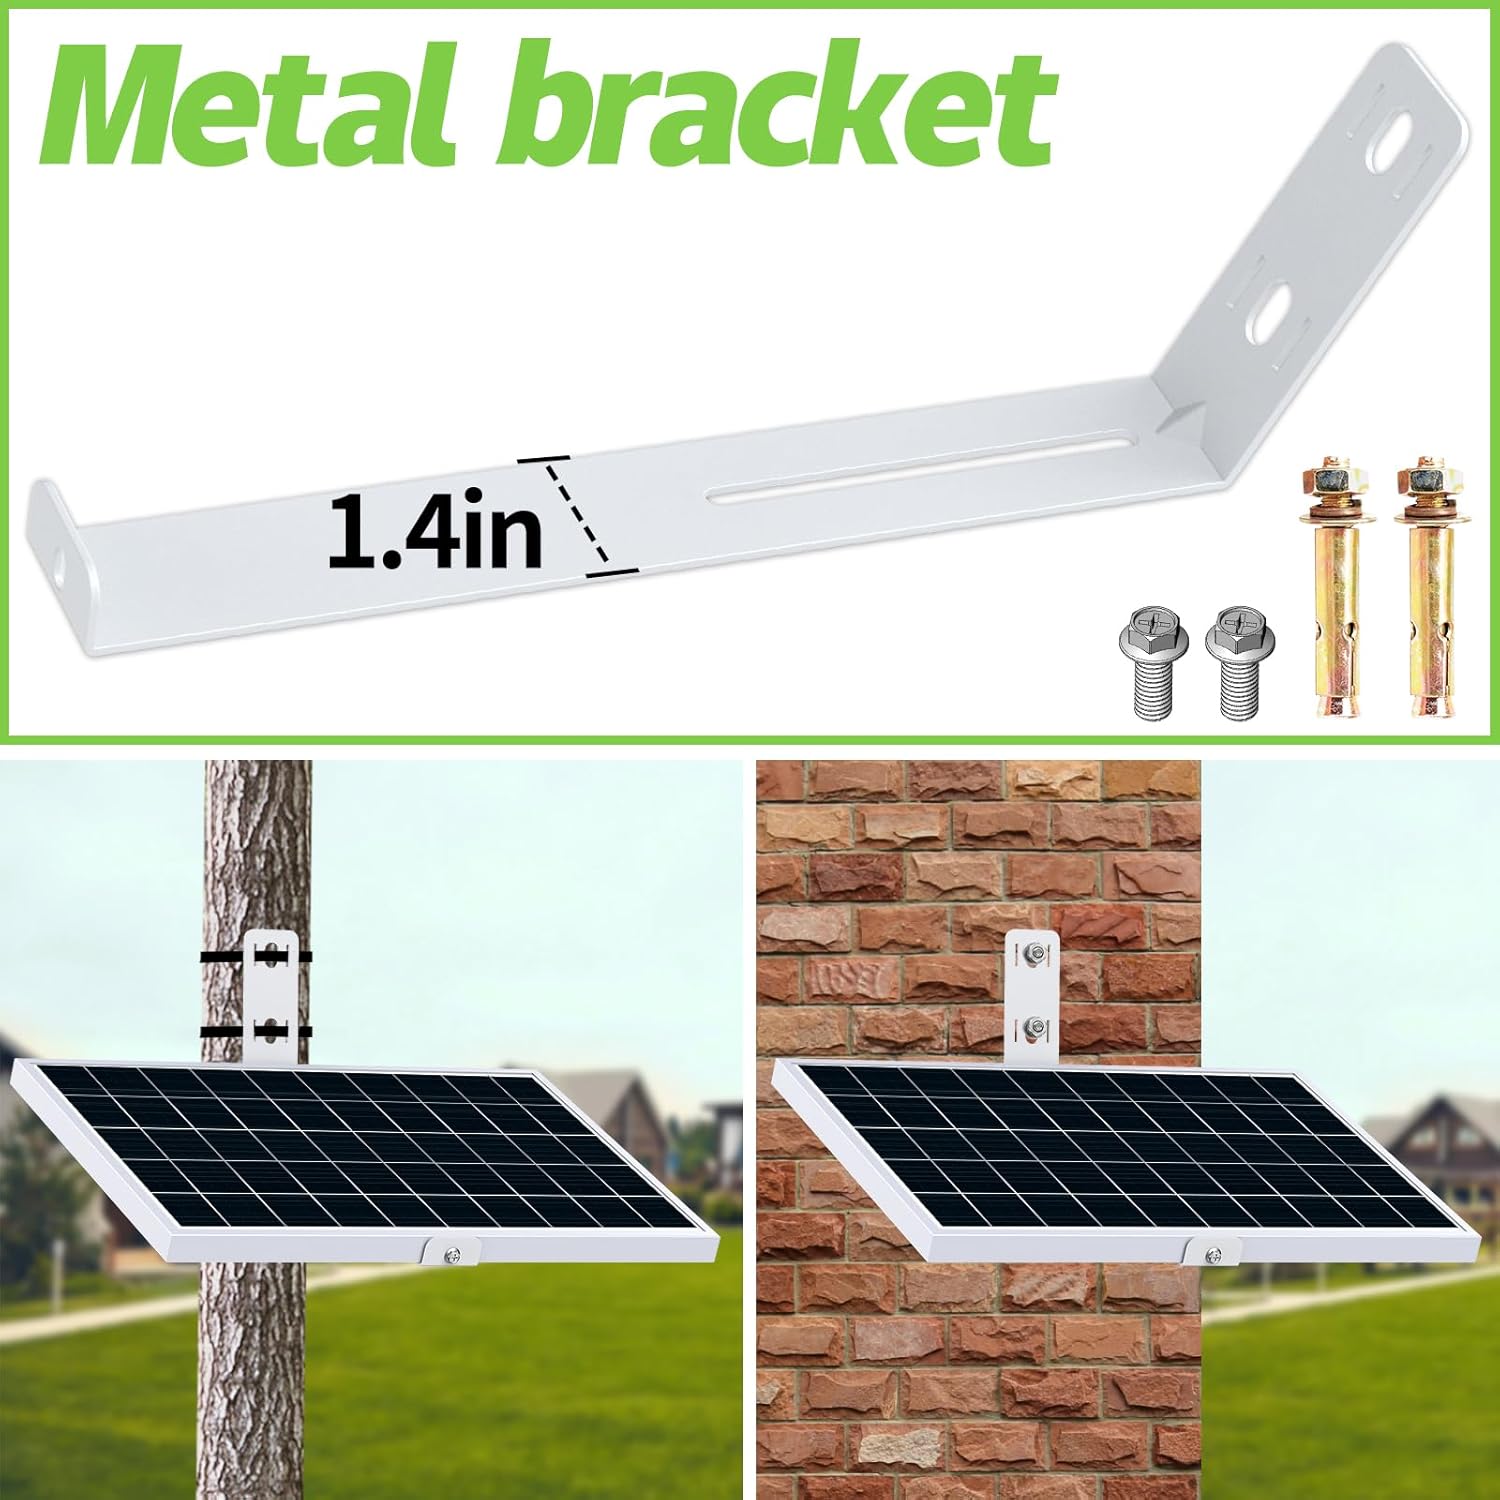
Figure 5.2: The metal mounting bracket and included screws/wall plugs for secure installation.
6. Operation
The Intelamp Solar Light is operated using the included remote control. Ensure the AA battery is correctly inserted into the remote control.

Figure 6.1: Remote control layout and functions.
6.1 Power On/Off
- Press the ON button to turn the light on.
- Press the OFF button to turn the light off.
6.2 Sensor Modes
These modes activate high brightness upon motion detection and then dim or turn off after a set duration if no further motion is detected.
- 30s: High brightness for 30 seconds after motion, then dims or turns off.
- 3m: High brightness for 3 minutes after motion, then dims or turns off.
- 10m: High brightness for 10 minutes after motion, then dims or turns off.
- Dim: The light stays dimly lit and brightens to full intensity upon motion detection.
- Off: The light remains off until motion is detected, then turns on at full brightness.

Figure 6.2: Motion sensor detection range, illustrating how the light activates when a person enters the 30-meter detection zone.
6.3 Lighting Modes (Timed Illumination)
These modes provide continuous illumination for a set period after dark, independent of motion detection.
- 2H: The light will stay on for 2 hours after dark.
- +1H: Adds 1 hour to the current timed lighting mode.
- 6H: The light will stay on for 6 hours after dark.
- Dim: The light stays dimly lit for the set duration.
- Off: The light turns off after the set duration.
6.4 Brightness Adjustment
Adjust the light intensity using the following buttons:
- 60%: Sets brightness to 60% of maximum.
- 80%: Sets brightness to 80% of maximum.
- 100%: Sets brightness to 100% of maximum (3000 lumens).

Figure 6.3: The solar light providing 3000 lumens of high brightness in an outdoor setting.
7. Maintenance
- Cleaning the Solar Panel: Regularly wipe the solar panel with a soft, damp cloth to remove dust, dirt, or debris. A clean panel ensures efficient charging.
- Cleaning the Light Unit: Clean the light unit's surface and motion sensor lens periodically to maintain optimal performance.
- Battery Care: The internal 12000 mAh battery is designed for long-term use. If the remote control battery (AA) needs replacement, ensure it is replaced with a new AA battery of the correct type.
- Seasonal Adjustments: In winter or periods of reduced sunlight, ensure the solar panel is free of snow or heavy frost to maximize charging efficiency.
8. Troubleshooting
| Problem | Possible Cause | Solution |
|---|---|---|
| Light does not turn on at night. |
|
|
| Motion sensor not detecting. |
|
|
| Light is dim or runtime is short. |
|
|
9. Specifications
| Brand | Intelamp |
| Model Number | DE-005-10E |
| Product Dimensions (L x W x H) | 23.5 x 19 x 4.5 cm |
| Item Weight | 2.81 Kilograms |
| Material | Acrylonitrile Butadiene Styrene (ABS) |
| Color | White |
| Power Source | Solar Powered |
| Battery | 12000 mAh (internal), 1 AA (for remote, included) |
| Voltage | 3.2 Volts (DC) |
| Number of Bulbs | 170 LEDs |
| Luminous Flux | 3000 lm |
| Wattage | 12 Watts |
| Special Features | Motion Sensor, Adjustable Brightness, Dimmable, Water Resistant, Remote Control Included |
| Motion Sensor Range | Up to 20 meters |
| Installation Type | Wall Mount |
| Specific Uses | Garden, fences, gates, paths, roads, veranda, farm, parking lots, garages |
10. Warranty and Support
For warranty information and technical support, please refer to the product packaging or contact Intelamp customer service directly. Keep your purchase receipt as proof of purchase.
Related documentsDE-005-10E

Ask a question about this manual
Ask about setup, troubleshooting, compatibility, parts, safety, or missing instructions. Manuals+ will review the question and use this page’s manual context to help answer it.