
1. Introduction
This manual provides detailed instructions for the proper setup, operation, and maintenance of your FEELWORLD CUT6 6-Inch Recording Monitor. Please read this manual thoroughly before using the device to ensure safe and efficient operation. Keep this manual for future reference.
2. Key Features
- Real-time Recording: USB2.0 recording function supports video capture up to 1080p30 from compatible cameras in MP4 format over HDMI. Simply plug in a FAT32 formatted USB flash disk and press the record button.
- Clear Viewing: Features a 6-inch 1920x1080 high-resolution touch screen with 8-bit color depth, providing clear and rich color images and video.
- Secondary Editing for Live Streaming Material: Supports secondary editing and can record with LUTs applied, streamlining post-production workflows.
- HDMI Loop-out with LUT: Equipped with HDMI 2.0 input (supports 4K 60Hz signal) and HDMI output (supports up to 1080p60). When the LUT switch is on, the HDMI output defaults to displaying the custom LUT image to other connected displays.
- Accurate Exposure and Focus Tools: Includes professional tools such as waveform, RGB parade, vectorscope, RGB histogram, histogram, audio meter, focus peaking, zoom, zebra, false color, frame guides, and safe area for precise filming.
3. Setup
3.1. Power Supply
The FEELWORLD CUT6 monitor can be powered via F-series batteries (NP-F550, NP-F750, NP-F970) or a 12V 1.5A power adapter. Ensure the battery is securely attached to the battery plate on the rear of the monitor or the power adapter is connected to the DC 12V IN port.
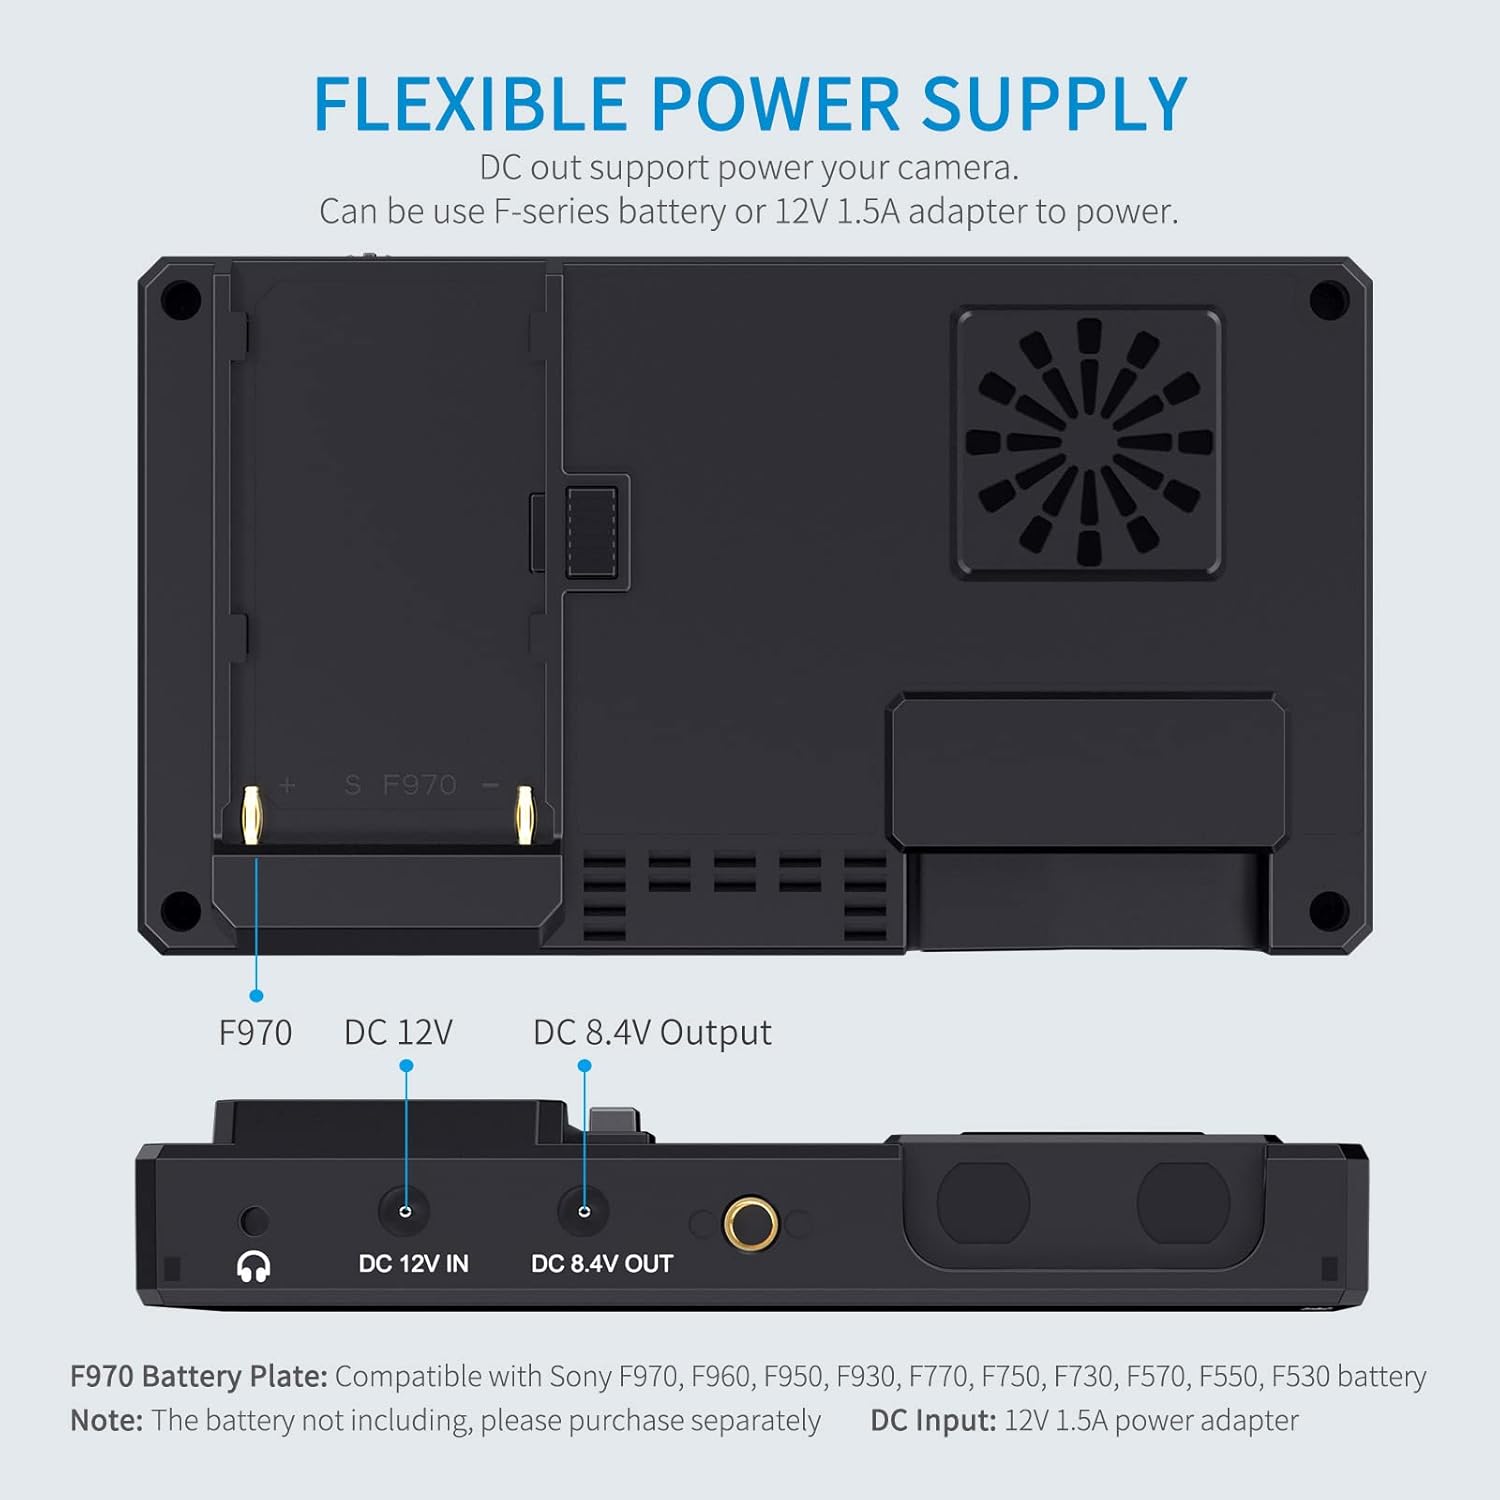
Figure 3.1: Flexible Power Supply options for the FEELWORLD CUT6 monitor, including an NP-F battery plate and DC 12V input. Note that batteries and power adapters are not included and must be purchased separately.
3.2. Mounting
Attach the monitor to your camera rig or stand using the provided Mini Hot Shoe Mount. The mount allows for flexible positioning and viewing angles.

Figure 3.2: The FEELWORLD CUT6 monitor shown mounted on a camera setup, illustrating its use in a professional filming environment. The image also displays the included Micro HDMI Cable, Mini Hot Shoe Mount, and User Manual.
3.3. Connections
Connect your camera or video source to the monitor using the HDMI 2.0 input. The monitor also features an HDMI output for looping the signal to another display.

Figure 3.3: Close-up view of the FEELWORLD CUT6 monitor's side, highlighting the HDMI 2.0 input and HDMI 1.4 output ports, along with the integrated cooling fan. The HDMI input supports 4K 60Hz signals.
4. Operating Instructions
4.1. Basic Operation
The monitor features a responsive touchscreen interface. Power on the device using the power button. Navigation through menus and settings is primarily done via touch gestures.

Figure 4.1: The FEELWORLD CUT6 monitor's 6-inch 1920x1080 touch screen, demonstrating its clarity and touch responsiveness for confident detail capture. Specifications like 450nit Brightness, 1000:1 Contrast Ratio, 367 PPI, HDR Monitoring, and 160° Wide Viewing Angle are highlighted.
4.2. Recording Function
The CUT6 monitor allows for real-time recording directly to a USB 2.0 flash drive. Ensure your USB drive is formatted to FAT32. To start recording, simply press the dedicated record button on the monitor's interface.
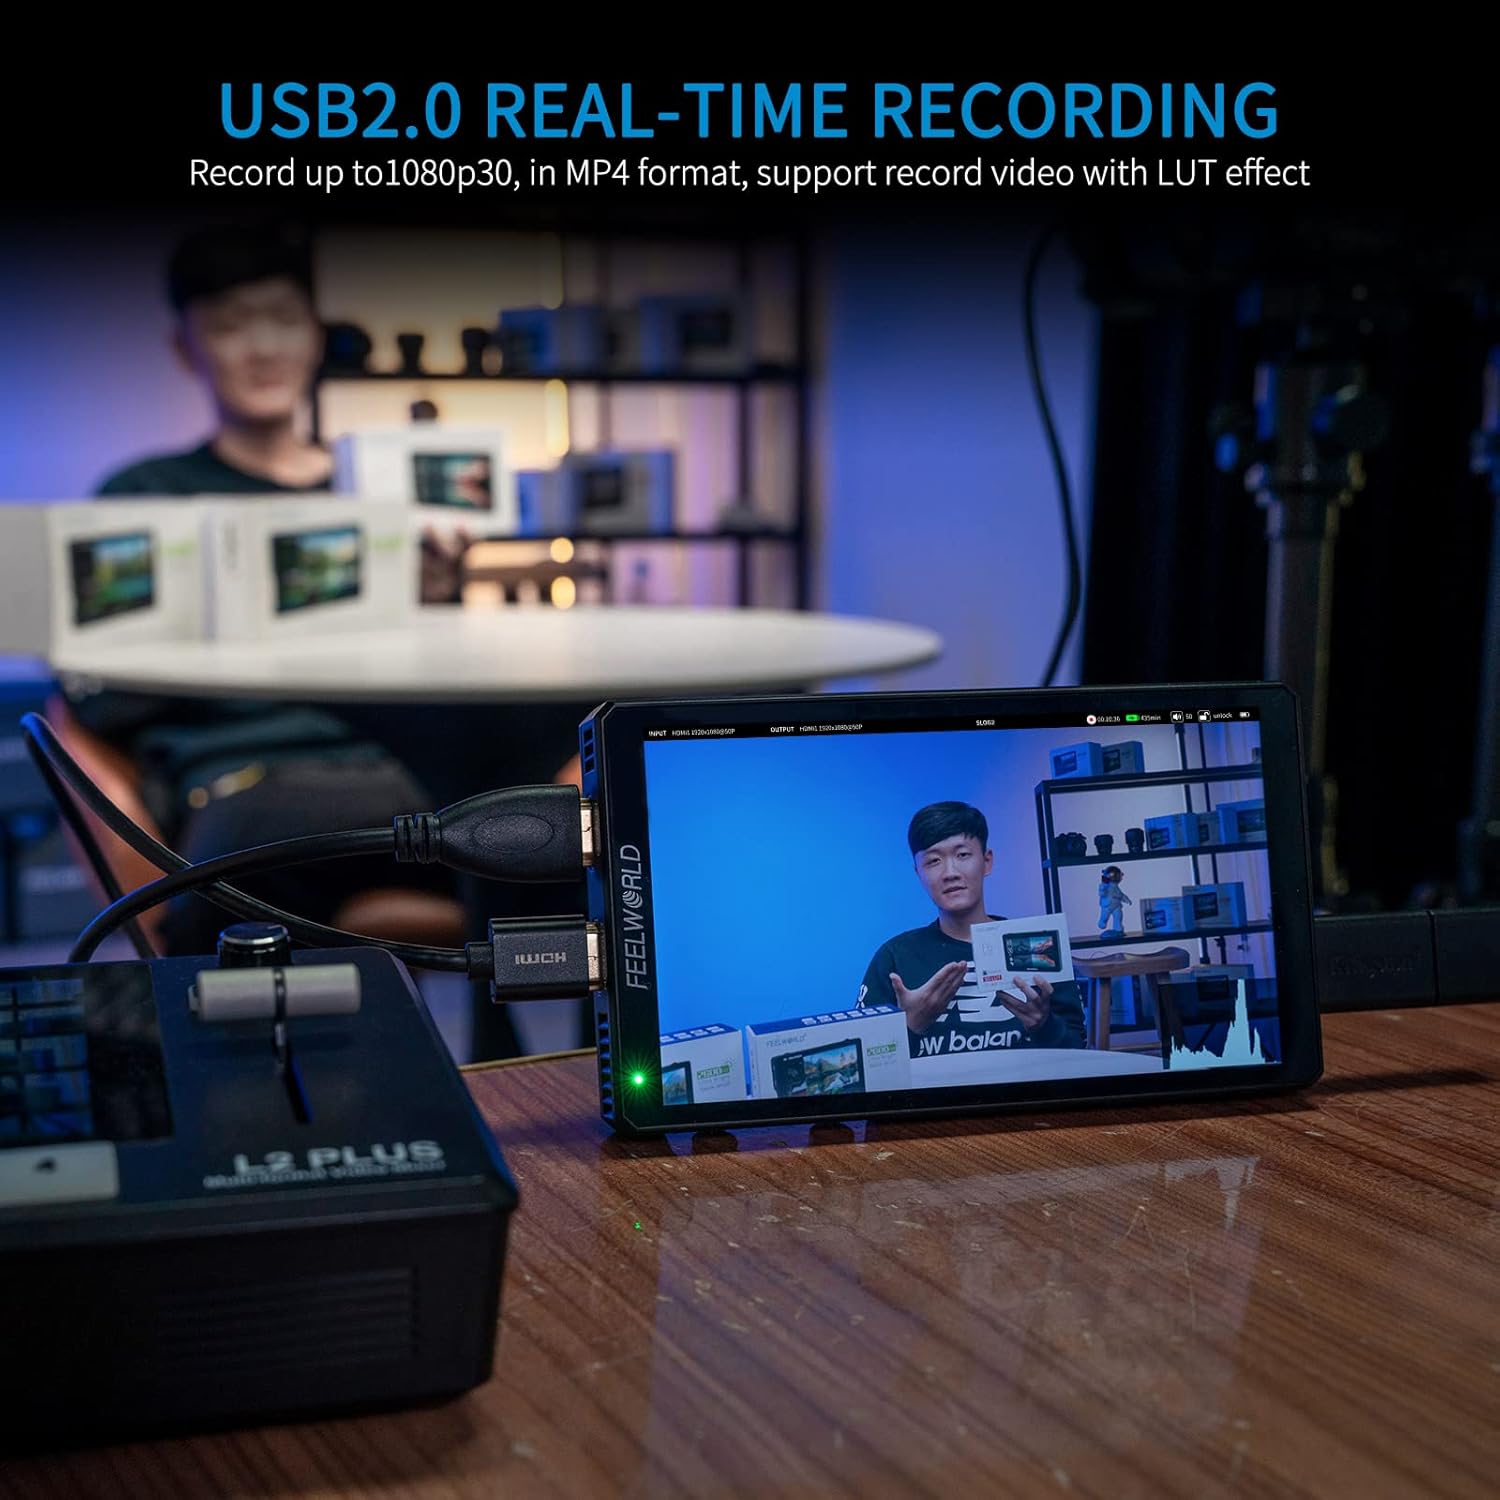
Figure 4.2: The FEELWORLD CUT6 monitor showcasing its USB2.0 real-time recording capability, allowing users to record up to 1080p30 in MP4 format, with support for recording video with LUT effects.
4.3. LUT Management
The monitor supports uploading and applying custom 3D LUTs. This feature is particularly useful for secondary editing of live streaming material, allowing you to quickly improve work efficiency by baking in color grades.

Figure 4.3: Illustration of the HDMI Loop-out LUT function on the FEELWORLD CUT6, demonstrating how custom LUTs can be outputted to other displays for live broadcast cinematic image. This feature is beneficial for secondary editing of live streaming material.
4.4. Monitoring Tools
Access a suite of professional monitoring tools via the touchscreen interface to ensure accurate exposure and focus. These include waveform, vectorscope, histogram, focus assist, audio meters, zebra, false color, and various frame guides.

Figure 4.4: The FEELWORLD CUT6 monitor's display showing an array of accurate exposure and focus tools, including 3D LUT, Waveform, Vector Scope, Histogram, Peaking Filter, Anamorphic Mode, False Colors, Exposure, Zoom-in, Image Flip, Embedded Audio, and Nine Grid.
5. Maintenance
- Keep the monitor clean by wiping it with a soft, dry cloth. Avoid using harsh chemicals or abrasive materials.
- Protect the screen from scratches and impacts.
- Store the monitor in a cool, dry place away from direct sunlight and extreme temperatures.
- Ensure proper ventilation, especially around the cooling fan, to prevent overheating.
6. Troubleshooting
6.1. No Power
- Check if the battery is fully charged and correctly inserted.
- If using a power adapter, ensure it is properly connected and the power outlet is functional.
6.2. No Signal
- Verify that the HDMI cable is securely connected to both the camera/source and the monitor.
- Ensure the camera/source is powered on and outputting a video signal.
- Check the input settings on the monitor to ensure the correct HDMI input is selected.
6.3. Recording Issues
- Confirm the USB flash drive is formatted to FAT32.
- Check for sufficient storage space on the USB drive.
- Ensure the recording resolution and frame rate are supported by the monitor and USB drive.
7. Specifications
| Feature | Specification |
|---|---|
| Package Dimensions | 7.4 x 5.04 x 3.23 inches |
| Item Weight | 1.23 pounds |
| ASIN | B0BQW6CG5F |
| Date First Available | December 22, 2022 |
| Manufacturer | FEELWORLD |
8. What's in the Box
- 1 × Monitor Recorder
- 1 × Micro HDMI Cable
- 1 × Mini Hot Shoe Mount
- 1 × Manual
9. Warranty and Support
For warranty information and technical support, please refer to the official FEELWORLD website or contact their customer service directly. Keep your purchase receipt as proof of purchase for warranty claims.